PLShutterbug
-
Posts
76 -
Joined
-
Last visited
-
 walt.farrell reacted to a post in a topic:
Copy selection to new image
walt.farrell reacted to a post in a topic:
Copy selection to new image
-
Oufti reacted to a post in a topic:
Copy selection to new image
-
Copy selection to new image
PLShutterbug replied to PLShutterbug's topic in Desktop Questions (macOS and Windows)
Thanks, that was it. I was working with an Image layer rather than a raster layer. Using Copy Flattened, then Paste into my new document, got me the result I need. I didn't even realize this was a thing. I know about background layers, and have added layers, and have created raster layers, but have never considered the real differences between them. I'll have to study this. It might solve a bunch of other frustrations with Photo. -
Using Affinity Photo 2.3. Hi, I can't figure out how to copy a selection in an image, then paste it into a new image, or create a new image with just the selection. I've used a combination of the Flood Select and Selection Brush tools to create a selection. I've tried simply pressing Ctrl-C to copy the selection and then pasting into a new document I've created, like I can do with other Windows applications. What gets pasted into the new document is the entire original image, not just the selection. What am I doing wrong, and how can I end up with what I want? Thanks.
-
firstdefence reacted to a post in a topic:
Imported PDF page does not render properly on print
-
That's exactly what I did, and I worked on the problem page first since it was the last I copied and then chose the specific PDF page from. I think maybe that is the root of the issues I experienced. The rest of what you say makes sense, now that you've explained it.
-
Thanks, this does look better. In your first reply were you saying that that one page of the original PDF file I downloaded from IMSLP was translucent rather than opaque like all the other pages in the doc? And that's partially why it printed in such a different way?
-
Thanks for your responses. It's my first chance to get back to this. My first comment is, I don't know why it is relevant that the page image is translucent. Why is that important? On my monitor, despite the fact that that page is ... to me it's transparent, not translucent, but maybe that's just semantics ... the notes look just as black on that page as they do on the previous page. So that doesn't tell me why they print "faded-looking." Can you explain why that would be? I'll comment about your other messages too, but I'd like to know why what you are saying is important.
-
Hi, I'm new to Publisher. I'm trying to remove the grey scanning "background" from a piece of music (that's public domain - downloaded from IMSLP). The original is a PDF file. I created a new document in Publisher, Placed the document, and copied each page I need to print, converted to a Picture Frame, rasterized, then discovered I needed to make a Curves adjustment to make the background drop out. The second page of my document (the first page of the violin solo part) prints on my Epson WorkForce 7720 printer just fine. The third page (the second page of the violin part) though, prints so light at the bottom of its page I cannot use it. This despite it looking "fine" on my display, next to page 2. If I print to PDF instead, I get the same effect. I'm attaching it here. What am I doing wrong that it looks ok on my display but just that one page prints too light? Aside ... The Curves adjustment on the first page that worked was to the Main channel, on the second page it was Intensity, and on the third page it was Alpha. So a related question is, why doesn't a change to the same channel work on all three pages? Attached: original downloaded source PDF from IMSLP, the afpub doc with that document embedded, and a "Microsoft print to PDF" 'soft print' that illustrates the problem. Thanks in advance. Ysaye - Reve d'Enfant violin solo part.afpub Ysaye - Reve d'Enfant violin solo part.pdf IMSLP36567-PMLP81457-Ysaye_-_Rêve_d'enfant_Op14_Violin_Piano.pdf
-
Finish crop in Develop persona
PLShutterbug replied to PLShutterbug's topic in Pre-V2 Archive of iPad Questions
@Callum: this is a current model iPad Air (5th gen), 64 GB, running iPad OS 15.5. I’m running Photo 1.10.5.280. -
Finish crop in Develop persona
PLShutterbug replied to PLShutterbug's topic in Pre-V2 Archive of iPad Questions
@Callum: here is a video. IMG_1621.MOV -
Finish crop in Develop persona
PLShutterbug replied to PLShutterbug's topic in Pre-V2 Archive of iPad Questions
Right. I am sending a video showing where all I double-tapped to try and close the box. -
Finish crop in Develop persona
PLShutterbug replied to PLShutterbug's topic in Pre-V2 Archive of iPad Questions
@Callum No. I hope you are not implying I should be … -
Finish crop in Develop persona
PLShutterbug replied to PLShutterbug's topic in Pre-V2 Archive of iPad Questions
@Callum, no - I just tried it. I double-tapped all over the grid: edges, intersections of thirds lines, in the middle, on the handles … none saved the crop. -
Finish crop in Develop persona
PLShutterbug replied to PLShutterbug's topic in Pre-V2 Archive of iPad Questions
Accidentally discovered that choosing another tool completed the crop. But … why isn’t there a “Done” button or equivalent? -
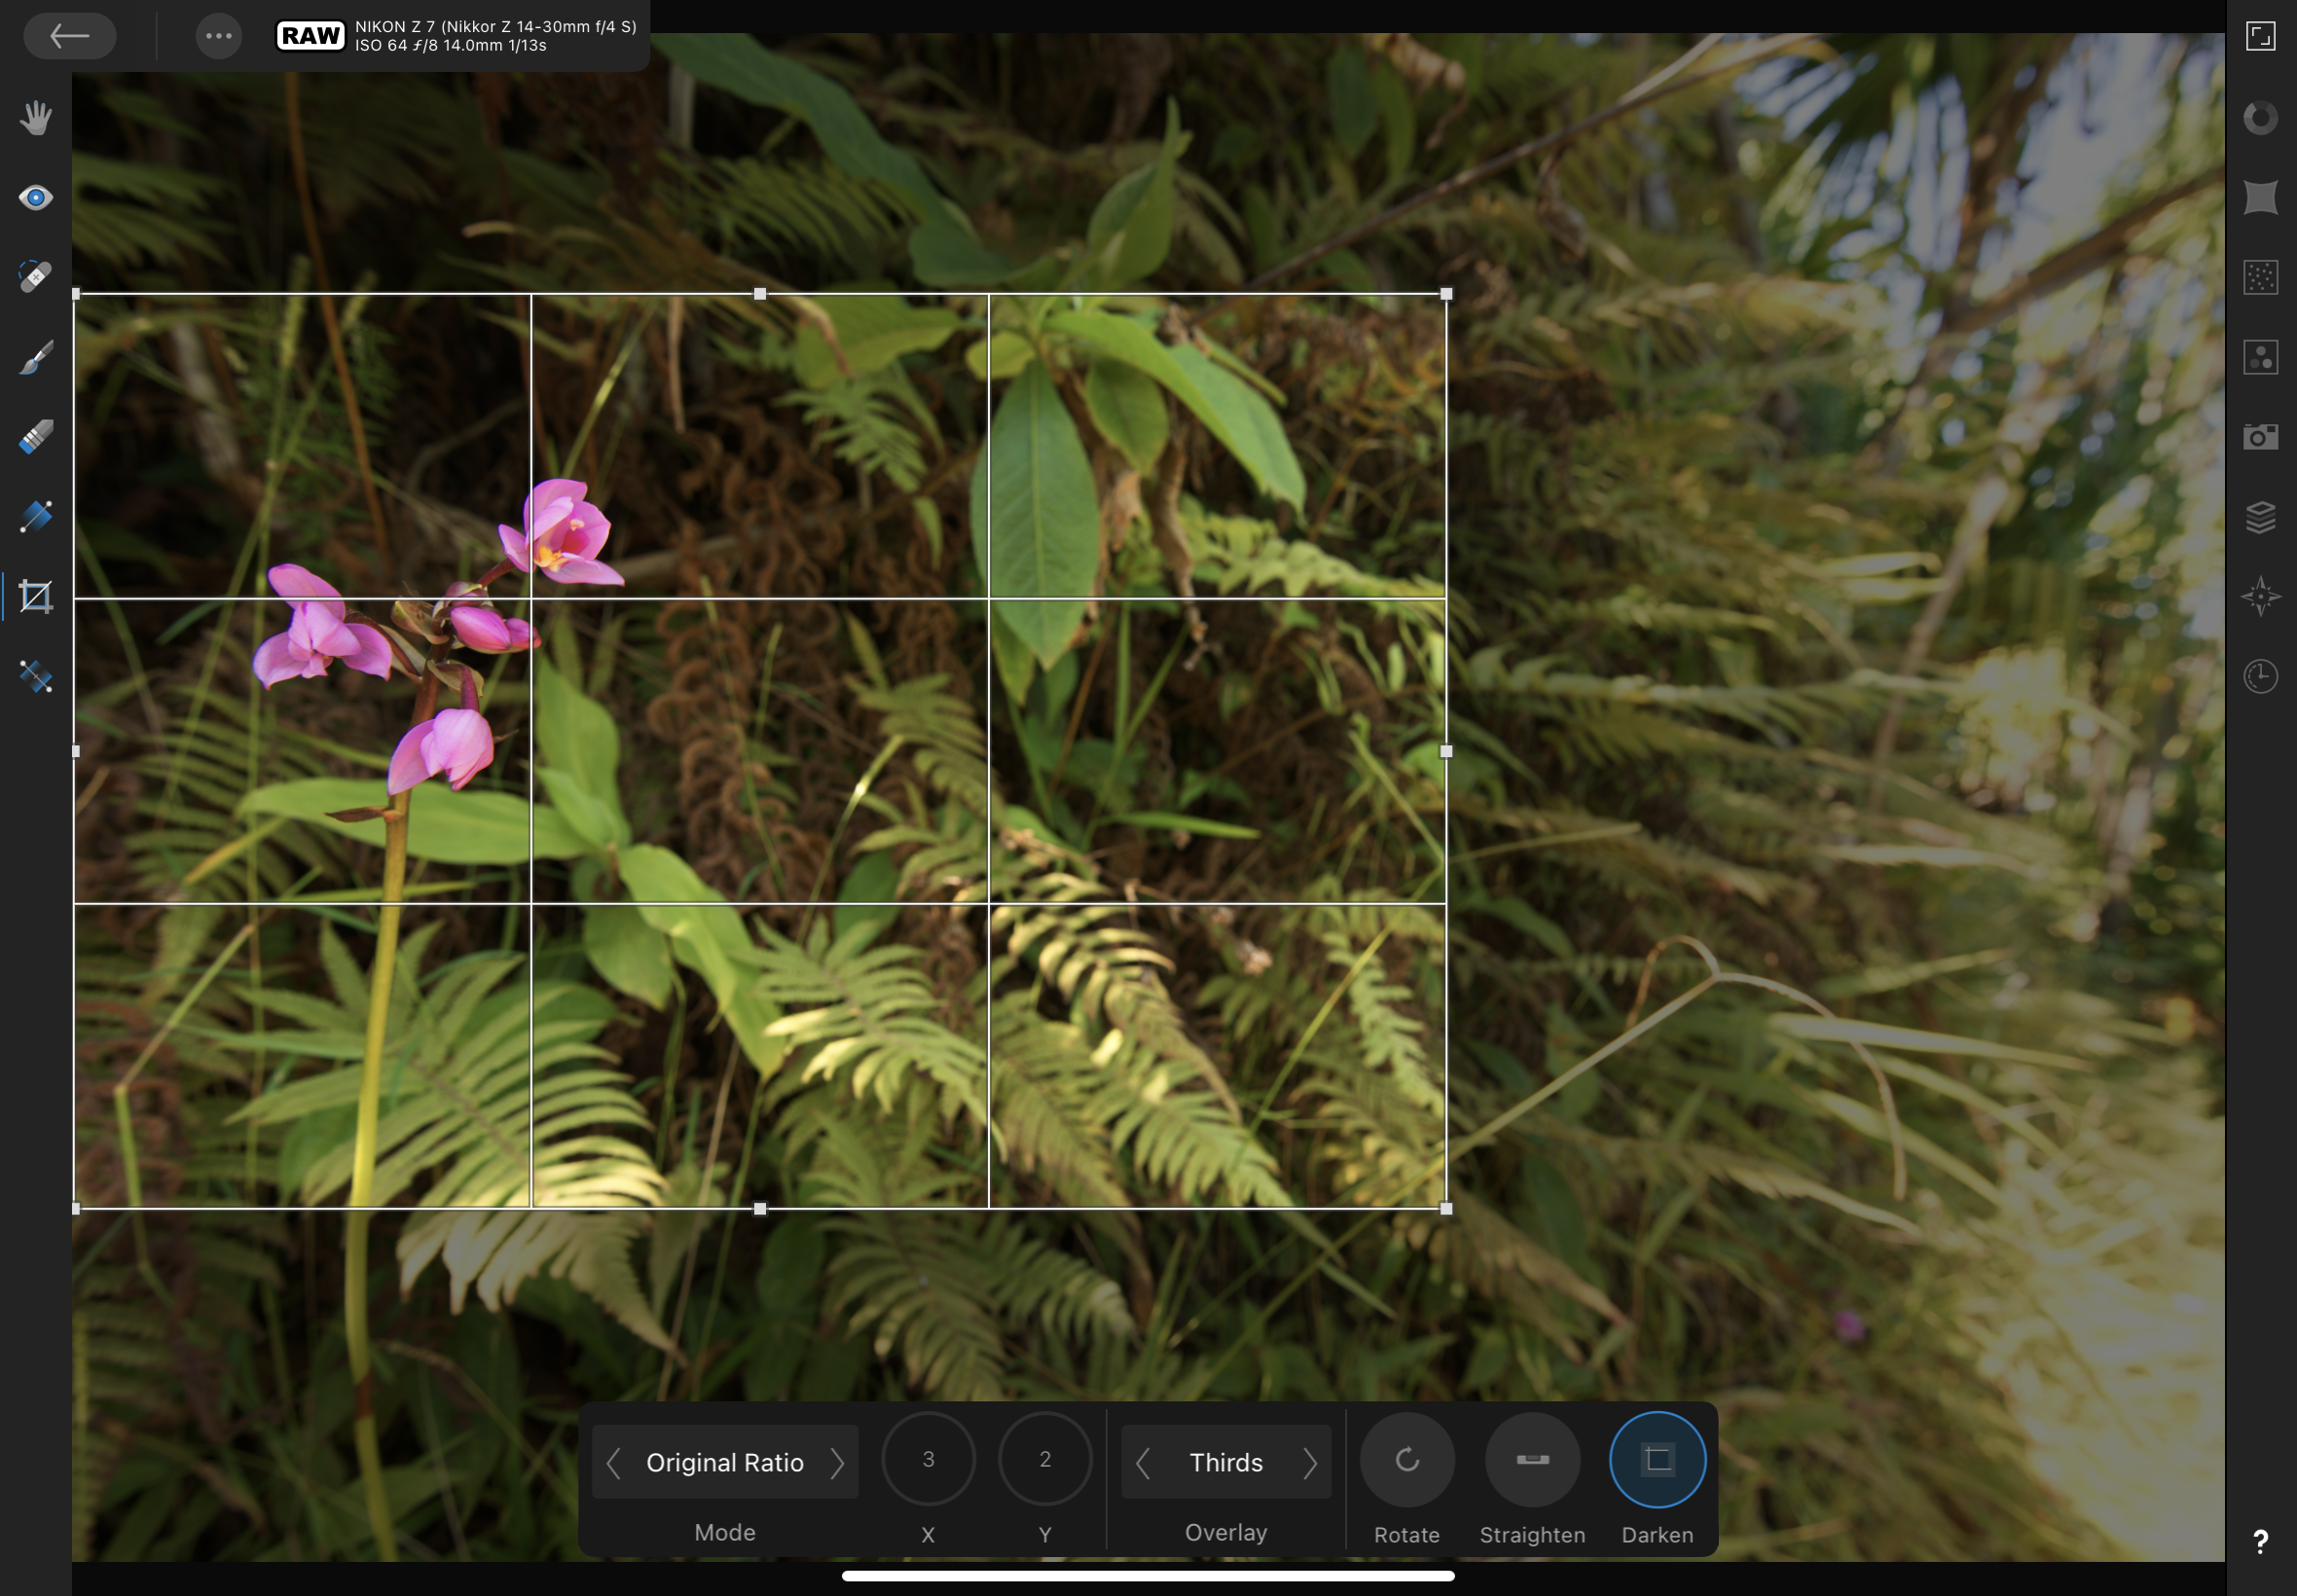
I am trying to crop an image in the Develop persona but cannot figure out to complete the crop. See attached screenshot … Can someone help? Please don’t suggest doing this in the Photo persona. I want to do it in Develop. Thanks in advance.

-
I just started using Photo on iPad. I was able to open a Nikon .NEF file directly from my Synology SAN drive via DSFile, but after editing I see no way to use “save a copy” and put the new file back in the same place. DSFile is a choice, but there is no way to indicate where in the directory structure to put the file. DSFile shows as “on my iPad” … my only other choice is to save in my iCloud Drive. Is it possible to save to a SAN drive?
-
I will do that. I actually already did, but then decided to work on the balance some more before trying a print. I saved as JPG once and it did print the image when I opened that file, so I know I can get it to work. I like the idea though of just adding a Merge Visible layer. One thing: do I need to make the other layers invisible when I print with Merge Visible at the top of the stack, or does it matter?