
.jpg.f0de27e551683407b2d28a1ee883a6e6.jpg)
Mr. Mendelli
-
Posts
30 -
Joined
-
Last visited
Recent Profile Visitors
1,034 profile views

-
.thumb.jpg.cbb002c11427833816656d914def8170.jpg) I've done some more testing to be certain but I am getting inconsistent results. I will update this post with my findings when I have more concrete data.
I've done some more testing to be certain but I am getting inconsistent results. I will update this post with my findings when I have more concrete data. -
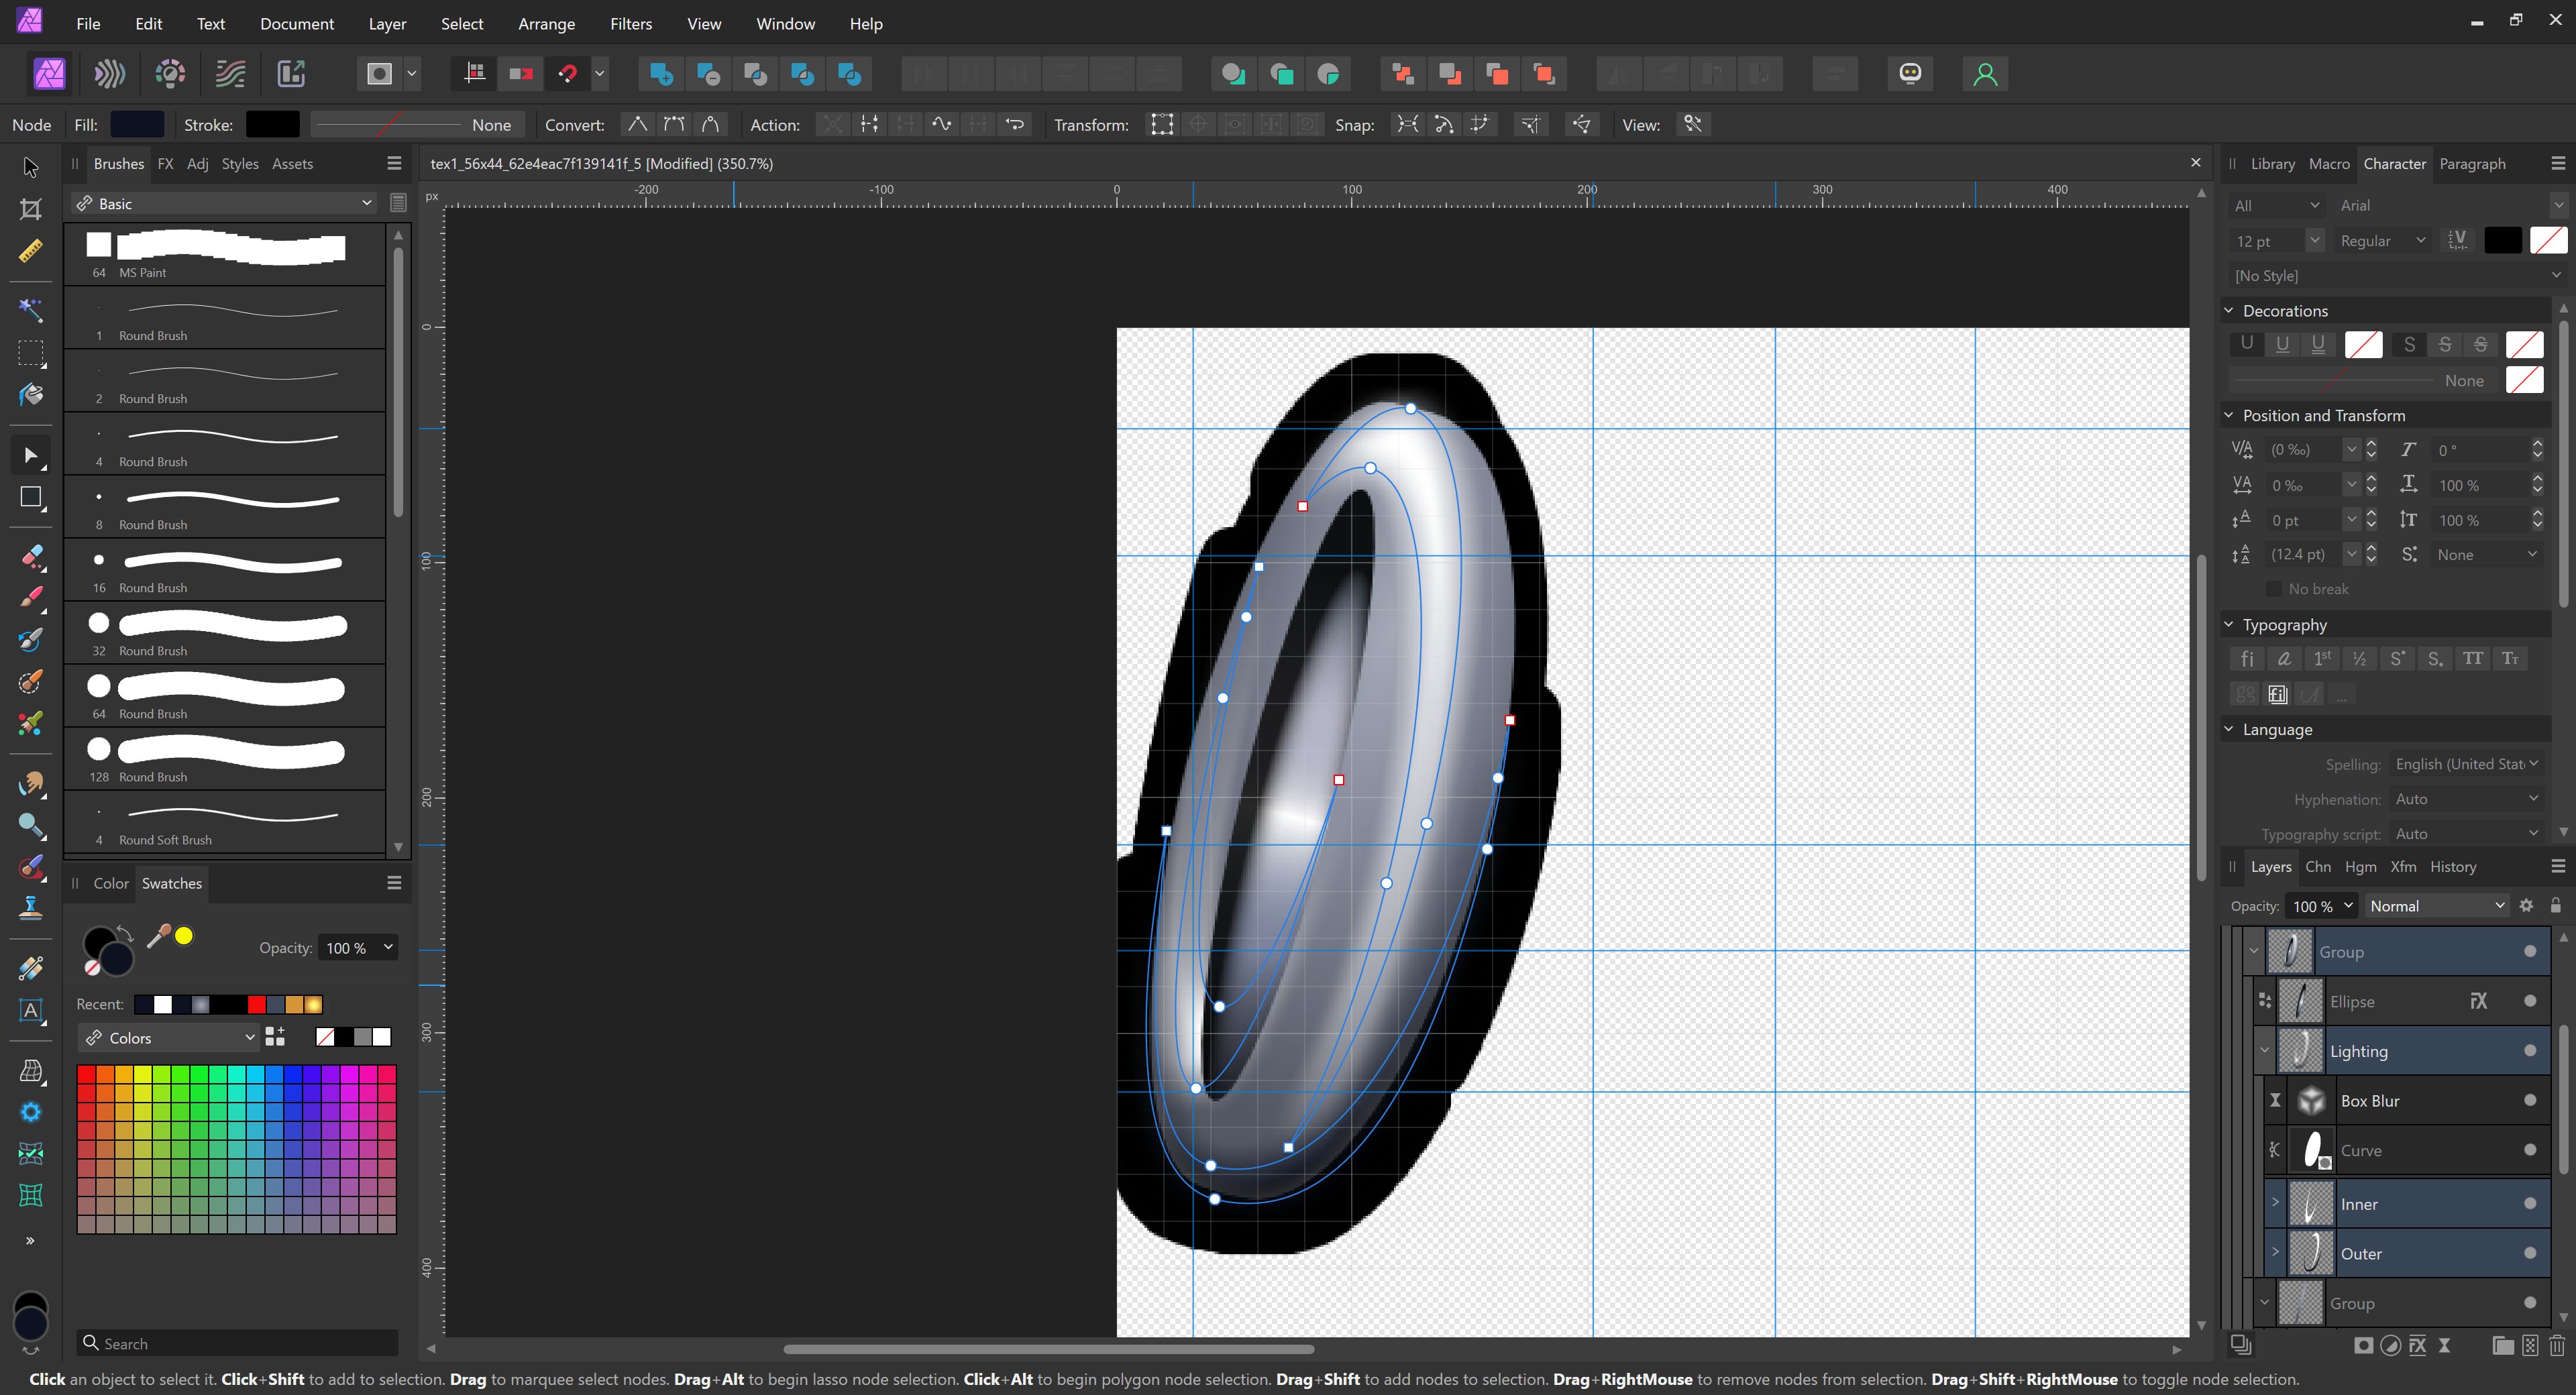
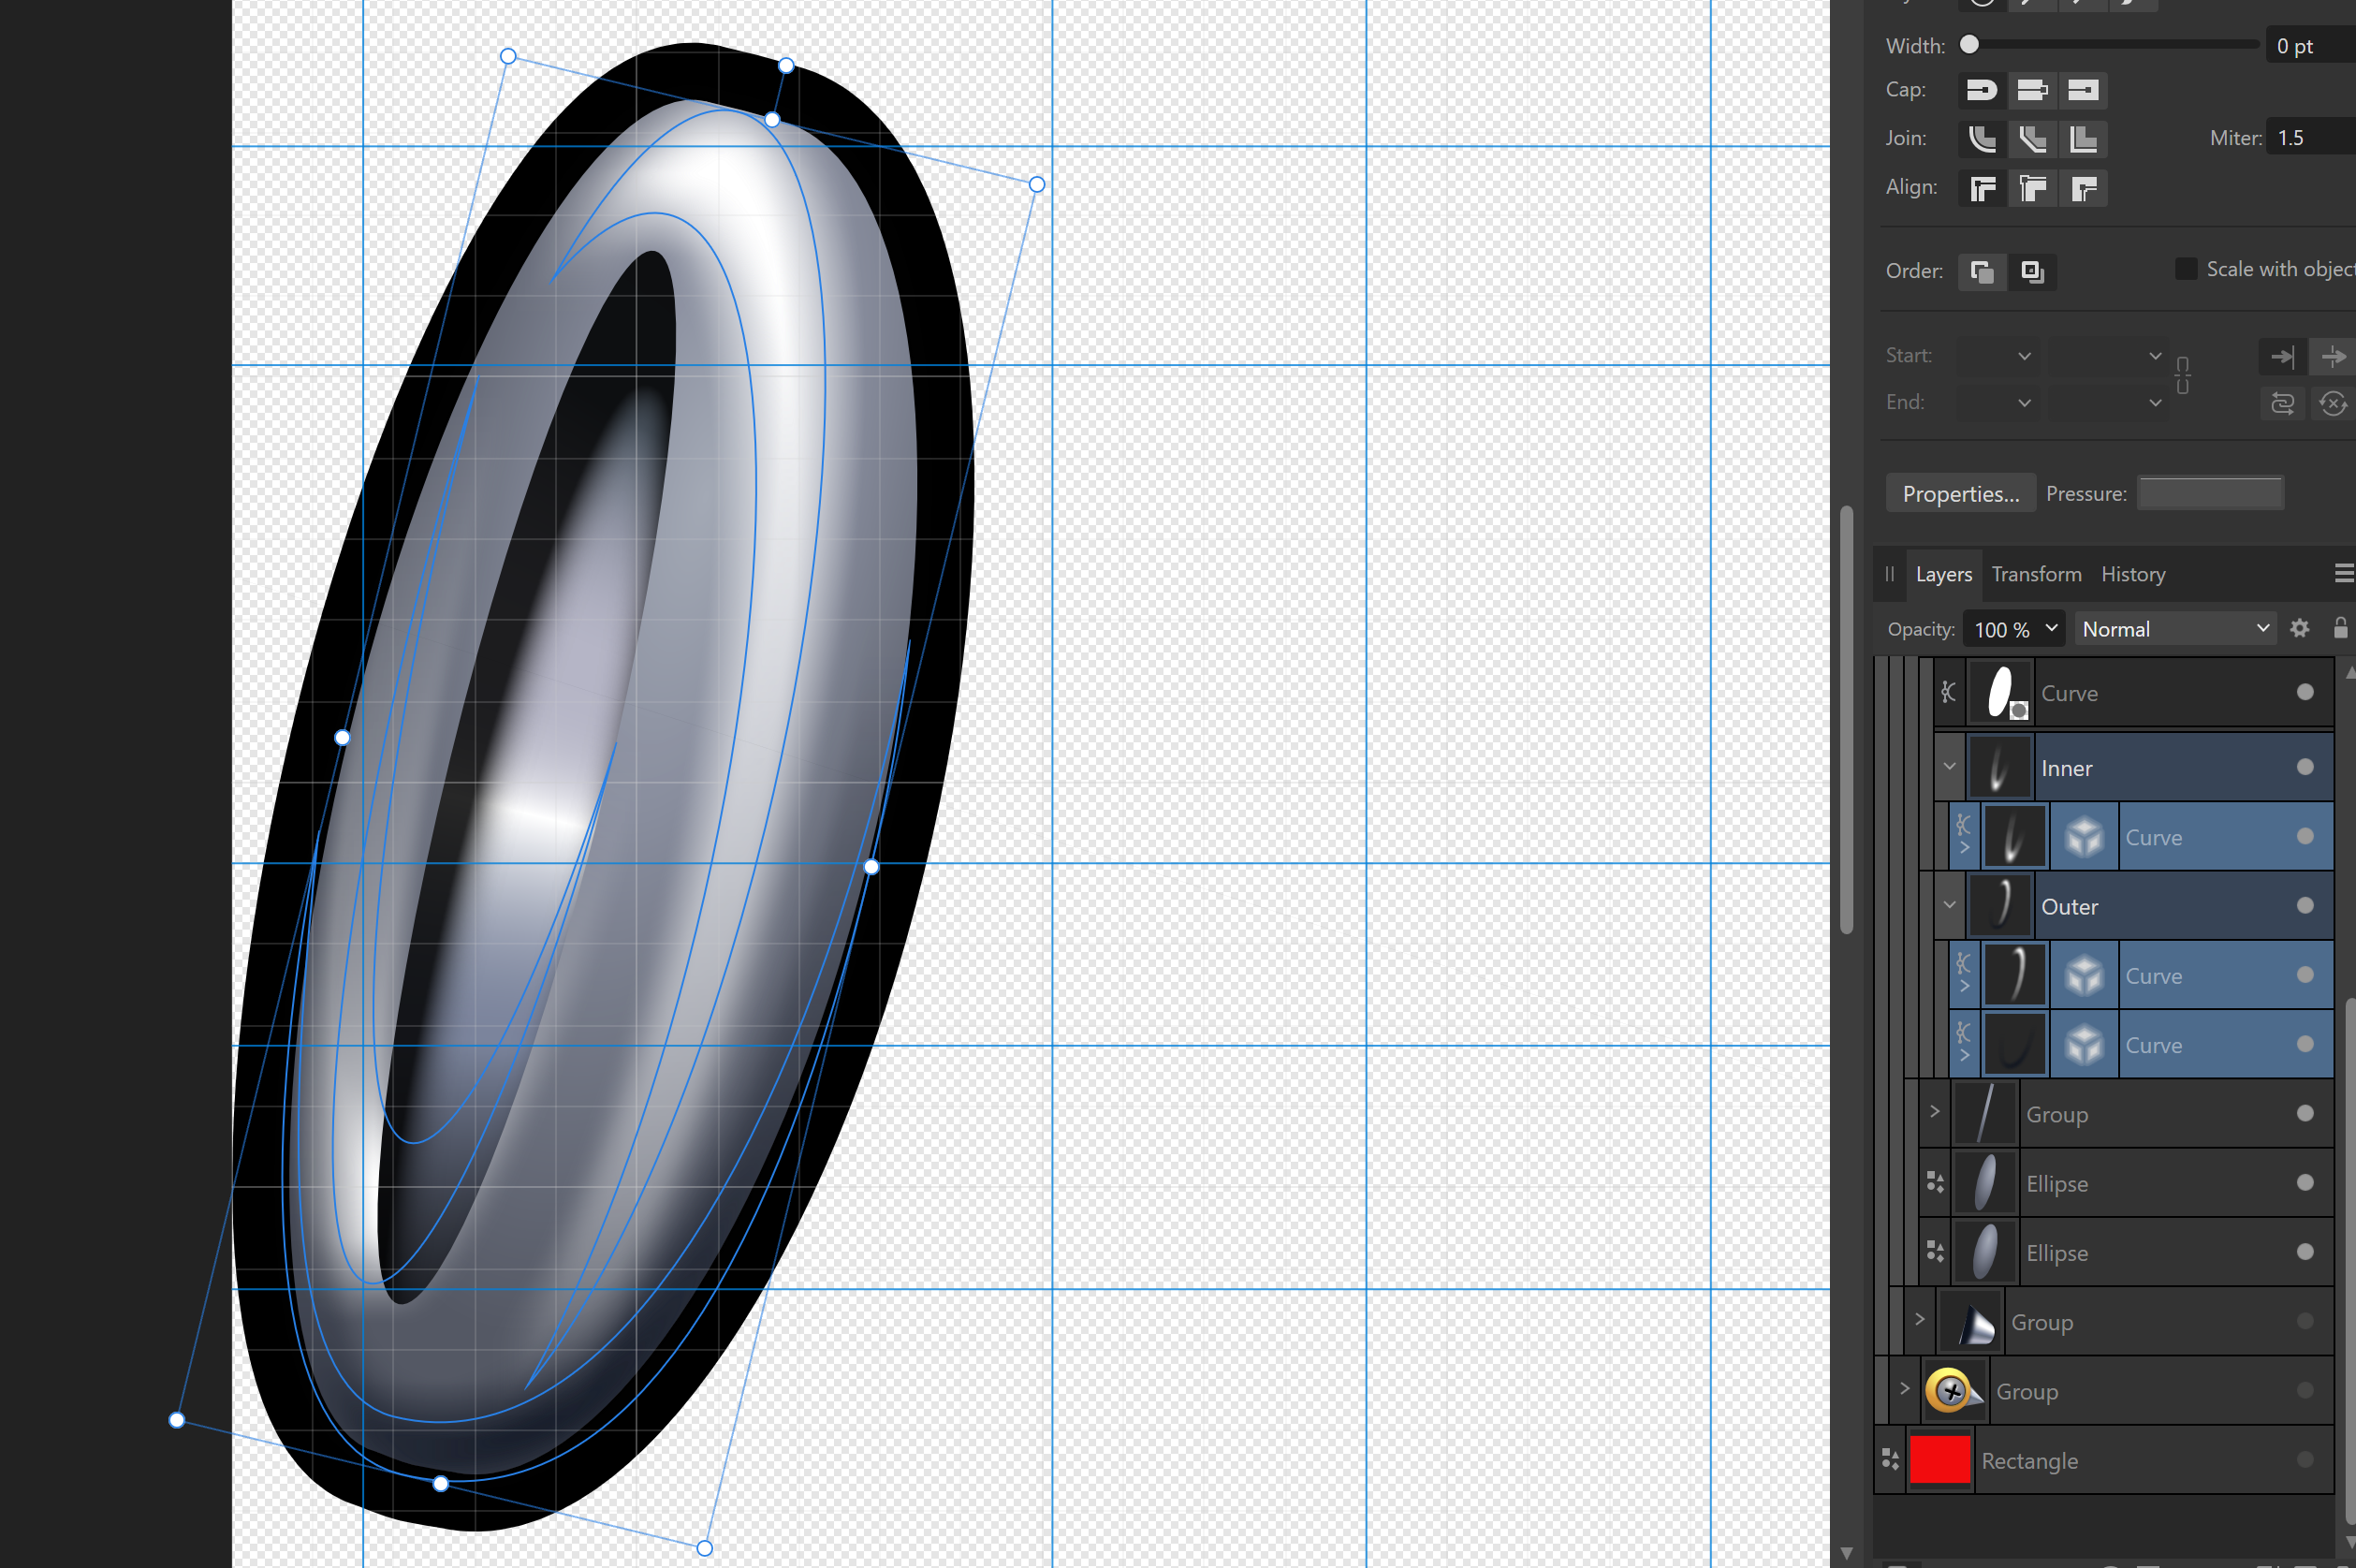
In this project, I have different groups that make up different components of a whole image, the overall image has a thick outline so I grouped all sub groups into one parent group where I apply a live outline layer effect. In one of the nested groups, I am applying a live box blur effect to some curves for a lighting effect, I have also applied a shape layer as a clipping mask to this nested group. The issue I am having though, is that if the box blur effect is applied, it is somehow escaping the bounds of the clipping mask and is adversely affecting the parent group outline effect. I need the blur effect of when the box blur is enabled, but the outline effect of when it isn't. How can I achieve both? Update: I did get the look I want by applying the blur effect to each individual shape, but why does it not work when applying to the group?

-
Generically speaking, not the builtin asset library.
-
I posted about this recently and believe this to be a bug given it happens any time I copy objects from existing documents into new ones that have the live Gaussian Blur layer effect. I was working with a different document using the same layer effect on a hidden layer and the same issue happens when copying into a new document, but not with the document it originates from. I have other similar assets I have made and they all present the same issue when copying them into another document, but not if I use them as embedded documents. The issue is as described in my other recent forum post where performance drops significantly and the software becomes completely unresponsive or takes a very long time to complete any action on the affected documents. Attached is another document I have copied from and noticed this behavior in addition to my previous post containing a different document using the same layer effect that also causes the same problem. tex1_32x32_708b180f31cef832_14.afphoto
-
Thank you, I've never encountered something like this in the years I've used Affinity software before. Update: This may actually be a bug, I observed identical behavior with a different source document and have submitted a bug report after being able to replicate the behavior.
-
Mr. Mendelli changed their profile photo
-
I'm working on a document in Affinity Photo v2.5.7 that I have noticed considerable performance issues with and nothing I have looked into makes sense: - I have hardware acceleration enabled - RAM use is set to 8GB (of 32GB) - I have rebooted my PC multiple times - I have checked for pending updates - I have cleared caches - I am not low on disk space - Other programs are running normally - I have tested other documents already This one is very puzzling for a number of reasons, aside from what I have listed above, my document is extremely optimized and lightweight. The canvas is only 1024x1024px, all elements are shape layers with only one layer effect, and the whole document is roughly half a megabyte. In terms of performance issues, it is excessively slow to open, edit, and save. Anything I do takes magnitudes longer than even much more complex documents. Attached is the document in question in it's currently afflicted state. Specs: OS: Windows 10 x64 CPU: AMD Ryzen 5 7600X (@4.7GHz) GPU: MSI Ventus 3X OC GeForce RTX 4070 Ti Super 16GB (DDR5@6400MHz) RAM: G.Skill Trident Z5 RGB 2x16GB (DDR5@6400MHz) tex1_64x64_m_fefe12c9bdfa636e_5.afphoto
-
 Mr. Mendelli reacted to a post in a topic:
Can I Rearrange Custom Document Presets?
Mr. Mendelli reacted to a post in a topic:
Can I Rearrange Custom Document Presets?
-
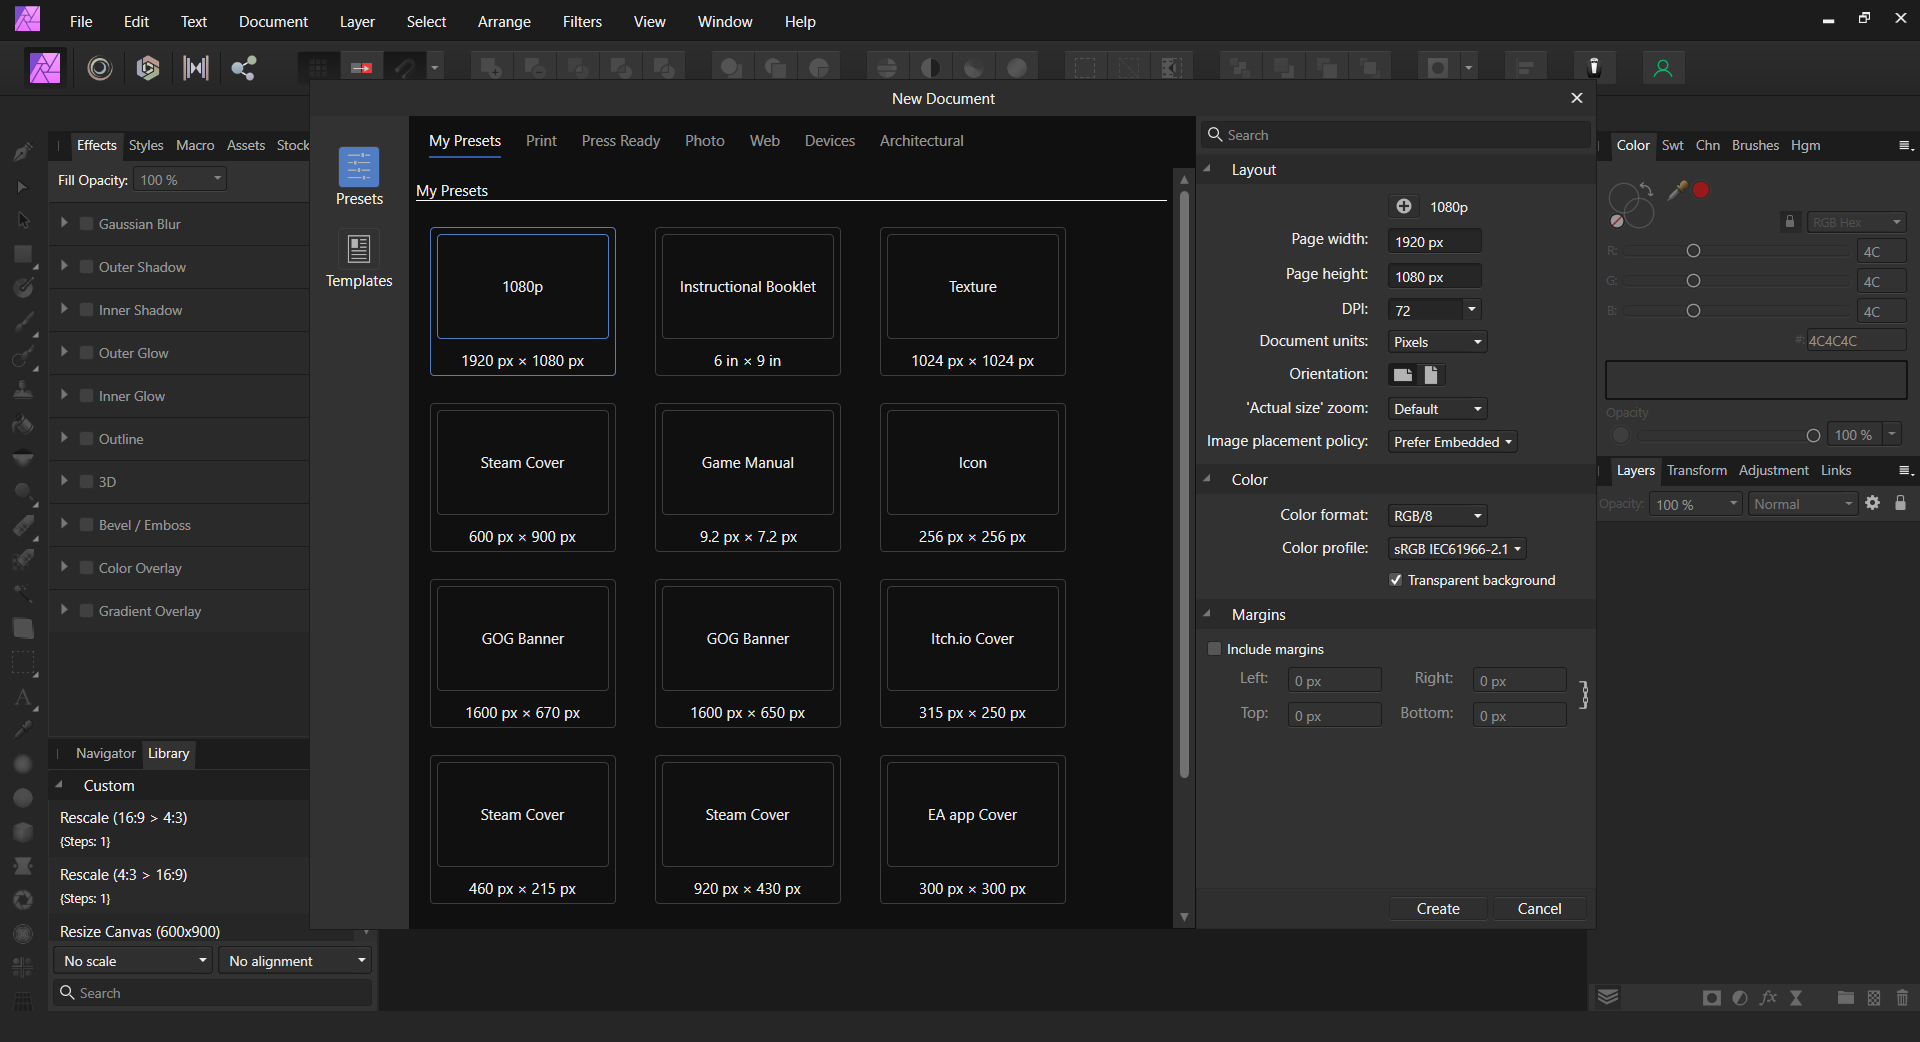
I would like to rearrange all of my custom presets alphabetically without having to remake all of them. I have tried several different things, and I cannot find a way to do this.
-
Mr. Mendelli reacted to a post in a topic:
Can I Combine the Ellipse, Rectangle, and Rounded Rectangle Tools into the Shape Preset Tool?
-
Mr. Mendelli reacted to a post in a topic:
Can I Combine the Ellipse, Rectangle, and Rounded Rectangle Tools into the Shape Preset Tool?
-
Bummer, well thanks for all of the replies everyone.
-
I already tried that (I should have specified so...), it did not work that way for me. All I have access to in the grouped tool is what is in the screenshot.
-
I prefer how this tool is in Affinity Photo, all of the shapes are contained within the one tool button. I can add the individual shape tools, but I like to have my tools as consolidated as possible.
-
I thank everyone for their input. I have this partially figured out now. I can now get the texture to show properly in my texture swapping program I am using (they're packed into a container of sorts) and they show up as they should in that program, but still render as pure black in-game for reasons that elude me. On the note of my partial progress, I think I was either misunderstanding, or this is a bug. I tried the masking method, but before revisiting this from a new angle I was masking the layer I wanted to change directly. Now with the semi-functional method I am making the mask layer it's own layer as well as placing it on top of the stack as the sample document had. I'm not sure why this makes the difference it does, but it's there regardless. Going back the the in-game issue, I believe it's a color format or color profile issue when exporting which is an entire other matter that will need to be addressed at another time in another thread if I am unable to resolve it on my own. Upon closer inspection with my texture tool, I noticed what the issue might be, though I don't know how I'd fix it. It seems the red channel is not being handled correctly. Seen here is what the original looks like in the channels preview in my texture program: ...and this is what it looks like after I make my changes and replace it:
-
I have been experimenting and this isn't going anywhere for me. I have looked into the Channel Packing video as well as the other proposed suggestions. Method 1 has become too convoluted and I can't tell if I am doing it right, and I believe Method 2 will not work with this type of texture packing due to the colors. At this point I'm just very confused and this feels overly-complex. I was going to try the alpha masking method from Method 1, but I think I need to make a separate layer for R, G, B, and A individually(?). And even if that is what I am supposed to do for that method to work, I have tried and failed multiple times to make an individual layer for each channel. I have attached an attempt document using the mask/erase method. gravity_body_bc.afphoto
-
 Mr. Mendelli reacted to a post in a topic:
How to Edit the Alpha Channel
Mr. Mendelli reacted to a post in a topic:
How to Edit the Alpha Channel
-
Lisbon reacted to a post in a topic:
RGBA Texture Packing Support?
-
I will look this over @Lisbon, thank you for the assistance.
-
Thanks, channel/image packing in this context is a new concept to me as of the last few days. Looks like I just need to do some homework to learn a new format as I had to with Direct Draw Surfaces.
-
I am running into some trouble saving edits @Hangman. I need to be able to save and export these textures the same way they are when I extract them from the game. Do I need to make changes to the channels as well after I make my edits to cement them? Currently the "hidden" portion of the texture is being replaced with all black pixels. I'd like to add that while there are other tools that can work with this type of image, I would prefer to use Affinity Photo for workflow purposes.

.png.255de33cd491c204ae880d5ea4ebd232.png)