Jaffa
-
Posts
220 -
Joined
-
Last visited
Everything posted by Jaffa
-
Basically the title says it all, I go to the "Freehand Selection Tool", then up the the "Type", up top, select "Polygonal", but instead of what I expect, get the Magnetic Tool? Tried several times because I thought it must be me ........... but not me! Am sure it will be fixed fairly soon.
-
Thanks casterle, you have been very thorough in your explanation, however, you really need to speak to me as though I am in kindergarten ---- in this particular instance. I did look at First Defence's link, but when I saw "geared towards motion picture production", my eyes started to glaze over. Do I need a plugin - seems NO Do I need specialised knowledge - seems clearly - YES Where can I start (from an EARLY POINT in the process) - Not identified, I would love to know! Am struggling here!
-
NEF files Nikon D5600
Jaffa replied to janetw's topic in Pre-V2 Archive of Affinity on Desktop Questions (macOS and Windows)
I have a Nikon 5200, just an earlier model than yours, Janet. NEF files are consistently fine in AF. See that you image is at 400%, so many images would be pixellated at that size. What is it like at 100%? -
Thanks First Defence, so I gather from your response that a plugin is required, or perhaps to process the image in a third party program first? Am still trying to understand?
-
Have just been viewing the Official James Ritson video tutorial on Blend Modes. Whilst it looks very impressive indeed to me and I can follow quite a bit of it, I am completely lost on one aspect. At the beginning, he talks fairly quickly about "3D Render" and "Render Passes". I have just looked in Help and not much there to enlighten me. Does one have to use a Plugin to do this? Or can I activate "Open Colour IO"? Is there a video tutorial to start to learn 3D rendering?
-
Thinking about it, Callum, I was not using the same computer. The one I had the problem with was at our learning centre. Worked fine when I got home. So, unable at this stage to provide a screen shot.
-
When I say this, this is just after upgrading to V 1.7. I was tutoring a class of seven others in an Affinity Photo process I had done before. We got to the point where I used the Warp Mesh Tool and it showed as two strong horizontal lines with a normal line in between. I managed, with difficulty, to do some manipulations, with a very pixellated and stepped result. When I got home I experimented again and on that occasion the Warp Mesh Tool seemed normal. Not sure what to expect ongoing?
-
I have just carried out an experiment with doing a standard crop of an image. I put a red marker first however in the area to be cropped out. Following the crop, I extended the canvas, which showed that the information was still there. The second part of the experiment was to do the crop, then I rasterized the layer. Again I extended the canvas which clearly showed that the part cropped out was no longer there. Thinking about it, after you crop, the history records that it is a "raster crop", so that alone should be a clear indicator. Interesting! Though I don't think much in life will change after this - though it does help me understand rasterizing that bit more. Also many thanks Carl, for your informative response!
-
I, more or less, understand what rasterizing is, particularly for smart objects and for changing vector images. However, I have just been watching a YouTube video by Hubert in which he crops an image and then rasterizes it. Now, I belatedly learned that the area outside the crop is hidden. So, presumably (or guessing) rasterizing the image serves to make the crop final, in that the hidden part disappears completely? Is that the case please? Also, how does this relate to vector or smart images, or is it something different again?
-
This turns out not to be a problem (yet anyway!). I followed the very clear Vimeo Video by James Ritson to plugin the Nik Collection to Affinity Photo. Despite ticking the box bottom left and rebooting, I seemingly could not get six modules to "work". Tried ticking and unticking, restarting Affinity, and kept getting the dialog box under. So I rebooted the whole desktop - still the same. In the end, I went to Filters, Plugins, Nik and saw Silver Efex Pro 2 (the only module I really want) as an option. Tried it and it works perfectly. Still get the dialog box shown under ........ but not a problem - it seems. Thought I might let others know!

-
Hi Dan, most of my work does not need rasterizing, so unfortunately you are saying that there isn't a simple way around. I rarely use "place" and therefore Smart Objects. Thanks for the feedback though.
-
Hi Ian, I hope that my suggestion is too basic, nevertheless, I recall that when I first started the selection brush happened to be in the "subtract" option. Simply switching on the toolbar above to "add" solved the problem. This happened many times before I "cottoned on".
-
Up to now, Ian. I have had no significant problems. Later. choose my image to be utilised by Affinity Photo. From memory - jpeg, Though I should consider TIFF. Hope that helps!
-
Hi Fixx, seems I should have explained myself better. I mean that if I save what I have done the first day, including the crop, then next day open the Affinity file again then the original data before the crop is available. I tried this a short while ago and that does not happen. Would be very glad to be proved wrong!
-
I don't think that this is an option, is it? Have checked through the video tutorials etc and cannot see anywhere. Is there a workaround perhaps?
-
Thanks firstdefence, I will try that should work!
-
Hi RC-R, it's not just when I have a new session, I can have Layers and History open for one photo, then later when that photo is closed I open another photo and the Layers and History are not there - and I have not closed those panels. This is in the same session and I go into Studio thinking that - maybe they are there and perhaps hidden behind another window - but they are unticked! It is certainly not screen size because I use two monitors, one for the program and the larger (about 550 mms) for the image.
-
Just about every day I am opening up "Layers" from the Studio by going to View>Studio, then I want "History" and repeat the process. Is there any way that I can leave the Studio open until I have ticked the items I want, instead of this repeating? I have looked through the Manual and for Studio it shows 22 entries - I may have missed how to do it, but doubt that!
-
Many thanks for your responses, RC-R and Alfred. I have watched the video tutorial a couple of times and now understand. What confused me at first, was that I wondered how I had managed fine, so far. However James Ritson, explains that at the end when he says that both the clipping and masking work the same when you are dealing with adjustment layers, etc. It is just in situations I don't really encounter at this stage, that the difference is crucial.
-
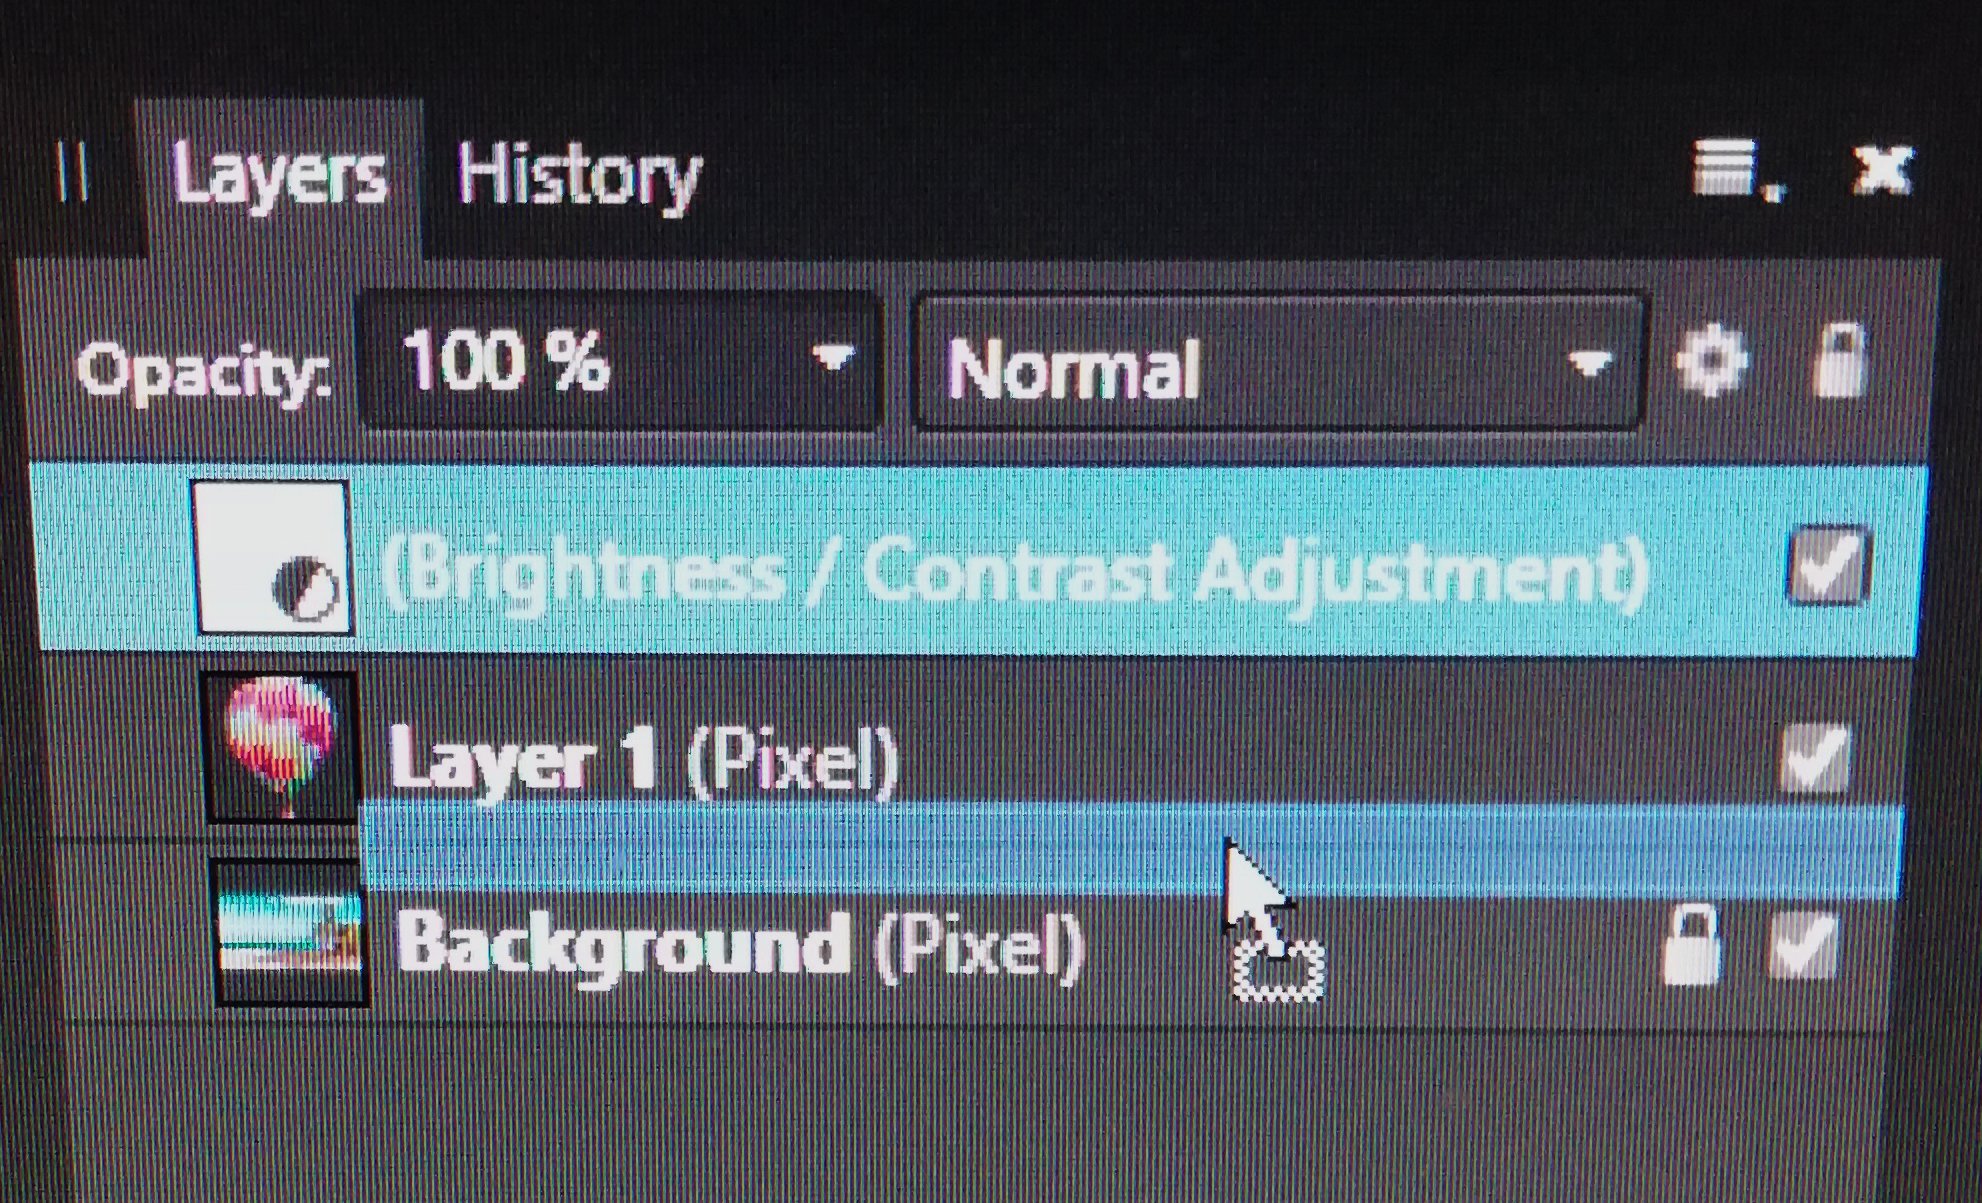
I have been creating many standard layers and child layers - it seems forever. However, one thing I have taken for granted up to now is that I am creating Child Layers in the correct way. However, have just realised that Windows Affinity Photo shows a small perpendicular line and that seems to be the normal way to achieve it. The way I have been doing it is to drop the adjustment layer into the blue line that does not extend all the way to the left, my image re-inforces what I mean. My overall question therefore is - what is the difference between using the "partial" blue horizontal line and the small blue vertical line? (Note: I fully realise that the "full" blue horizontal line is used to create a parent or standard layer).
-
Hi firstdefence The two documents were 1st started at 1620 x 1079 -- resized to 3243 x 2160 2nd started at 1056 X 1080 -- resized to 2112 X 2160 In Affinity - Export (from File Menu) I chose Bicubic and obviously 100% quality. At our club they will be viewed and assessed using a 4K projector. I have viewed at 100% on my LG (TA) monitor at home. .
-
Just yesterday I wanted to have two images at a bigger size, in fact I practically doubled them in size in Affinity Photo. I did not expect it to work too well and had in mind to use ON1 instead. However, whilst I may have just been lucky with the particular images that I was working with, the results, to my eye, were excellent. I have not seen any mention made of this with Affinity and wonder about others experiences?? Of course the traditional way is to enlarge 10%, save, enlarge another 10%, save, etc, but I did not even need to do that.
-
I love the noise reduction in Affinity Photo. Just recently I used 395% on a girl's face and it worked beautifully. Now we all know that in practice you can only have 100%, so the scale must be different in some way. What is 100% based on in Affinity Photo? Is that the measure to which some other programs can only reach to? When I am singing the praises of Affinity Photo to others how do I explain this?
-
Many thanks for your very helpful explanations. RC-R - I am saving your comments on a file on my PC for reference whenever necessary.
-
... or just "Open" instead, Fixx? Why do people "like" to place images, why a seemingly unnecessary step?