rintin
-
Posts
33 -
Joined
-
Last visited
Everything posted by rintin
-
 Hi there, I bought AF and AD v1. I see no important improvements on v2 on release, so I'm still there using v1. Question! Poly-selection-tool was improved? I feel is not workin as fine as it work in photoshop (in aaaany ooooold version like PS CS2 -legacy-). The point where you click to create the selecting shape is working (at last in v1) like... hard steps. Doesnt matter the close you press the next one. If you used PS, you know what I mean compared with Affinity and I was expecting something like this will be improved time ago. Second one. Is there any advanced AI option for select people or separate background "on the fly" like in newer versions of PS? It's ok working manually, but selecting someone with hair on a random background to work with "pretty accurated on the fly" is a must for a 2023 professional software like this (IMHO of course). Thanks for your time, Love to read your answers!👍
 -
Hi there, User of affinity photo and designer for windows (desktop). Is there any way to ONLY show fonts from a specific folder instead all the installed ones? Is a mess to guess if one is good or not for a purpose or another one deppending on its license. Would be helpful having the option to list only those ones we have in specific folders. If is imposible at this point, I suggest to add this feature.
-
My times: -Deigner: 5.61 seconds -Photo: 4.38 seconds My config: cpu: i7-6700 os: windows 10 home Note: these apps (and os) are in a SSD.
-
ok, bought
-
Hi mates, I'm an Affinity Photo user, and I really like it. I'm considering to get Affinty Designer. But I'm asking myself if I really need it. Of course, I don't "need" (I can do things using AP or software that I use for different purposes like CSP or Anime Studio). But just comparing it to AP, what can I do in AD that I can't in AP? (or what thing I can do faster in AD). Thanks in advance!
-
Done! Hope they like it as much as me
-
Hi mates, I'm a proud owner of AF for windows. Now, I want to gift the same software to my parents. Whats the best way to do that? Sign in using my account and buy a new license for them, or better creating a new account? I don't remember if the software asks for the email during the first installation, and in this case maybe looks better using one of their email adress instead of mine (so, for doing in this way I should take their laptop at midnight... I'm not sure haha). What do you think? While I white for your answers I'm going to make a custom "software gift card" Thanks in advance!
-
Installed at the same time? Nice!!! Finally I can say byebye to other software in my laptop as well :)
-
Hi, I think the answer is NO. But, anyway... I bought a license that I use every day in my desktop PC. Can I install the same one in mi laptop? Thanks.
-
Hi! 2 questions: 1) About selections (and free crop as well). While we are creating one, and we want to move it during the creation process, for example in PS we can hold spacebar to move and continue using the tool before applying it. Is there any key for this purpose? With shapes is working as expected. 2) About crop: 2.1) I can't fit crop-area into the visible layers. If that option is available, can someone take a screenshot of the fitting options and share it, please? 2.2) Is possible to have a normal selection and crop automatically around that area? Very useful for selecting a layer pressing Ctrl+LMB, and just crop for exporting the minimum size for that image. Thanks in advance.
-
Nope. On this computer I don't like to work with beta versions. For the same reason I bought AP just when released without trying the previous open beta xD
-
You are welcome ;)
-
If you press ALT+LMB, drag to see in black/white to define when you have to stop dragging because is the correct levecl correction by left or right: If I release LMB first, the image keeps that mode. If I release ALT first, the image get back to normal mode. Is that a feature or bug?
-
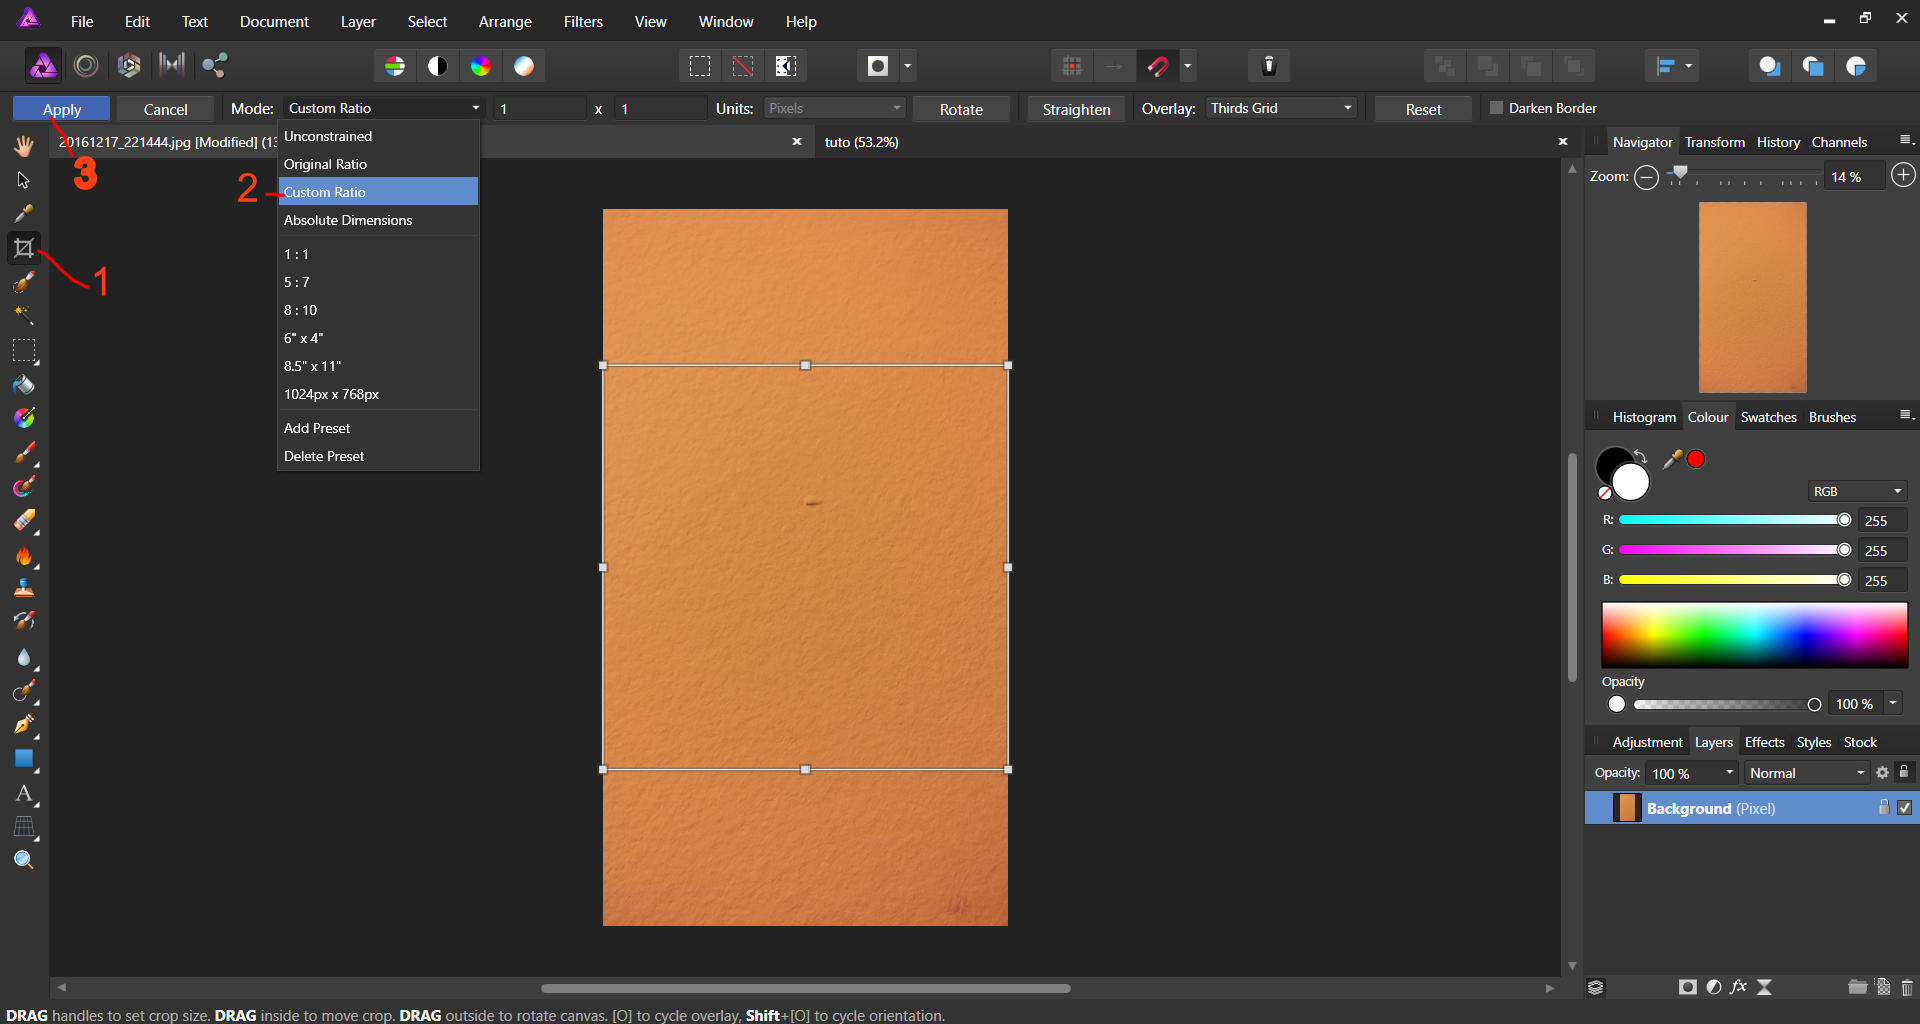
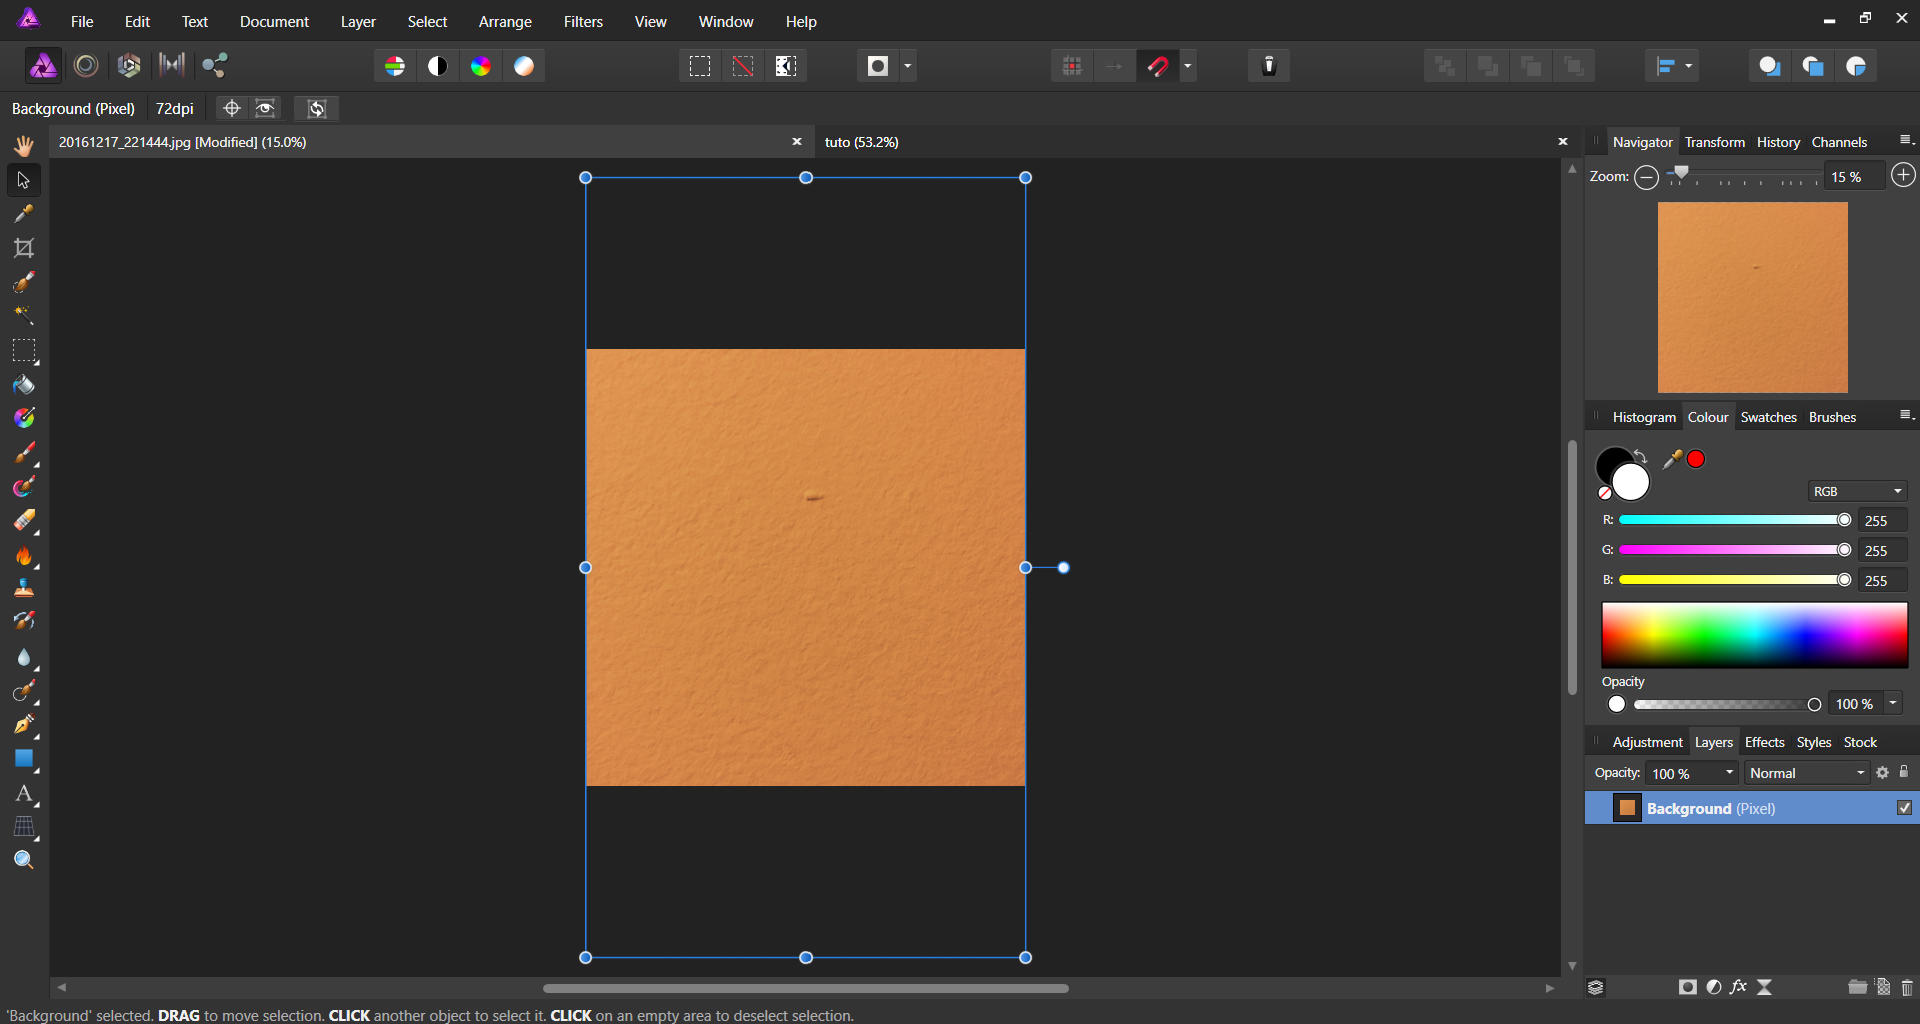
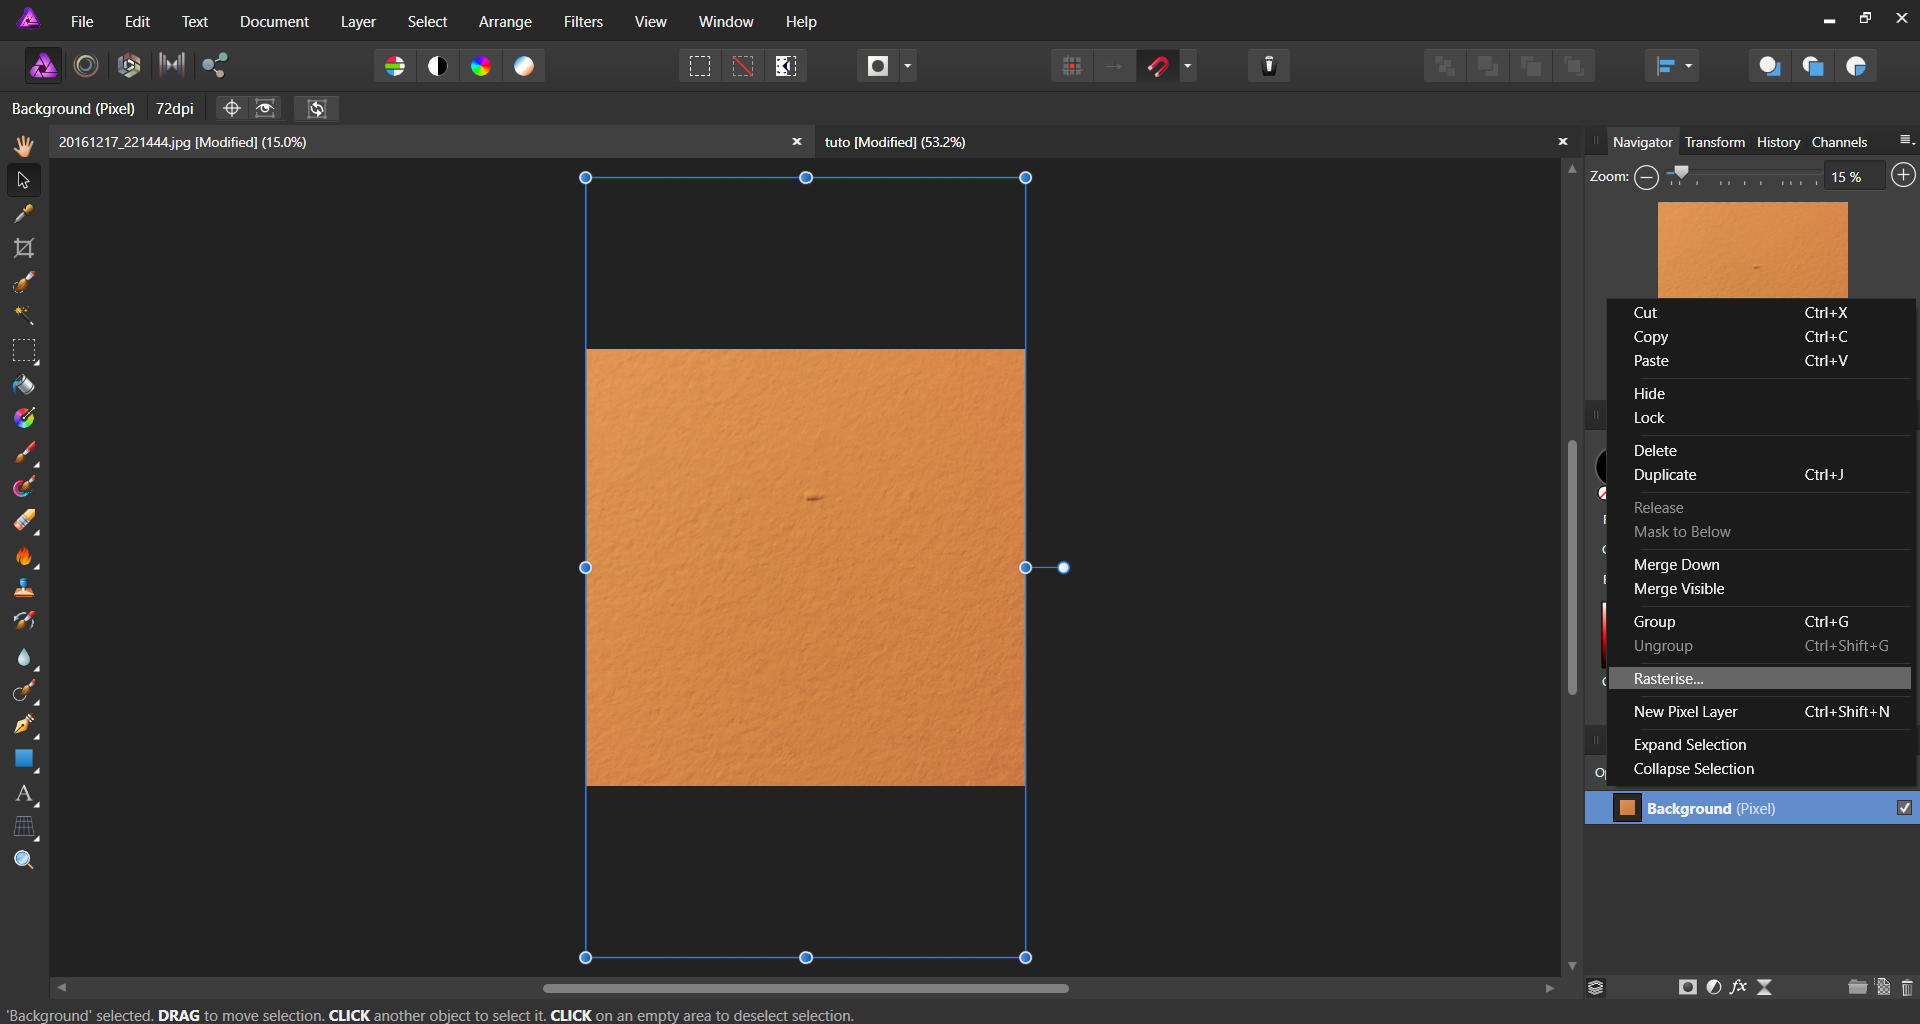
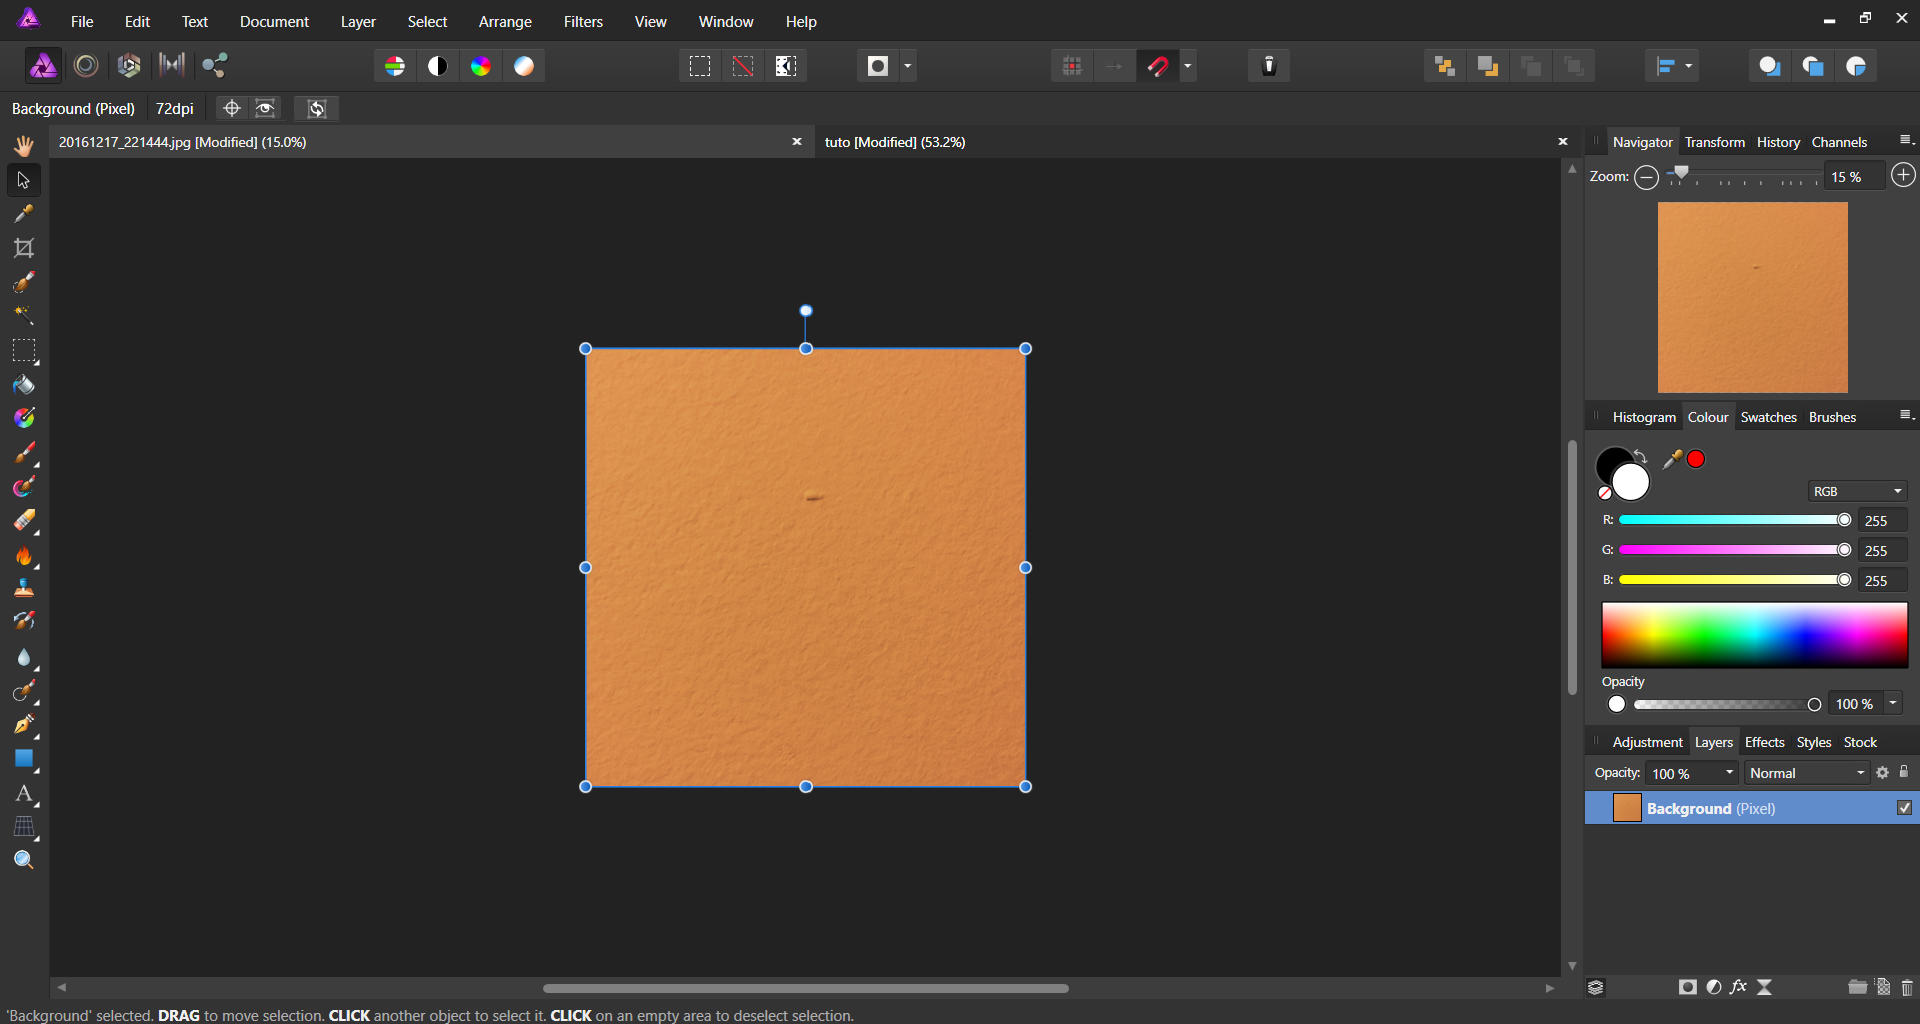
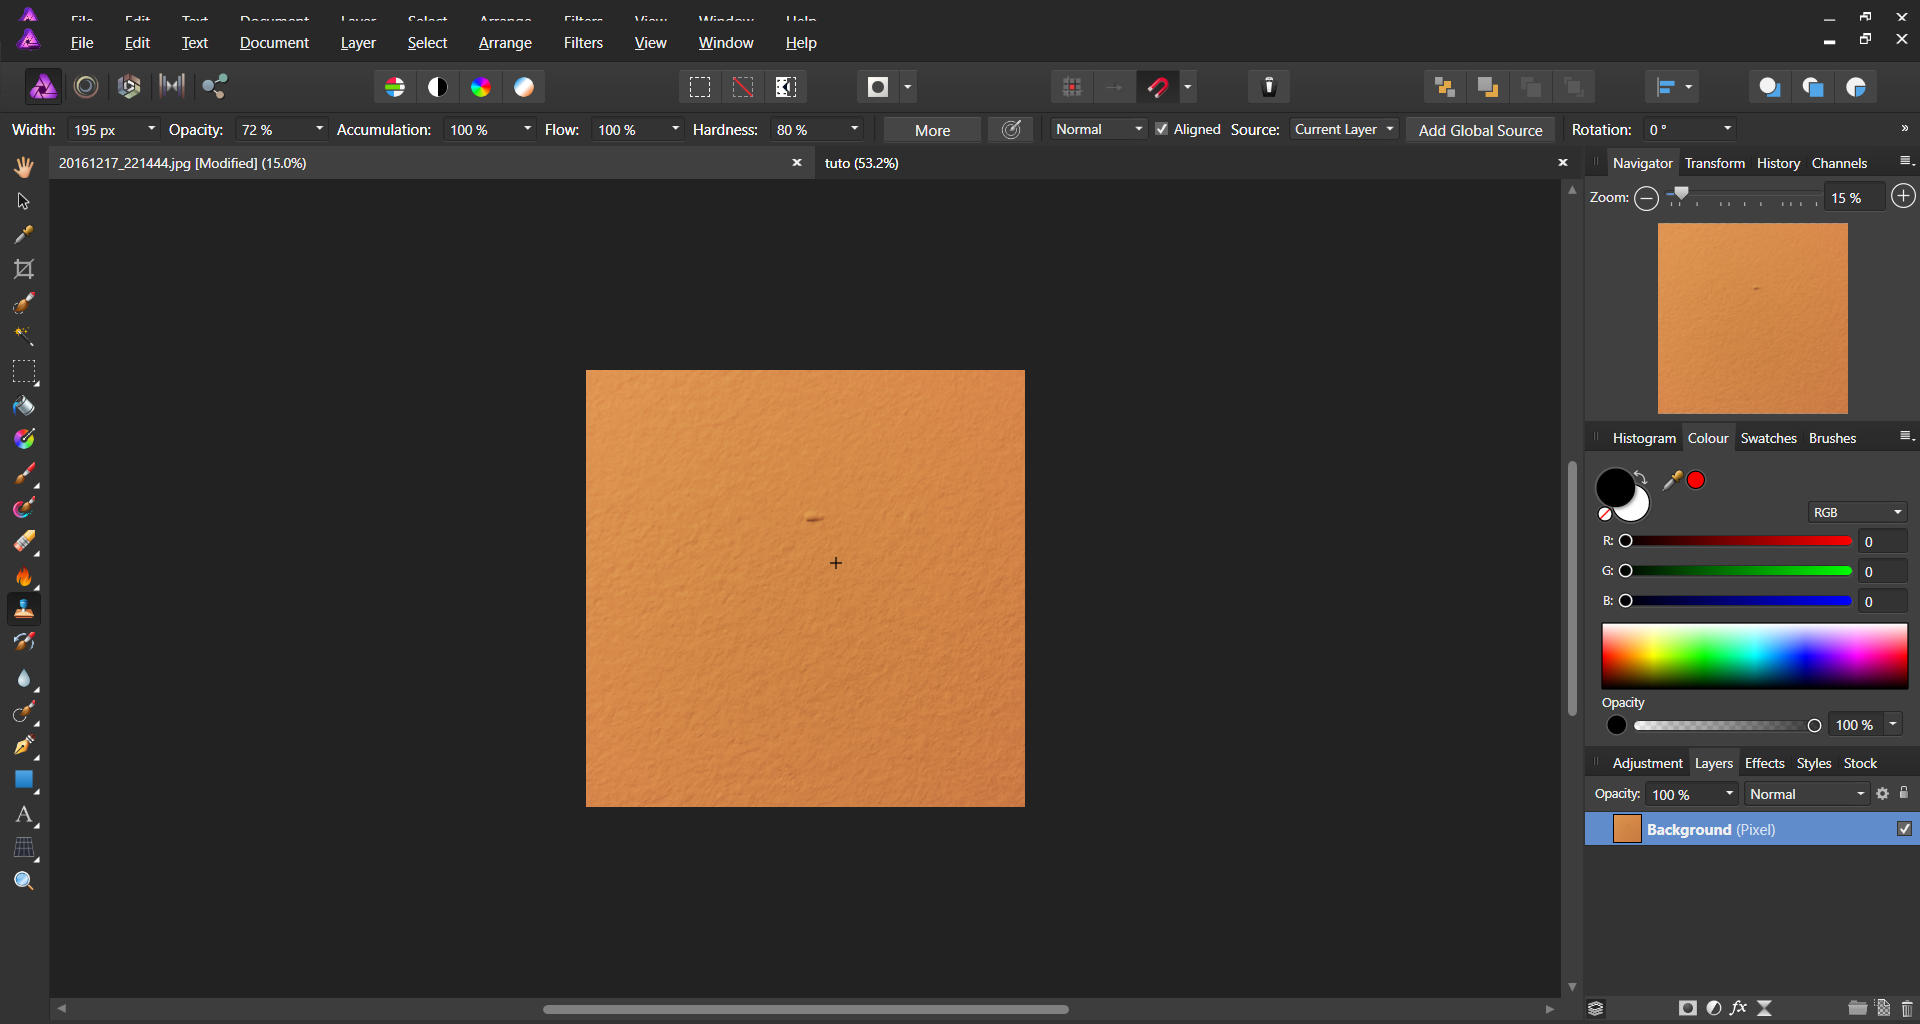
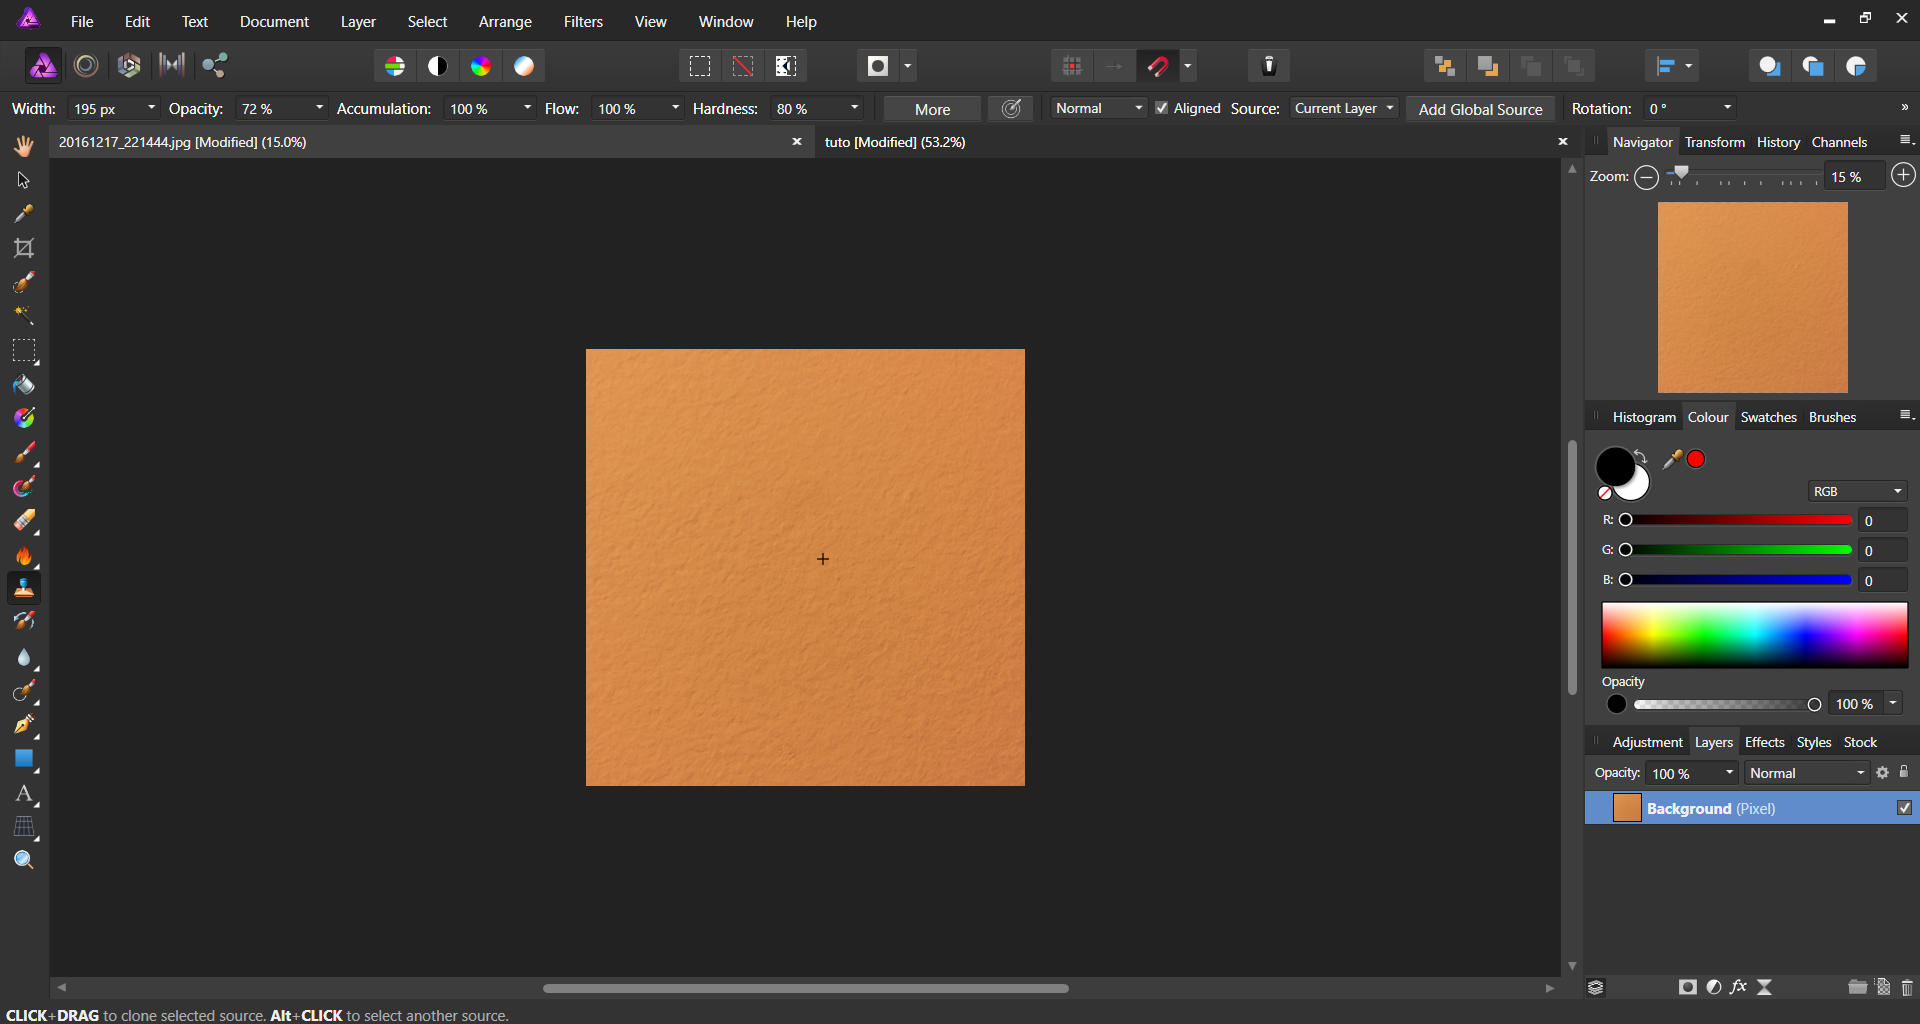
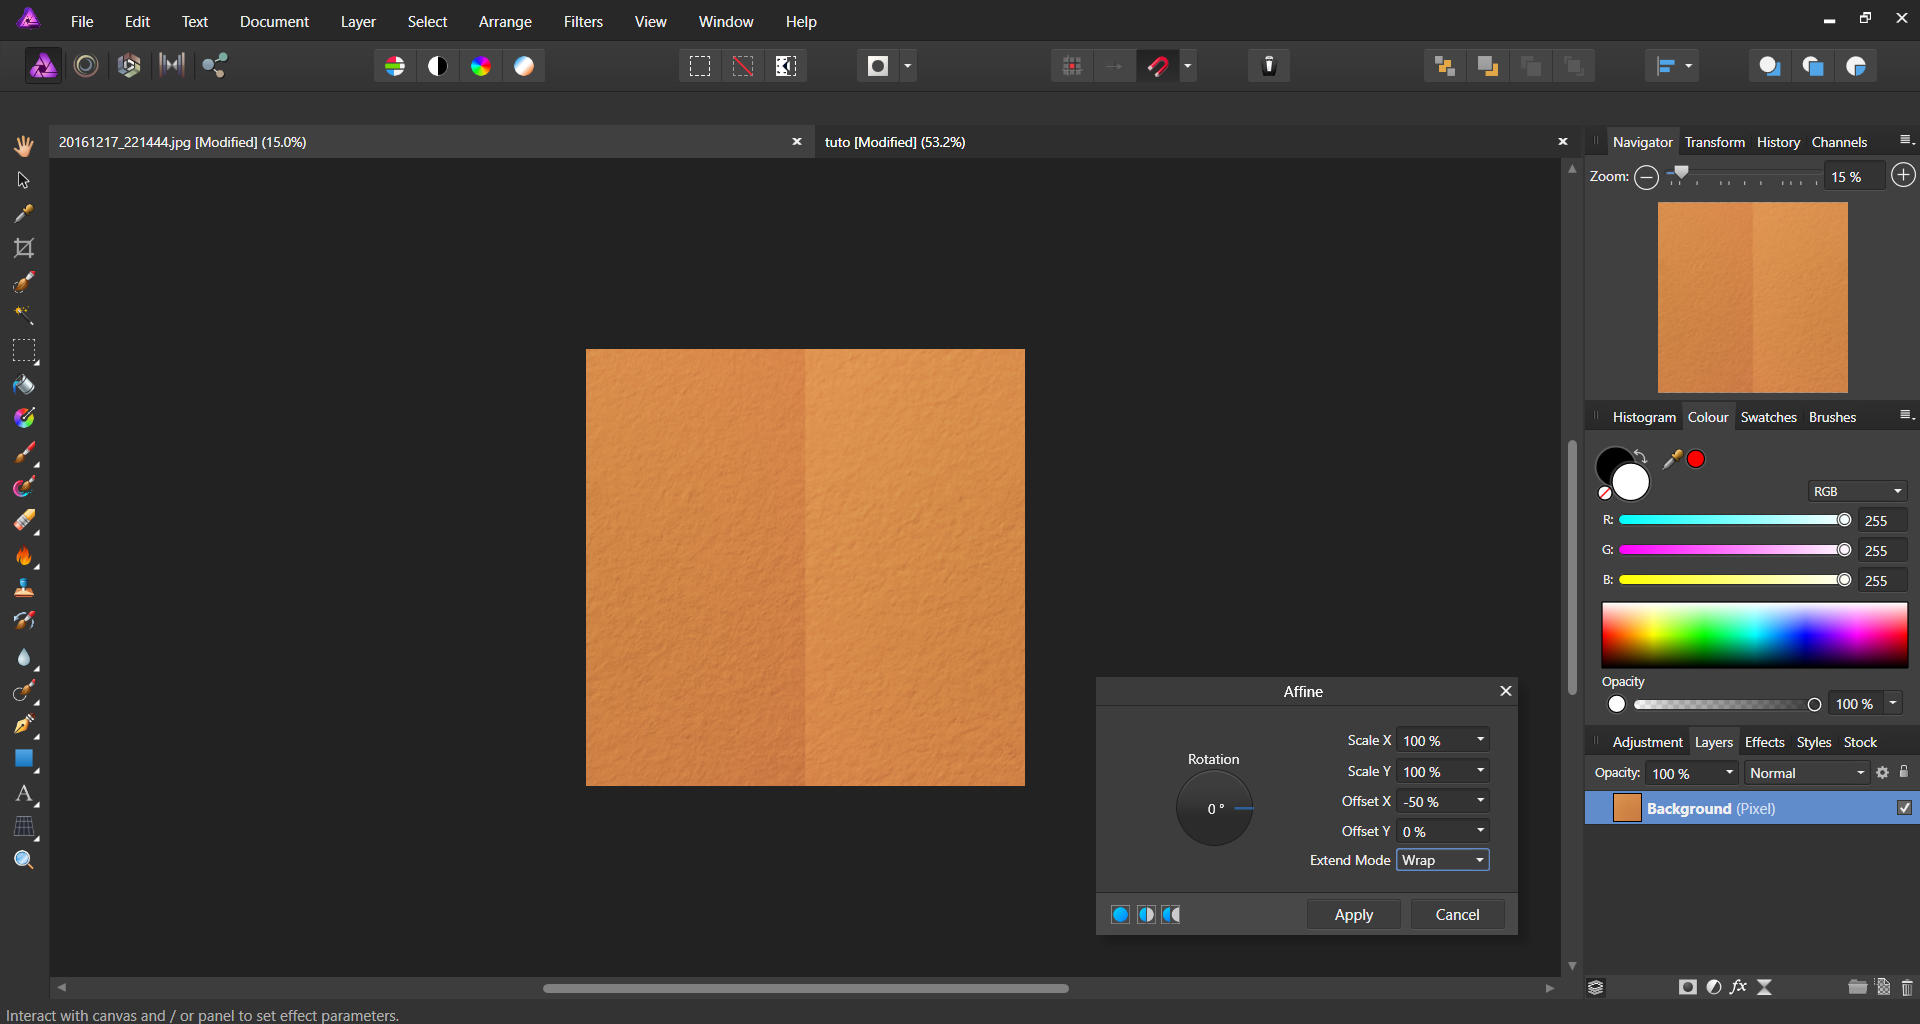
As I promise, here you have: Firstly, we have to take a base picture to convert it into a texture. If we take our own photo, better to do perpendicularlly to the “target”. In the following example I wasn’t take it in ideal conditions for a real case (phone camera, bad illumination, etc), but is enought to show us the process. Once we have the image loaded in AP, we crop to obtain a squared canvas. If we select the layer, we can see that is still existing image out of our squared canvas. That’s not usefull for our purposes. We need to displace ONLY the inner area. To fix that, just rasterise the layer. As you can see, the outer area was discarded. Delete imperfections on the picture you don’t want to be part of your texture. In the example I used the Clonning Brush Tool, selecting a near area as the origin (ALT+LMB) , and later apply it on the area we want to make dissapear (LMB) Now, we have the base image ready for the next step. Let’s go to make it a seamless one! Go to Filters>Distort>Affine. In the window’s tool, set the “extend mode” to wrap. Move x-offset to “-50%” and apply. As you can see, exists a noticeable hardness difference between left and right area (and light changes. In that case, is more pronunced because of a bad photo). The idea is using the Clonning Brush tool, selecting areas from one side and applying in the center and extending it to the opposite side (play with brush size, opacity and hardness) until the center gets uniform in x-axis. Open again the filter “affine”, and now restore the displacement setting x-offset to “+50%"). Now, repeat the same previous steps but working with y-axis. This is just a quick example. Work well (hardness, opacity, size…), and repeat the displacements and correction steps as many times as you need to get a texture without blurred areas (or mores darkness, etc). And that’s all. Once you complete the process, you will have a seamless texture ready to be exported and loaded in a 3D model, as part of a real time material in a game engine using the included “repeat x-y” options, etc etc. If we done it well, with a single texture we can cover very big areas, without the necessity to use gigant textures and, of course, without visible “cuts”. I Hope will be useful. Feel free to share if you want ;)

-
If you think would be helpfull I can try to make a step by step explained with several screenshots. Give me some time. One day-off with a bit o free time I will search an appropiate base photo (or better, I will take an own one of a ground or similar) and show the entire process. Mental note: change the AP language to english before starting (more useful for more people).
-
My workflow is the following one. For hand-painted textures: 1) In my case I use AP to import UV map (because of the extension. Gimp can do that as well, but better in AP for me). And export as png/psd. 2) I paint in Clip Studio Paint (my favourite software for that purpose) and save. If I don't need edition, final export directly from ClipStudioPaint. If needed, open and edit using AP again. And, of course, import in the 3D soft for applying and exporting the entire model, ready for real-time purposes. For realistic seamless textures: In AP I load a photo for creating a squared texture. I use the option Filters>Distort>Affine to "displace" in both axis and fix those areas with cloning stamp. After that, I return the image to the original position using the same filter. and that's all, Ready to export and use it!
-
Ahaaa, exactly! Y was trying to use pixel , and what's working as I want is [P] tool!! Learning every day new things to master AP as well as PS in the past :)
-
Finally I'm doing something similar. LMB (don't move de mouse), Shift+RMB and move the mouse for getting a perfect line.
-
That's what I need 95% of times. Align the line horizontally or vertically. Probably I will have to combine with snapping options.
-
But if you want to creat a simple line, you have first to drag at least a little and later press shift. So... if in this small drag you don't paint straight, the line isn't perfect. And if you press first shift and later click, is creating a line from another position to te current click. Is that what you are talking about?
-
Sure. If I do that: -LMB click -Move from left to right Then, the "line" I've done with the pixel tool isn't a consistent line, it's irregular. I tried pressing typical key modificators like control, alt, shift, but I can't get the expected result.
-
1) ok! 2) so, that operation mode is based on 2 steps. Create the outline, and later fill. I would preffer a single step outline/stroke. 3) and how can I keep de Y along the stroke? I think would be better including "line" with those type of parameters inside shape tools. Thank you ;)
-
Maybe are already answered, but the forum is a little bit spreaded, so I ask (probably) again: Q1) -Now, if I paste an image and I want to select an area and delete the selection, first I need to rasterize the layer. Is there any way to set pasted layers as rasterized ones by default? Or can you explain me wich advantages has this operating mode? Q2) -I can't find where can I create a stroke for a selection of an empty layer. (I take a look around the logic menus near the fill options). Q3) -Is there any way to create a simple line with a defined and non-mutable width size? I'm playing with arrow tool (without arrows on each side), but I can only set by %, and in addition it changes on moving de Y of the mouse. Suggestions: S1) -In the layers list panel, if we select several layers and click "RMB", would be fine to see there "merge selected layers" as well. S2) -I would be happy to see an extra button in the navigator to resize zoom to 100% in a single click. Clip Studio Paint has this one and it improves a lot the workflow. Thanks in advance.
-
AP Roadmap?
rintin replied to rintin's topic in Pre-V2 Archive of Affinity on Desktop Questions (macOS and Windows)
Thanks, I didn't see that topic :) -
Do you have a public roadmap for the upcoming AP functionalities? Would be fantastic.