TEcHNOpls
-
Posts
758 -
Joined
-
Last visited
Posts posted by TEcHNOpls
-
-
Nope, RC2 should be the same as retail, syncing all of my settings between these too is problematic so I tend to stay in latest beta.
-
@Chris B this bug is still present in RC2
-
The UI bug is also present in the latest Retail Version.
Also, I'm only mentioning UI bug, not other issues you may have. -
Hi,
1. Have more than one image open
2. Select brush tool in each image.
3. Makes sure you have same brush settings in all open images, brush does not have size control, Force pressure to control size is OFF
4. Enable ' Force pressure to control size'
5. Switch to another image (by clicking tabs or ctrl+tab)
6. Notice that 'Force pressure to control size' control is set to on, but the pressure does not control size.
-
1 hour ago, Chris B said:
It was:
Changes Since 1.9.3 (source)- Fixed crop tool issue where all presets were landscape.
1. I can't find these in any windows related notes.
2. This says something completely opposite of what was happening before. I have portrait images, and when I selected 5:4 it automatically switched to 4:5 mode. And when I selected 5:4 in landscape, it was in 5:4. Now it defaults to landscape for portrait 'sized' photos.
1 hour ago, Chris B said:What's wrong with the Rotate button? I'm not sure how the app can anticipate whether you want to do a landscape or portrait crop.
It adds addition steps when it's not needed. By default, at least with such a button/option, it would change 5:4 to 4:5 for portrait 'sized' work.
-
20 hours ago, Chris B said:
This was a deliberate change - it's perfectly reasonable to want to crop a portrait image to a landscape image... You should be able to create your own preset and you can add it to the top of the preset list.
Side note, things like this should be mentioned in the change log.
-
20 hours ago, Chris B said:
This was a deliberate change - it's perfectly reasonable to want to crop a portrait image to a landscape image... You should be able to create your own preset and you can add it to the top of the preset list.
AFAIK, before the change, you could not have a 4 : 5 preset and a 5 : 4 preset as the app thought they were the same. The first field is Width and the second field is Height so 5 : 4 is technically landscape, making the preset correct.
From my perspective, it's a bad change (thou I can understand for some it's for better). Can you make some "auto rotate" option or something?
From my perspective, keeping two presets and thinking about which one to use is a waste of time and space. If it's so, why not have presets for both types already pre-installed in the first place?
Also, help for this need to be updated "saying allows you to access preset manager" says nothing about "how to access it".
-
Two small issues:
1. The beta, at start up, does not report a new beta version is available (this also happened in previous release of the beta)
2. When having an image in portrait orientation (proportions), and using the crop tools presets (like 5:4), it will always default to landscape orientation. This was different in older releases where the proportions would adjust to the current orientation. (ie. 4:5 for portrait).
-
There is no notice in older beta about this one.
-
This is utter crap, so ugly, takes twice as much of screen estate forcing me to move up and down all the time. Also, if I open any page it will always shows the top of the thread, not the latest response, which I believe what was happening before (or maybe it's just that, I did had to scroll so much!).
If there is no compact mode, please revert to the old layout, this is ugly :c (and counter-productive)
-
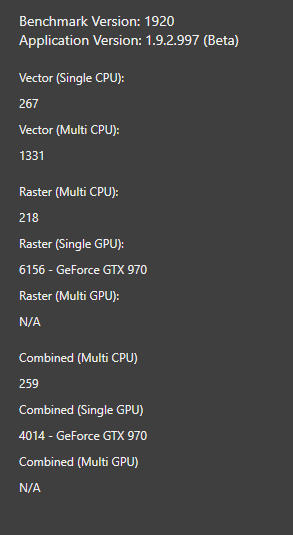
Windows 10, Nvidia 970 GTX, Driver version: 461.91
-
I've been testing with OpenCL off, and besides some lack of responsiveness a few times, these Issues seem to be not happening in this case.
-
I will try, if I remember correctly I did this two times with the same files.
-
I can check soon, today or tomorrow probably.
ps. Can I remove these clips or d o you still need them? -
OpenCL is on.
-
Easy, I don't want to keep tow separate setups in parallel. Affinity has always said that last beta is as good latest retail, if retail is released later, I even asked about this and got specific info:
https://forum.affinity.serif.com/index.php?/topic/137478-affinity-photo-windows-customer-beta-1921005/&do=findComment&comment=766945
and here
https://forum.affinity.serif.com/index.php?/topic/110078-611-crash-export-button-more/&do=findComment&comment=599176
-
When I did a stack and moved layers outside the group, one of the layers was showing on/off no matter how it's positioned, depending solely on the zoom level.
https://clips.twitch.tv/SucculentBitterCodSmoocherZ-Btsctcw0-X7Ci5JD
-
It's back. With a vengeance.
See the clips, the screen gets corrupted easily, and after one of these, I managed to damage the layer I was working on.
https://clips.twitch.tv/MagnificentFurtiveSoymilkArsonNoSexy-o9819aDCeYv6Q8YM
https://clips.twitch.tv/FrozenMildDadChefFrank-grv8kFOHEkZq4sH_
-
Fair enough, sorry for being a bit salty :c
-
Is this the same as .1035 or did you forget about Beta testers again?
-
AMD Ryzen 5 3500X, 16GB RAM

-
There is not Batch LUT importing cog icon in this RC.For reasons unknown its visible now.
-
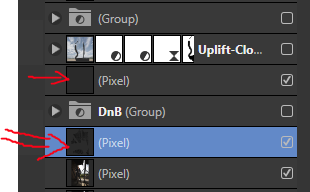
@Gabe to see the issue, just move back to the start of history, you will find that the selected (arrow with one line) layer is painted white a lot and it's empty at the end of history.
Also, try this:
1. Select 'black' layer (arro with two lines)
2. ctrl+click, nothing is selected
3. enable layer visibility and try the same, it should select properly now.
4. with the selection, make the black layer disabled, and select the layer directly below it
5. go to: edit -> fill, choose inpainting, notice that the UI kinda looses responsivness and waits for the "working' dialog to appear for a long time.
6. edit -> inpaint is much more responsive/fast
7. you can compare the results too as I felt they were different (also using inpainting brush+selection seems to give different results too).

-
Should be uploaded in ~15 minutes.


Tools bar undocked issue
in V1 Bugs found on Windows
Posted
1. Have Tool bar undocked.
2. Open AP, let it load, don't click anything.
3. Press Alt+F4
4. Notice that AP does not close, but the Tools Bar does.
5. Uncheck View > Show Tools
6. Check View > Show Tools. AP crashes.
Tested on 1.10.5.134