vovkasolovev
-
Posts
38 -
Joined
-
Last visited
Everything posted by vovkasolovev
-

Path operations: "Roughen"
vovkasolovev replied to karim's topic in Older Feedback & Suggestion Posts
BUMP +1 Path operations: "Roughen" was posted on May 5, 2015.
-
Thanks for the suggestion. I tested it carefully, unfortunately this method is even slower than Live Filter Displace with noise layer (which I find not suitable for actually working on a complex illustration). I came to the conclusion that Live filters from AP are based on a pixel-by-pixel modification and are therefore generally slow. We need a vector method like the one described here (thanks to a tip by @GarryP), which modifies not the whole canvas but only the curves themselves.
-
Thank you for answering! Sadly. Unfortunately I couldn't find anything suitable from the links. By the way this “Roughen” Feature Requests on the link recently turned 10 years old!
-
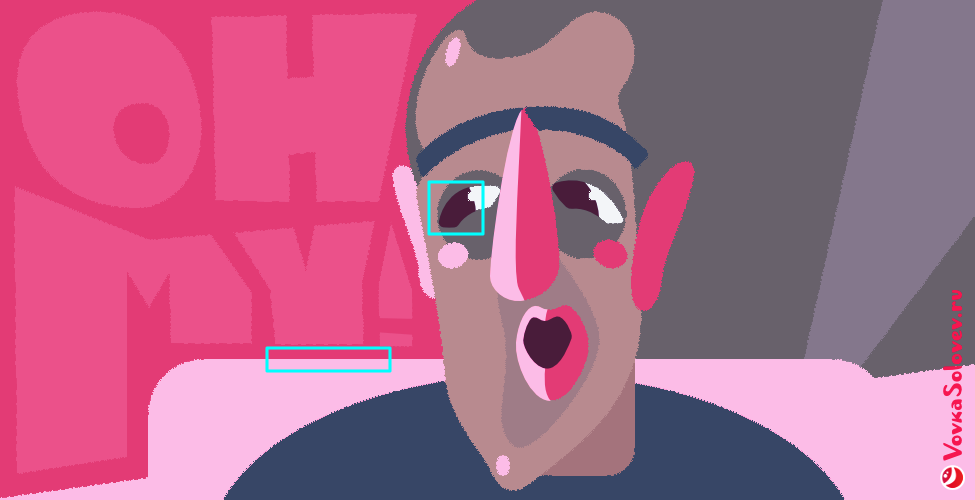
Please advise if there is a way to distort edge at vector shapes? Looking for an analog on how to do non-destructive roughen edge distort at large vector image, shapes and just paths with custom bushes. Here is an example of what I want to be able to do, created in Illustrator: Using a brush for outlining doesn't work for me - i have shapes with gradients. Post-processing doesn't work for me - I need to have distort on the bottom layer, and there will be smooth objects made of translucent gradients on top. Please don't suggest hack to use Displace from Affinity Photo: I've tried it, it's a very slow algorithm, impossible to work non-destructively with it on an image with a huge number of shapes.
-
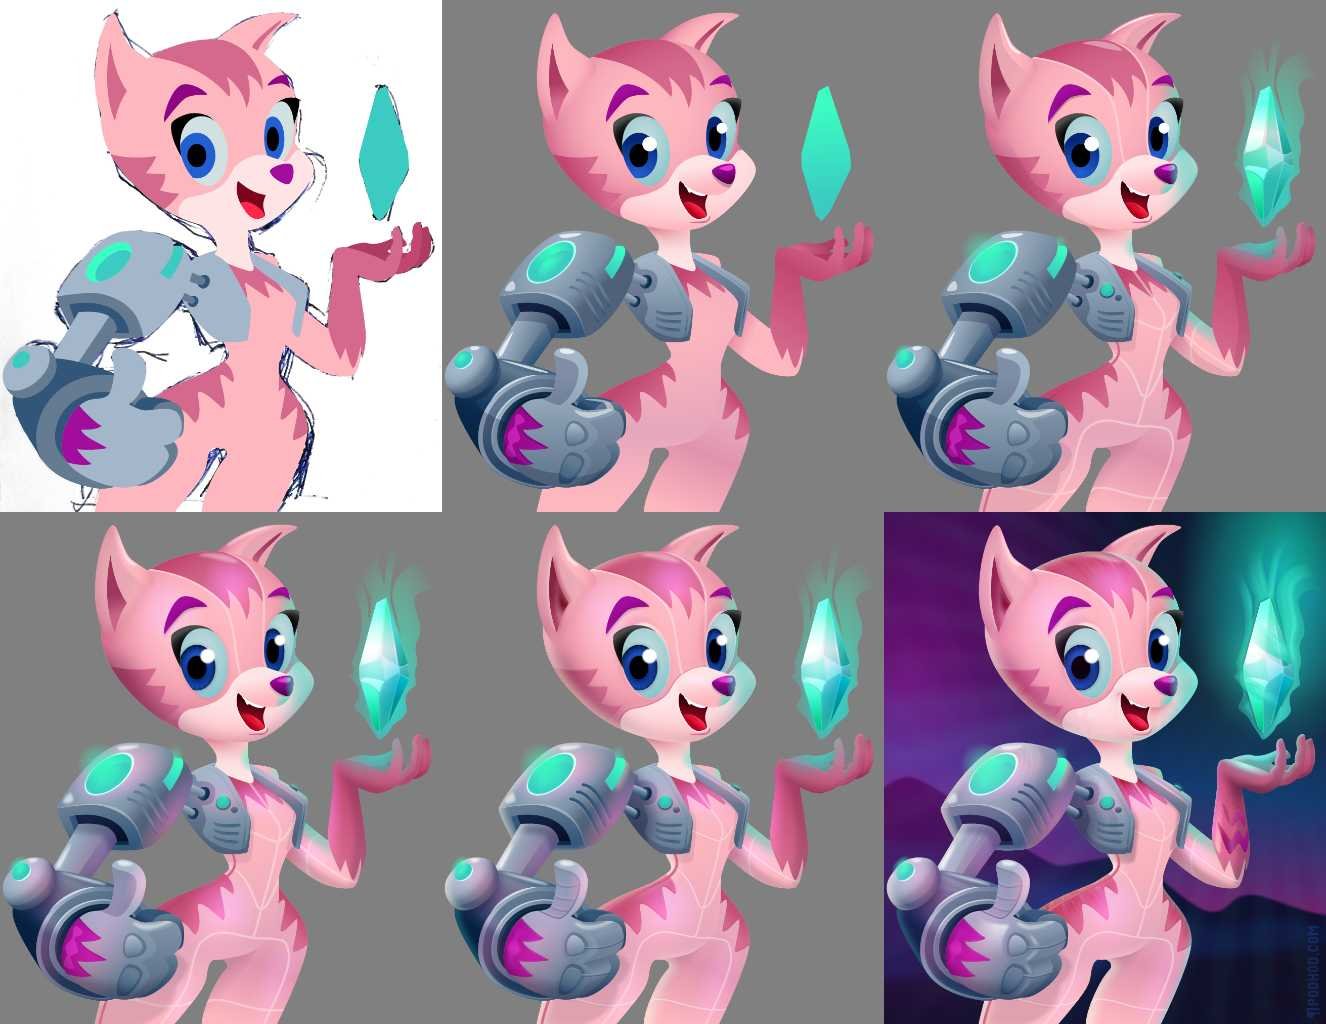
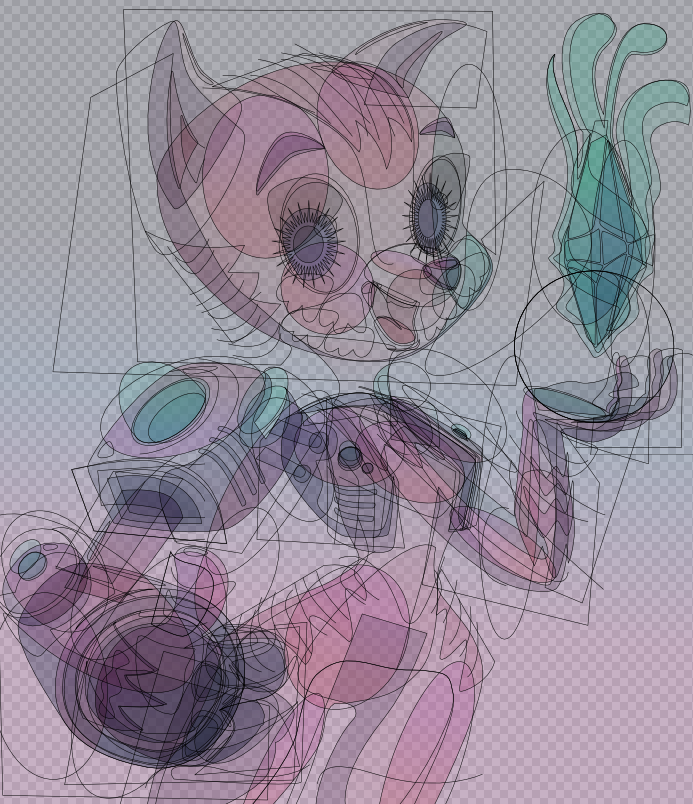
Hi! I want to show you how I drew a fully vectorized character in Affinity Designer. I drew the character in the genre of the game or cartoons: an anthropomorphic animal in a super suit, with a robotic arm and a magic crystal. I intentionally chose an atypical palette of pink and emerald. Watch the accelerated to 1-minute video. The length of the full recording was 6 hours from the sketch to the final result. I remind you that in YouTube you can watch in slow motion and move through the frames during the pause by pressing keys < and >. Progression of the image creation process. Final X-ray view.
-
- 5
-

-
- affinity designer
- character
- (and 2 more)
-
You're not wrong. When you see words about “the same program” that is a simplification of the phrase, about how software is made. Simplistically speaking developers create a set of libraries and three sets of settings to build three different desktop programs from them. The result is different programs that are compatible, share common features, and have a uniform interface. To have or not to have certain features in a program is a purely political decision when creating these settings. And while in the case of some features the divisions are clear, in the case of others they are not clear. In my opinion, such Filters should have a place in the program for photo editing and in the program for drawing. There are many threads on the forum about the separation of features, which shows that there is a problem and a need, I suggest not to repeat in this thread about it. Users feel that their needs are not being heard, users have to solve the needs problem with crutches like this Asset. I'm sorry it stays that way, even though I'm a huge fan of AD.
-
I understand about features, and I understand and accept why there is no, for example, Scope in AD. But the line of separation of features is not clear in case of Live Filters, and there is no answer why features are supported, but you can't use them in a convenient way, and you have to use less convenient destructive tools in a program with a focus on vector drawing. In Pixel Persona there is Blur Tool, but no Live Blur, there is Sharp Tool, but no Live Sharp. There's Mesh Wrap, but no presets like Twirl. Here's an example of how to make a nice shadow using DOF, which is not in AD. It's not just Live Filters that are not clearly separated in features. For example, it would be much more convenient to make illustrations in AD if there was support for Photoshop Plugins, which is available only in AP, so that you could put, for example, GMIC filters.
-
Let's be honest, that's not an argument when it comes to the little icon in the Layers window in Affinity Photo. The lack of Live Filters in Pixel Perosna in Affinity Designer is a decision to sell the same program twice. If the developers wanted to lighten the program, they could have added this little icon if an AP license is available. But they don't, so this is the solution that came in the form of a set of Assets. (Thanks to Sansnom for coming up with the idea and implementing it within the available possibilities).
-
After creating a Group, you can turn it into a Symbol. Then duplicate this Symbol and use it as a opacity mask for the element to be applied. In this way the Group and the Mask will be synchronized. It is a shame that this is only done this way in AD, only because developers decided to do mask clipping by nesting the mask into an object as a group instead of overlaying it on top, which would have allowed to do it with a group as well.
-
I'm sorry, I didn't mean to offend. I couldn't take that answer seriously, I thought it was a professional joke. Something between using ascii art and drawing a gradient manually with pixels. (Although I would seriously expect a solution like, that it could be done through Affinity Publisher, since that's what happens)
-
Thanks for the answer. Yes, not a bad idea if you need a couple of lines. But you need to repeat raster and vector layer manually, you can't copy, it's difficult. It's not accurate. And it is not suitable for complex patterns, which have to be constantly fine-tuned in the process of work.
-
Yes, you literally repeated what I did, after that result I have a question.
-
Wow, I appreciate your invention! 😂 _,.·'`^`'·.,_,.·'`^`'·.,_,.·'`^`'·.,_,.·'`^`'·.,_,.·'`^`'·.,_,.·'`^`'·.,_,.·'`^`'·.,_,.·'`^`'·., Sorry, it's not a solution to size text characters manually. Creating a decoration (printing on fabric for a costume) involves dozens of editable lines and hundreds of circles.
-
I needed to make a decoration of decreasing circles. How do I make a dotted line with variable thickness? If I select a dashed line, the Stroke Width Tool has no effect on the thickness of the dashed line. And there is no Pressure option in the Dash Line Style interface. I've also done Vector brush with a circle. But the width of the brush changes but not the distance, and the proportions of the circles are not preserved. (As I understand, there is no possibility to change the length of the period of the Vector brush?)
-
You just don't get the whole idea. The way you write you don't get the original bitmap fill image, which could be rotated and distorted by the fill transformation. The point is to get the original undistorted bitmap. Not just exporting an object with a fill. .
-
In list item number 8. You can do it any way you want, such as in a pixel persona. You can, as long as there's nothing extra there. I described it this way to avoid all the complicated cases when there are effects, masks, etc. on the object.
-
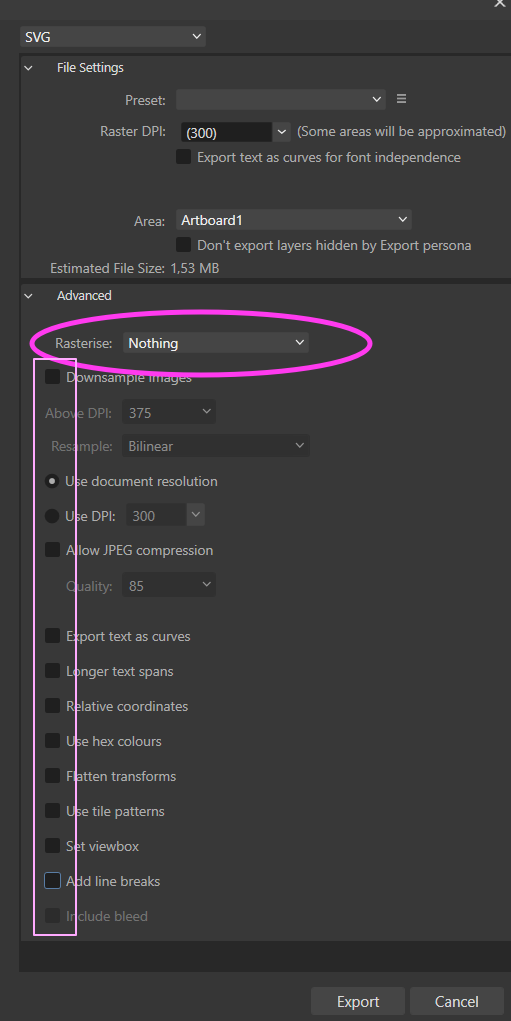
I want to share how to edit bitmap fill, how to extract image from an object with bitmap fill. I have an old project in which I used bitmap fiil, but the bitmap itself was lost. I needed to edit the bitmap itself (found a bug in a complex texture). I know that Affinity Designer 2 doesn't have this feature officially, nor did the first version. I recently came up with a way that worked: Copy the object with bitmap fill to a new file, so that the canvas is larger than the object. Export the document. Select SVG, and check that nothing needs to be compressed: tab Advanced → Rasterize → Nothing. Uncheck all the boxes in this tab (example of settings on the attached image). After that you will get a large SVG file with the bitmap texture encoded in bitmap64 format. Open the SVG file in a text editor that can open large files (Notepad++ is good for Windows). Copy the huge set of characters between quotation marks that starts with something like: data:image/jpeg;base64,... This is your encoded bitmap in text format. Google any decoding service by searching for “base64 image decode” Paste the copied text into the text field of the service, click decode, click save image. Congratulations, you have the original bitmap! Edit it and apply it to your object as a new bitmap. Done!
-
Hi! Please, teach me how to create lot of lines that emphasize the perspective of the bridge, as in the main illustration for version Affinity Designer 1.8 (marked in red in my picture). In the Welcome window, there is a sample file with this image and even a mention for a tutorial, but I did not find such a lesson. Get sample file in AD: Help→ Welcome→View Samples→(Page2) Sunset Bridge Marianna Orsho Large preview from this artice.
-
Thank you! It's works! Without AP! Another great thing is that I can select Displacement map myself. With combination with image size change, there is full control over edges of a objects now.
-
Hello! Please, make me a hint, when we can expect PNG8 with full alpha? I found myself less working with AD because of lack of this final step that I regularly needs for app and web development, and to keep small file size in AE projects. I searched on forum, and see that this is often requested in last 2 years already. AD have magnificent Export persona mode, that is great for automatisation, and really need this feature.
-
In "Grid and Axis manager" the size of grid spacing measured in pixels. This is right for square grid, but has no sense for any other type of grid. Right now other grid types is defined by diagonal spacing in rotated pixels. The only reasonable way for artists measure non-square grid in pixels is to define some height or width of the grid in real non-rotated pixels, but not actual side of grid. To understand it better, please, take a look on my example, with typical for pixel artists 2:1 isometric grid.
-
Affinity Designer have a really great grid tool. But there is no tool to work with grid directly. I suggest Grid Vector Brush Tool. It will create vector shapes by grid cells shape and connect shapes together. It will have option to unite new object with same object we paint before, it will have option to subtract underlying objects we paint before with another color. This tool will help you to draw easily isometric art and vector "pixel art". It will be more straightforward to use with grid than Vector Pen tool. It can become more understandable for beginners, and time-saver for pixel-artists.
-
- 1
-
-
Nice suggestion! But no: There is no AA, phantom pixels in the clipping, and does not affect the horizontal line. General problem is that this is a modification for each individual object and it depends on the size of the image. Well, I realized that I was looking for some kind of filter effects over object groups. But in AD there are no filters.
-
Thank you. I do not see any advantages over PS in this workflow.
-
Unfortunately, strokes works only with basic shapes, but add a lot of limitations and makes uncomfortable real workflow, like when you make a lot of changes, use object clipping or gradients.


.png.1f5d27f8c2c6bbe1df8982994995cbbe.png)

.png.d713e2c89beebb20a679d94512877583.png)


.png.a889fcd01821232a14f82c428249f0a3.png)