Bri-Toon
-
Posts
2,156 -
Joined
-
Last visited
Everything posted by Bri-Toon
-
Affinity first light??
Bri-Toon replied to Gasman's topic in [ARCHIVE] Photo beta on Windows threads
Have you ever thought about running a Syetem Restore? Normally, it is not recommended, but it was finally addressed in Windows 10. Depending on how far back you first ran into memory problems, you might be able to go back before that time. Just keep in mind that it will get rid of any program you installed after that point, but your files will all stay. -
Gold, AF Gold
Bri-Toon replied to David4's topic in Pre-V2 Archive of Affinity on Desktop Questions (macOS and Windows)
In that case, Designer just became a gold master. It is finally available for purchase for Windows. -
Oh well thank you then.
-
Gold, AF Gold
Bri-Toon replied to David4's topic in Pre-V2 Archive of Affinity on Desktop Questions (macOS and Windows)
Judging by that topic, Everblue meant it as a metaphor. The discussion was about Affinity Photo matching the quality of Adobe Photoshop. He meant when it comes to a match. -
Affinity first light??
Bri-Toon replied to Gasman's topic in [ARCHIVE] Photo beta on Windows threads
If I may add in my say, that sounds normal. 4GB is extremely low for a computer. 10 or at least 8 would be the minimum needed for any computer today. I am sorry to say that though. Something else that wouldn't hurt is to clean up any unwanted files. Unless you still use those other programs, uninstall them or any others that sneakily come with Windows. Then in the Task Manager, disable any unnecessary program in the Startup tab (or msconfig for Windows 7). Then in the Task Manager, expand for more details, and end any processes that are taking up too much memory. -
It's difficult to see the problem because the screenshots each give an overview rather showing the actual zoom size. But judging from this, it looks like the 100% view is the most pixelated and then the 75% after that. And you are right. The quality should be clearer the more you are zoomed out. May I ask if these are print previews?
-
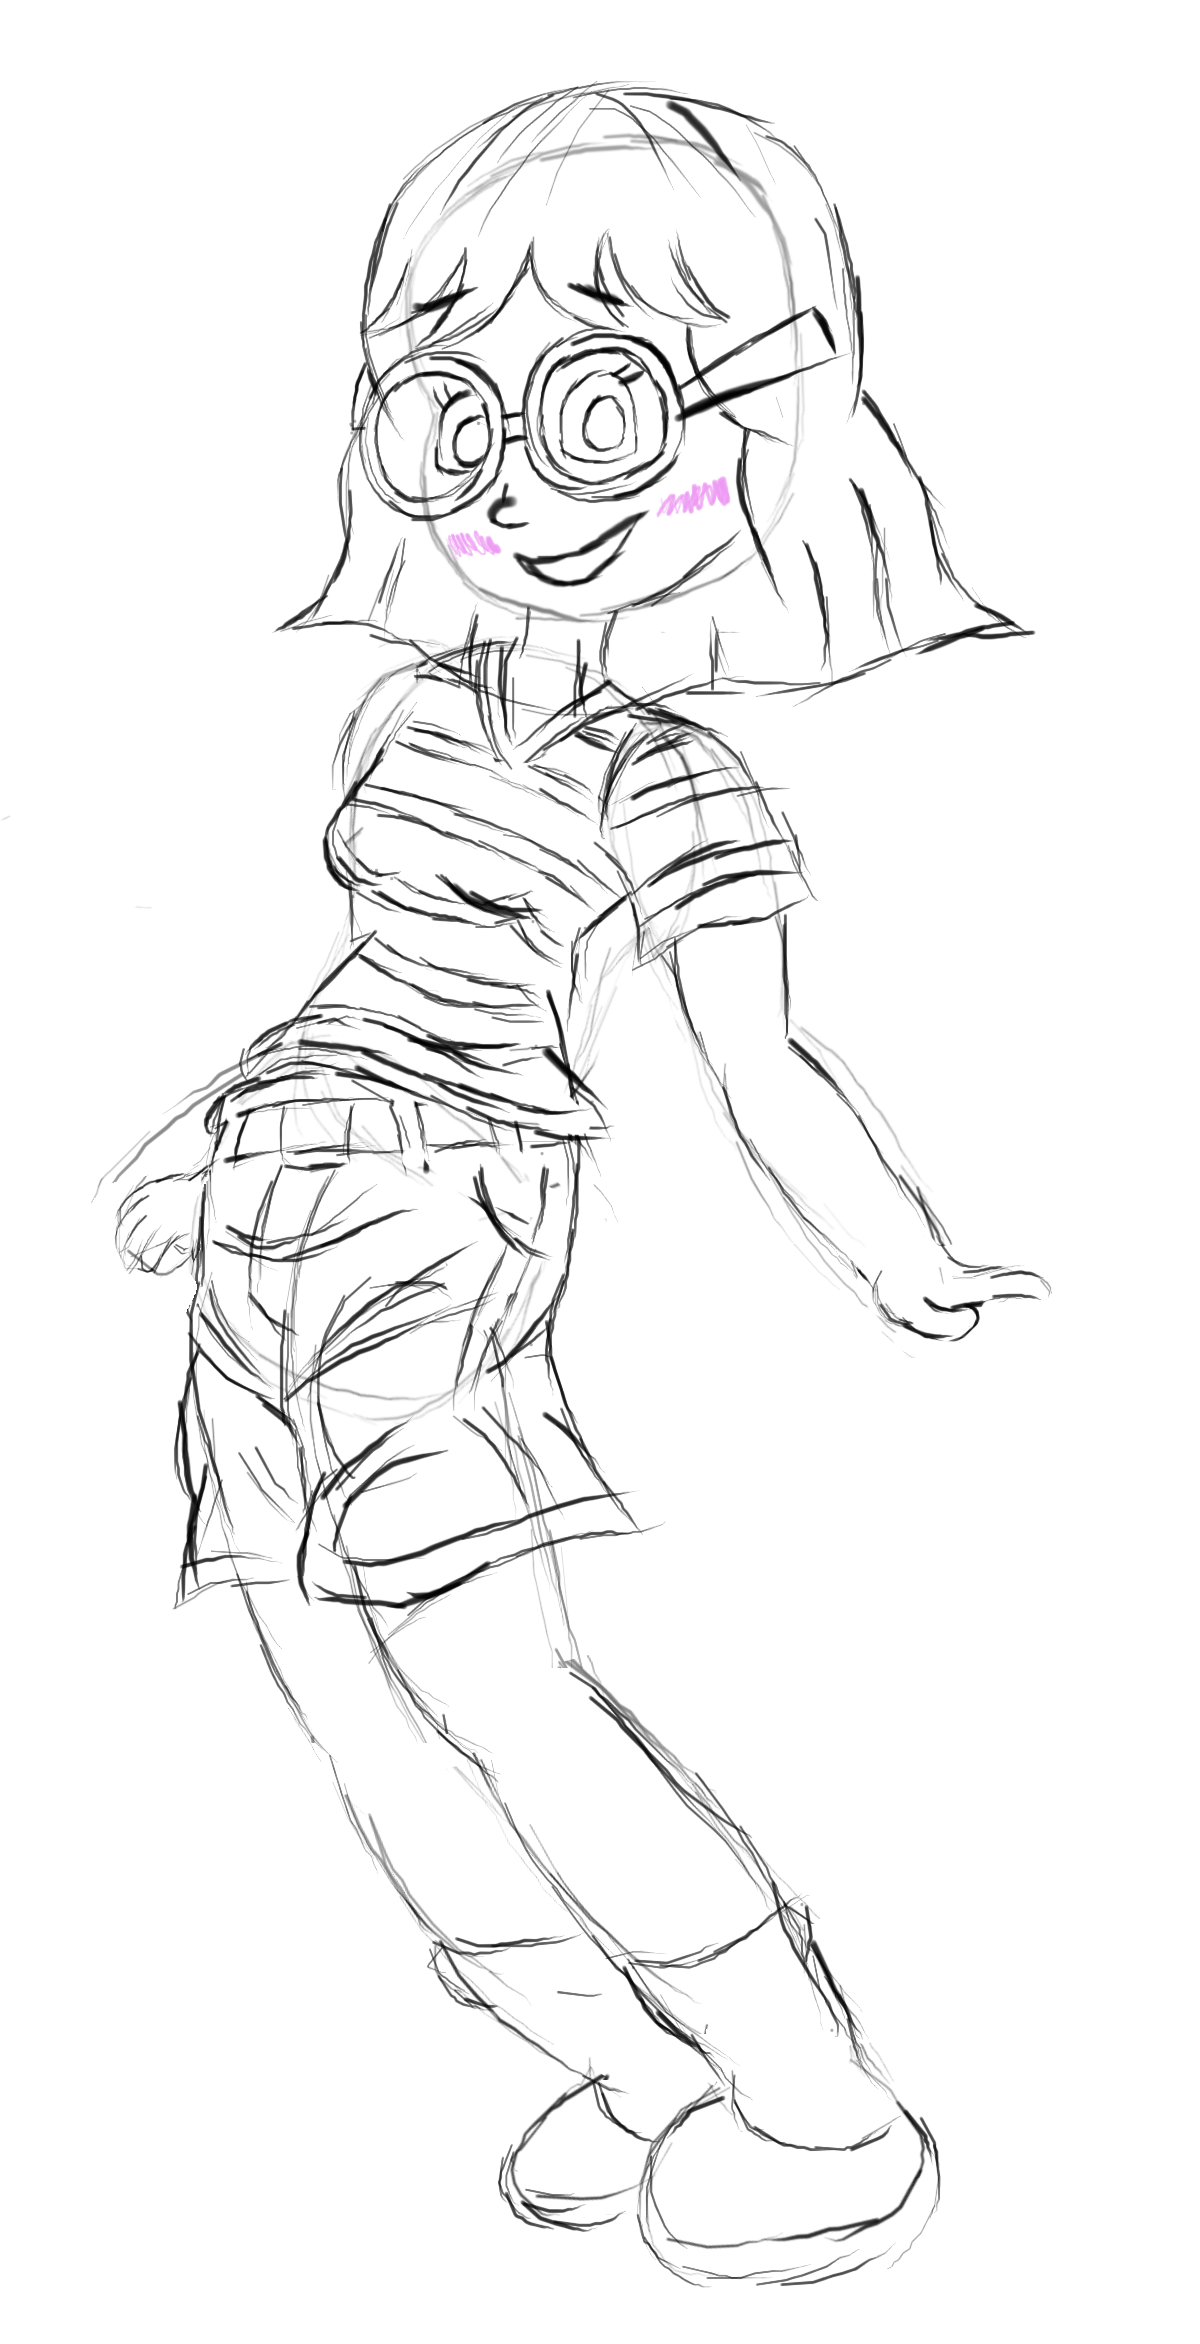
Why thank you, Alfred. You quoted Obtusity, but you gave me the point. :P Don't worry, I took care of it. Not a problem. I just wanted to make sure there wasn't confusion. Yes, that works too. There are so many ways of doing it. It's interesting to learn how everyone works differently. Something else I do is organize each body part in its own layer. If I want to change the size of Angie's shirt for example, then I select it in the Layers studio instead of on the canvas because I don't want other objects to accidentally get selected. Or if I want to make Angie's head shorter, then I can just drag the "Top Hair" layer down without the "Back Hair" being edited. In fact, I think I am going to make that change, because her head looks too narrow in comparison to earlier sketches.
-
I noticed that the rules apply differently with vector traces. That is because the computer can't calculate what areas would be the line work. There is an option to expand strokes to fills, but there is not an option to do the opposite. In some cases, it can be obvious where the line art might be, but depending on how much of the fill is spread, there is really no way of knowing. I'm not saying you shouldn't do it this way, because it's what ever works for you. I'm just explaining why tracing results do that.
-
I took a look at what you were talking about, R C-R. That is pretty wild. If any additional shapes need to be made to create something like the bang in your example, then for me, I think the "Bangs line & fill" is the way to go. Having the outline in the back can get confusing, but hey, everyone learns differently I suppose. Heck yes, Petar. That would be a great feature.
-
Well aside from the program being built from the ground up, it was originally Mac exclusive just as the Plus range is still Windows exclusive. Not too many people would balance between the two platforms.
-
I see. That can come in handy. I thought you meant something like what Cacani does here. That's why I was WHAT? Wooaah! My deepest apologies. I did not know that. I was referring to Alfred's comment from earlier. Don't even worry about it. I joke all right, but I don't push them that far. Why thank you so much. I'm happy to have your support.
-
Thank you very much. I'm glad you like it. And what? I didn't know there was a way to hide part of a stroke and still show the fill! How in the world did you do that? Edit: Alfred, he drew that beard you love.
-
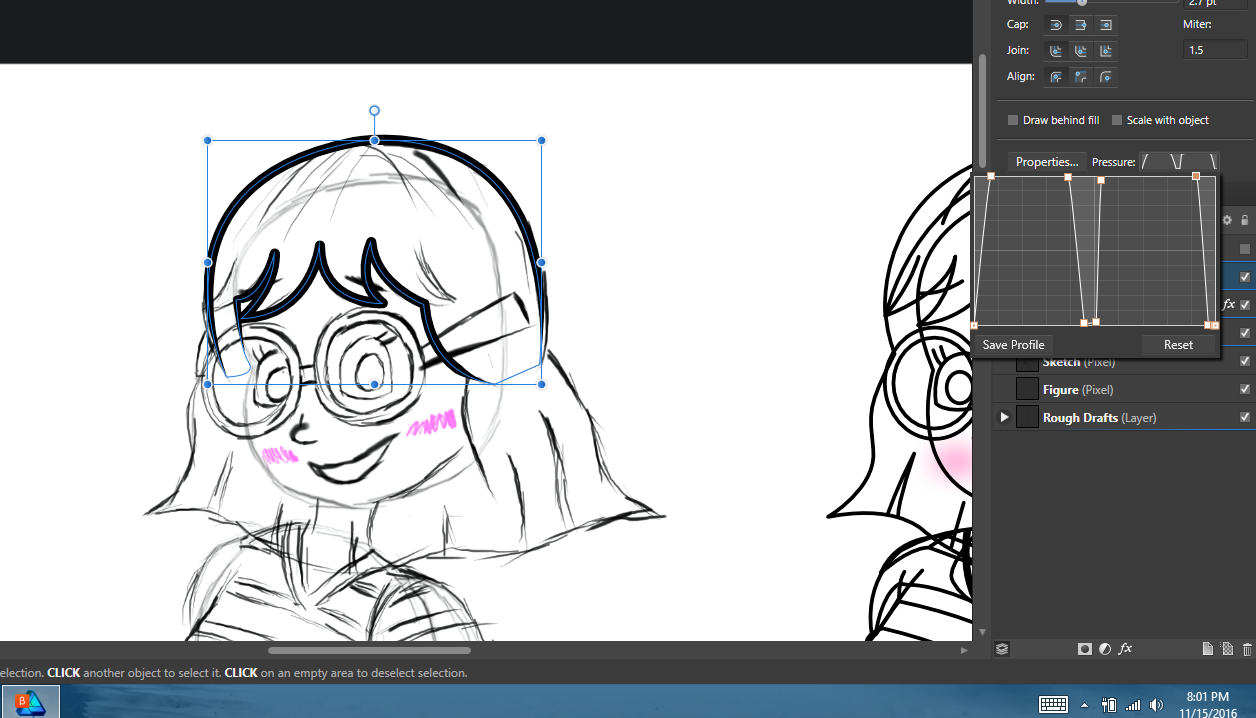
Obtusity, I love that first example you mentioned. I almost did that too. I also tried experimenting with the dashed stroke and see if I could get just one or two gaps right where I wanted them, but no success on that. One thing that is a challenge in doing it the way you mentioned is to know how to set up the pressure profile map. If there was width tool like in Illustrator to do it manually, that would be much easier. But hey, I think I came close. Anyway, I appreciate everyone's feedback, and I'm happy to learn about the different styles. In the end, I decided to go with the approach of closing the path and keeping the fills and strokes as one. To make Angie's hair as two objects, I realized I could close the top part on the collision of her bang all the way to the left. Angie Sketch.afdesign 2.afdesign

-
I am very familiar with the live paint objects myself. I do really miss using it. The characters in the background of my profile page are all live paint objects. Yeah I heard of that technique. It is useful because you can overshoot your lines and just get rid of them later. Though, one reason why I actually prefer not to do this is because it is harder to make future edits. For me, I try to keep the outlines as strokes. Looks good. I like the small addition of the lips. I'm glad it worked for you. I tried doing it that way, but I must've messed up somehow.
-
I see what you did there, Alfred. The part of the hair that is meant go behind the head just runs along side of it. Yes, maybe I was overthinking it. Though, when I did this in the past, it was easier to animate! Manipulating the hair to make it look like it was blowing came together well. Perhaps that is why I was struggling so much with this task. A beard? Eek. I don't think the kids would like that on their babysitter, even though she does tend to act corny.
-
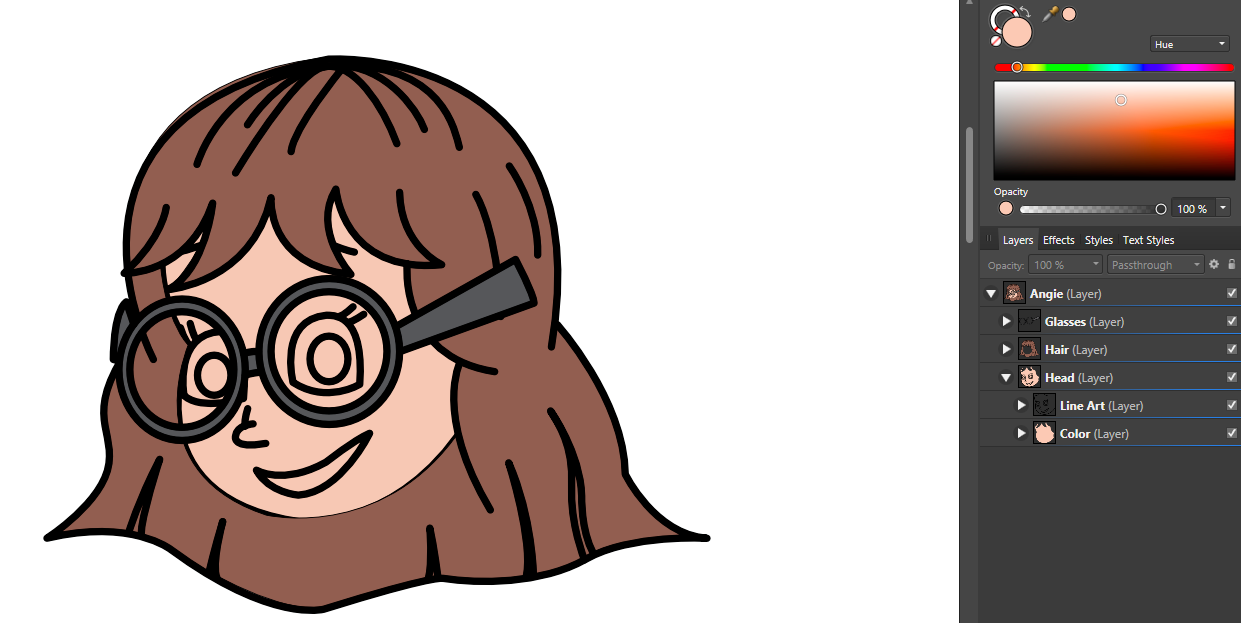
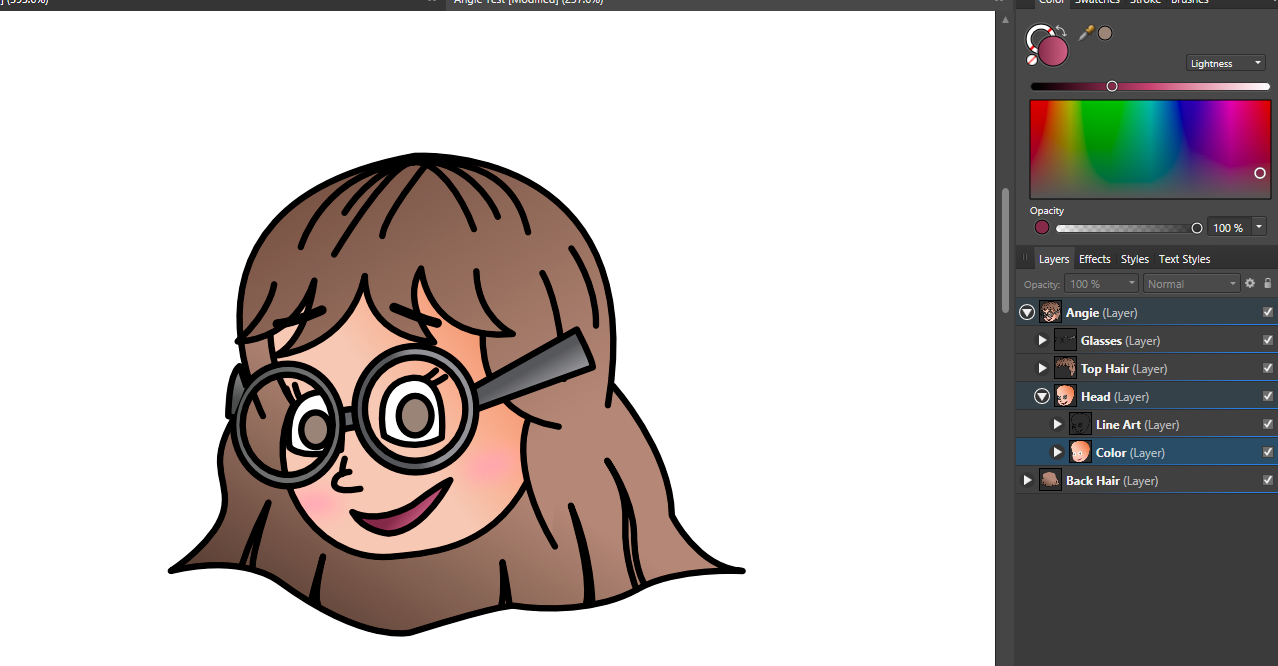
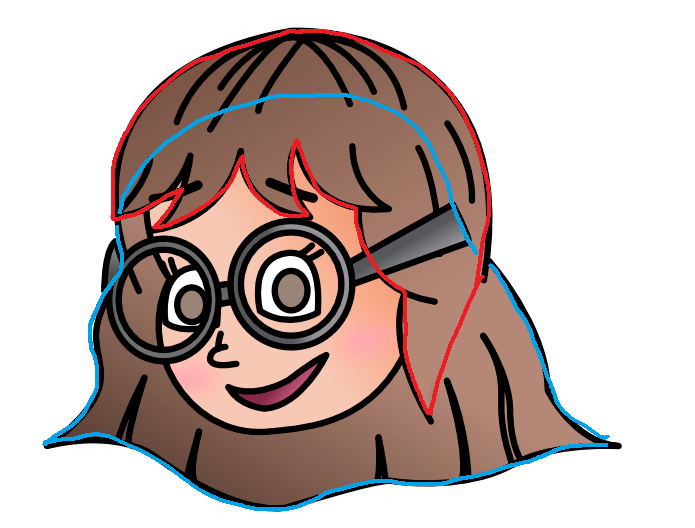
Thank you very much for the detailed response, Ambiroa. After testing each of your methods, I find the first one to be most helpful for complicated situations. This is what I ended up doing. I made separate layers such as Glasses, Hair, and Head. Then under those I had sublayers called Line Art and Color. As I was making progress, I realized that I indeed did need to make her hair as separate route layers. With the Hair layer being on the bottom, it gets cut off by the Head on the top. With the Head layer being on the bottom, it gets cut off by the Hair above. So I had to figure out where to separate the hair into two layers. Finally, this is how I did it. The red indicates the part of the hair in front of the head, and the blue line indicates the part of the hair in back. Petar, I may check out the book. It's never too late to learn new styles.
-
^^ I like your username, dude. :) Thank you for your reply. I think I will do it that way. It's easiest to figure out and doesn't cause any stalling. It's neat how everyone has a different way to design.
-
Gdenby, I think it's interesting that your method was used for comic creation. That is exactly what this is for, and I recently finished a class on comic creation (on paper). I want to make a comic called "Angie and the Knuckleheads." Hmm so you're saying to have the face and glasses on top of all of the hair. That is interesting. To do that, I will need to give her a weird shaped head, but I think it will work. Thanks. Yes, traditional methods were faster. I really look forward to the feature to turn pixel selections to vector objects. That will make things much easier for this reason.
-
[AD] Vector persona eraser tool
Bri-Toon replied to jgrayillustrate's topic in Feedback for Affinity Designer V1 on Desktop
Yes, I am referring to that very one. And yes, it certainly would. -
[AD] Vector persona eraser tool
Bri-Toon replied to jgrayillustrate's topic in Feedback for Affinity Designer V1 on Desktop
I too wanted that particular function in Designer a long time back. Compared to just erasing, I love how it can wipe off any overshooting segments or an entire stroke. Very, very useful. -
Thank you for your feedback. The instructions are not too clear to me. Can you please elaborate? If by the first method, you mean all open paths and fills behind, then that part makes sense to me. If you mean closed paths for the other two methods, then this is my problem. Aside from her glasses, I can't really decide how to pen a shape since it is difficult to tell where to make the close. Since the top part of her hair overlaps her head whereas the bottom part does not, I can have both the top and bottom be separate objects. However, if I close the two strokes for the top (indicated by red), then it doesn't look right.
-
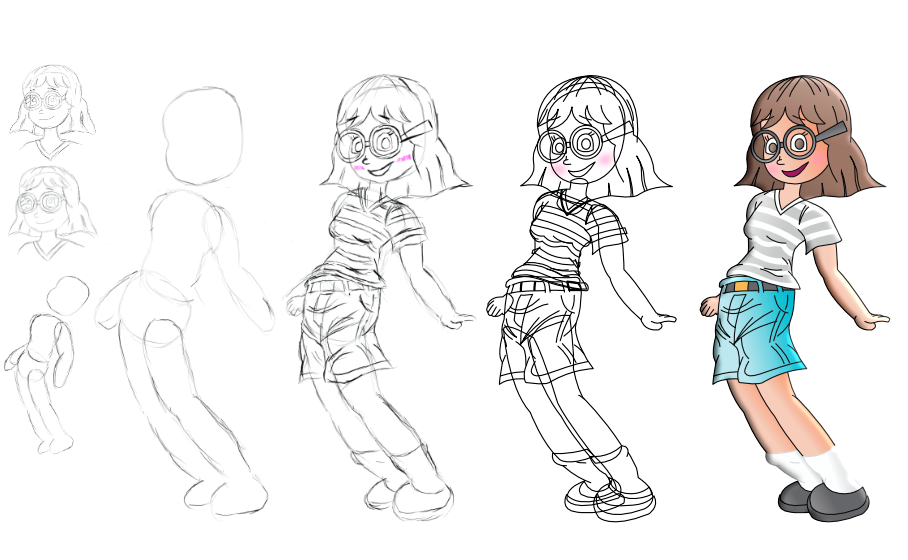
This is probably a very basic question, but as I explore different methods of art, I'm trying to get more complex in drawings now. Since it is ideal in vector drawing applications to keep all paths closed, I want to know if anyone has any suggestion on how to transform a rough sketch into a vector outline drawing and still be able to easily apply color? In more complex drawings, I'm having a hard time figuring it out. Attached is an example of what I want to add vector outlines to. The reason I am having a hard time is because some areas overlap each other, but they also fall behind each other. Her hair, for example overlaps her face on the right side, but it goes behind it on the left side. Then the bottom of her hair goes behind her whole head. What is a preferred way to ink this?
-
I don't know too much about Photo, but I am learning a lot about Designer. Perhaps in the sometime future, I could make a basic and advanced video tutorial and post it here. It is quickly becoming my favorite program. Thank you very much for the response. That is really good to know.
-
Wowee! That is one way to use your head. Would that be allowed though? The regular installation requires email registration. Anyone who is not yet signed up could take advantage of it.
-
The thing is, I already have my forum subscription set to the email server I want to use instead. I have switched in the past for the same reason. As I registered for Affinity Photo, I forgot that I have previously switched because I wasn't getting notified of new responses. I'm afraid now that I may not get notified when my beta is available, because I accidentally used my old email.