h_d
-
Posts
1,629 -
Joined
-
Last visited
Everything posted by h_d
-
 Perhaps ask a clear, detailed question in your own language, with some screen grabs, and someone will try to understand.
 -
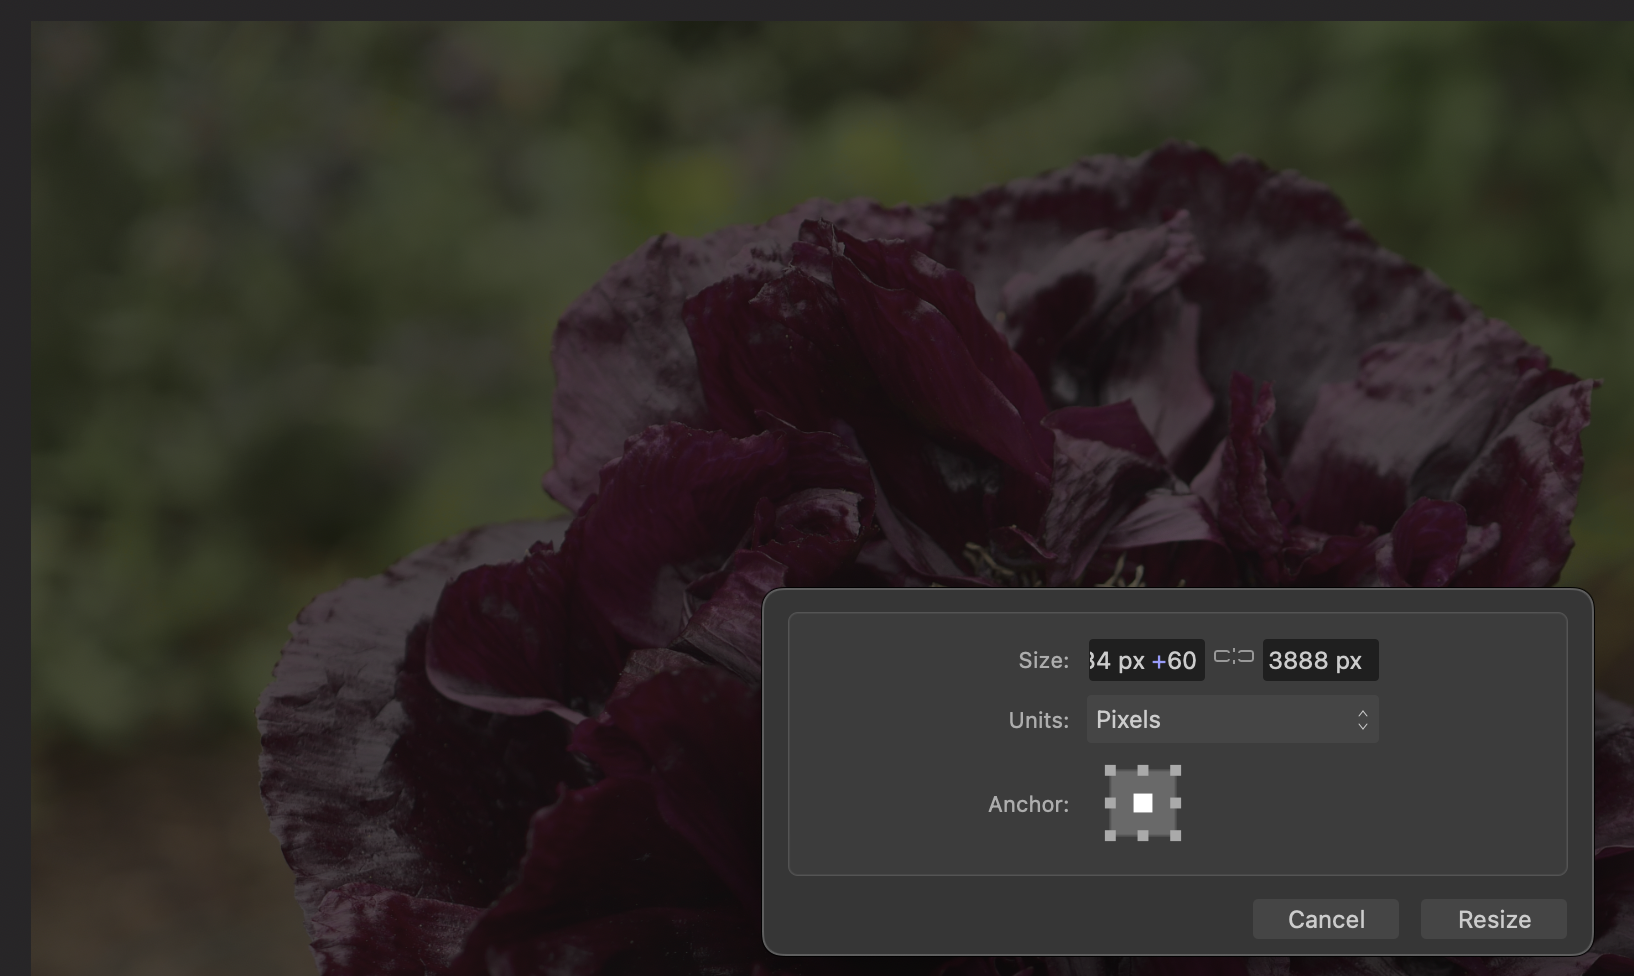
And uncheck the proportional chain between the two dimensions. The graphic/icon/logo/whatever isn't at all clear but you have to break the chain between the two dimensions.
-
Open and work on PDF in Publisher.
h_d replied to vikingtone's topic in Desktop Questions (macOS and Windows)
Following on from my previous rather flippant remark. I would just repeat, in all seriousness, that you should not be embarking on this work unless you are being properly paid for it and unless you have the skills and knowledge to accomplish it. If you don't, then I hope you have the strength to tell whoever asked you to do it that you will need more help/training/support. You should not expect Affinity Publisher to offer an immediate solution. First and foremost it is not a pdf editor or a data management tool. But it goes deeper than that. As far as I can see you are being expected to unpick someone else's laborious work and to recast it into another format. In my opinion you should first be looking at ways of extracting, categorising and structuring the original information into a database or a format like .xml. Once you have control of the structured data, then you can present it in any number of ways. Affinity Publisher may be helpful then. But what you cannot do is take .pdfs, or Word docs, or any sort of pre-formatted text of this complexity, and expect Publisher to sort it out for you. It can not. Publisher is a desktop publishing application. It is a page layout tool, not a data management tool. Again, and with all respect, control the data before you start on the presentation. -
Affinity Photo 2 - Unawares shutdown
h_d replied to Myusacka's topic in Desktop Questions (macOS and Windows)
Hi @Myusacka and welcome. No to all of these. These forums are mostly dependent on user help although sometimes Serif chime in (often months late). User support is good-excellent but you'll need to ask specific, detailed questions with examples if you want helpful answers. -
Open and work on PDF in Publisher.
h_d replied to vikingtone's topic in Desktop Questions (macOS and Windows)
I hope you're being paid... -
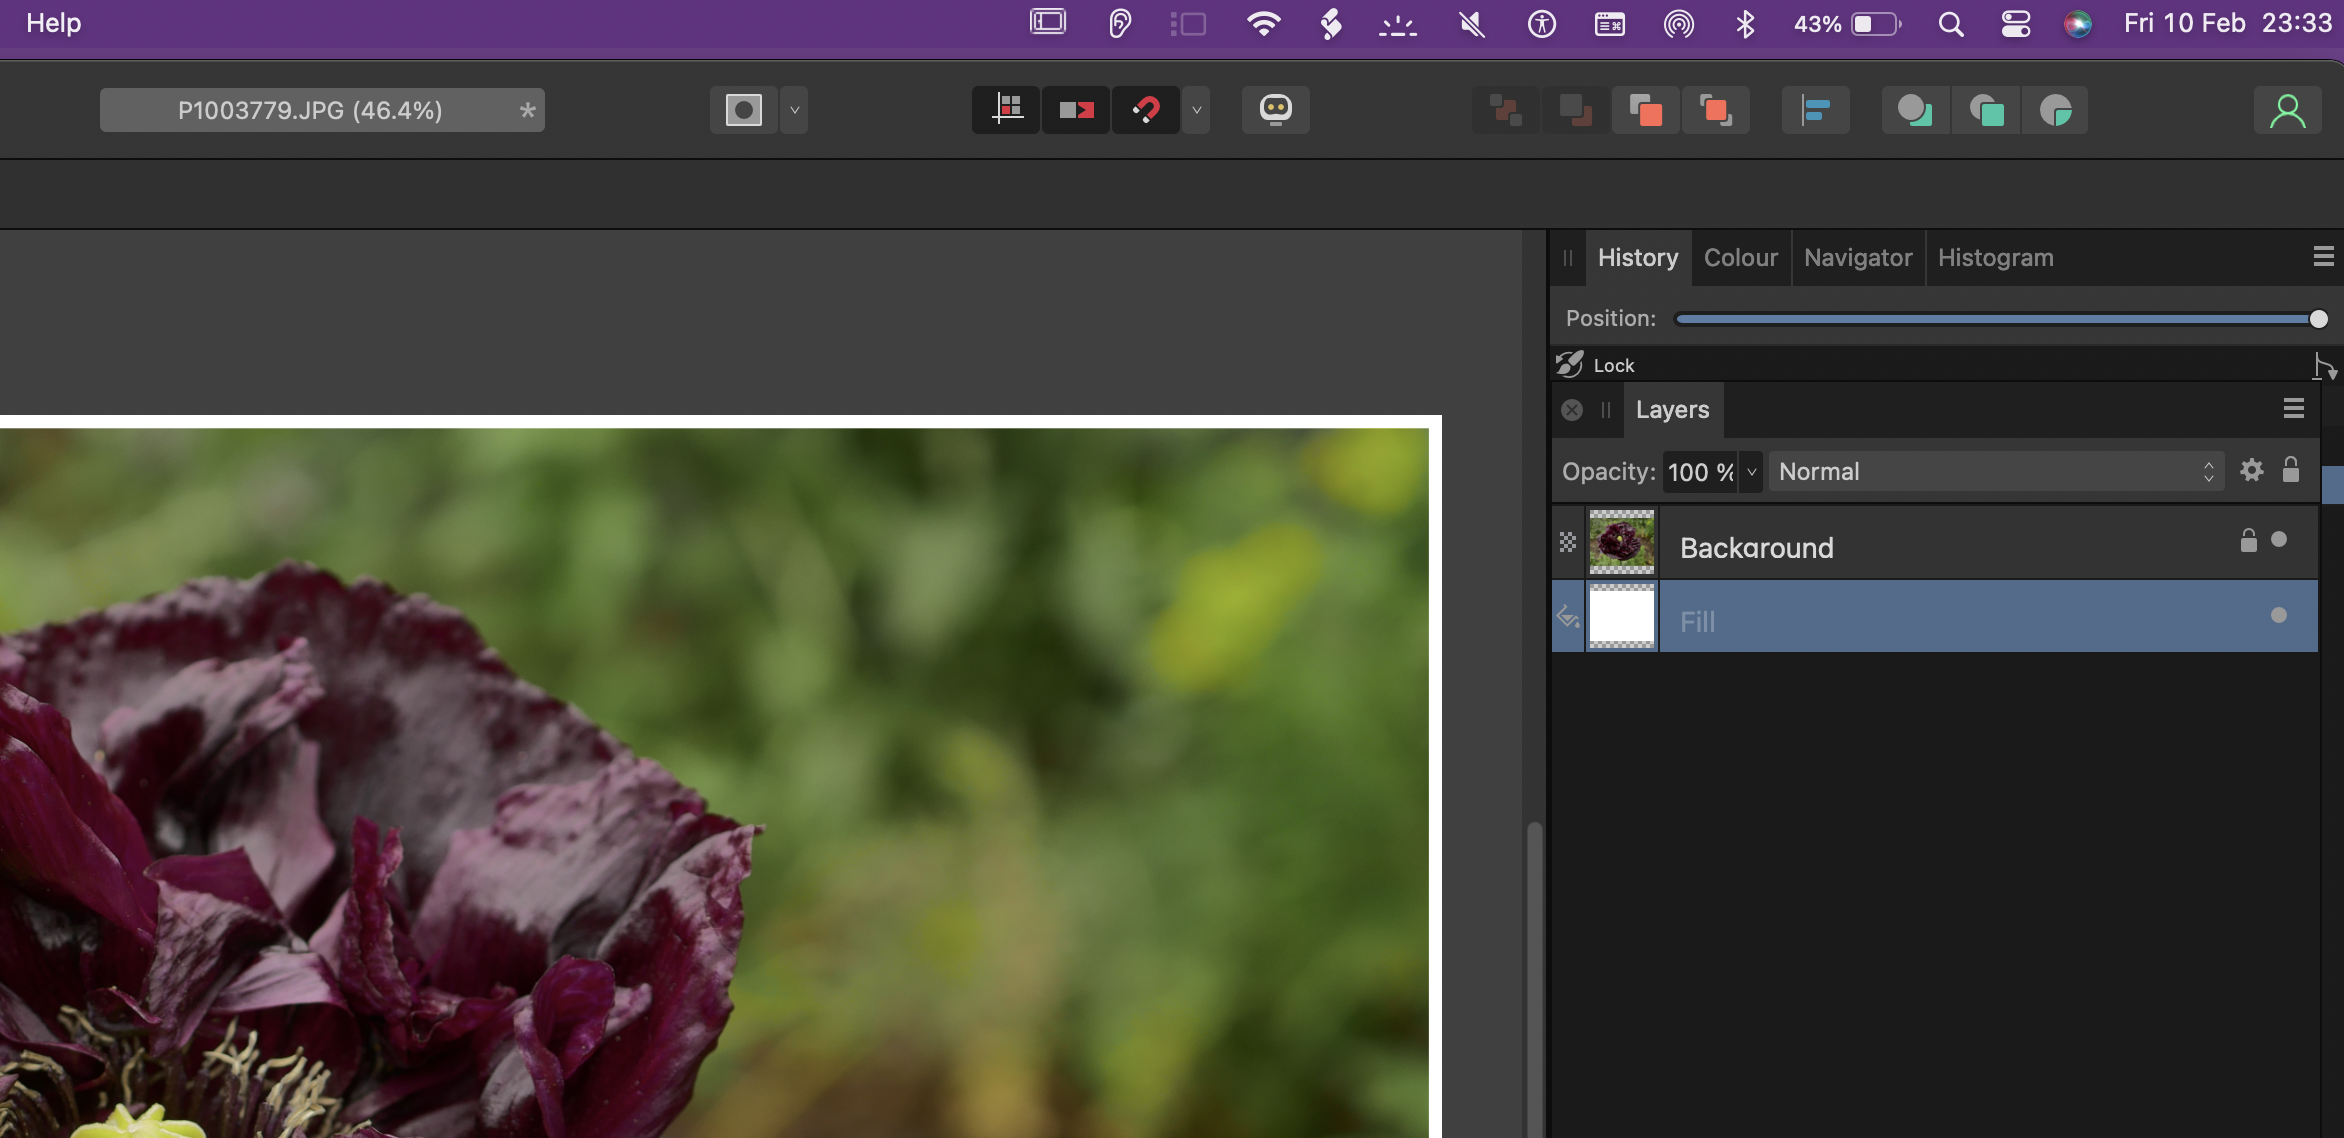
You'll need to start from scratch with an image that doesn't have an existing border (as yours does, even the cr2 layer). When you Resize Canvas the default is to resize proportionally. If you want to add an equal (absolute) number of pixels to each edge of the image then you need to turn this off. In the Resize Canvas dialog, click the chain icon to unlink the two dimensions. For a 30px border: click into both of the fields in turn and type +60 (that's 30 * 2) into each one, after the existing dimensions. Make sure the Anchor is centred. Click Resize. This will add the same number of pixels to each edge: (My screen grab shows the input for the first field. You need to fill with the same +value in both.) This will give you an extended canvas with an equal number of pixels (30) all round. You can then create a rectangle or fill layer behind the image layer which will extend 30 pixels on each edge (that's 60/2).

-
Nine-digit numbers become phone numbers in a pdf
h_d replied to BugsJane's topic in Desktop Questions (macOS and Windows)
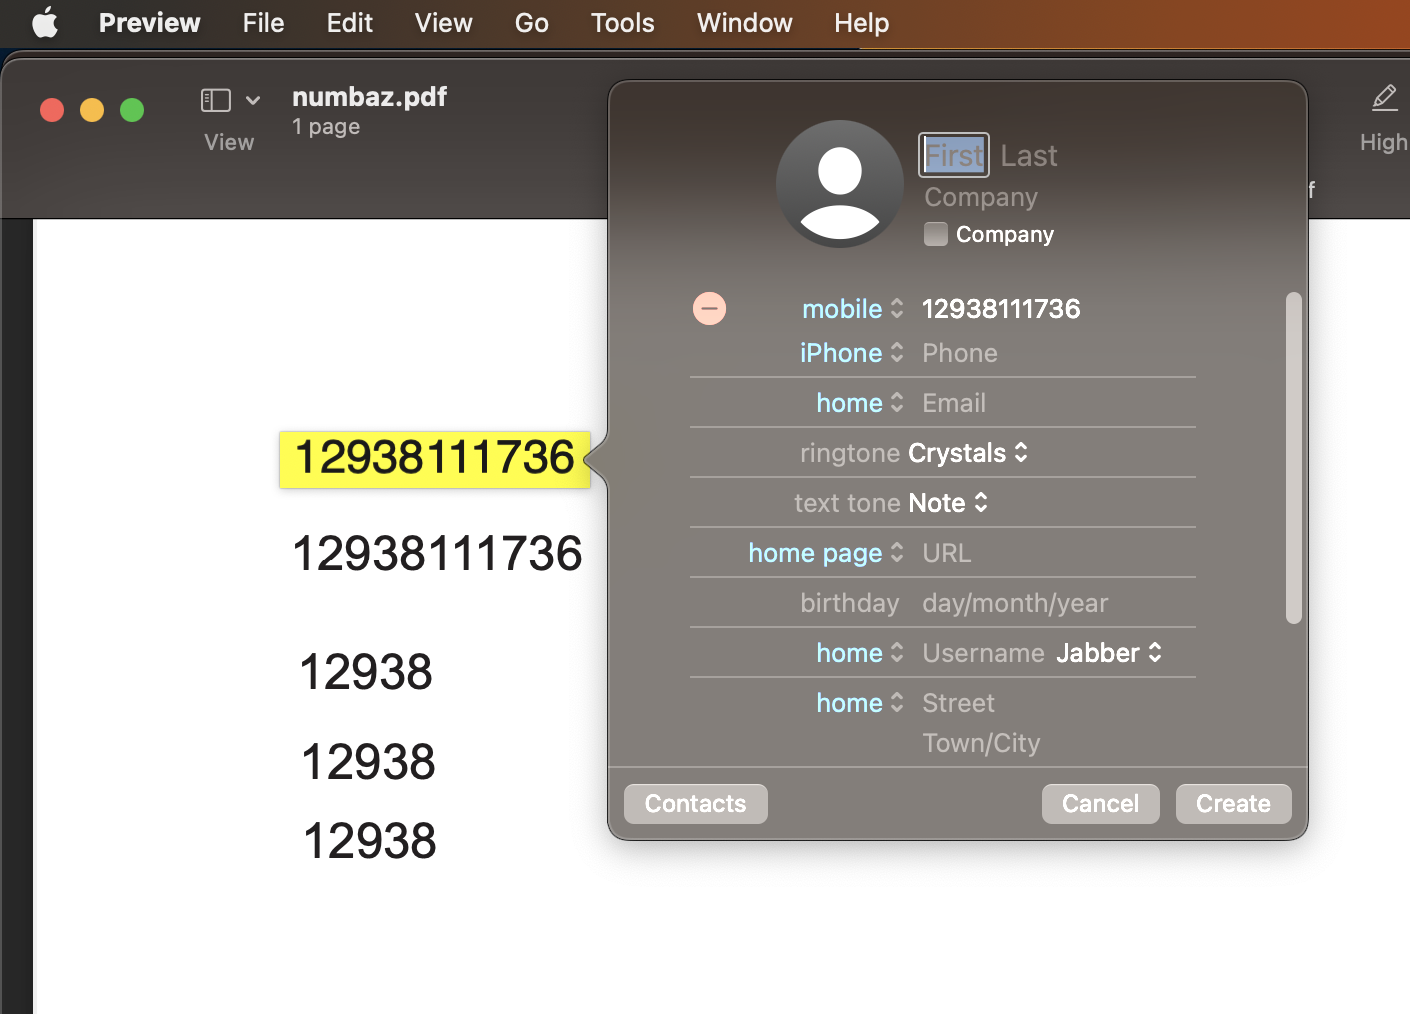
You can find out about macOS data detectors here. Doesn't look as though they can be turned off in Preview. -
Nine-digit numbers become phone numbers in a pdf
h_d replied to BugsJane's topic in Desktop Questions (macOS and Windows)
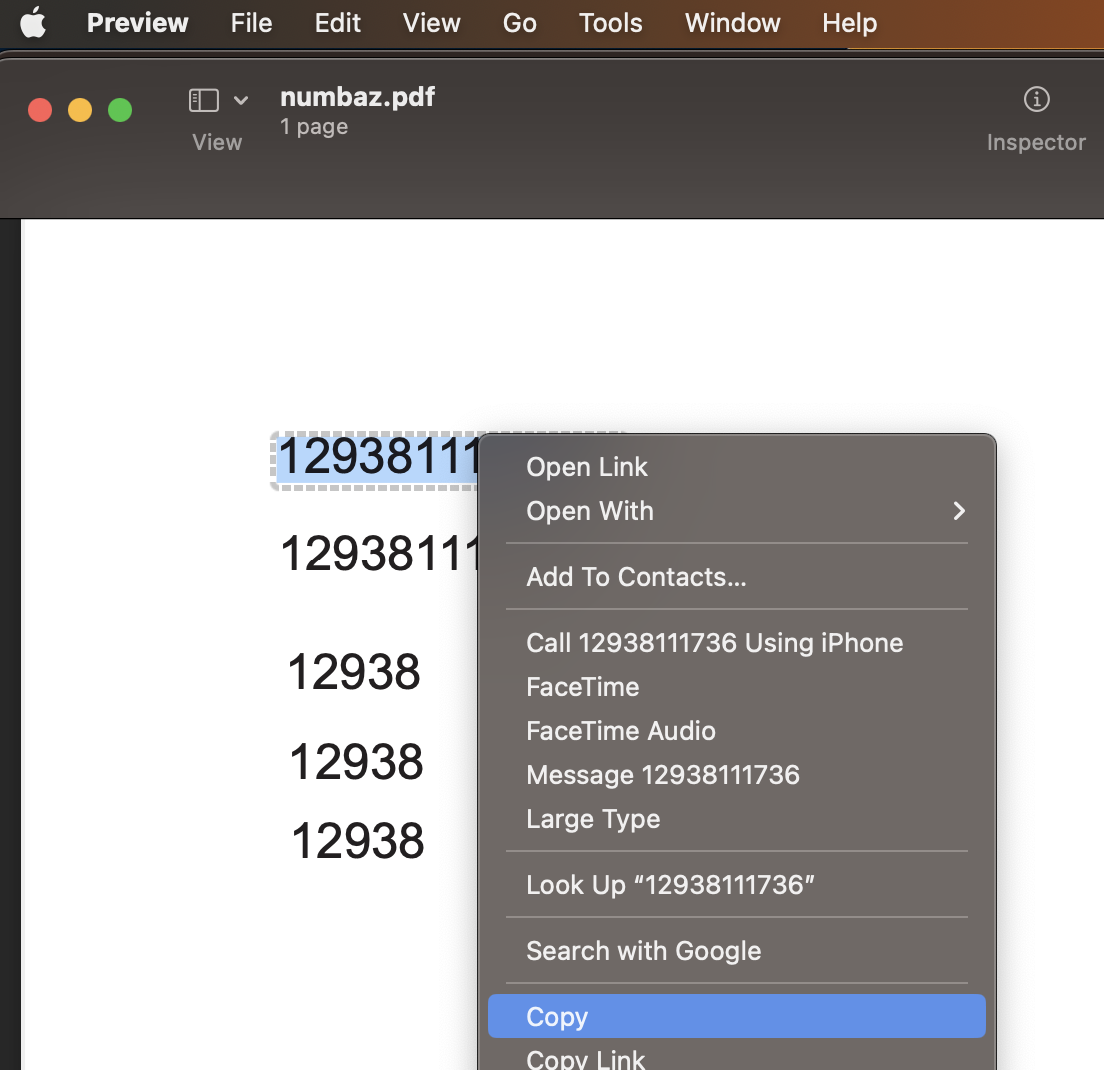
In macOS Preview you can ctrl-click on the number and then choose Copy from the contextual menu:
-
Nine-digit numbers become phone numbers in a pdf
h_d replied to BugsJane's topic in Desktop Questions (macOS and Windows)
I have tried Acrobat Reader for Apple Mac with my test pdf and it doesn't display a phone number popup. -
Nine-digit numbers become phone numbers in a pdf
h_d replied to BugsJane's topic in Desktop Questions (macOS and Windows)
MacOS Preview. It's clever like that. Not an Affinity thing.
-
How do L shaped text frame in publisher?
h_d replied to MxHeppa's topic in Desktop Questions (macOS and Windows)
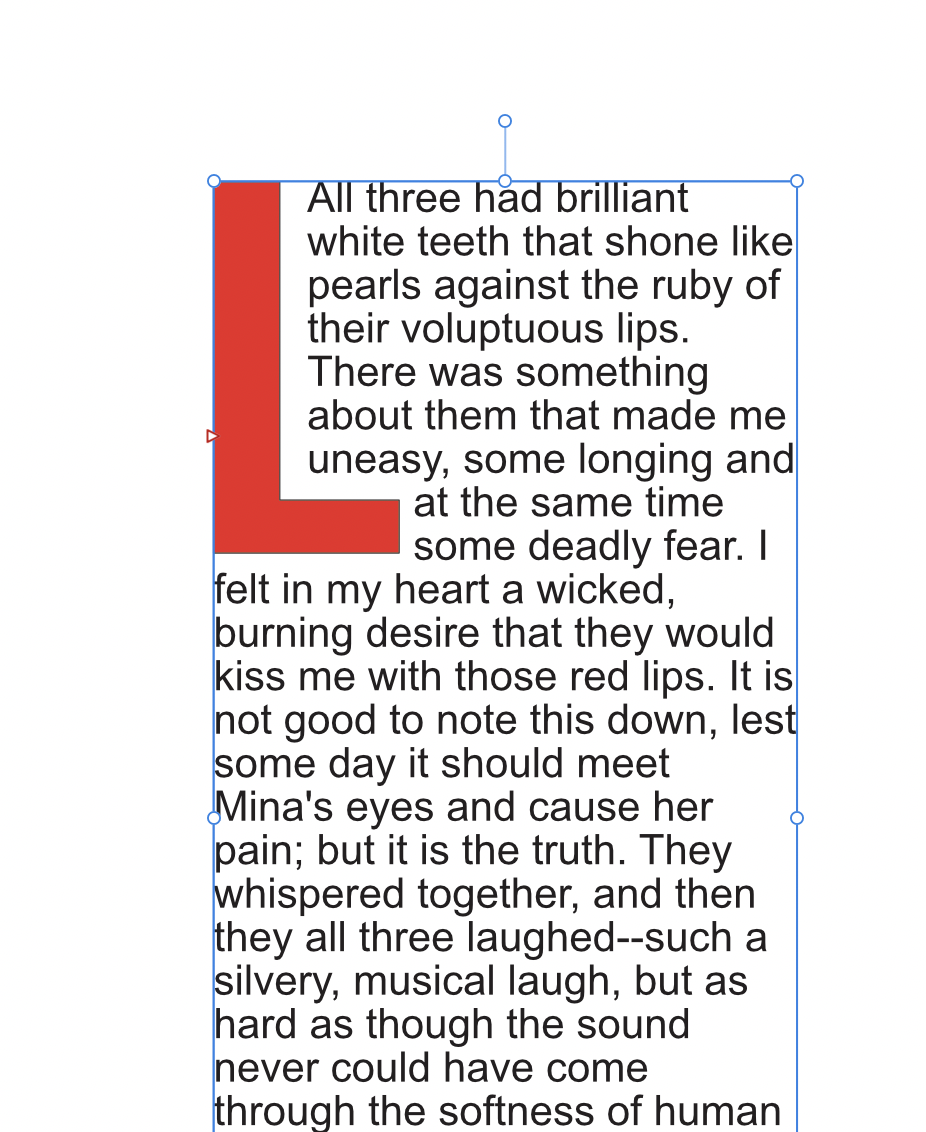
Or do you mean something like this: I drew the L shape with the Pen Tool in Polygon Mode, then adjusted the text wrap using Text - Text Wrap - Edit Text Wrap Settings.
-
How do L shaped text frame in publisher?
h_d replied to MxHeppa's topic in Desktop Questions (macOS and Windows)
Draw the shape with the Pen tool in Polygon Mode, close the shape then Layer - Convert to Text Frame. You can adjust the nodes of the text frame using Node Tool. -
Also make sure that you have selected the layer that you want to cut from. Screen Recording 2023-02-07 at 20.53.22.mov (I rasterised my original Rectangle layer to turn it into a Pixel layer.)
-
Turn on snapping. Screen Recording 2023-02-07 at 20.42.11.mov
-
Is this what you want - Screen Recording 2023-02-07 at 20.38.02.mov (using the Gradient Tool on a Radial gradient)
-
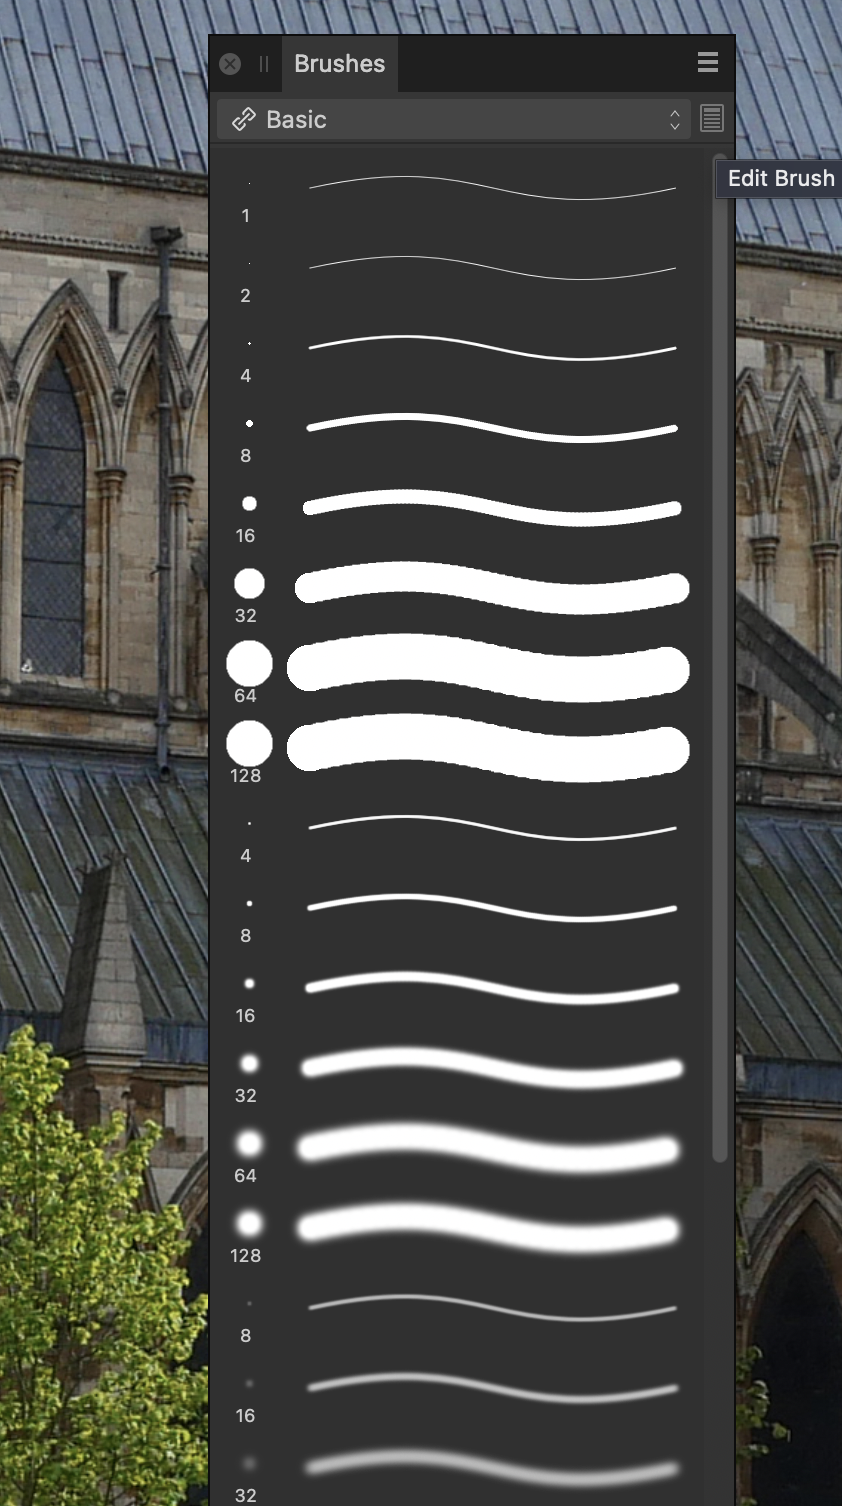
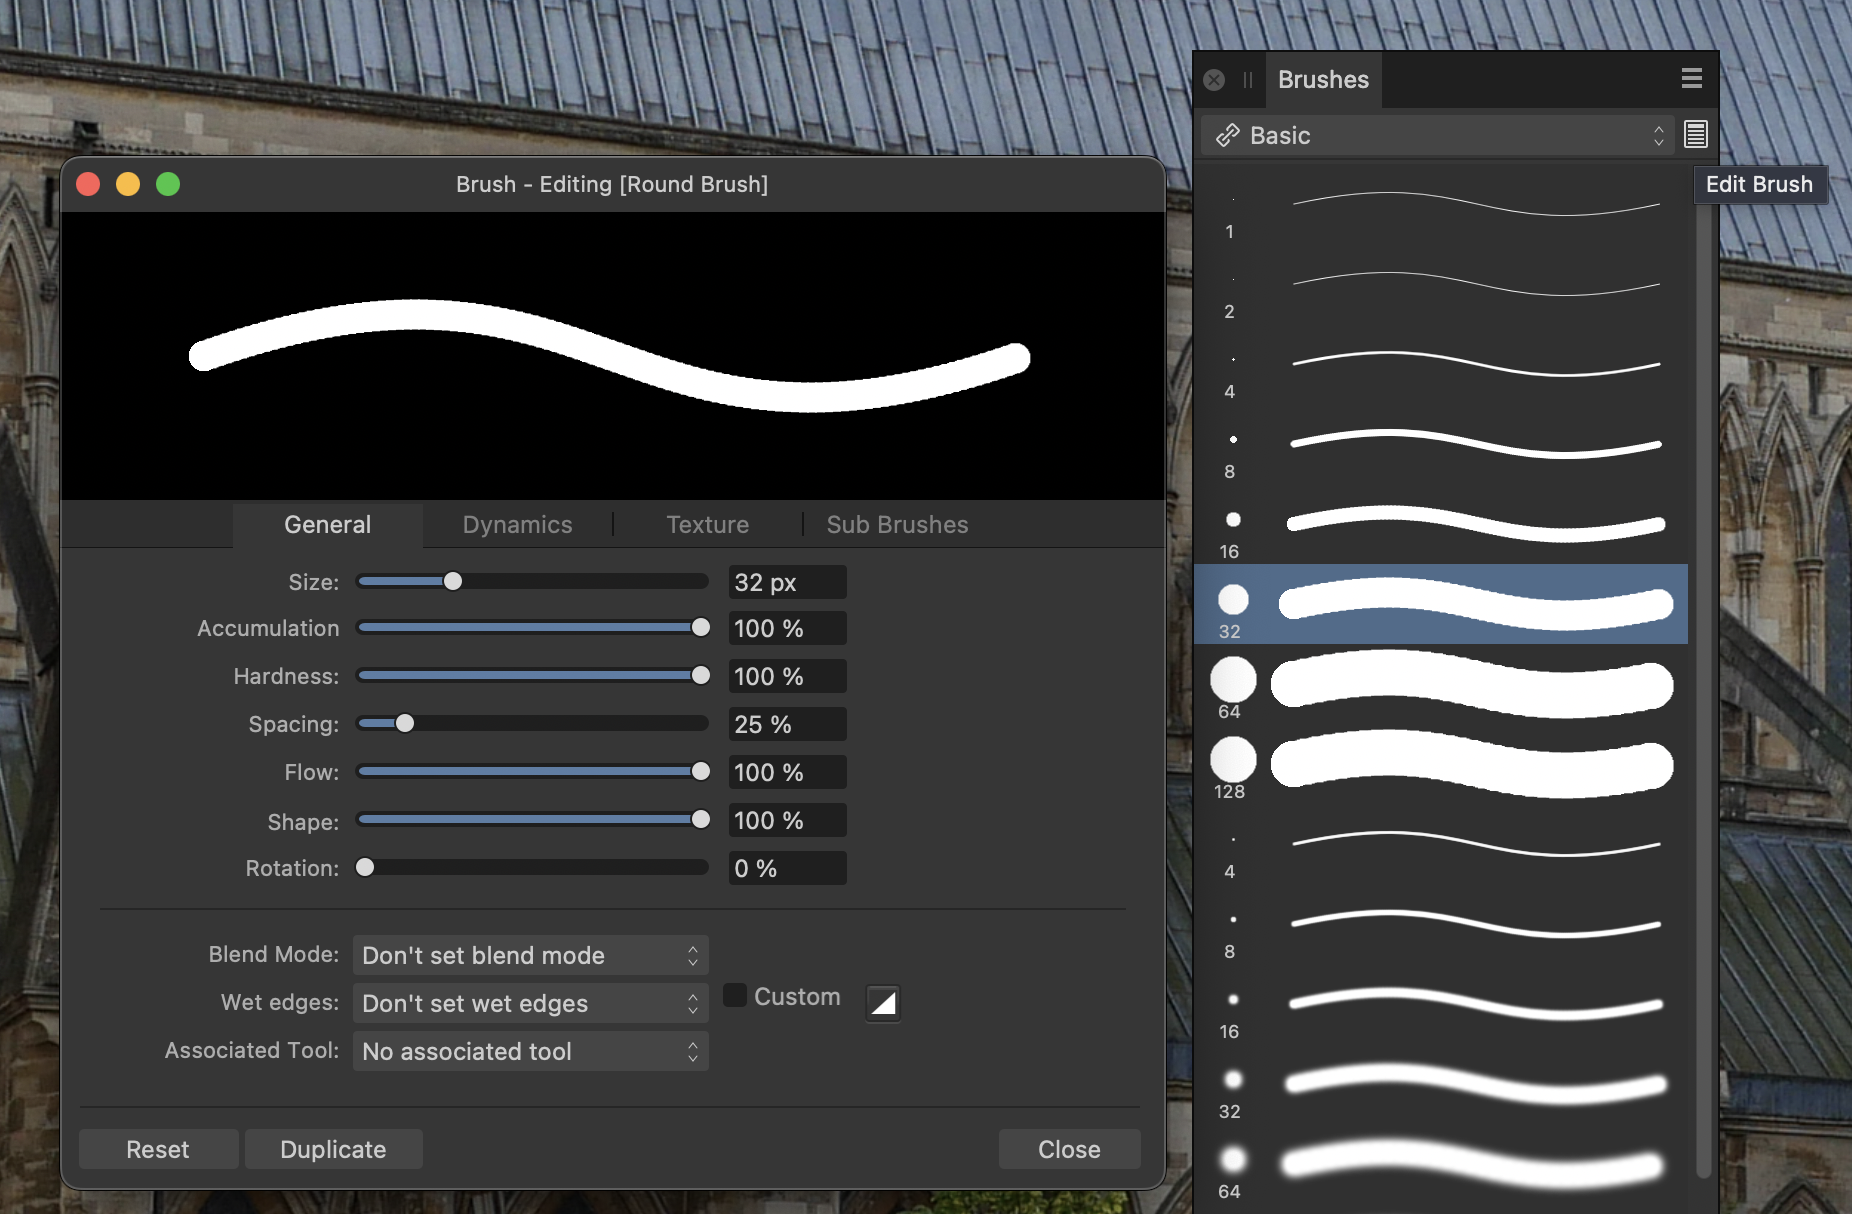
The Basic tab in the Brushes panel (Window-Brushes in Photo v2) includes a number of 'feathered' or soft-edge brushes: And hiding under the unobtrusive Edit Brush button is a plethora of settings:
-
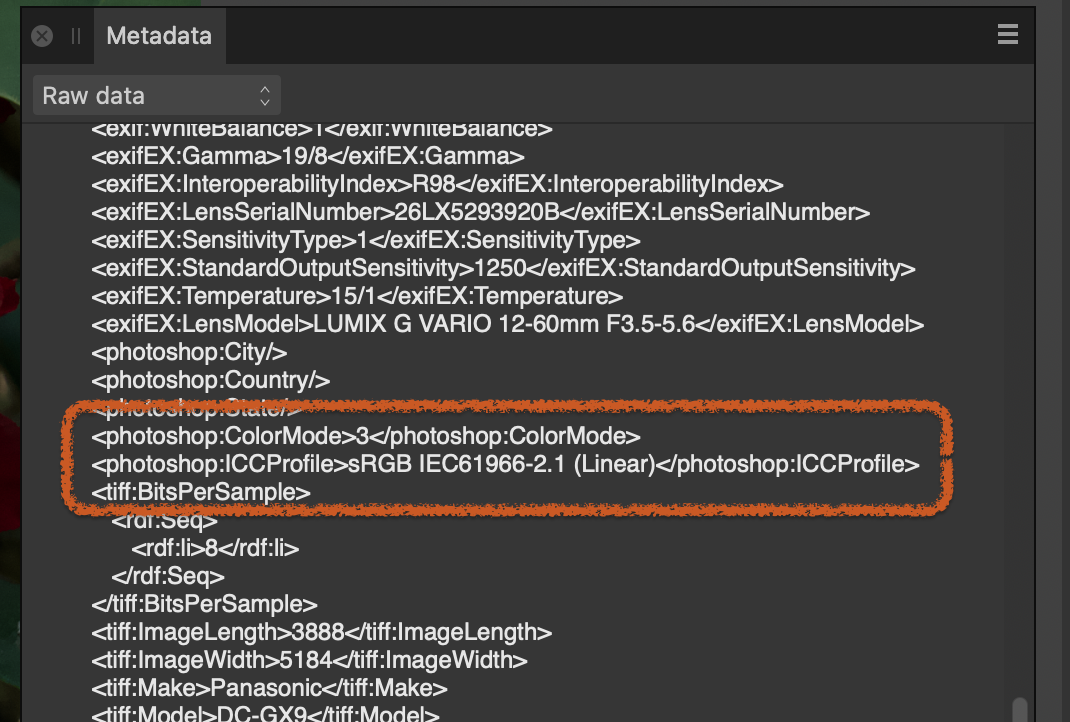
There's a camera setting for the E-M1 MkII that switches between AdobeRGB and sRGB. As far as I can tell, the only way you can check the setting in Affinity Photo's Develop persona is via Window-Metadata-Raw Data and then scroll through hunting for the ICC Profile: (This is from a Panasonic .rw2 file.) But I have to confess I'm clutching at straws offering that as a solution. It may also be something in your RAW conversion settings. If you could zip and upload the original .orf files someone might be able to double-check.
-
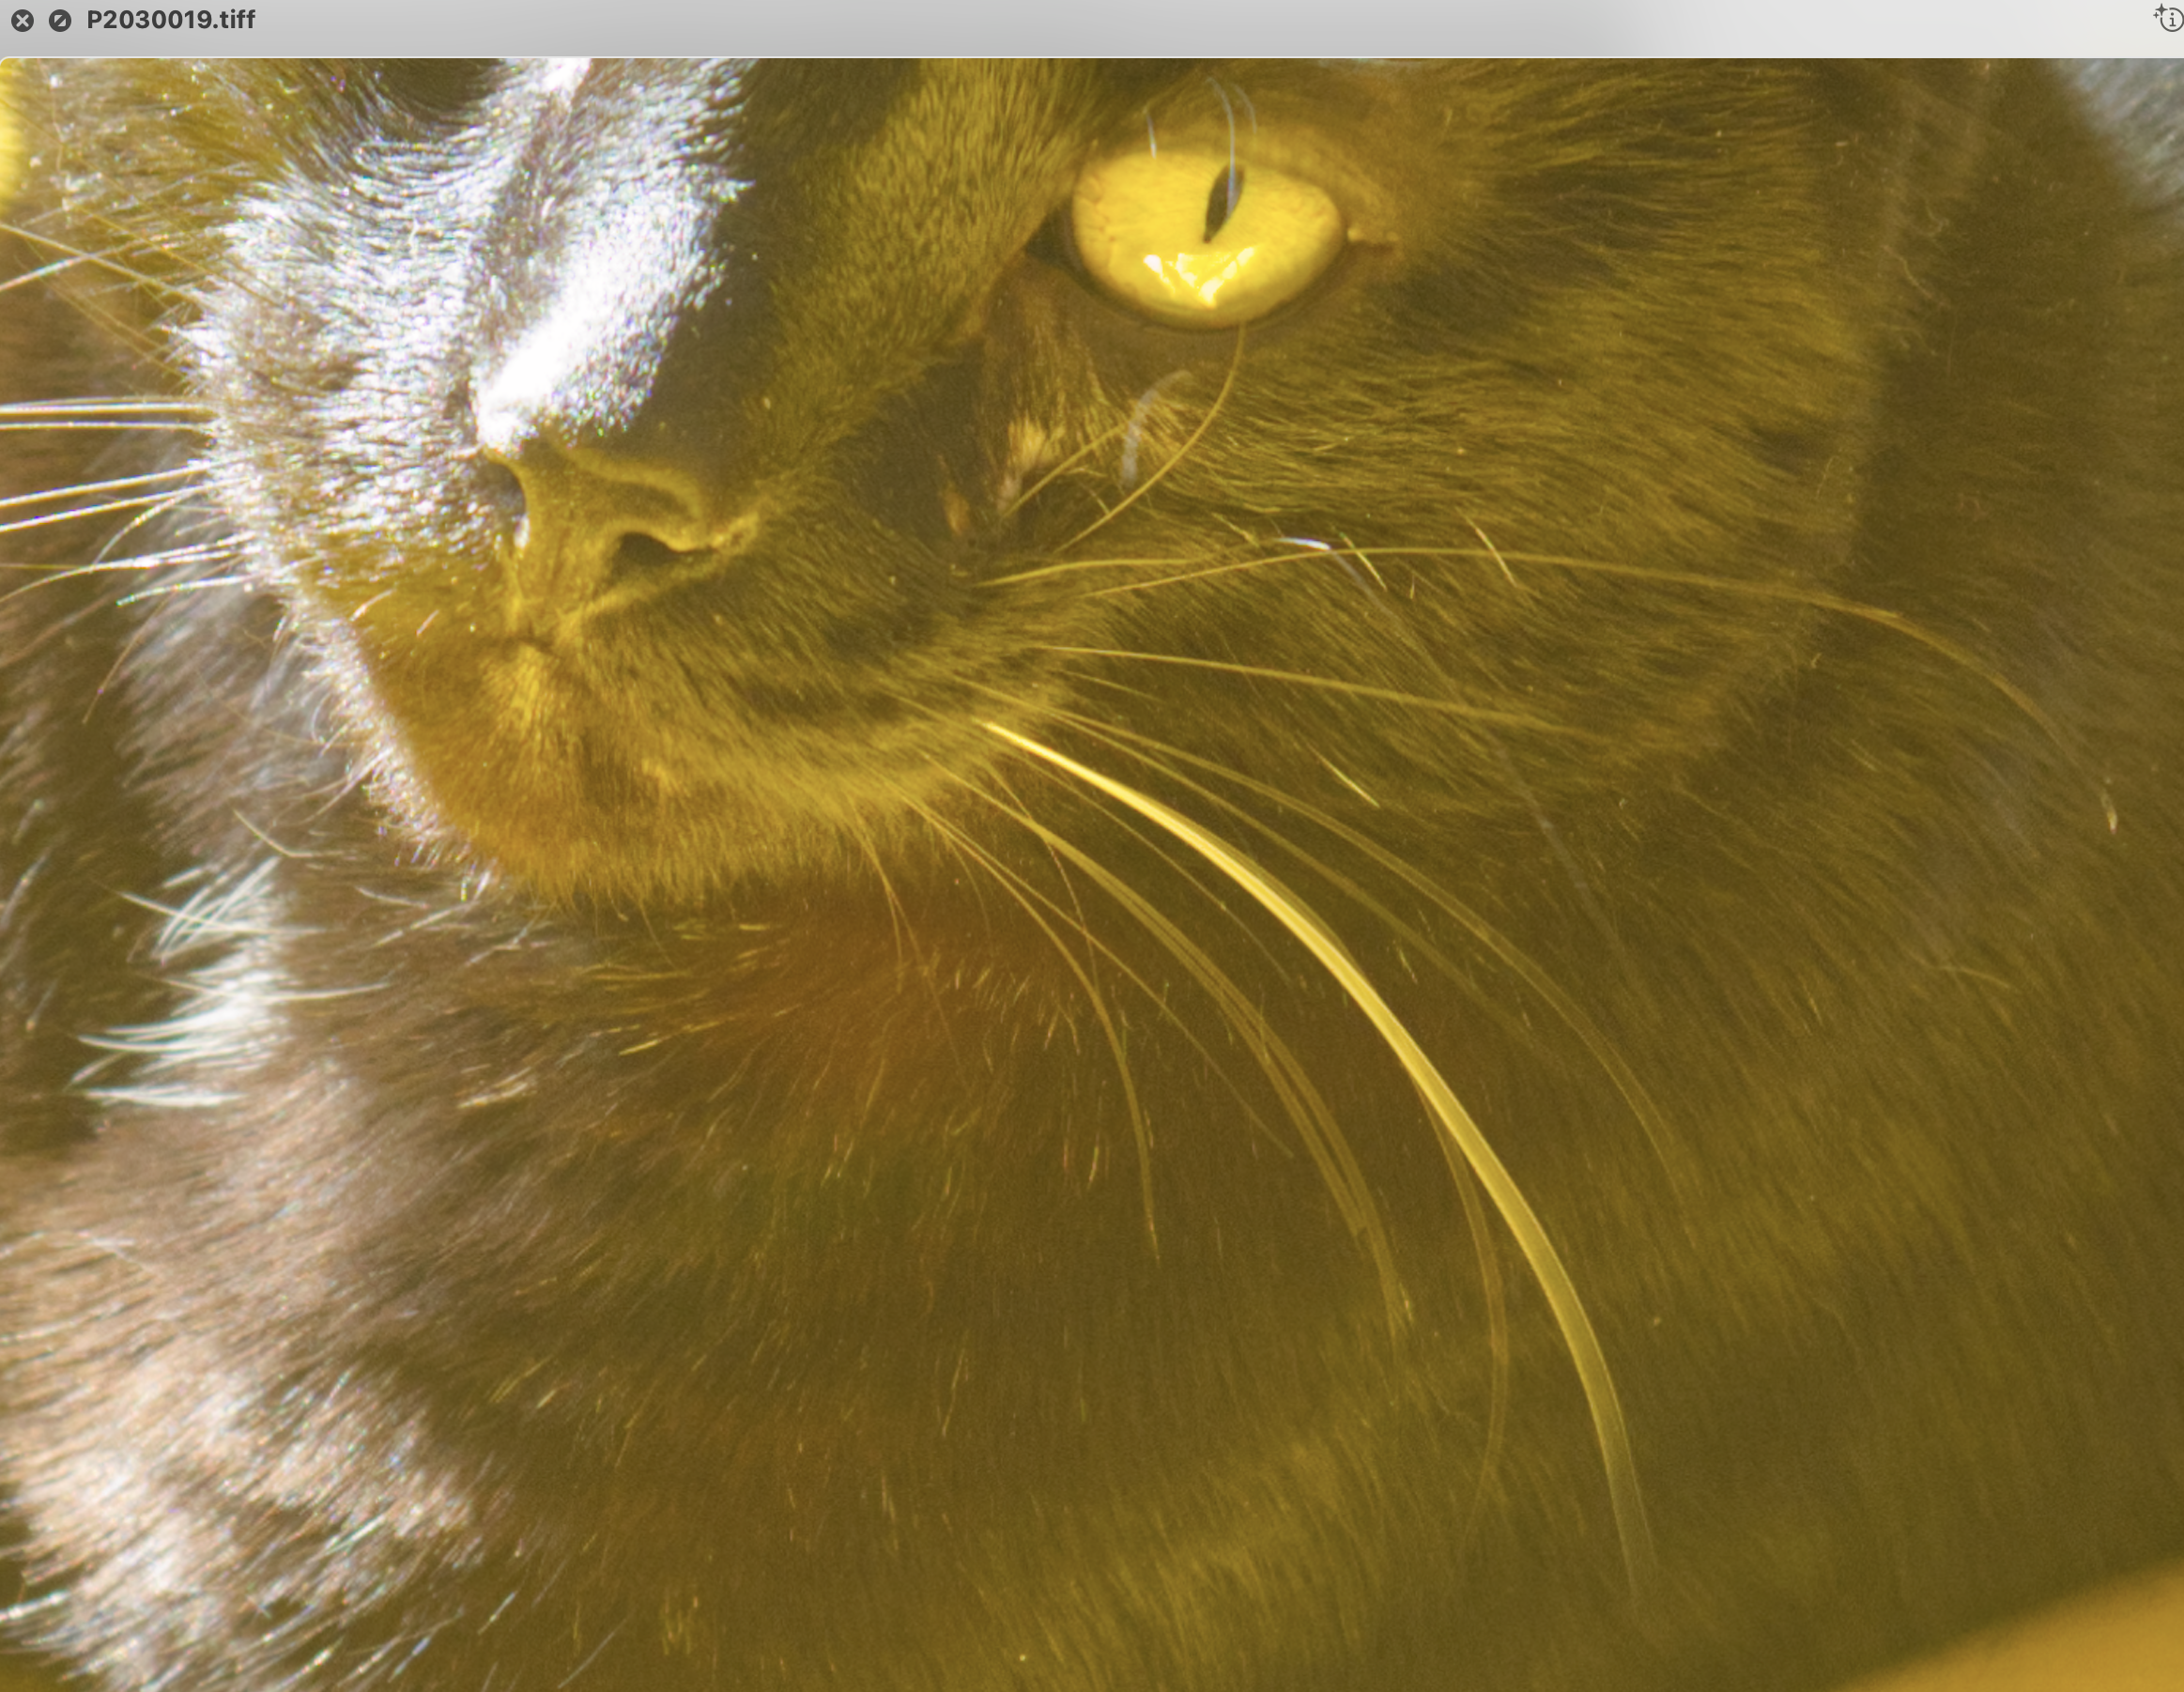
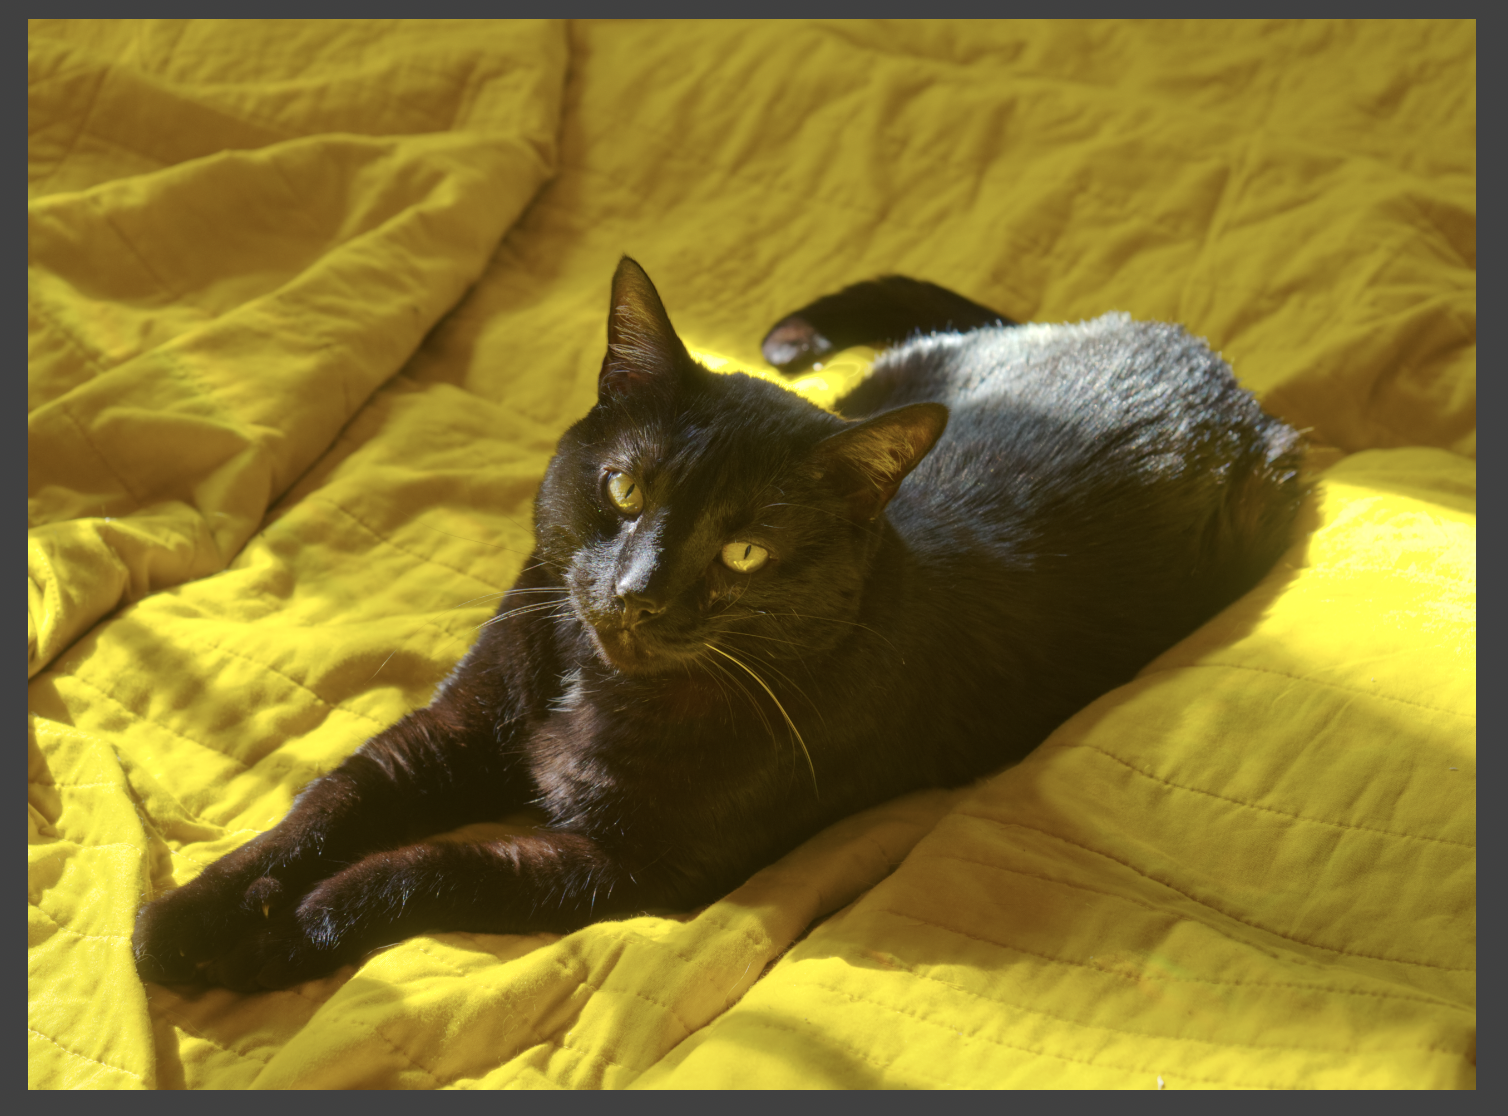
One option would be to omit the outlying exposures (P2030016 and P2030019) and leave de-ghosting turned off when you do the HDR merge. This will avoid introducing the blurred whisker in the long-exposure image: (Out of focus? Camera shake? Cat shake?) With the following settings: I get a tone mapped image like this: You can then make further destructive tweaks in the Tone Mapping persona or non-destructive adjustments in the Photo persona. Not sure about the reasons for colour cast, but it might also be worth trying with the original out-of-camera images, and checking the camera's Color Space settings. The files you uploaded have an sRGB profile but if the originals were shot using AdobeRGB the conversion may have caused issues.
-
Clone brush doesn't work
h_d replied to RDT's topic in Pre-V2 Archive of Desktop Questions (macOS and Windows)
You could install the free 30-day trials and test things out. You have nothing to lose. To say 'I visit here and see bugs, so everything must be wrong' is like saying 'I visit a hospital and see sick people, so everyone must be ill.' -
You can get a 30-day free unlimited trial of Publisher (all functionality) if you scroll to the bottom of this page.
-
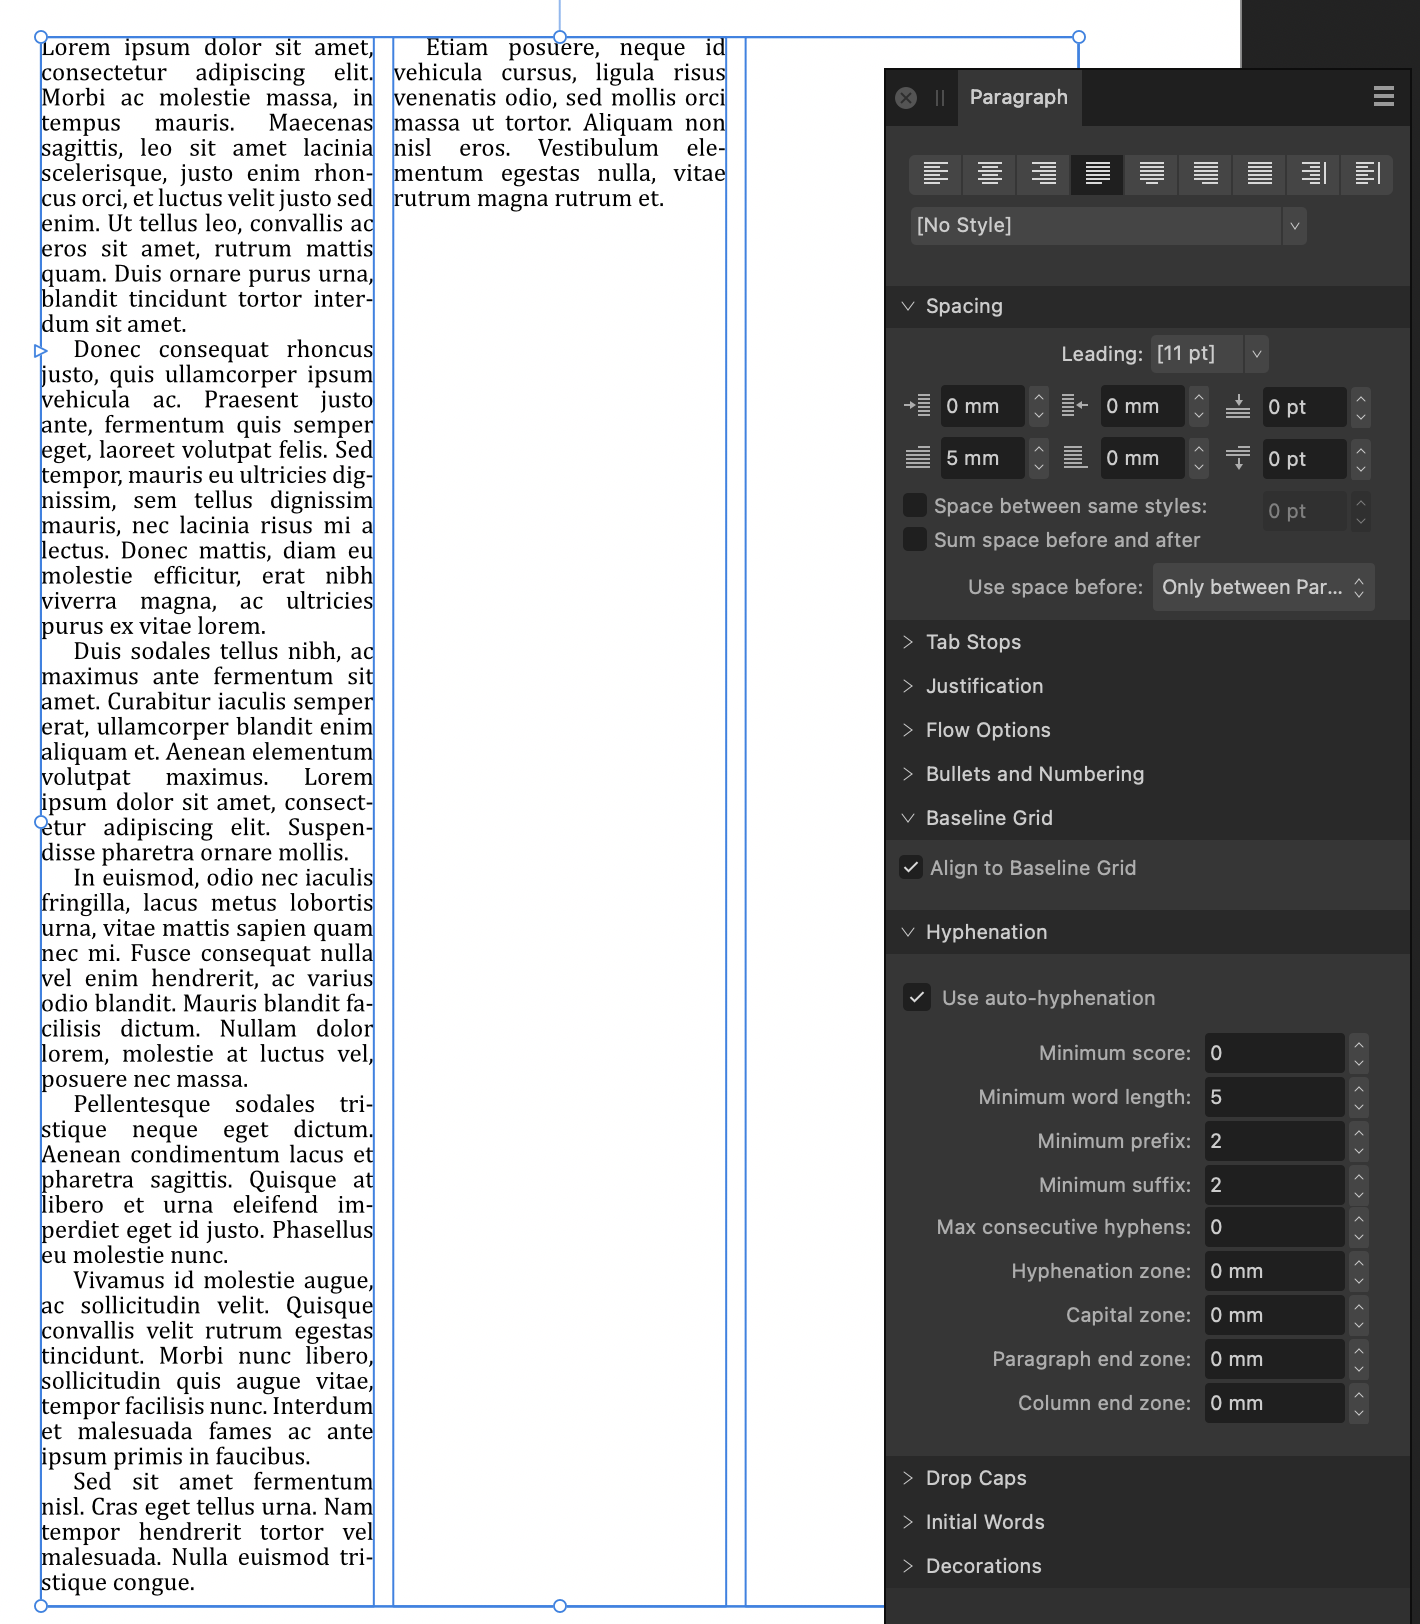
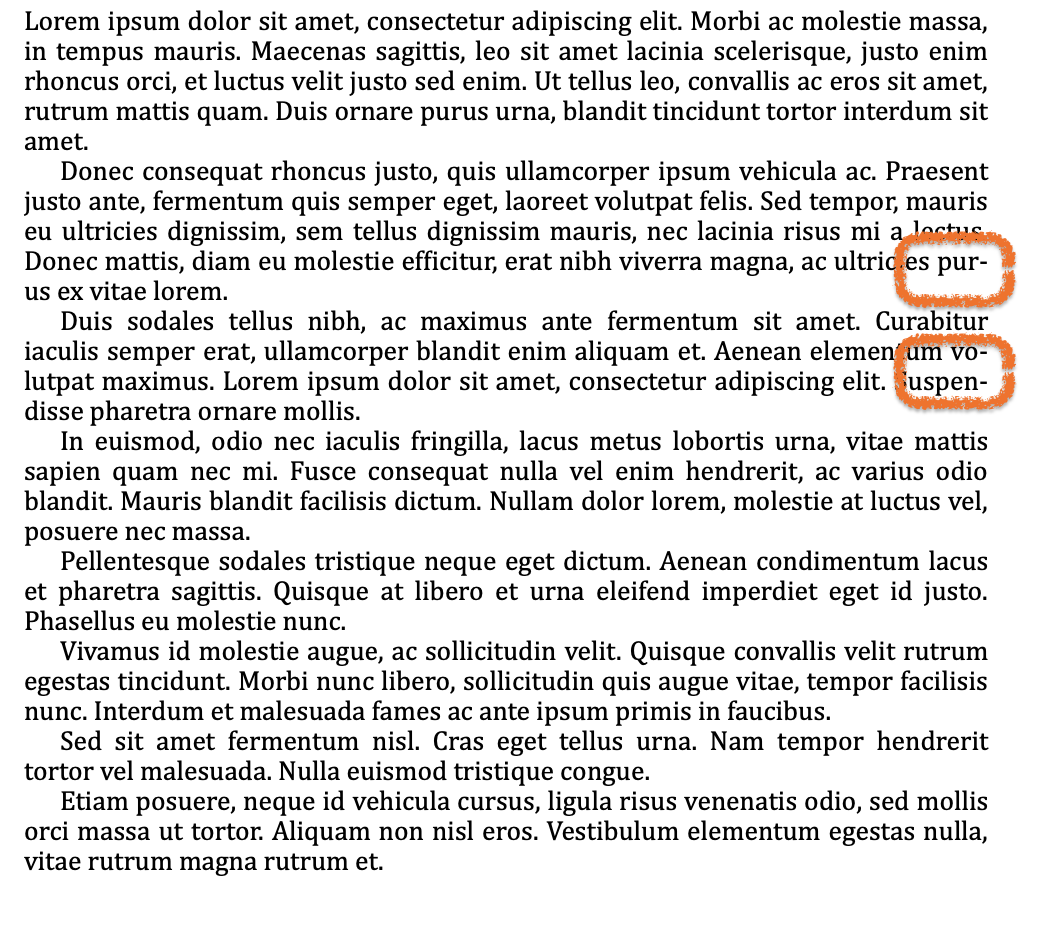
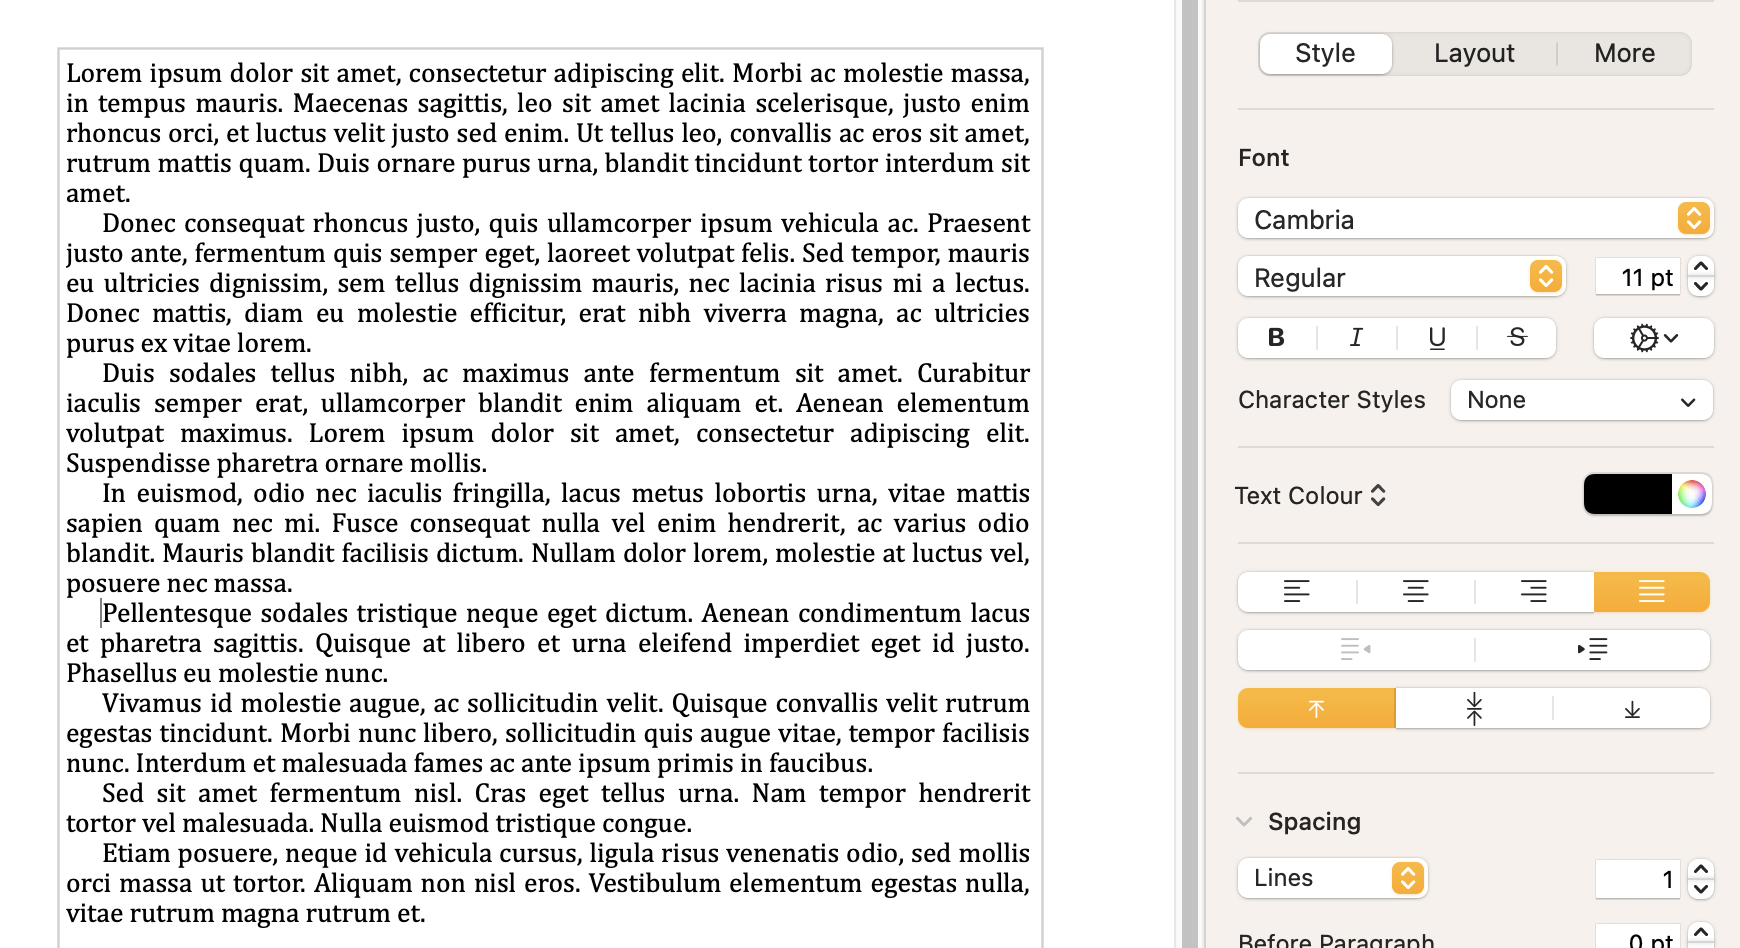
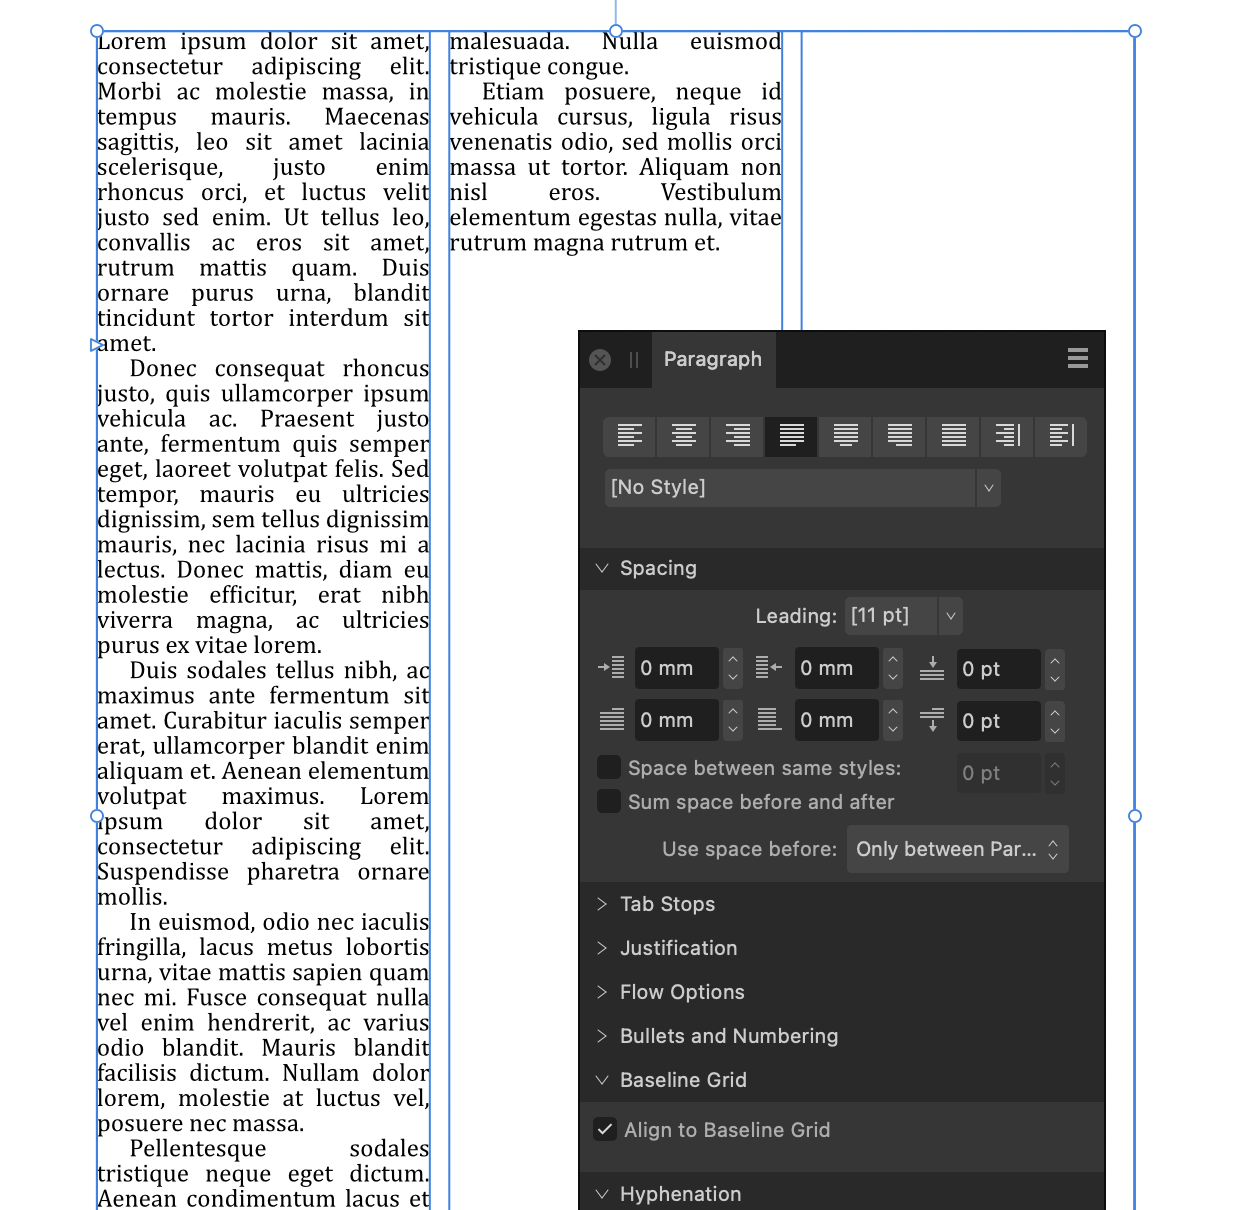
That's mainly because it's not hyphenated, and I haven't made any adjustments to word or letter spacing. Here it is with Auto-Hyphenation on (no other changes): Turning on hyphenation in my Pages example has a less dramatic effect because the frame is much wider and the spacing can be more evenly distributed:
-
You might want to clarify 'Football' too ⚽ / 🏈 / 🏉 😉
-
What I meant was that the original shape (in Pages) and the new shape (in Publisher) don't have to be the same width: justified text copies and pastes from one to the other without any spacing issues. Original text in a Pages text frame: The text from Pages copied and pasted into Publisher:
-
I think it depends on compatibility between Publisher and the source application, and possibly on the OS too. For example, pasting styled text from Apple Pages into Publisher seems to work pretty much perfectly - justification, indentation, leading etc are replicated exactly. Spaces between words are accounted for in the justification engine - the shapes of the source and target frames don't come into play. I agree though that in many cases
-
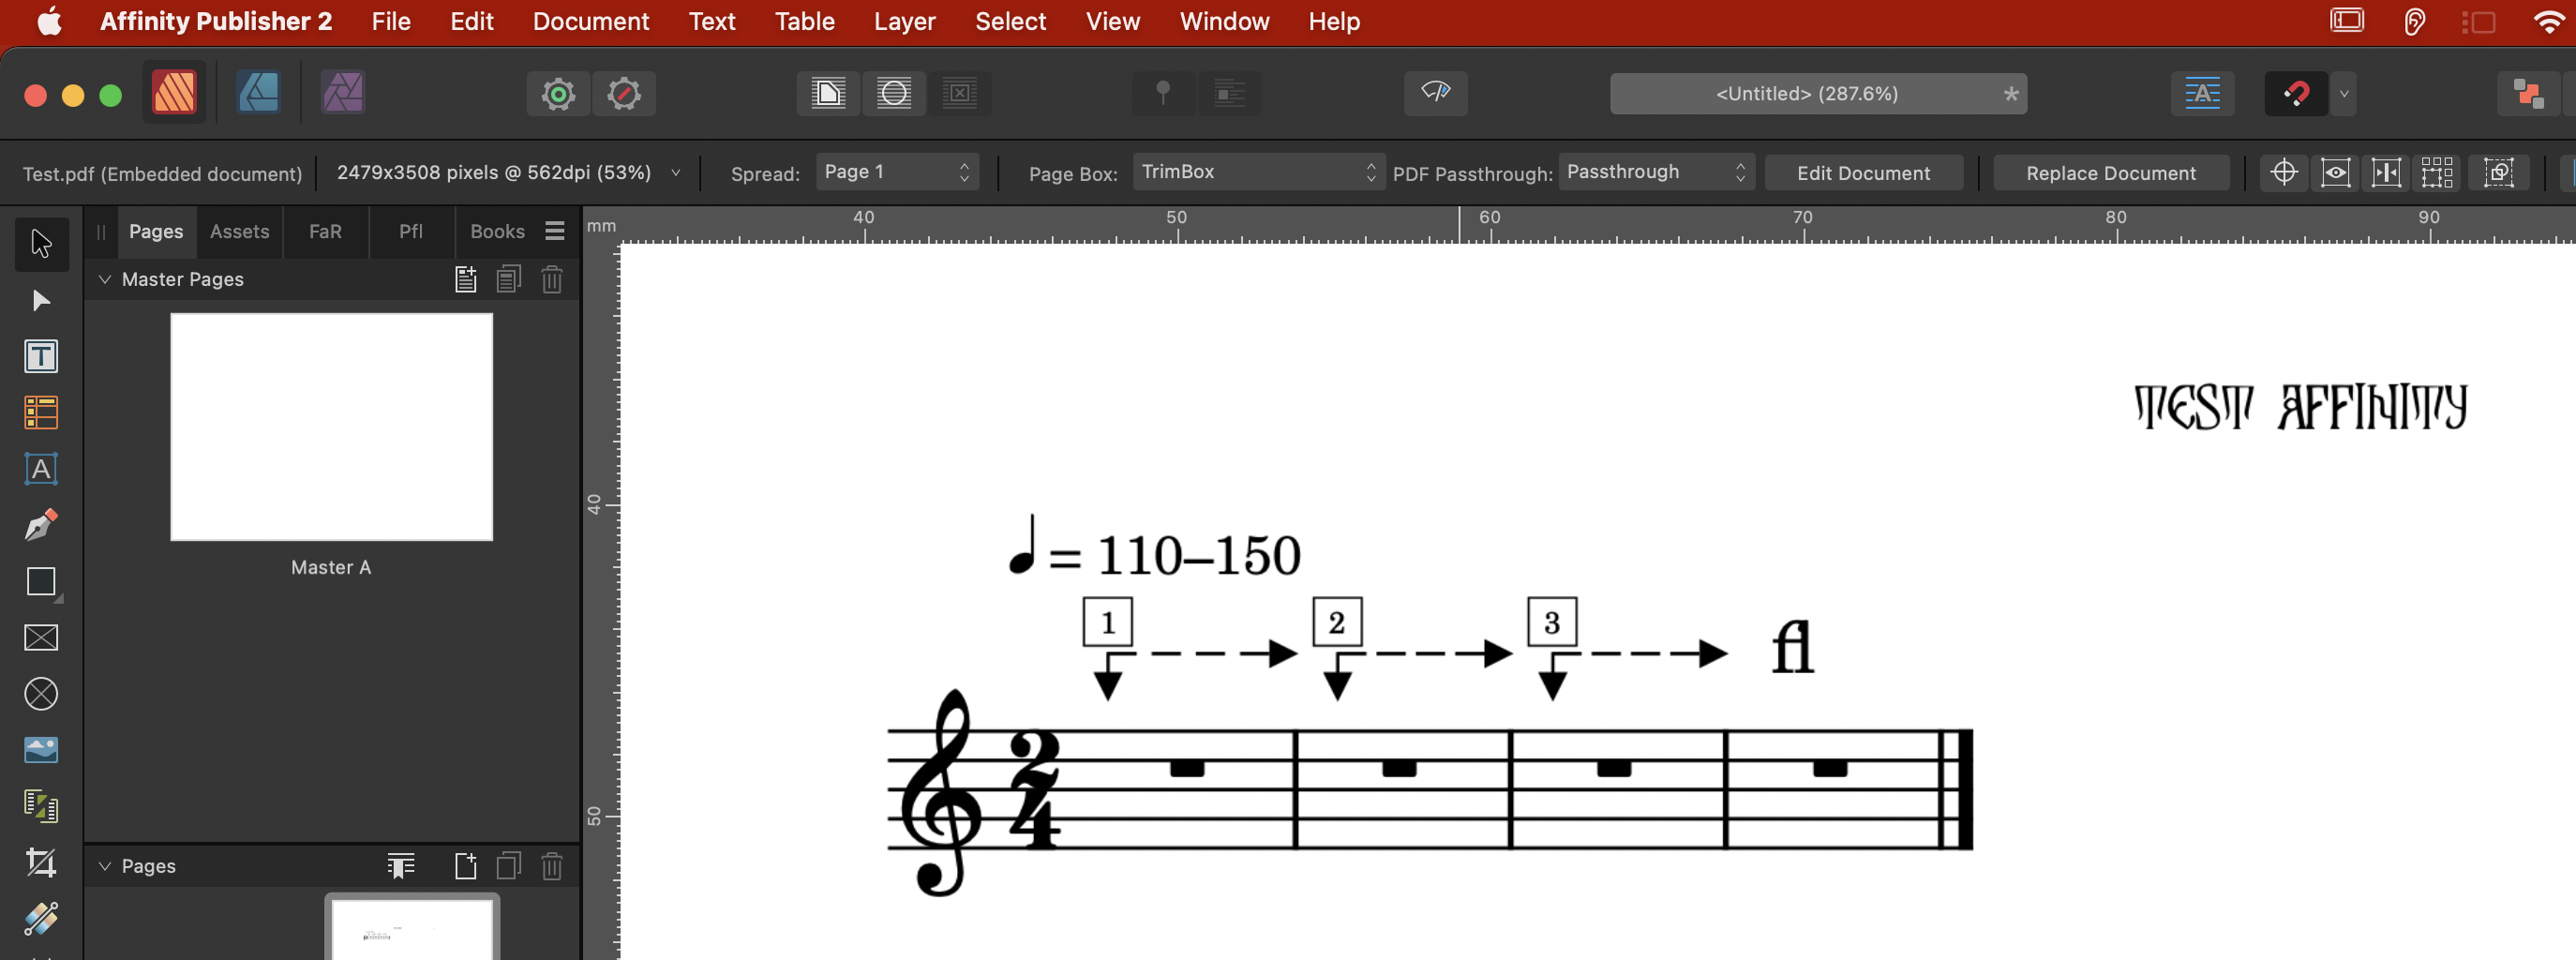
What happens if you Place the pdf into an existing Publisher document? I get all sorts of crud if I Open, but this if I Place test.pdf: (Publisher is not a pdf editor...)