Big_Stan
-
Posts
227 -
Joined
-
Last visited
Everything posted by Big_Stan
-
Yes, achieving a "realistic looking" DOF is my goal. There are numerous PS tutorials that show how to accomplish DOF with various degrees of sophistication (subtlety). I tried to modify a couple of the PS tutorials to work in AP with no success.
-
Ok, laying semantic aside, when are the AP guys going to get around to implementing a "depth map" capability. It has existed in PS for several years and if I am interpreting "verysame" correctly, many people have been asking for this capability in AP. Being able to realistically reduce background clutter in a photo is an important capability. Right now I am trapped into retaining PS in order to implement a depth map, I'd like to finally cut the San Jose umbilical.
-
Disappointing, I was hoping not to have to keep CS 6 around just for the blur feature.
-
Thank you. How do they expect to compete with PS if they won't address long standing problems? In any case, if the lens blur doesn't work, do you have any information regarding Gaussian blur
-
I have seen several PS tutorials for applying a lens blur with a gradient and was wondering if there was an Affinity Photo tutorial that covered a similar process.
-
precisely the same
-
Thank you. Just after I pushed the send button, my brain started to work and I remembered how to do, exactly as I used to do it cs6. I am truly having a dumb day.
-
I have two variants of the same photo; the first image is of a Barred Owl against an extremely cluttered back ground. In the second image, I masked the owl and applied a heavy application of Gaussian blur to the background resulting in a sharp owl against a very blurred background. My goal is to merge the two images and blend them, in order to adjust the amount of blur in the final image. I used to be able to accomplish this in CS6, however I cannot make it happen in Affinity Photo (1.6.7) Is there an Affinity Photo tutorial that describes a method to accomplish my goal?
-
Grab the selection brush tool and "paint" the model. Then go to Refine and adjust feather & smooth to your satisfaction. I usually go for a 2 to 3 px feather to avoid a "sharp" demarcation between the model and the background. Next go to Filters > Shadows/Highlights and adjust to your satisfaction. This will lighten the model and leave the background dark/subdued in order to reduce image clutter. I usually make this kind of an adjustment in LR or C1 where I have more control and I can apply a clarity adjustment and add some "punch".
-
Create a custom watermark pen
Big_Stan replied to Big_Stan's topic in Pre-V2 Archive of Desktop Questions (macOS and Windows)
Thank you. After a few wrong turns, I was finally able to get there. -
Create a custom watermark pen
Big_Stan replied to Big_Stan's topic in Pre-V2 Archive of Desktop Questions (macOS and Windows)
Here is the PS tutorial to make the custom brush: How to Create a Watermark Custom Brush in Photoshop The best way to watermark your photos is through creating a custom Brush. This may sound complicated but you will see in this episode just how simple it is. You will want to start off with your logo on a plain white Background. If your logo is not grayscale, go to Image > Adjustments > Desaturate. Your goal is to have your Logo be black and the Background white. You can also use your signature by scanning (using a scanner) a white piece of paper with your signature on it. Make sure that your logo is high enough resolution to show up well on your photos. We recommend the Image Size between 500px – 1000px. That way if you need to Scale your logo down you won’t lose quality. Once you have a document sized 500px – 100px with a white background and your Logo centered it is time to turn it into a custom Brush. Simply navigate to Edit > define brush preset. Give your brush a name you will remember and that’s it! As a bonus we show you how open the Brush Preset Manager and move your Logo (watermark) to the front of the brush list. That way when you right click with your Brush Tool, your logo will be the first option. Using Your Custom Brush Using your logo as a custom brush couldn’t be easier. Hit “B” for the Brush Tool and right click. Choose your logo from the list. If you followed our steps with the Preset Manager it will be in the front. Choose a Color and place your logo on a New Layer. You may Size the brush the same way you would Size a normal Brush. Open and close brackets “[ , ]“ will make your brush larger and smaller. As a bonus try using a Color from your image as the brush Color. This way your logo will be less obtrusive. You may also use blending modes to make your logo blend with your image. Watermarking Future After you create your custom brush there is no need to follow those steps again. Your custom brush is saved in your Photoshop preferences and can even be exported. The next time you want to add a watermark simply grab your Brush Tool, select your logo and click! -
Create a custom watermark pen
Big_Stan replied to Big_Stan's topic in Pre-V2 Archive of Desktop Questions (macOS and Windows)
Thank you. I had seen this Vid and it seems to need affinity Designer as an interim step in order to work. -
In Photoshop, I was able to create a custom pen that placed a watermark on an image. To use the watermark pen, I would go to the pen menu, scroll down until I found the watermark pen, select it and then click on the image and my watermark (my name) would appear where I clicked. 1. Is there a way to create a similar custom pen in Affinity Photo? 2. In Photoshop it is possible to create a digital watermark, can a digital watermark be created in AP?
-
Affinity Photo and Noiseware
Big_Stan replied to Franklin's topic in [ARCHIVE] Photo beta on macOS threads
Seems to be working now. The only issue that I have discovered is that the Noiseware preview is inverted, you have to stand on your head to see the preview correctly. After clicking OK, the image is displayed correctly. -
On your 2016 posting regarding Noiseware compatibility with Affinity, you stated,
" Works with 8 bit colour formats only. Crashes Affinity Photo when working with 16 bit images. Convert the image to 8 bit colour format to use the plug-in."
How were you able to make it work? I followed your advice, converted the image to 8 bit RGB and Noiseware opened. However, when I selected a noiseware setting and then hit OK, Affinity INSTANTLY crashed.
-
Removal of Power lines
Big_Stan replied to Big_Stan's topic in Pre-V2 Archive of Desktop Questions (macOS and Windows)
IMPRESSIVE!!! You publish a tutorial, I'd buy it. What opacity, flow, and hardness did you use with your clone stamp? -
Removal of Power lines
Big_Stan replied to Big_Stan's topic in Pre-V2 Archive of Desktop Questions (macOS and Windows)
May have been a "quick job", but the result was VERY much better than I was able to accomplish. When I went across the tree, I left quite a bit more residual "debris" behind. Do you mind sharing what you did? Thank you -
Removal of Power lines
Big_Stan replied to Big_Stan's topic in Pre-V2 Archive of Desktop Questions (macOS and Windows)
I was sizing in Affinity when I received your reply.
-
Removal of Power lines
Big_Stan replied to Big_Stan's topic in Pre-V2 Archive of Desktop Questions (macOS and Windows)
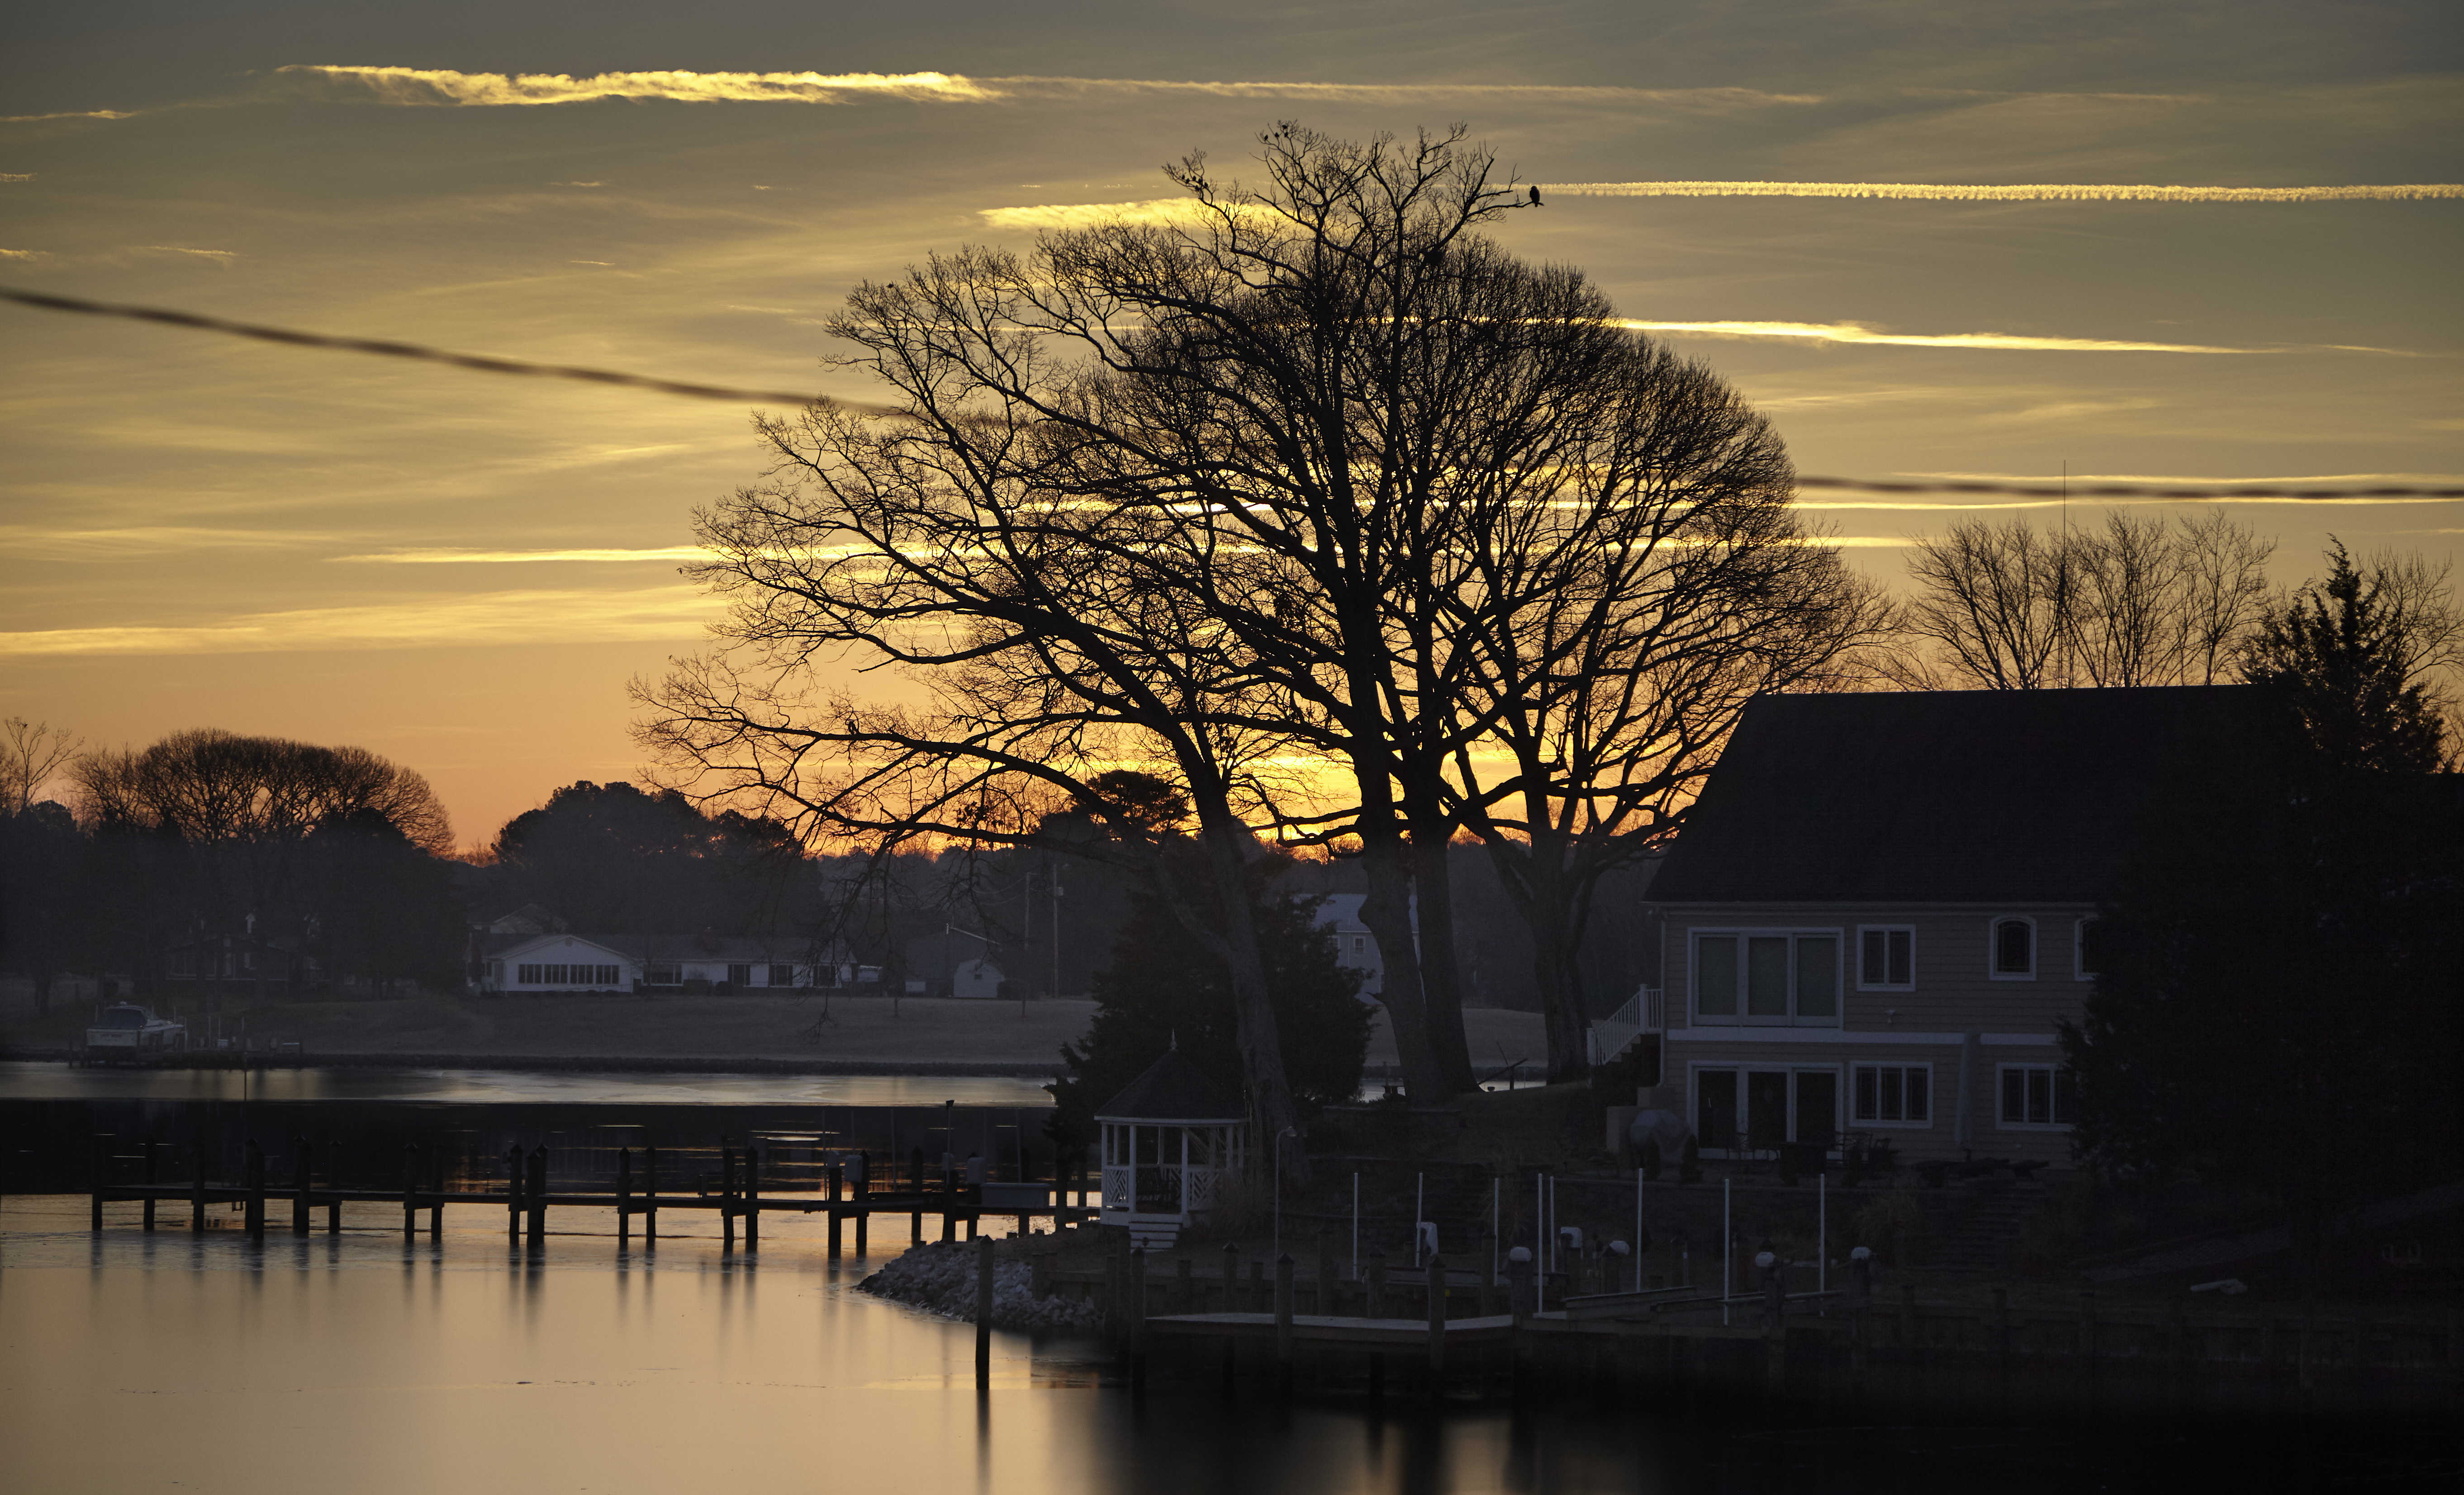
I should have said that I am trying to remove the power line from a complex background. I have a shot where the power line goes in from of a large oak tree with bare branches. I tried the inpainting approach and it left residual marks where the wires were in from to the tree. I tried to upload the image (13.8mb, JPEG) that I am working on, but I keep getting the error message: "Upload failed, There was a problem processing the uploaded file. -200" -
Removal of Power lines
Big_Stan replied to Big_Stan's topic in Pre-V2 Archive of Desktop Questions (macOS and Windows)
It looks like a good technique to remove the power line from complex background, such as trees. -
I found this Photoshop tutorial that uses the pen tool to create a path in order to facilitate power line removal: Remove Power Lines From Photos Simply follow these steps: Using the Pen tool, create a path that follows the powerline you want to remove. Then select the Spot Healing Brush tool and click on the Content-Aware option in the Options Bar. Change the brush size to about twice the width of the wire and in the Paths panel (Window > Paths), go to the fly-out menu (four-line icon on the top right) and choose “Stroke Path” and select the Spot Healing Brush from the drop down. This will stroke the path and remove the power lines! Watch the video tutorial here: https://photoshoptrainingchannel.com/remove-power-lines/ Is this doable in Affinity?
-
John, Thank you, not exactly what I wanted to hear. Never had that problem with CS 6. I guess that in spite of all my wishes to abandon Adobe, if I want to continue to use Viveza, I am condemned to use it with Photoshop . I feel like the subject in the old Kingston Trio song about "Charlie on the MTA" Stan
-
When I open an image in AP the color looks normal (see image 1). When I use the Viveza 2 plug-in, the image (as seen on the screen, has a purple cast, see image 2). When I hover the mouse over the image, it appears purple in the loupe for a split-second and then "flips" to normal color, but still shows purple on the screen. The adjustment sliders work, but the image is still purple. When I click "OK", the image returns to the normal coloration with the Viveza adjustments.
-
My AF Plug-ins vanished
Big_Stan replied to Big_Stan's topic in Pre-V2 Archive of Desktop Questions (macOS and Windows)
Nope, I do not have a Beta, just using the retail version. It is getting weirder, I was finally able to get the plug-ins back, (I had to shut down and then restart, reload the plug-ins and then restart again) however, now NIK says my trial has expired. NIK works perfectly in CS6, just refuses to work in AP. I have owned NIK for years (even before Google bought them). -
Up until today, I have been successfully using Noiseware, Topaz, et al plug-ins with AF 1.6.6 and they suddenly vanished. How can I get them reloaded? Mac Pro, High Sierra 10.3.2, 10 GB Ram