Feestenpateen
-
Posts
7 -
Joined
-
Last visited
-
Adobe Colour Space v sRGB
Feestenpateen replied to Woad V.'s topic in Pre-V2 Archive of Desktop Questions (macOS and Windows)
"I Love Ya", "Intrinity", "Something Magic".. -
 Feestenpateen reacted to a post in a topic:
Canon R6 Mk ii RAW Files Issue
Feestenpateen reacted to a post in a topic:
Canon R6 Mk ii RAW Files Issue
-
 Greg Spinks reacted to a post in a topic:
Tool Icon Size—Need to Enlarge
Greg Spinks reacted to a post in a topic:
Tool Icon Size—Need to Enlarge
-
Hi, haven't seen this come across yet while looking for it. It's great that you could set the background for a new document to transparent. However, sometimes at night i start up the program with the best intentions. The rest of my desktop is already 'set to' night mode/dark mode (The OS, the browsers etc.). But then i startup the program and *BAM*. Sometimes i wonder if it wasn't really MIB passing by to clear my mind. Anyway, would be a great favour if the new document file would also have a little checkbox for the night users. Thanks in advance!

-
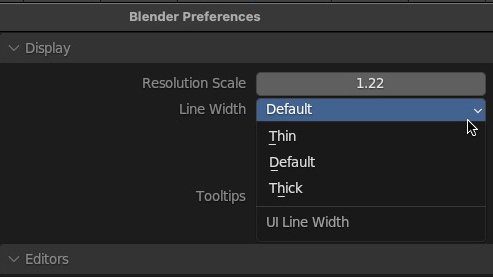
I do want to reply on this one. Since i have been working with Blender for a pretty decent time. And i actually love the way it can be adjusted there to your own preferences. Maybe that's a good example of free software on which the UI scale can be adjusted (while staying sharp). Also, maybe it's a good example overall. Note: The image i use as a example is scaled down, so it looks rather pixelated.
-
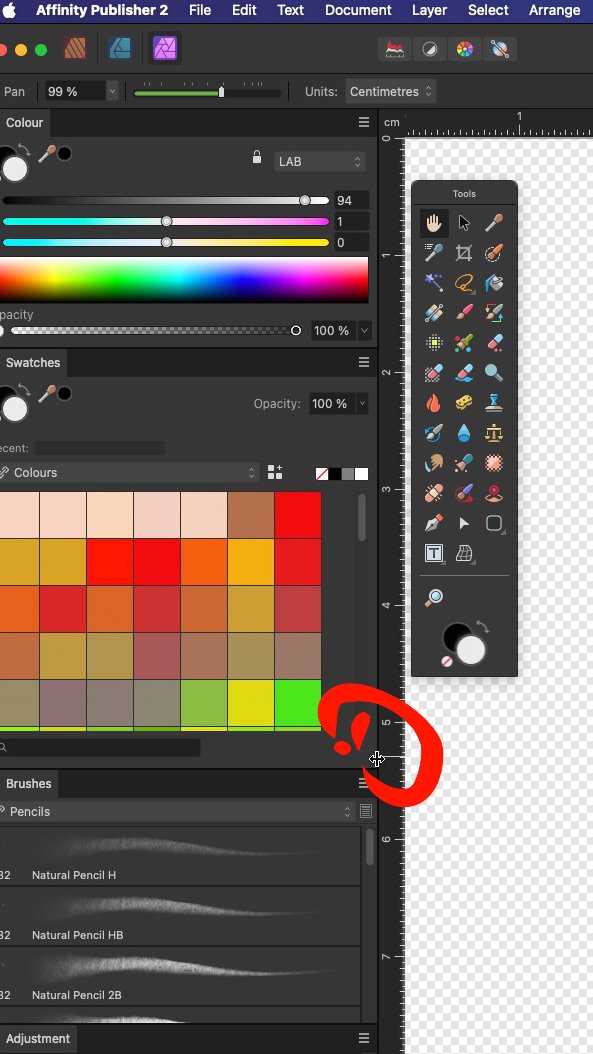
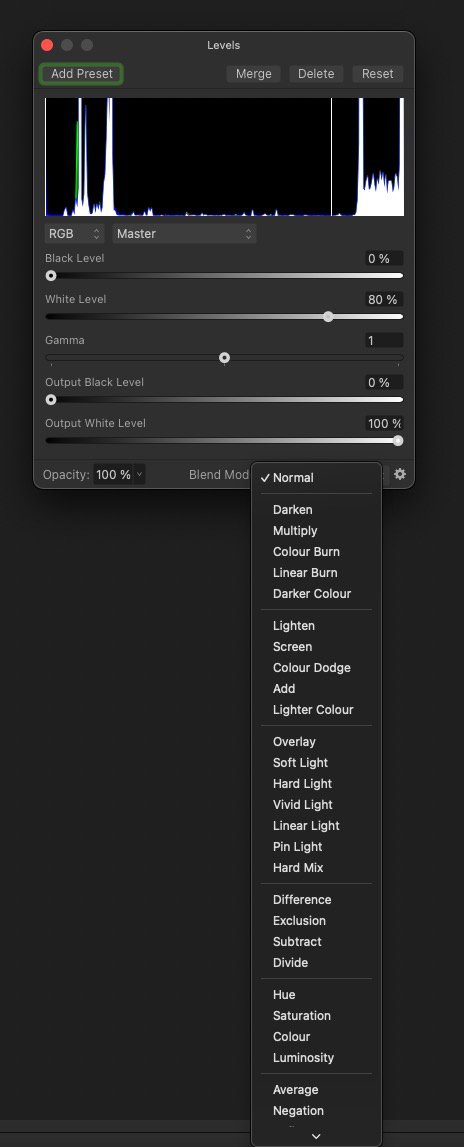
AffinityV2 on Mac. Would also like to reply on this matter. Same as locking the User Interface Design. Now please explain me if i got this wrong. But it seems to me Publisher is like the "upper layer" software, since you can easily switch between the different programs. Now i have set my preferences to my likings as a studio preset. Now it already kinda annoyed me that i had to do this 3 times over (publisher, designer and photo) to actually get the same presets switching from one to the other (as well as the same size with left and right studio. Making it sort of *flicker* while changing different programs). But then i take notice, when i actually load a file to only one specific program, all the presets don't seem to be there (probably cause i have only set them up in Publisher, but still...). I expect when i switch from one program to the other (within publisher), that it would have the same presets (and it does now, after making a lot of changes). But i also expect, while setting those presets, that actually loading other software (designer/photo) separately would still give me the same studio presets. Maybe someone can explain to me what the benefit would be of using the three software separately or as one. Would love to hear it! Other thing i came to notice, and this actually happened every time i use the program. I accidentally click somewhere and then i make changes to the UI. As en example, sometimes i want to make a bit more room and make the left (or right) studio a bit less wider. However, cause the UI is really thin i sometimes mis click and then i already unload a part of the left or right studio making it float. Which i didn't want. I'm a pen tablet user with the setting set to quite sensitive. But every time, on and on, i just float some part of the studio. But then putting it back again, it loads up next to the others again, not going back to the studio preset i wanted and which i never wanted to change. On top of that, when i do want them to restore them in my preferred order, they change back to some sort of default shape in which i don't like them. Again trying to adjust height or size, with again making the window float by mis clicking it. Etc. Since i saved the studio presets the way i want to work with them, could you please add a option to lock them, so you can actually not make them float, but are able to change them in size. and while we are at it, when i dock the tools, they are at the most left of the screen. But since the UI can be a bit small sometimes, or the line width in between a 'bit narrow', could it also be made possible i lock the Tools on the right side of the left studio (or visa versa)? That would be a huge + as well. But for now a lock on the UI would be off huge preferences. Pretty please! One more; when you open up a adjustment, the pop-up screen always seems to load on the bottom off the screen. That shouldn't be a problem when you want tot change the Blend Mode, but mostly, the menu that pops up actually goes down and you need to 'scroll' to see all of them. But when it's really really low, the menu pops up. Making it visible and clear just by one click. Maybe when the screen isn't really low, but still low, it would be able to make the Blend Modes pop-up already, instead of still down (and making you need to scroll). Now i don't want to be all negative and such, and i really like the software to work with, but there are just several UI preferences that i also see other people ask for. And which, in my opinion, would make sense to actually add or change to the software itself. Anyway, thank you for even making this (V1 and V2) and making it able to not get this really expensive subscription to some software i don't even want. *cough* A...E *cough*. I really do appreciate your work! Thanks for all in advance! Have a nice day as well!
-
Dan C reacted to a post in a topic:
Bugs/Omissions - (1) No Active/Disabled Indicator on Force Pressure (2) No Caps Lock for Brush Crosshairs
-
This bug seems to still exist in light mode. In dark mode it works as expected.
-
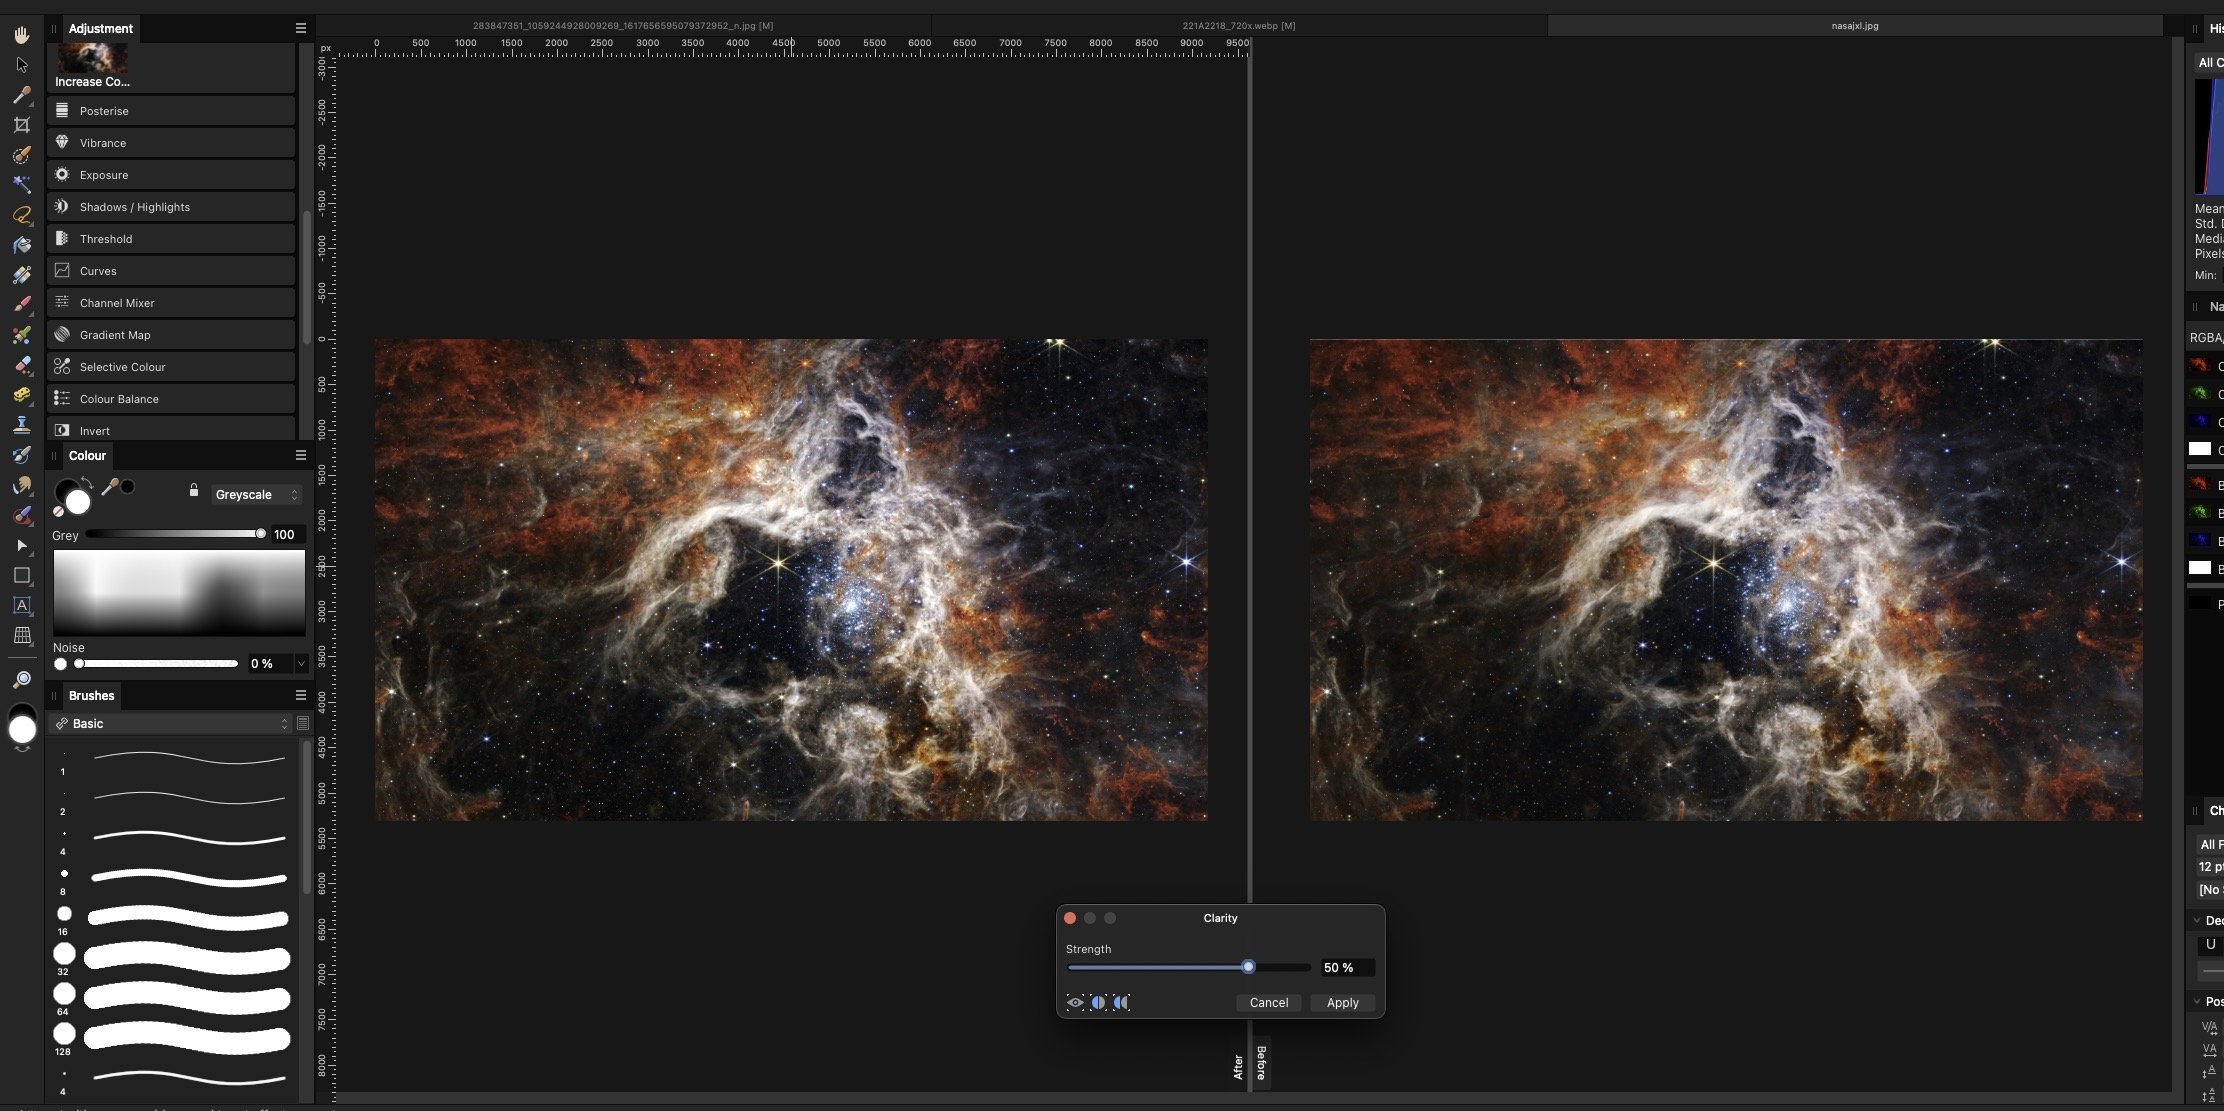
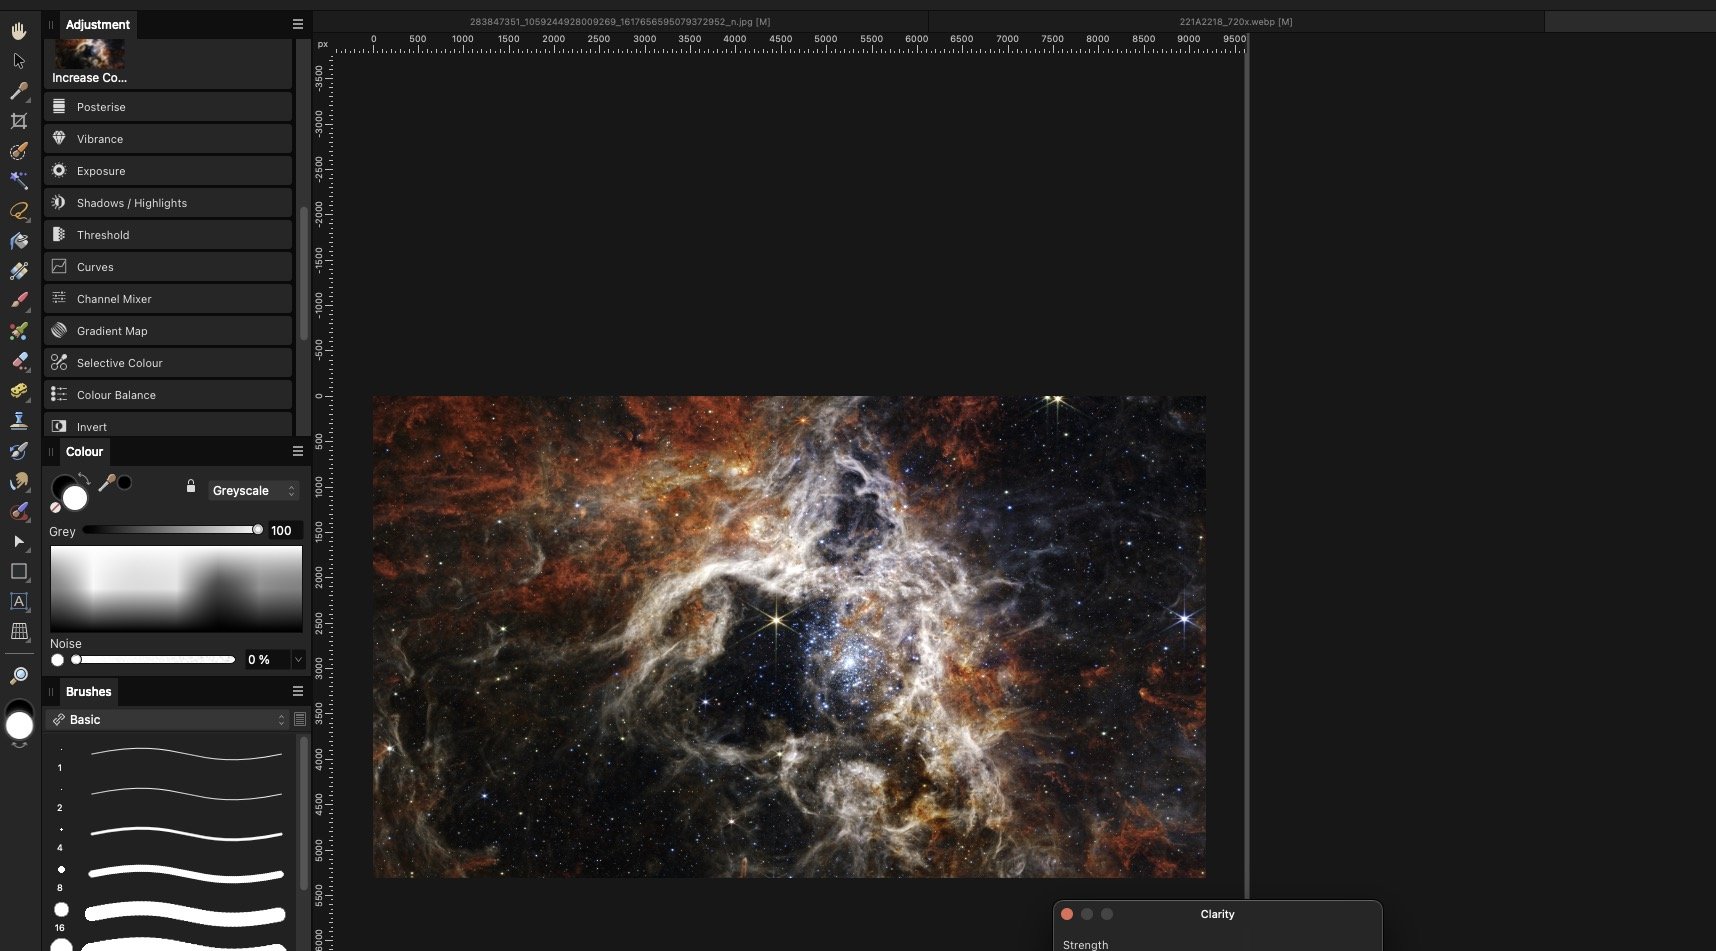
Thanks for your reply Paul! It wasn't actually what i meant, but still it is interesting to watch, i might learn a thing or two from it. And I see that I posted my bug report/request a bit too soon since i wasn't actually done typing. Also the screenshots weren't attached yet. But because those are now attached you might understand what i meant by saying so. Also in the bottom middle you can see the 'after' and 'before' where i was talking about. Making it a bit weird of reading my photo's from right to left instead from left to right, cause in this cause in this case the left one will be the 'final' result. Last but not least i would like to ask you Paul; "WHO?!" 🚗
-
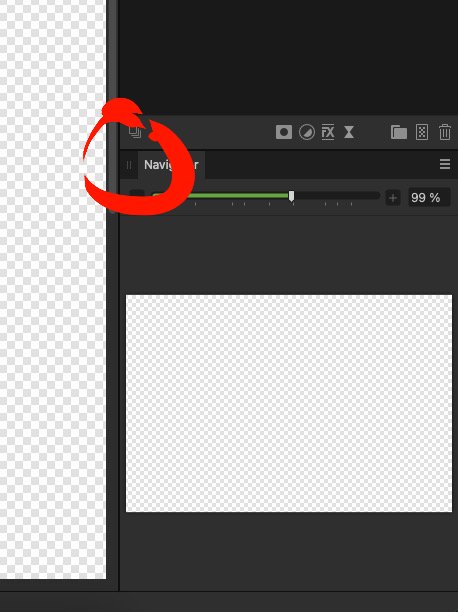
Hello, I'm new to the forum, but not new to the program (except Affinity V2, which has only recently came out). I seem to have found a bug, but i don't think it's really a 'software'-based bug. While looking for a answer/solution to see the mirror view (comparing the two images next to each other while applying a filter) mirrored so it would make sense in my head. I came across quite a lot of topics mentioning cq. kindly asking if this could be implemented. Now I'm not a genius in writing code, nor do i want to say it is easy, but maybe with a bit of explanation from your side (Affinity Serif) on why this is really hard to adjust/add/tweak this and to make this work. It doesn't sound like a very big thing to swap both sides of the UI. Of course it doesn't matter what i think, since that would be 'my opinion'. But by a quick search on the World Wide Web (really like that term, since we are all connected) says that there are round about 2,6 billion people (36% of the world population) use the Latin Script. It is there by the most commonly used script in the world. A bit hard to ignore (then again, it's just mu opinion) and to not make adjustments on that part of the UI. I haven't come across to this before, but i would have had expected from V2 (since it's a better version of version 1.0) that it would actually be better. So i think i may have found a bug there, since it looks like nothing is being done with that subject. Anyway, by that being said and by actually using this function (and after recovering from tweaking my eyes to read from right to left), i came across a actual software bug. And of course by trying to solve this bug and trying to be part of this great community, i thought i do my part of the work and report this bug as good as i can. I think i did quite a great job on the bug mentioned above about reading/watching in Latin script a.k.a reading from left to right. So here's some information on my behalf to help you fix this bug as easy as possible. I'll try to work from the checklist which is stated on the Forum. - Double checked, using the latest version; Affinity Photo 2 2.0.4. - I could reproduce it, and because i didn't want to make a screenshot with the actual photo i was working with i had to reproduce the same situation. I did use another photo of a 'world wide web' to do so. This also applies to new documents being made. As you can see in the photo both images are not really equalled of mirrored. This happens after zooming in a couple of time using the shortkey; ⌘+ (couple of times) , ⌘0. When 0 is only pressed once you will get the screen like my screenshot. But again pressing ⌘0 fixes this at once. You can see that its properly corrected in photo2. Now it could get a little confusing since the one on the right (before, or how the photo was) has a issue and the one on the left (after, and how the photo would become) could be mixed up. But that just depends on what part of the world you were born and with what script you were grown up with. - macOS 13.2 (22d49) - the before and afters are already explained. - Adding photo to Affinity Photo V2. Go to Filters > Sharpen > Clarity... > Click on Mirror view > Zoom in using ⌘+ > Wanting to see to see full picture using hotkey ⌘0. Pressing ⌘0 again seems like a short term fix. Also, don't take this all to critical, but take it as a good amount of feedback off seeking for the obvious. - Screenshots coming ride up! - Not using any unusual hardware. - As far as i know, it used to work that both images were equally mirrored. But with the 'human' bug of not being able to swap left from right in mirror view i can't recall on previous versions. But by seeing several similar request on a longer period off time when V1 was still the stable and functioning at that time. It seems like it has been implemented for quite some time now. I don't have screenshots off this, but i believe that the furterst i saw back was from 2015. But the most recent are from round about 2020/21/22. Save the best for the last, but i do also want to thank you to make this program possible for a one time payment instead way (my opinion again) too expensive software programs.