Le0nard
Members-
Posts
6 -
Joined
-
Last visited
Recent Profile Visitors
The recent visitors block is disabled and is not being shown to other users.
-
 NotMyFault reacted to a post in a topic:
Convert photo to image with round pixels (limited color palette, resp. gray tones)
-
 Le0nard reacted to a post in a topic:
Convert photo to image with round pixels (limited color palette, resp. gray tones)
-
 Le0nard reacted to a post in a topic:
Convert photo to image with round pixels (limited color palette, resp. gray tones)
-
 Le0nard reacted to a post in a topic:
Convert photo to image with round pixels (limited color palette, resp. gray tones)
-
 Le0nard reacted to a post in a topic:
Convert photo to image with round pixels (limited color palette, resp. gray tones)
-
 Le0nard reacted to a post in a topic:
Convert photo to image with round pixels (limited color palette, resp. gray tones)
-
 Le0nard reacted to a post in a topic:
Convert photo to image with round pixels (limited color palette, resp. gray tones)
-
 Le0nard reacted to a post in a topic:
Convert photo to image with round pixels (limited color palette, resp. gray tones)
-
 Le0nard reacted to a post in a topic:
Convert photo to image with round pixels (limited color palette, resp. gray tones)
-
 Le0nard reacted to a post in a topic:
Convert photo to image with round pixels (limited color palette, resp. gray tones)
-
 Le0nard reacted to a post in a topic:
Convert photo to image with round pixels (limited color palette, resp. gray tones)
-
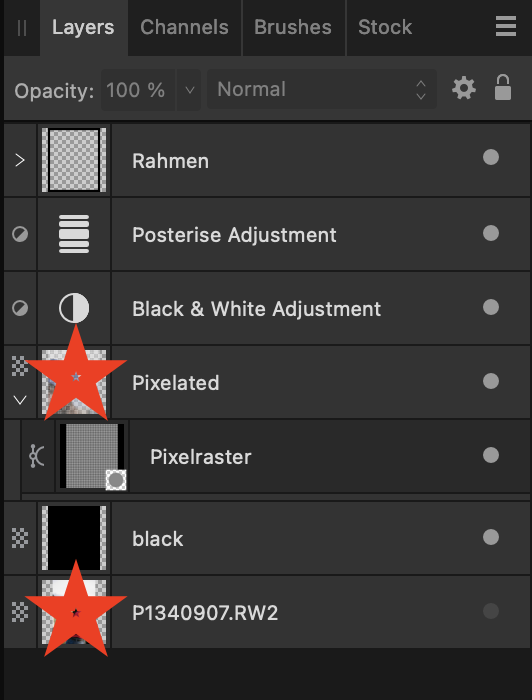
English version below ----------------------------------------------------- Hallo zurück und vielen Dank für die vielfache Beschäftigung mit meiner Frage! Da bin ich fast gerührt. Ideen ändern sich, für die Transparenz und das Verständnis eine kurze Erklärung, da es um ein Kunstwerk geht, bitte ich um Verständnis, wenn ich mich teilweise diskret halte. @NotMyFault Tatsächlich wird nur die erste Datei benötigt, da die physische Ableitung auf Basis dieser - allerdings handwerklich - geschieht. Der Transfer erfolgt durch eine Projektion auf das finale Trägermaterial. Daher auch meine Frage nach der Umfärbung zur besseren Visualisierung. Ich brauche eine separate Projektion je Grauton, da diese (es sind 20 vorhanden) mit bloßem Auge schwer zu unterscheiden sind. Da aus der Datei nicht direkt das Werk resultiert sondern rein der Orientierung dient, sind kleinere Schönheitsfehler redundant. Für mein Rendering bin ich nun folgendermaßen vorgegangen: - "pixelate" mit Wert 8 (später 1,606 cm im Durchmesser) - Dokument via "resize canvas" auf das spätere Maß von 450 x 367 cm skaliert. - Ausgangsfoto auf den gewünschten Ausschnitt groß gezogen. - "black and white adjustment" - "posterise adjustment" mit dem Wert 20 - rectangle tool: Rahmen aus vier Flächen geschaffen (je 13 cm) und gruppiert. - rectangle tool: Kreis mit den Maßen der Pixelfläche erstellt und auf diesen positioniert. - Cmd C + Cmd J zur Vervielfältigung und Anordnung des Dots auf meinen Pixelflächen. (Anmerkung 1) - "rasterize" aller Dots zu einem Pixelraster - rectangle tool: schwarze Fläche als untere Ebene angelegt - damit die Aussparungen später schwarz sind. - Pixelraster auf das Motiv maskiert. LG Leonard ----------------------------------------------------- Hello back and thank you for the multiple occupation with my question! There I am almost touched. Ideas change, for transparency and understanding a brief explanation, since it is about a work of art, I ask for understanding if I keep partly discreet. @NotMyFault In fact, only the first file is needed, since the physical derivation is done on the basis of it - albeit by hand. The transfer is done by a projection onto the final substrate. Hence my question about recoloring for better visualization. I need a separate projection for each shade of gray, since these (there are 20) are difficult to distinguish with the naked eye. Since the file does not directly result in the work but is purely for orientation, minor blemishes are redundant. For my rendering I now proceeded as follows: - "pixelate" with value 8 (later 1.606 cm in diameter) - Document via "resize canvas" scaled to the later dimension of 450 x 367 cm. - The original photo was enlarged to the desired size. - black and white adjustment - posterise adjustment" with the value 20 - rectangle tool: frame created from four areas (13 cm each) and grouped. - rectangle tool: circle created with the dimensions of the pixel area and positioned on it. - Cmd C + Cmd J to duplicate and arrange the dot on my pixel faces. (Note 1) - "rasterize" all dots to a pixel raster - rectangle tool: black area created as bottom layer - so that the cutouts are black later. - Pixel grid masked to the subject. Greetings, Leonard ----------------------------------------------------- --> Translated with www.DeepL.com/Translator (free version)
-
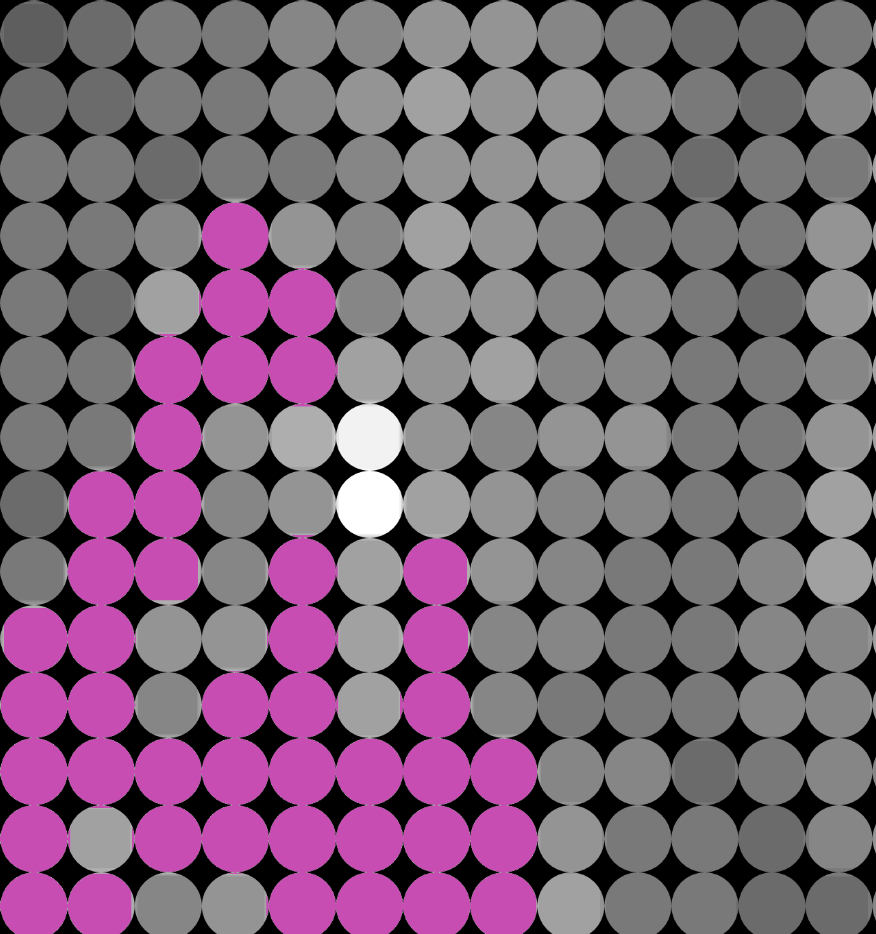
Hello, my question seems to be easy, but I didn't find any way to do it... Imagine having a pixelated image in affinity photo which is reduced to 20 grey tones (also look at my other topic here). Now you want to select all "pixels/color blocks" of one similar tone and change the color. How is this possible? Background of my question is that I need to create 20 new documents, each with the focus on one shade of grey (I want to focus this shade by color it pink). Hope you can understand! Thank you so much and greetings from Germany, Leonard
-
In this case I will have vector-circles which are really "round"? Because I did this step... ... with only 8 pixels and they're not really round: But in general I did everything right? Would be great if I could do it like vectors which are perfect round... OT: My Mac (MacBook Pro - 14", 2021 - M1 Pro - 16 GB - Ventura 13.0.1) had problems by doing the duplicate part. My solution was to create groups and rasterize blockwise. But is this normal? I mean these are only some pixels (well, each is a layer) and my MacBook is NEW.
-
 Lisbon reacted to a post in a topic:
Convert photo to image with round pixels (limited color palette, resp. gray tones)
-
 h_d reacted to a post in a topic:
Convert photo to image with round pixels (limited color palette, resp. gray tones)
-
First of all, thank you @Old Bruce, @walt.farrell, @h_d, @Lisbon so much for your answers! @h_d This looks also nice but isn't exactly what I'm searching for! But maybe I can use it another time! 🙏🏽 @Lisbon Wow, THAT'S IT. Absolutely. This looks actually great. I'm too busy this afternoon but I will try all these steps tomorrow. Thank you also for sharing these helpful videos! Because I really need to advance with my affinity knowledge and skills.. I will share my further experiences with my project and I'm sure asking for more help! Leonard
-
Hello, my name is Leonard, I am new in the forum and happy to be part of the international community here. I am from Germany and I am studying arts. For an art project, I would like to bring a photo to a certain pixel count. The analog artwork should later be 5 meters high and 3.696 meters wide, thus corresponding to an aspect ratio of about 3:4. As each pixel on the wall later measures 0.8 cm, this corresponds to the dimensions of 462.5 px x 625 px. So far, I've loaded my photo into Affinity Photo, converted it to BW, and reduced the document size to match my pixel count. 1. But now I want to reduce the color range as reasonably as possible to a total of 10-15 reasonable shades of gray. What is the best way to do that? And maybe this color range reduction makes sense BEFORE the pixel count reduction (where to get the better result)? 2. and for the visualization of the project the single pixels (will be put together later similar to a puzzle) should be "made" round. Imagine it like a mosaic with round tiles. The background, which looks through between the round pixels, should be black or gray at the end. (I suppose I should create a new document (with 3.7 meters x 5 meters) and scale the low-pixel photo large. So that I can then create a new layer "over" the image that "visualizes" the square pixels as round. So the new layer would be a grid with the gray background and transparent holes. Model: What approach do you recommend for me? I'm sorry, unfortunately I don't know much about it yet. I am new to using Affinity Photo. Thank you so much! Leonard ------------------------------------ German version: Für ein Kunstprojekt würde ich gerne ein Foto auf eine bestimmte Pixelanzahl bringen. Das analoge Kunstwerk soll später 5 Meter hoch sein und 3,696 Meter breit, also einem Seitenverhältnis von etwa 3:4 entsprechen. Da jeder Pixel an der Wand später 0,8 cm misst entspricht das den Maßen von 462,5 px x 625 px. Bislang habe ich also mein Foto in Affinity Foto geladen, in BW umgewandelt und die Dokumentgröße entsprechend meiner Pixelanzahl reduziert. 1. Ich möchte nun aber möglichst sinnvoll die Farbrange auf insgesamt 10-15 sinnvolle Grautöne reduzieren. Wie mache ich das am besten? Und vielleicht macht diese Farbton-Reduzierung auch bereits VOR der Pixelanzahl-Reduzierung Sinn (wo kann man das bessere Ergebnis erzielen)? 2. Und zur Visualisierung des Projektes sollen die einzelnen Pixel (werden später analog ähnlich wie ein Puzzle gesteckt) rund "gemacht" werden. Man stelle sich das vor wie ein Mosaik mit runden Fliesen. Der Hintergrund, der jeweils dann zwischen den runden Pixeln durchschaut soll am Ende schwarz oder grau sein. (Ich nehme an, ich sollte ein neues Dokument (mit 3,7 Meter x 5 Meter) anlegen und das niedrigpixelige Foto groß skalieren. Sodass ich im Anschluss eine neue Ebene "über" das Bild erstellen kann, der die quadratischen Pixel "rund visualisiert". Die neue Ebene wäre also ein Raster mit dem grauen Hintergrund und transparenten Löchern. Modell: (siehe oben) Welche Vorgehensweise empfehlt ihr mir? Es tut mir Leid, leider kenne ich mich noch nicht so sehr aus. Ich bin neu im Umgang mit Affinity Photo. Vielen Dank! Leonard


