SixSphinx
-
Posts
11 -
Joined
-
Last visited
-
 SixSphinx reacted to a post in a topic:
Affinity is joining the Canva family. RIP ?
SixSphinx reacted to a post in a topic:
Affinity is joining the Canva family. RIP ?
-
SixSphinx reacted to a post in a topic:
Affinity is joining the Canva family. RIP ?
-
SixSphinx reacted to a post in a topic:
Affinity is joining the Canva family. RIP ?
-
SixSphinx reacted to a post in a topic:
Affinity is joining the Canva family. RIP ?
-
SixSphinx reacted to a post in a topic:
Affinity is joining the Canva family. RIP ?
-
SixSphinx reacted to a post in a topic:
Affinity is joining the Canva family. RIP ?
-
 SixSphinx reacted to a post in a topic:
Affinity is joining the Canva family. RIP ?
SixSphinx reacted to a post in a topic:
Affinity is joining the Canva family. RIP ?
-
Many thanks to both of you! It is a big help to have a good workaround and to know that a fix is coming eventually.
-
SixSphinx reacted to a post in a topic:
Bitmap fill style is distorted when applying to a shape with different aspect ratio
-
SixSphinx reacted to a post in a topic:
Bitmap fill style is distorted when applying to a shape with different aspect ratio
-
SixSphinx reacted to a post in a topic:
Bitmap fill style is distorted when applying to a shape with different aspect ratio
-
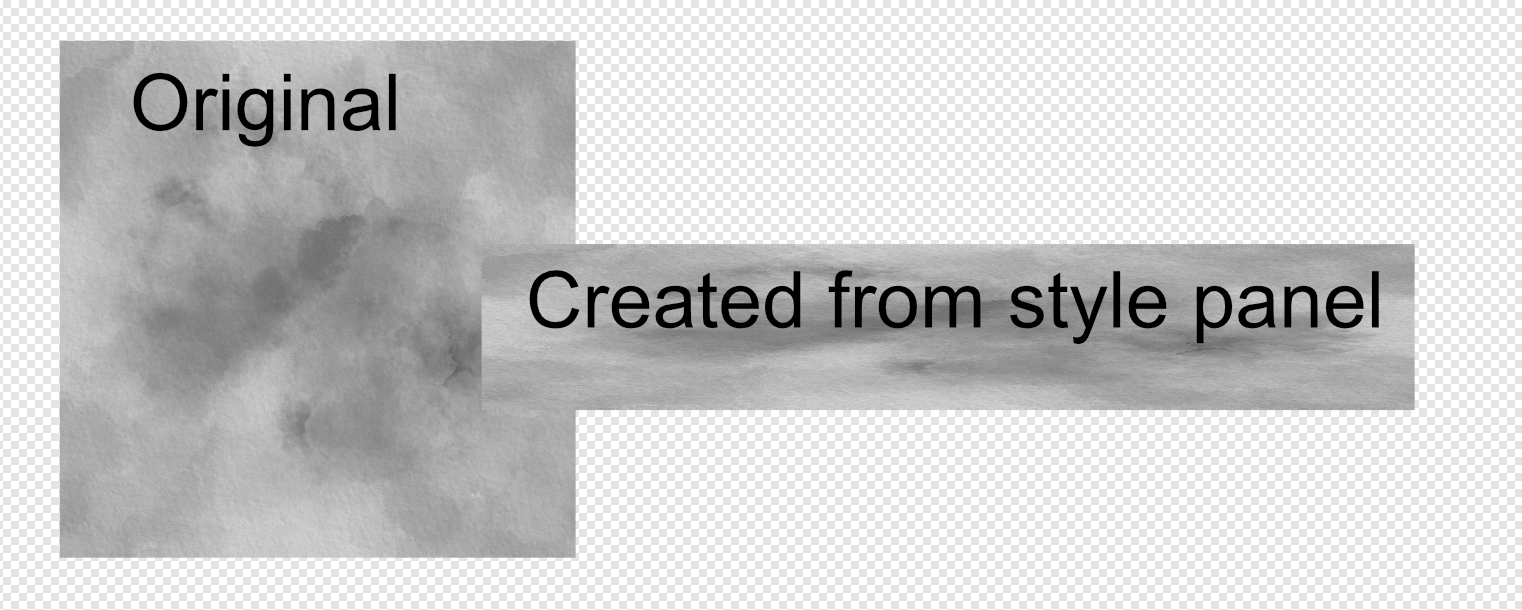
Thanks for replying! I'm sorry, it's not clear from my example, but the texture is seamless and is meant to be scaled down and repeated within some random shape like a bit of text. Otherwise, yes, I'd just clip the bitmap using the shape. I sort of suspected that this might be the current "by design." It's just that I can't think of a single instance where I'd actually want a seamless, repeating bitmap pattern to be distorted like this. So I was hoping there was a setting somewhere that I was missing.
-
I'm trying to create a bitmap fill and save it as a style. But when I try to apply it to a different shape, the aspect ratio of the fill style isn't preserved. Instead, it takes on the aspect ratio of the new object. I've tried locking and unlocking the aspect ratio of the bitmap fill before I create the style, and neither one works. I find that fixing the aspect ratio after the fact is more fiddly than just re-importing the bitmap every single time. So I'm fine with re-importing if that's the best option. What am I missing? File attached, although I'm not sure it'll be useful. Thanks in advance! bmpfill.afdesign

-
walt.farrell reacted to a post in a topic:
Extent of adjustment layer is automatically set to entire document
-
lepr reacted to a post in a topic:
Extent of adjustment layer is automatically set to entire document
-
This is it. Thank you for your help. Masking the group and not the rectangle is the key. Edit: Actually, thank all of you who replied. I really appreciate it.
-
Yes, thanks for responding. Here's the file. temp.afdesign
-
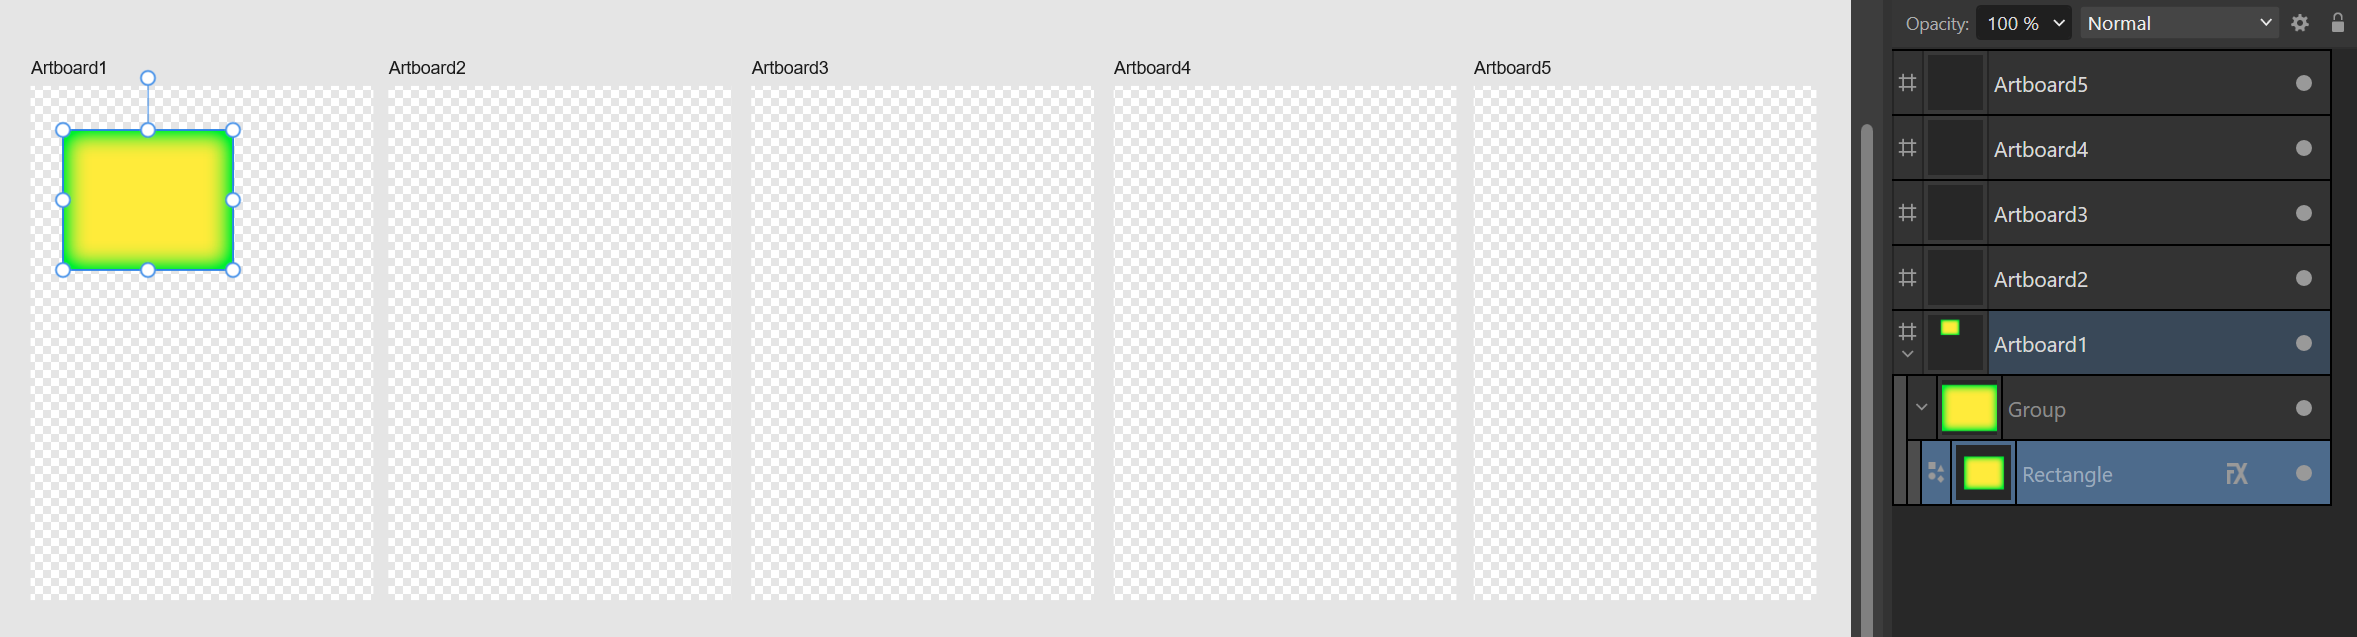
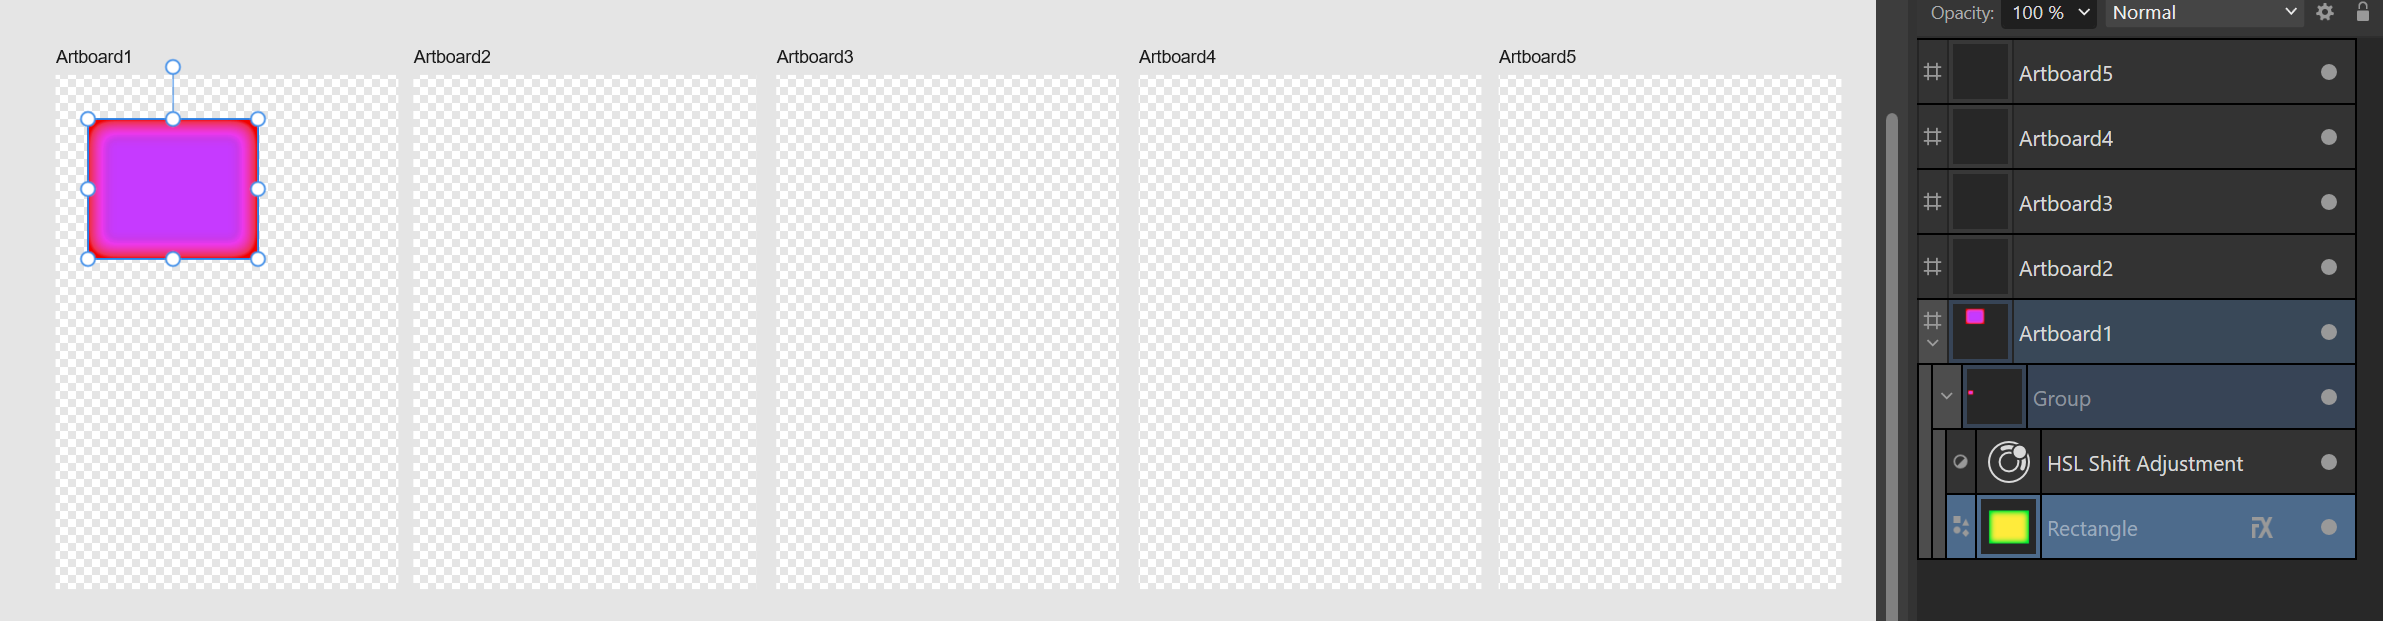
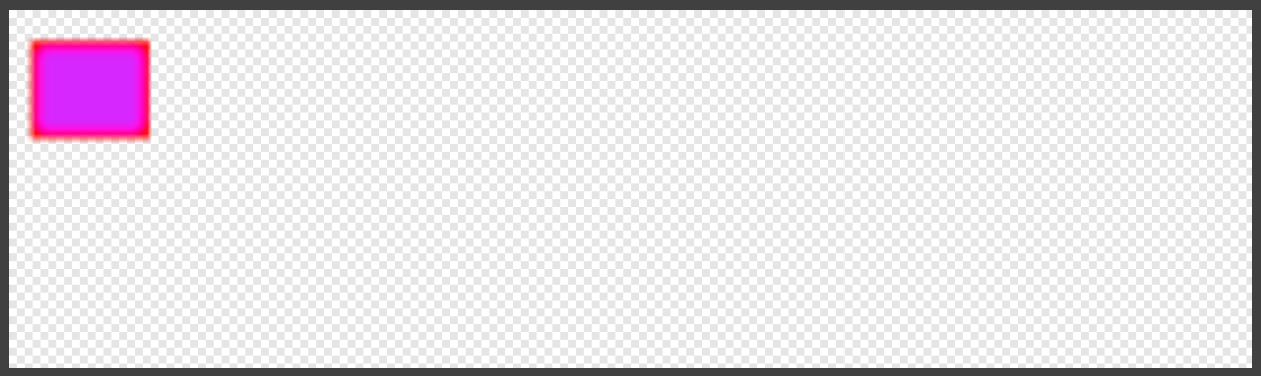
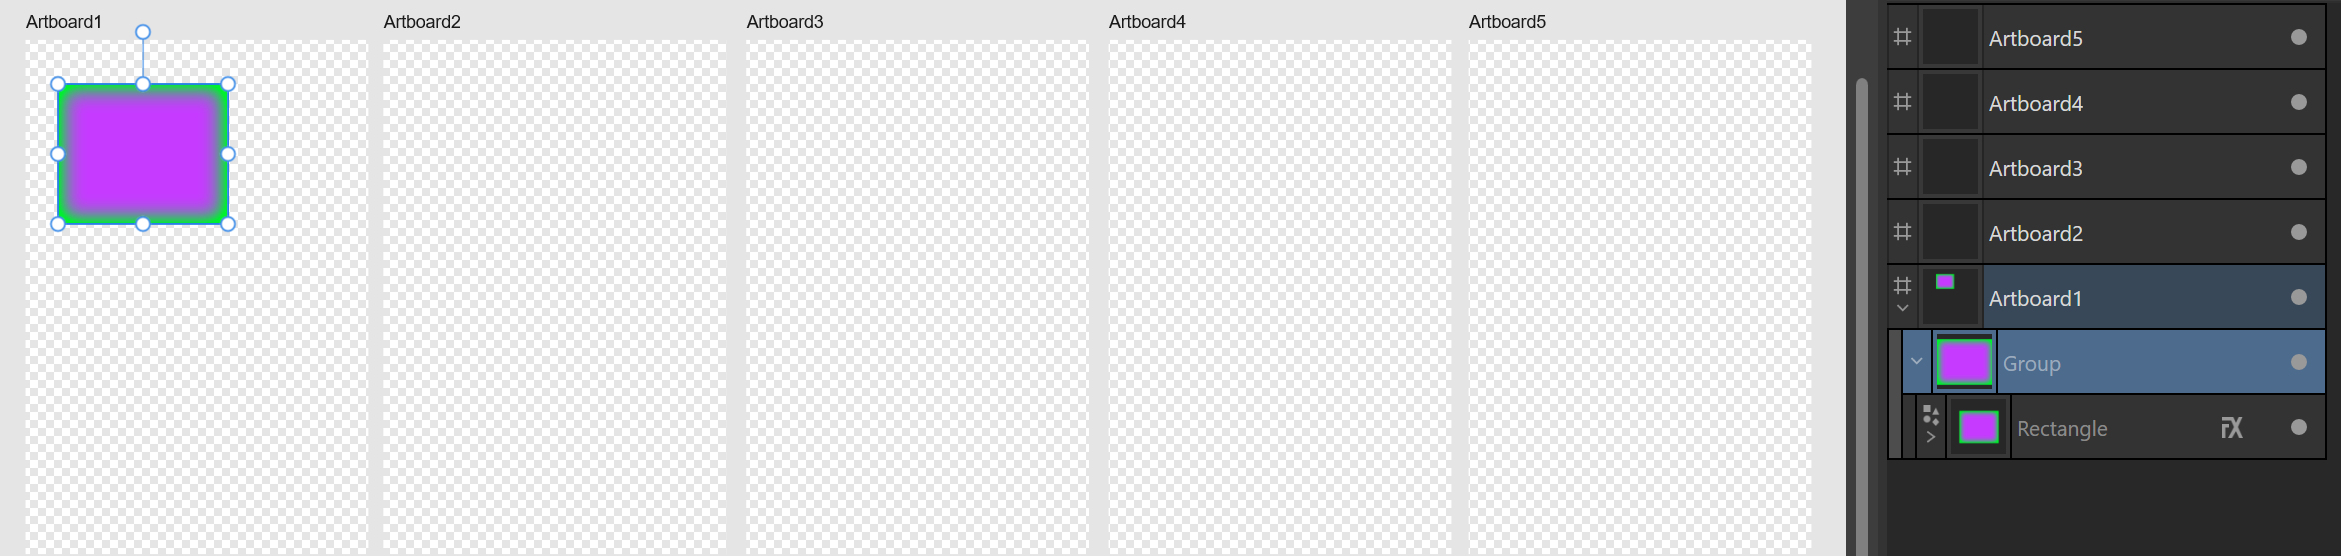
It appears that any adjustment layer or mask is given an extent that covers the entire docment. While this is logical, the extent of the adjustment layer is taken into consideration when exporting "selection only," which is not logical, since the adjustment layer is arbitrarily large. This causes lots of problems, especially when exporting documents, but also in the UI itself. For instance, here's a group with a rectangle that has a layer effect. It's in a document with multiple artboards. Here's the same group with an adjustment layer. The thumbnail of the group is now useless, because for some reason it's trying to show me the extent of the entire document. And here's the result of exporting the group as a "selection only." I then have to open this file in Photo, clip it, and save it again. Nesting the adjustment within the rectangle isn't an option, because then the adjustment doesn't apply to the layer effect. Can someone please help me understand what I'm doing wrong? I usually have to create a second copy of the rectangle just to clip the adjustment layer. But I don't feel like that should be necessary, when the extent of the adjustment layer has no real significance, it's just "large enough to cover everything."
-
Return reacted to a post in a topic:
Adjustment layer within symbol not propagating to outer nested symbols
-
Thank you! You are AWESOME. I hate that drag-to-mask function with a passion, and just when I think I've got it whipped, it trips me up again.
-
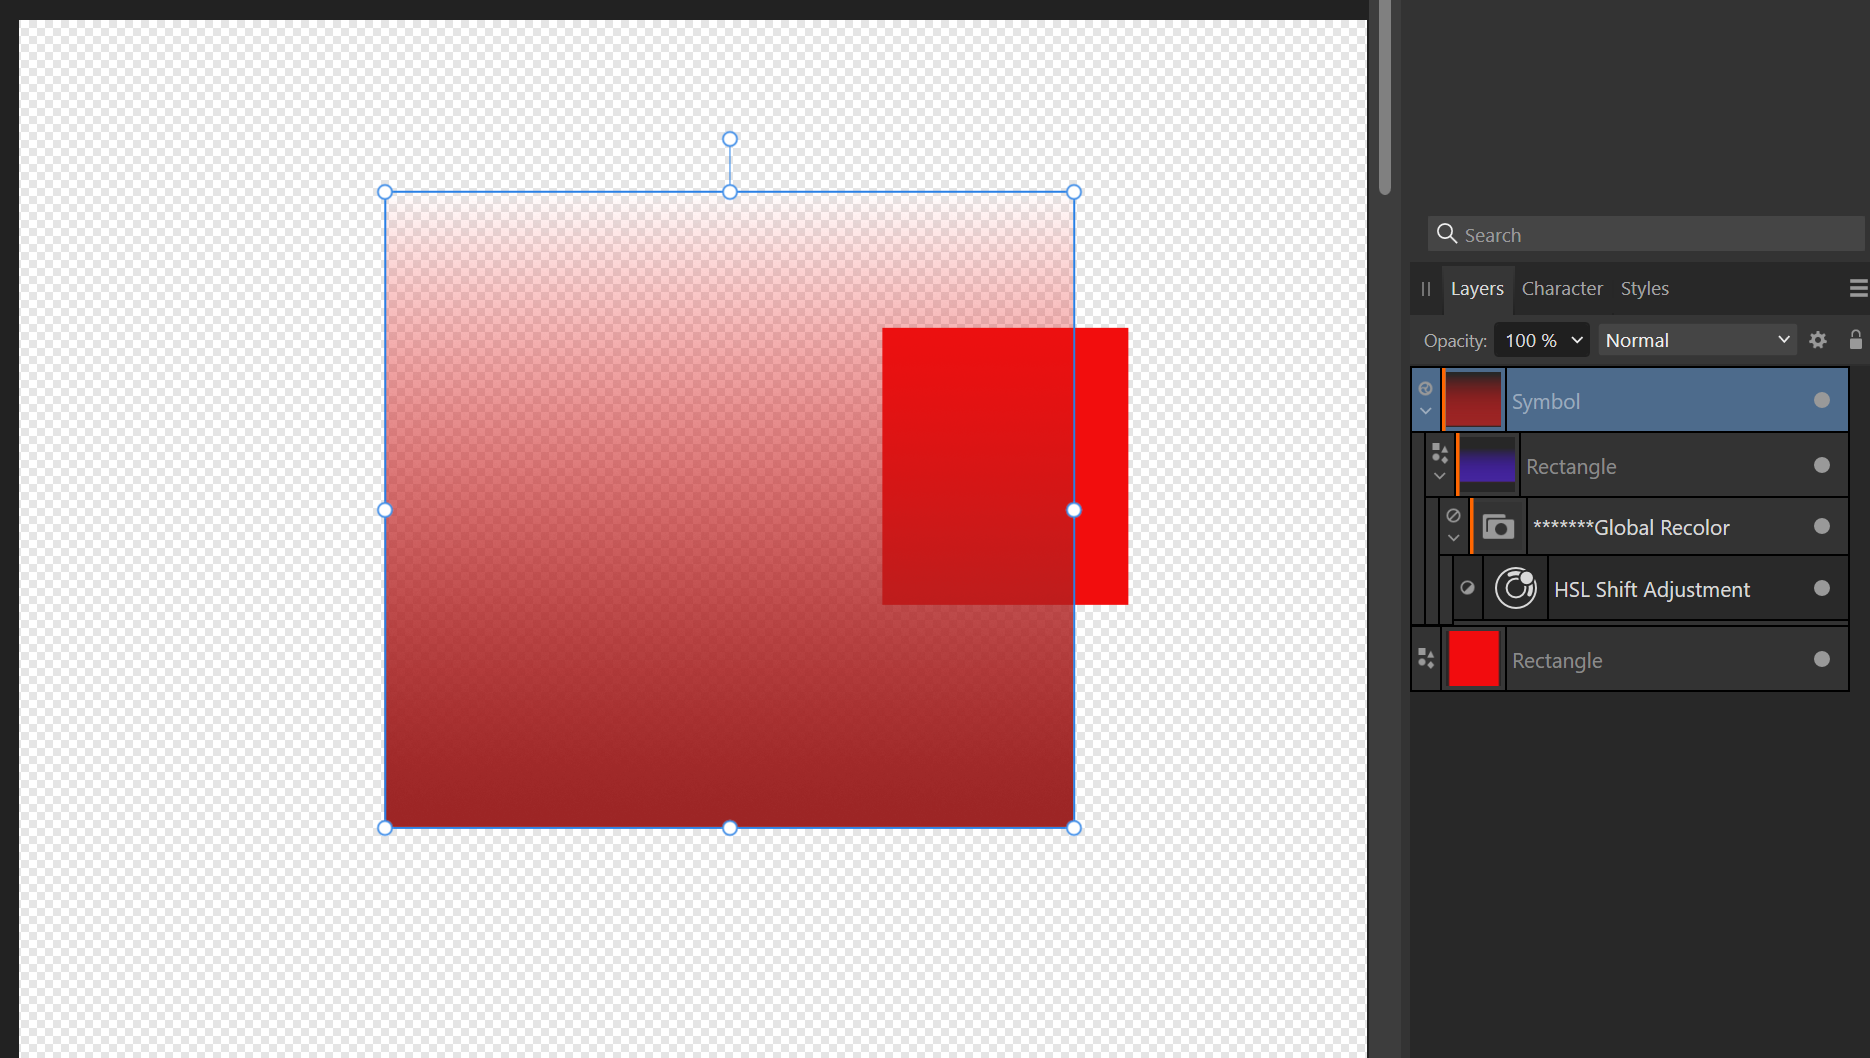
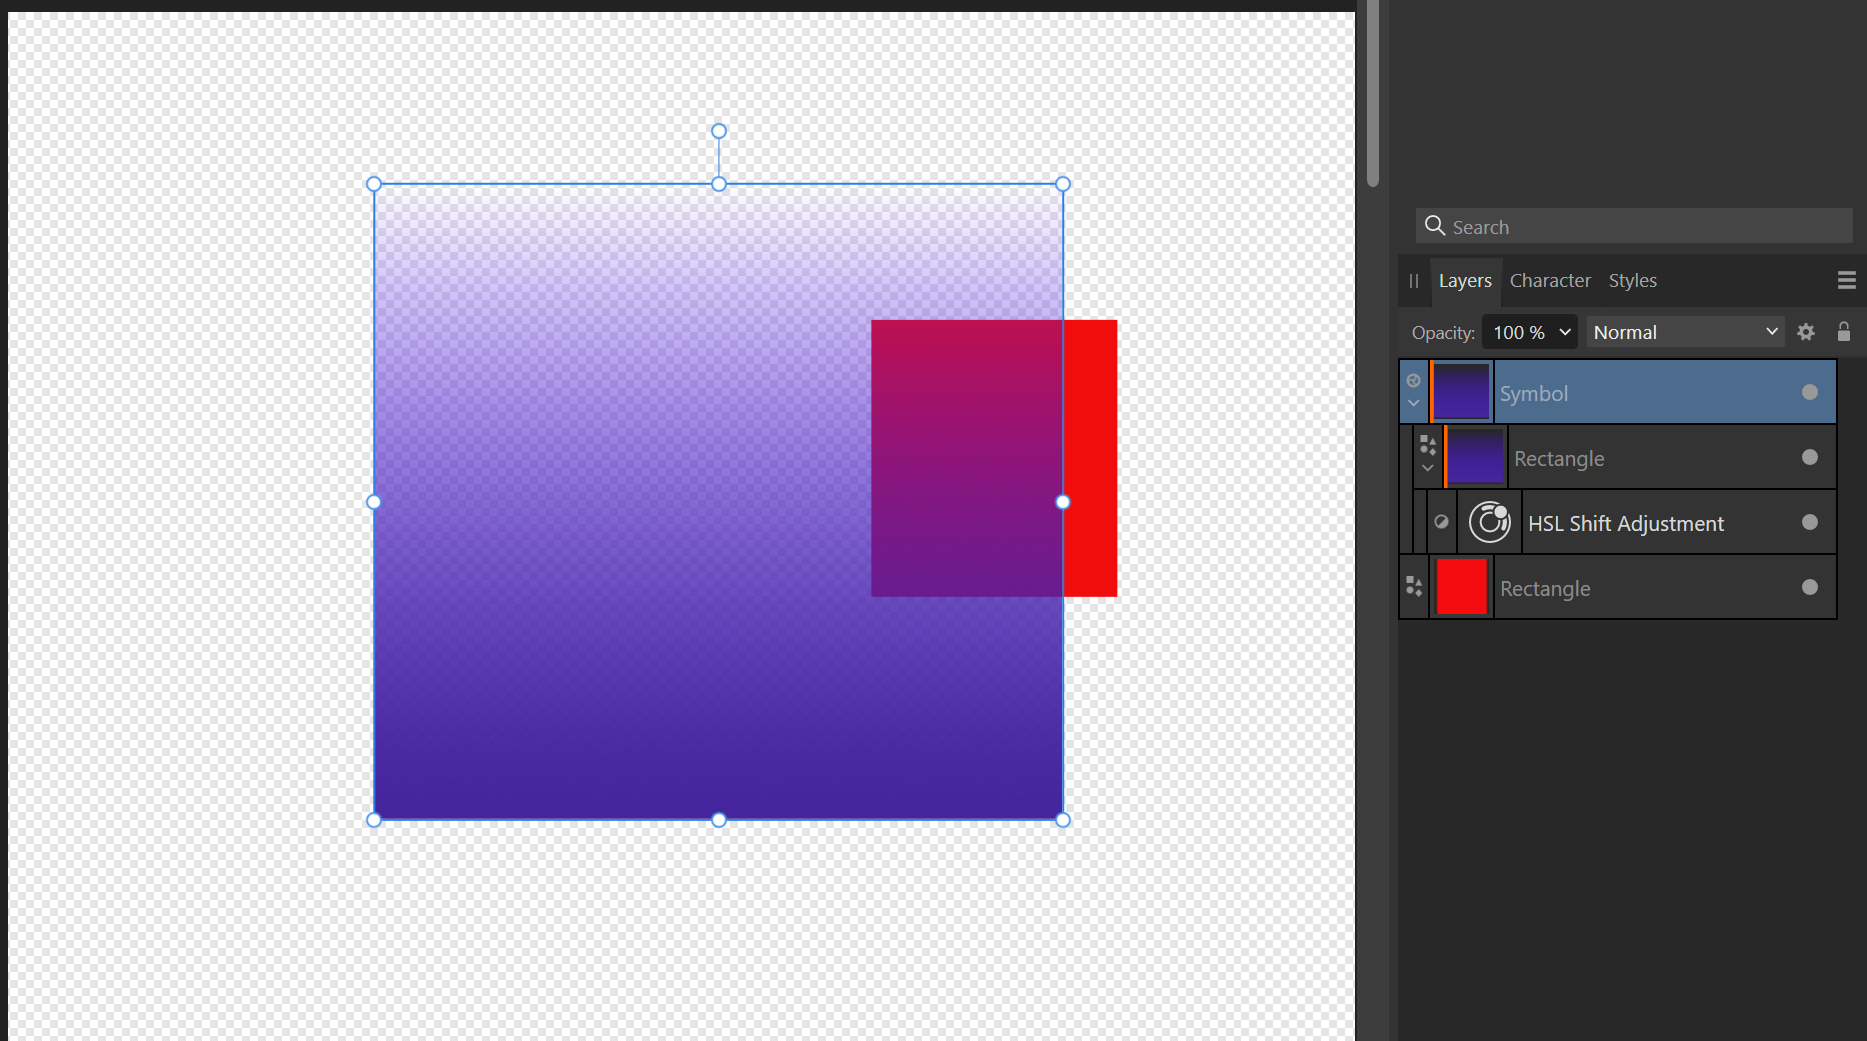
I commonly use an adjustment layer within a symbol to effect a global adjustment to many specific layers on several different artboards at a time. This is a very powerful ability, but I've found that if I try to apply that adjustment to a symbol layer with "normal" blend mode, the adjustment doesn't propagate through to the symbol itself. In the attached file symboltest.afdesign, I have a rectangle with transparent gradient fill. The native color of the rectangle is red, and I want it changed to purple without changing the layers underneath. As you can see, in the first image, the rectangle displays in the layers panel as purple, but the resulting symbol is still red. Both the rectangle and the symbol are in normal blend mode. If I've got something set up wrong, please let me know. It's easy to miss something when I'm nesting symbols, and I'd love it if there's an easy fix or a different method of achieving my ends. Note that in "passthrough" blending mode (second image), although the symbol itself displays properly, the adjustment passes through to the underlying layers, even though it's nested inside the rectangle. I don't think that this is correct behavior, either, when I compare it to the third image, which is how it behaves with a plain adjustment layer. Any help would be appreciated. Outer symbol set to "normal": Outer symbol set to "passthrough" Outer symbol set to "normal" or "passthrough" with a plain adjustment layer (desired effect): symboltest.afdesign
-
That doesn't really fix the problem since I need the parchment texture visible within the selection outline. Thanks though.
-
Thanks for replying. Let me see if I can give some more details. I'd love to have a selection export option that exports all visible layers, clipped by the selected shape (not its bounding box). From the very beginning, this has jumped out to me as an obvious gap in the selection export functionality that seems very possible to fill. In order to get my desired result, in every single artboard of every single file, inside every single shape to be exported, I have to keep an extra copy of the background textures, the overlying adjustment layers, and a layer representing the shape's fill color. If I move or resize one of those shapes, then everything inside the clipping shape has to be manually adjusted. I'd love to know that I'm wrong and that there's a much easier way to do this. To illustrate, here's an example of purple shapes with an overlying HSL adjustment over a textured background. The HSL layer is used to create different color variations. Here are the exports from this file. And here's the file as it has to be set up to get the desired results.
-
I often need to export everything within a certain shape outline, leaving the remainder of the selection area transparent. My options are currently: Selection Area: reproduces all visible layers but fills the entire rectangle around the shape, not leaving anything transparent. Selection Only: exports only the portions of the image within the particular shape, but doesn't export overlying or underlying layers. Desired outcome: exports only the portions of the image within the particular shape, and reproduces all visible layers. My particular use case is: I have wedding invitation designs with textured backgrounds and shapes on top that are blended with the background (usually using Linear Burn or Screen). I need to export both the background and the overlying shapes separately. This is so that my users can delete particular elements of the design if they want different invitation wording. I almost always have multiple color themes, which is one reason that I use multiple adjustment layers. I usually end up having to revisit the file to add color themes or make corrections and re-export. I have about a hundred of these files and counting. As it is, I have to have an extra copy of all the visible layers (overlying adjustment layers, background layers, plus a color overlay layer representing the color fill of the shape itself) clipped within the selected shape. So if I move the shape or resize it, then everything inside is also affected and I have to re-adjust it all. I currently work around some of the extra work by the liberal use of symbols, but that only eliminates about half of the extra work.