Big Swifty
-
Posts
7 -
Joined
-
Last visited
-
 tRoglet reacted to a post in a topic:
360 Images - edge matching
tRoglet reacted to a post in a topic:
360 Images - edge matching
-
CanRau reacted to a post in a topic:
Trouble with 360 Live Projection > Equirectangular Projection
-
Dan C reacted to a post in a topic:
360 Images - edge matching
-
So I tried the suggestion I found elsewhere and it works perfectly. The solution I found is for PS, but it's easy enough to change for AP. Here's a link to the video: The basics are to widen the canvas, make two copies of the widened layer, move one of those copies to the right, the other to the left, merge the three layers, do your global edits, resize the canvas back to it's original size.
- 13 replies
-
- 2
-
-
- panoramas
- equirectangular
- (and 3 more)
-
Thanks for the responses. I'm a bit too busy right now to give that first suggestion a try and also to upload a copy of the image to dropbox, but I will do so later when I have some free time. Before doing those, I will be trying a potential solution I came across last night and will post a photo of that as well. Theoretically it makes sense. The idea being that color corrections are made by using the information from nearby pixels. The left and right edges can only grab this information from pixels that are to the inside of the edges so this is what creates the uneven colorization/seam. By widening the canvas and moving copied layers of the image to both sides, the orignal image's edges now has pixels on both sides from which to grab information. After corrections are made the canvas is shrunk down to it's original width and the ugly, sometimes hard to correct with tools seam is gone.
-
Bumping an old thread because, as suggested, I looked first to see if my problem has been addressed before and this thread is about the same problem I'm having, though it's a bit different. Same issue with the seam when viewing a panorama as a 360°, except instead of having the visible seam in the sky mine are on floors, walls, and ceilings. Solid colors are easy to deal with using the inpainting tool, healing brush, and blur brush. Where I'm having problems is when the seam is located somewhere more 'busy,' such as a tiled floor or where they may be a painting, furniture, or other object on the wall that can't be blended without damaging the image. Is there a way of dealing with this tougher issues when the above mentioned tools don't quite do the job? Maybe create a duplicate layer and somehow erase or feather the edges so that the edits blend in better? Somehow use a layer mask to hide or reveal a duplicated layer and then flatten the image?
-
Greetings, I'm working with some new software for creating virtual tours - 3DVista. One of their features is the ability to create what they call "Live Panoramas," which is basically a time lapse 360 panorama. As an experiment I took photos from the same location at various times before, during, and after sunset. The way it works is that the panorama will gradually change from the panorama taken at the earliest time through 2 or 3 others until showing the panorama taken at the latest time. Here's a 23 second video demonstration. For this to work the alignment of all of the panoramas used to make the Live Panorama needs to be perfect. I usually use PTGui for stitching, but for these Live Panoramas 3DVista suggests using their stitching program. For whatever reason (probably my fault for slight camera/tripod movement?) the stitched panoramas are not perfectly aligned. Close, but not perfect. I know how to align the four stitched panos in PS, but I'm not yet familiar enough with Affinity Photo to know how to do it here and am looking to expand my knowledge of AP (and break away from PS). First I want to edit each photo individually to add a curve, some clarity, and a few other minor edits (which I know how to do) and then align them. I don't want to do any exposure blending, effects, or anything other than simply align them and then crop out or fill in any white space resulting from the alignment. Thanks for any help. Have a great New Year.
-
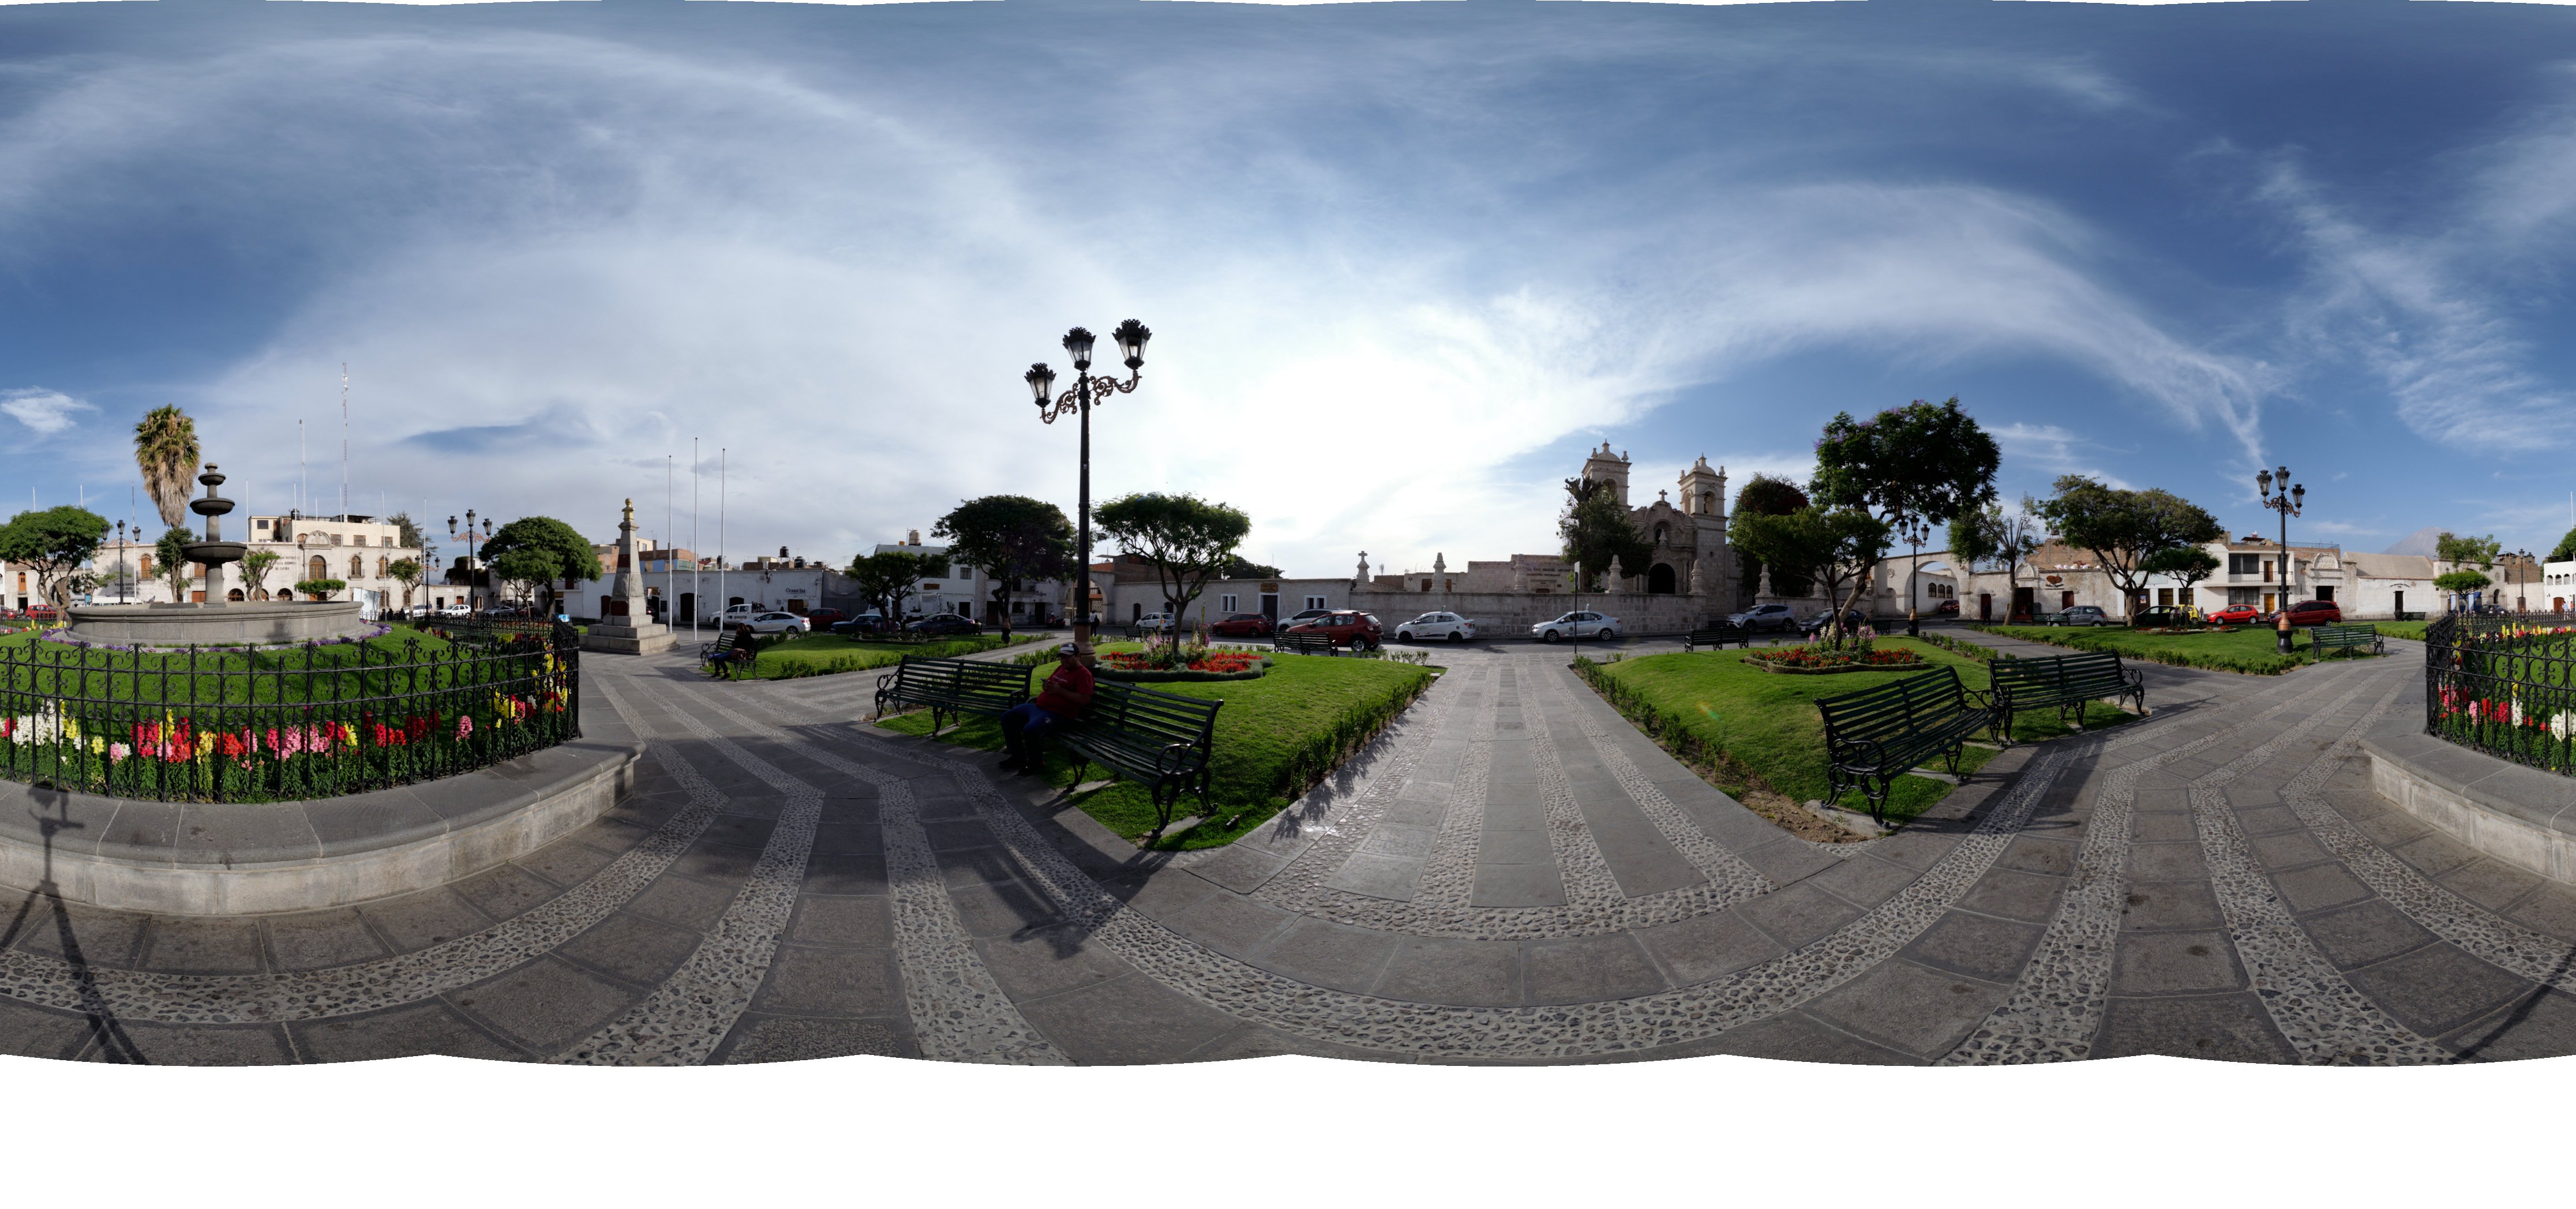
I'm working with Equirectangular (2:1) images for 360 degree photos and am trying to put together a macro which would eliminate a very small transparent part of the image at the zenith (the upper most portion) that results from tilting my pano head up 10 degrees when taking the photos that are stitched together in PTGui. I know I can take a zenith and a nadir shot to eliminate these transparent areas (and sometimes I do) but I'm experimenting with a time saving workflow that can have me simply inpaint the zenith. I'm not concerned with the nadir as I'll use a nadir patch. Here's the macro I have, which works fine with inpainting both the zenith and nadir: Select Transparent > Grow/Shrink Selection (2 pixels) > Inpainting > Deselect. Easy Peasy. But since the up-tilt on the pano head during shooting intentionally results in a tiny transparent area in the zenith and a larger one at the nadir, and since this transparent area at the nadir is about the size of the tripod and will be getting a nadir patch anyway, I'd prefer to eliminate the nadir from the selection process and only select the zenith. This should save processing time when running this macro on a batch with multiple images since the area at the zenith that needs inpainting is tiny and either sky or an interior ceiling, while the nadir area to be inpainted is larger and sometimes more complicated. Are the steps I can add to this macro to deselect the lower transparent area, or any other suggestions for a macro that would accomplish this? If this isn't possible I could live with both zenith and nadir inpainting, but am also curious about an added step which applies to macros in general. Say I didn't want to use a nadir patch; is it possible, as a last step, to Edit > Live Projection > and then use a smudge brush to smudge the inpainted nadir image resulting from the above macro? The area in need of smudging would always be in the same place, regardless of the photo being edited. Since I"m new to Affinity Photo I'm not sure if it's possible to include actions that use brush tools in a macro. I'm also not sure if macros will recognize steps added while in Live Projection mode, but I'll experiment with that. Here's an example of the type of photograph with this issue:

-
I'm new to both AP and working with 360x180 photos and am still playing around, trying to figure some things out. I took an interior photo with a window that is still bright (for my liking) after merging 5 bracketed images in Photomatix. After stitching in PTGui I bring the TIFF into AP for editing and use adjustment layers to add an S curve, boost brightness, vibrance, and use color correction to deal with a color cast. I also go into the Develop Persona to add a bit of Clarity and Detail Refine. All easy. One of the other adjustments I make (back in Photo Persona) is to use the selection brush to select the still bright window and then create a Brightness/Contrast adjustment layer to darken it up a bit. All good up to this point. The problem is that when I go to Live Projection > Equirectangular Projection to be able to move around the photo, the darkened window selection (at the same size the selection was made at before switching to Live Projection) remains static in the frame, not moving with (or attached to) the window. What am I doing wrong, or not doing that I should be in order to fix this selection (and any other edits I may have issues with in the future) to the selected area? The Affinity Photo Tutorial on editing 360 photos only shows how to use the Inpaint Brush and the use of adjustment layers - all done within the Live Projection. Would flattening/merging the layers before going into Live Projection be a solution, even if it means I could no longer edit individual layers?
-
Greetings, I'm trying to break away from Adobe and have been playing around with Affinity Photo. I still have on old version of PS so I haven't been reliant on the subscription model; which I'd have to get in order to edit 360 photos - something I'm just getting into. Recently got Affinity Photo because I've read it does a better job than PS with 360 editing. I'm okay with learning a new workflow if it means breaking away from Adobe, as long as Affinity can do the few things I need PS for. I do most of my editing in Capture One (superior Fuji X RAW processing) and use PS for exposure blending and a few other things C1 can't handle. Basic edits (exposure, curves, levels, etc.) are pretty intuitive in Affinity, but I'm trying to figure out how to make a selection and then skew it so that I can fix stitching errors (after using PTGui). In Photoshop, after making a lasso selection, it would be Edit>Transform>Skew. The following video (cued up to the relevant spot) demonstrates what I'm looking to do. I've come across a few suggestions online, but they're for Affinity Designer (Filters>Distort>Shear). Before I start going down rabbit holes I thought I'd ask a general question - are most suggestions/commands for Designer also relevant to Photo? And more specifically to what I'm trying to do right now, does anyone have a suggestion/solution for how to best accomplish what I've described and is shown in the below video? Many thanks.