Search the Community
Showing results for tags 'rmap-51'.
Found 7 results
-
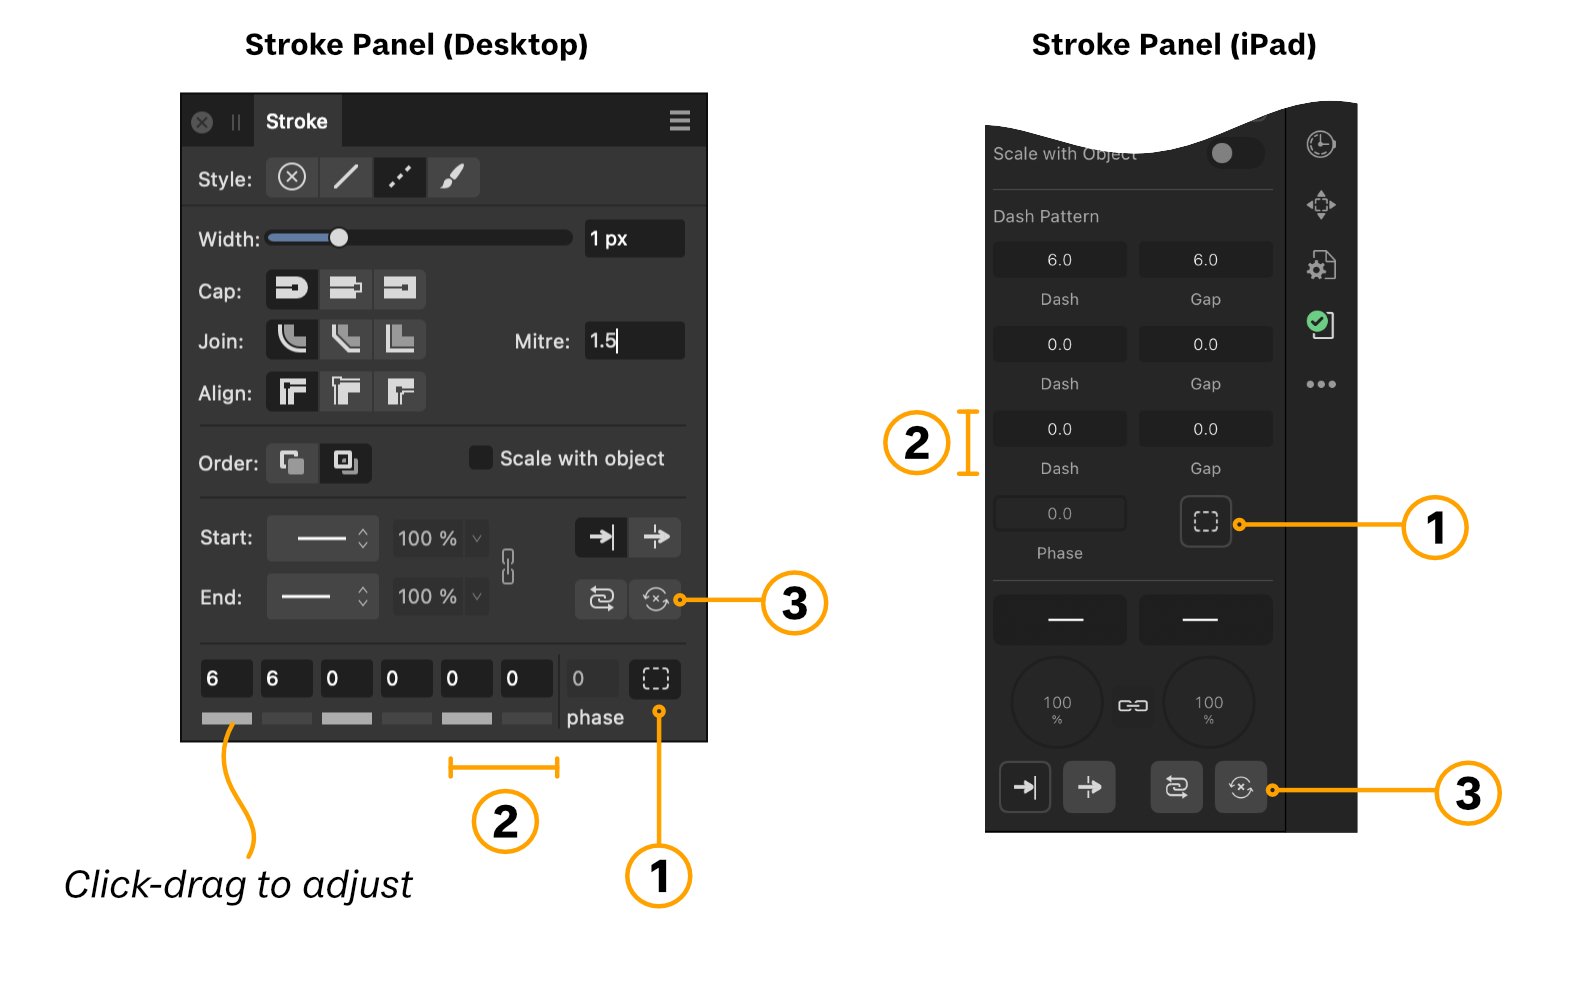
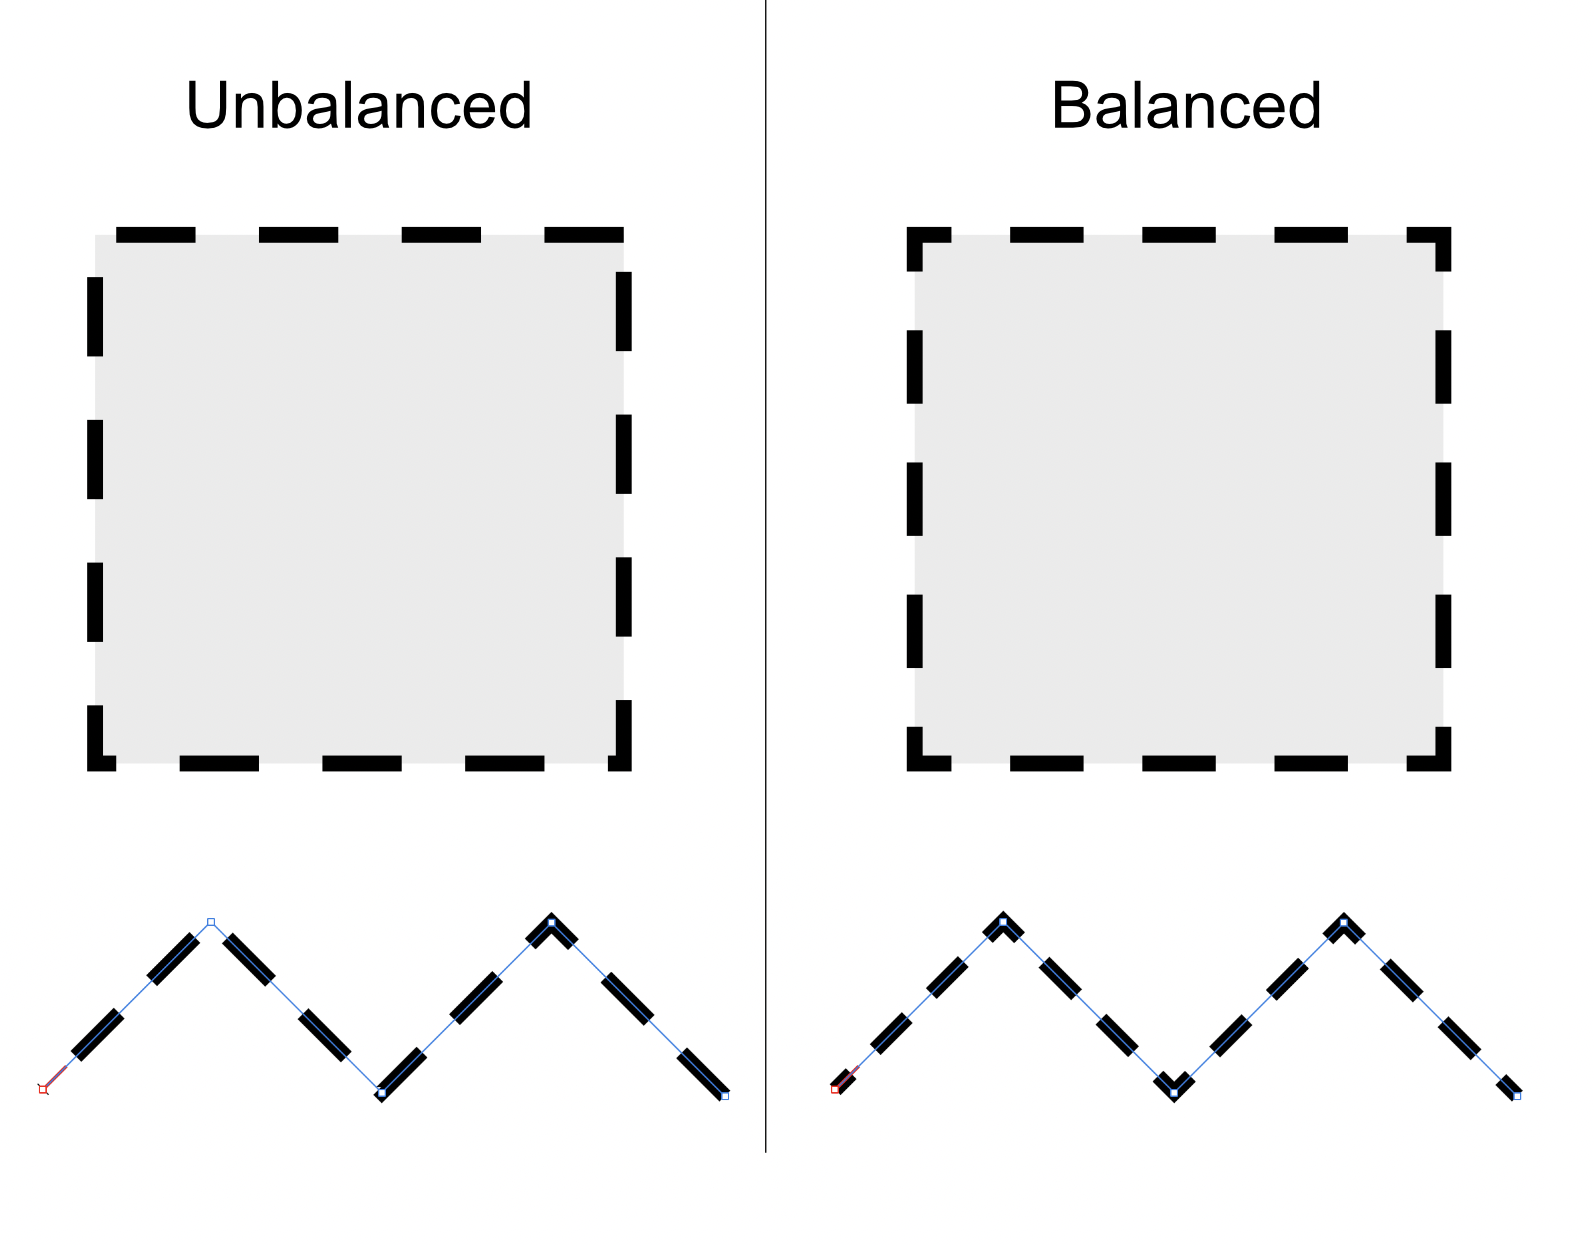
 Apps: All Platforms: Windows, macOS and iPad A few new features have been added to the stroke panel... 1. As has been commonly requested we have now added the ability to 'balance' dashed lines using a new toggle button on stroke panel. This means that the dash pattern is automatically rescaled between any cusps in a curve - making things such as corners of a rectangle or the start and end of a stroke look correct. 2. An additional dash and gap have now been added to build up more complex dashed line patterns (now giving you 3 dash and 3 gaps) making, among other things, two dot chain patterns possible. On desktop you can also click-drag the dash and gap indicator as shown to adjust the value. 3. A new button has been added to clear any arrowheads on a stroke - just making it more convenient than having to open the drop downs to set both ends to "None".
-
 There's a small bug which is only present with the initial launch of the apps (on macOS)... when you selected dash line style you can't manually enter a point value in the stroke width box... once you undock the stroke panel the stroke value is correctly displayed and the stroke width updated and likewise all works correctly if you then re-dock the stroke panel... Dashed Lines.mp4
 -
 We need a checkbox to force the corners of a dashed stroke object to be the same. Currently it's almost impossible to achieve a symmetrical look when using a dashed stroke on a rectangle, even when messing with the Dash, Space, and Phase values. Illustrator does this well and it's really useful.
 -
 Yes, I have searched for this on the forum and there is plenty of information. But it seems like this is not working for me. I create a lot of dashed lines for electrical wiring that will be shown on a webpage. It's really hard to follow the lines with affinity, see attached picture. So my question is what is the best practice here to get the lines clear and easy to follow... I have tried the phase but that solves maybe one or two corners but not all. Any suggestions? LInk to example: https://partner.nibe.eu/nibedocuments/30015/M11292EN-7.html Thank you in advance! /Marko On the left Affinity and on the right Illustrator and below them how the actual html page looks (made with illustrator).
-
 this topic created by the user ra.skill is very important and there is still no solution to it in v2! pleeease serif!!!!
 -
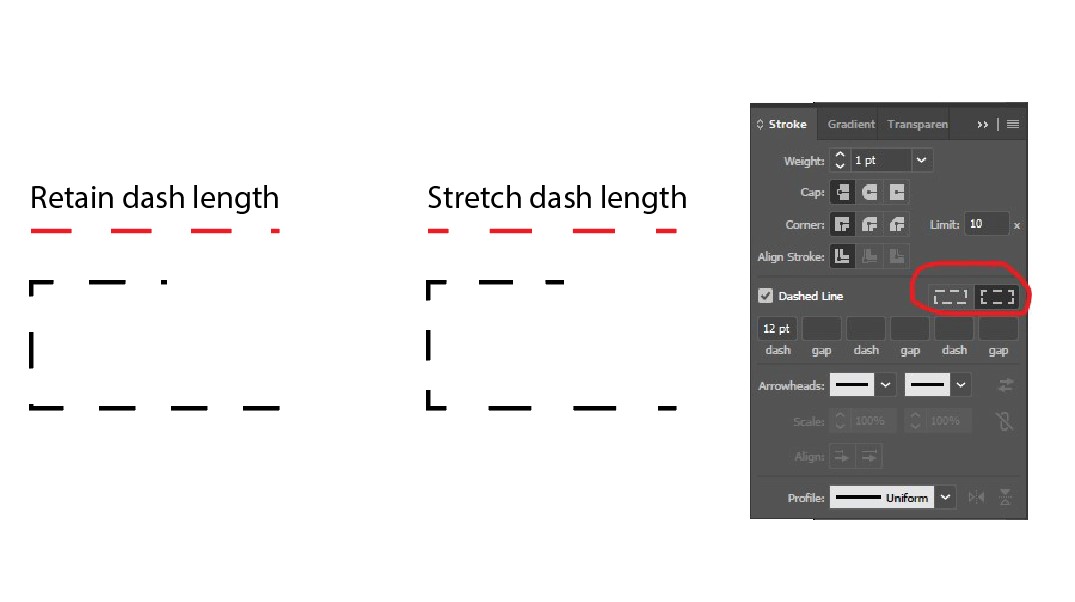
.thumb.jpg.c2f75fd811242693326d4481c5786058.jpg) Currently in all Affinity products when creating a dashed line there is no simple way to create even endpoints or corners. Yes, there is the option to change the "phase" but it very rarely gives the result you want and yes you can spend a LOT of time adjusting the dash size and spacing until you get something perfect... but none of these things are a good workflow... if I then need to adjust the shape the dash alignment goes off again and back to square one. I hate saying this but.... In Illustrator there is a very simple button to toggle between retaining the exact dash length and therefore corners or endpoints are not the same and stretching the dash between corners/endpoints therefore making them all the same (see image below). We need this in Affinity! It's a big time saver, improves workflow and offers the best of both worlds depending on the desired outcome.
Currently in all Affinity products when creating a dashed line there is no simple way to create even endpoints or corners. Yes, there is the option to change the "phase" but it very rarely gives the result you want and yes you can spend a LOT of time adjusting the dash size and spacing until you get something perfect... but none of these things are a good workflow... if I then need to adjust the shape the dash alignment goes off again and back to square one. I hate saying this but.... In Illustrator there is a very simple button to toggle between retaining the exact dash length and therefore corners or endpoints are not the same and stretching the dash between corners/endpoints therefore making them all the same (see image below). We need this in Affinity! It's a big time saver, improves workflow and offers the best of both worlds depending on the desired outcome.
-
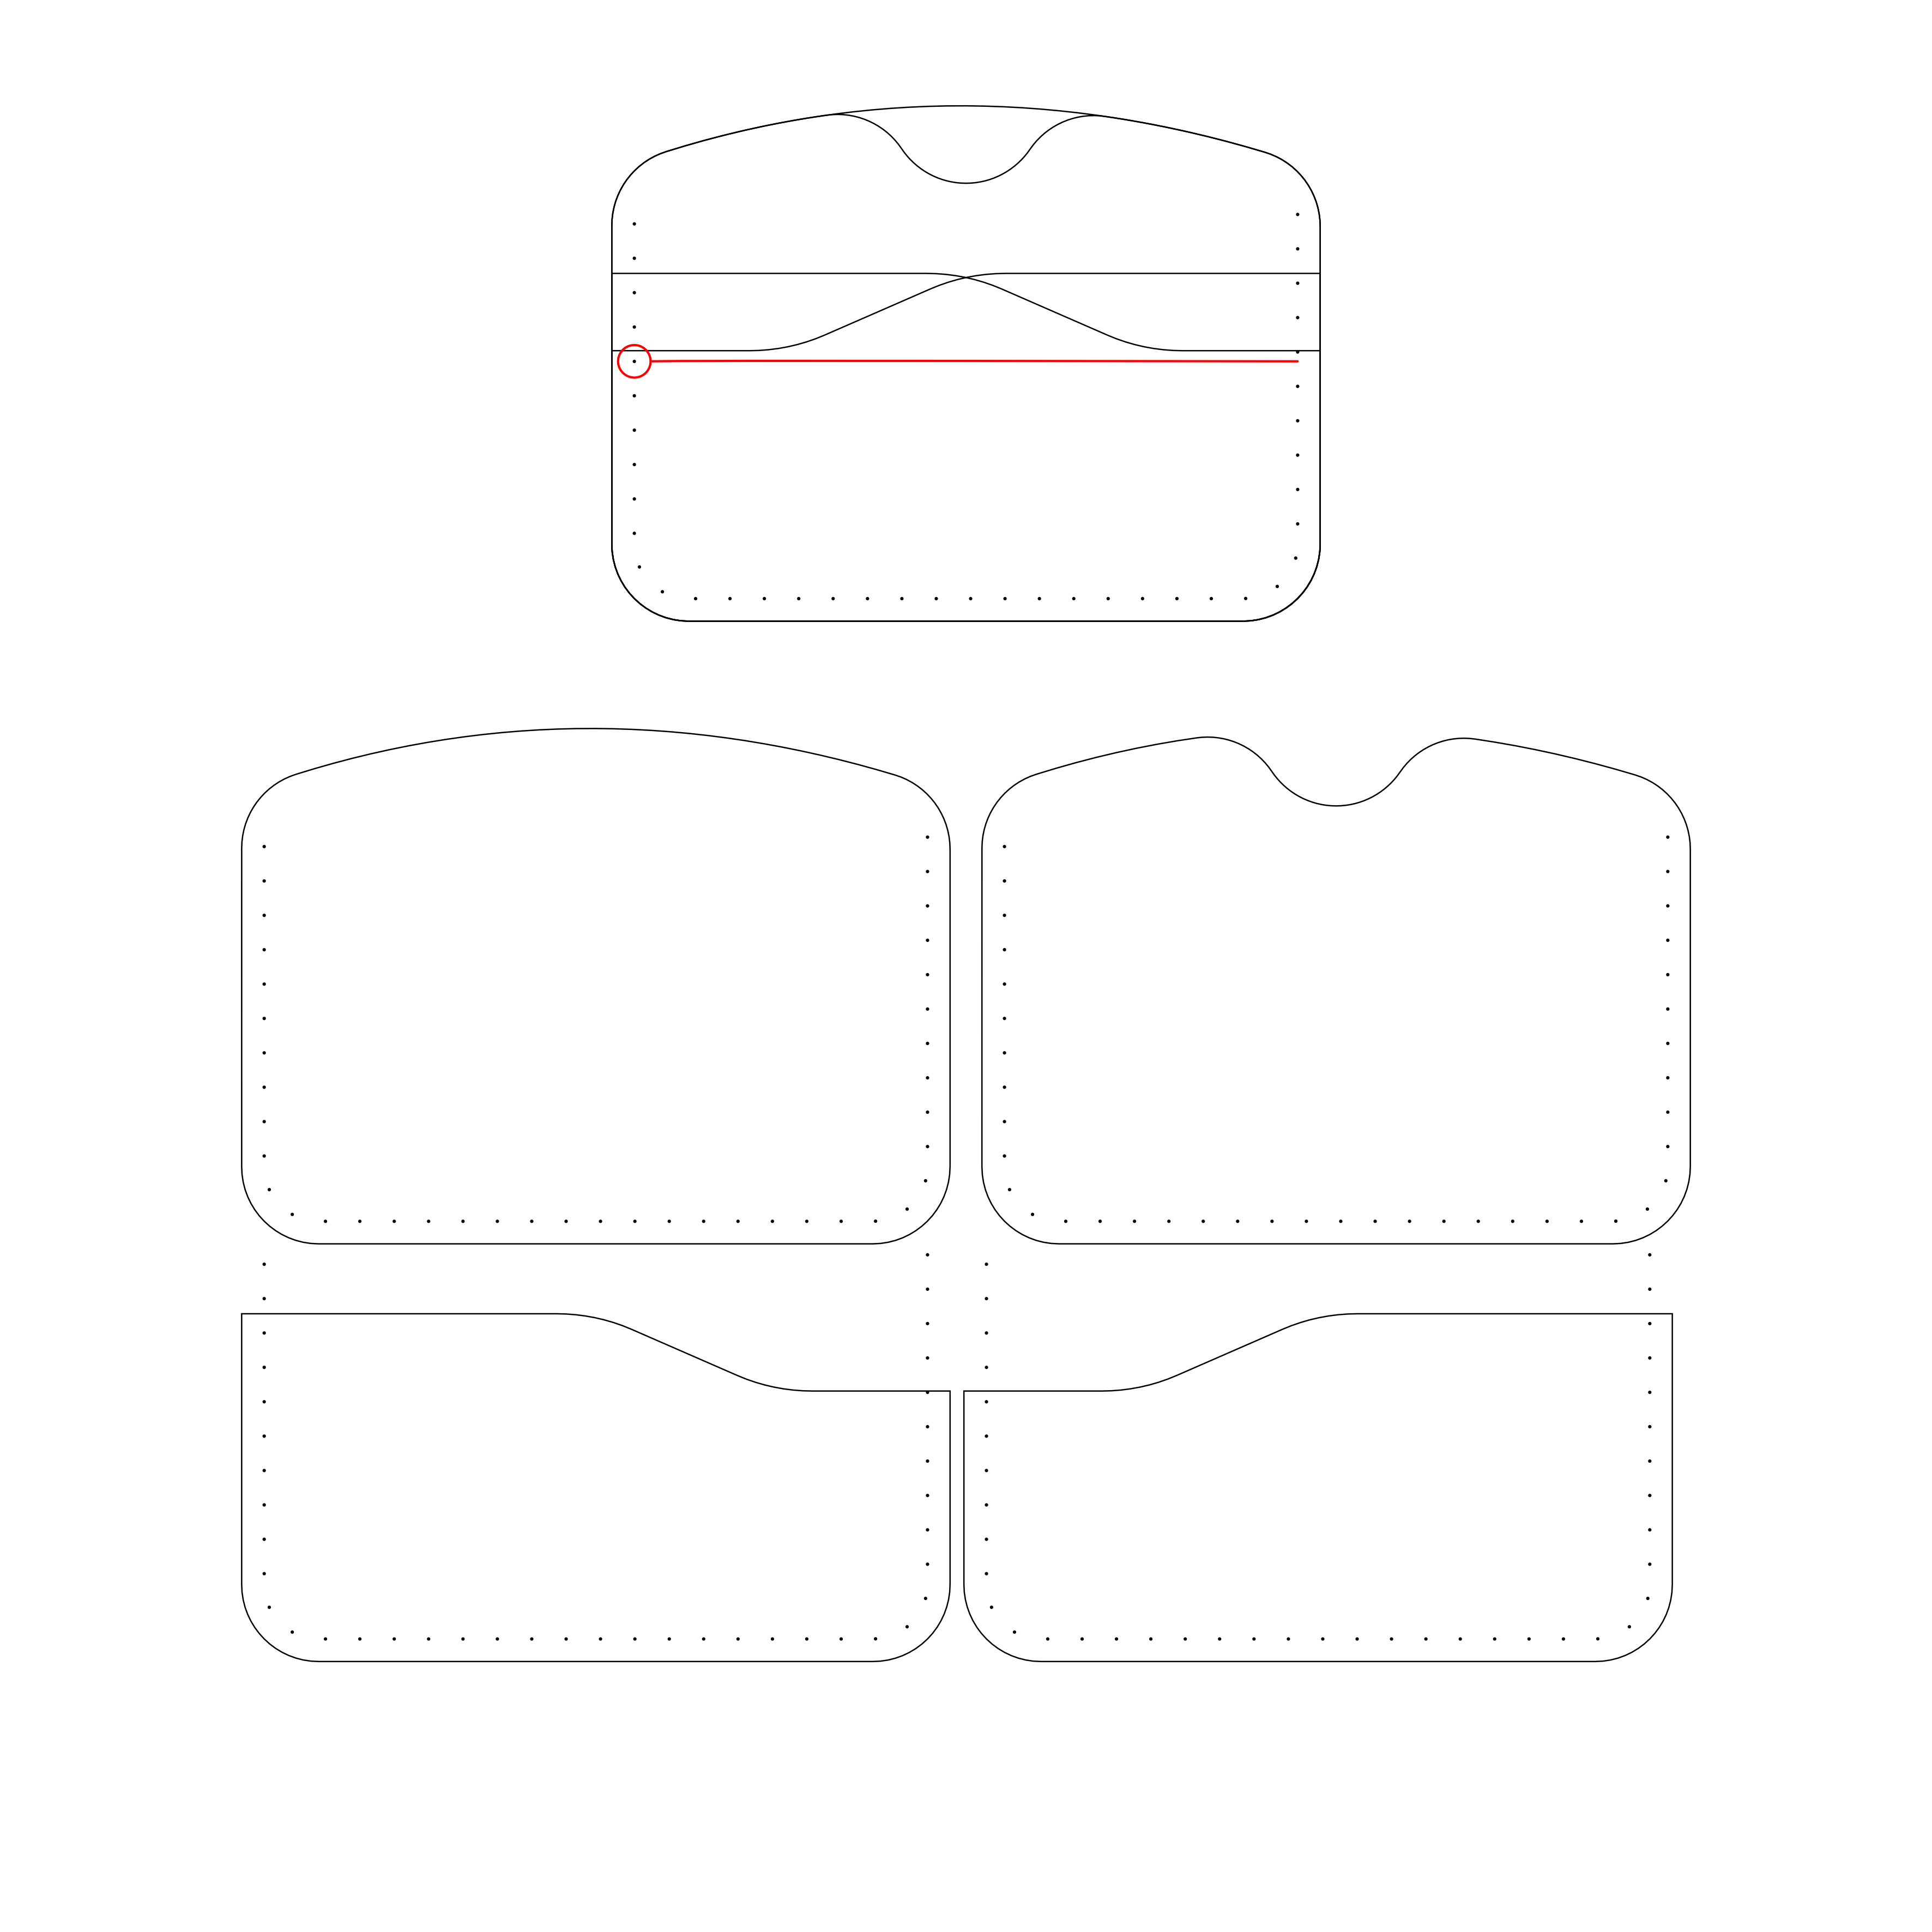
 I used to use Adobe Illustrator primarily as a way to create laser cutting files for my leather working designs. One feature that Adobe Illustrator has that I cannot figure out how to get working on Affinity Designer is the ability to evenly space out dashes across the entire length of a stroke. Another is the ability to change stroke in different units. This helps me out in creating uniform bilateral stitching that works on each individual panel when I separate the main design into each individual leather panel. I'm sure there is some way to do what I need to in Affinity Designer 2 but I have not been able to figure it out. I have tried messing with the 'Phase' setting, even using decimal places but I cannot get it close enough. Feature Suggestion: It would be very helpful if we can move stroke in different units (other than points) so that we can more accurately place dashes. A way to evenly space dashes across the entire length of a stroke ( for example spacing of approx. 3mm per 1mm dot but spaced evenly across the stroke so some shifting is inevitable) The file attached may illustrate the issue a little better. With the current method of stroke/dash spacing, it's not possible to get precise, evenly spaced stitching holes so that they line up uniformly throughout the design. The red circled dot with a red 90 degree stroke helps illustrate the primary issue. On a 4 panel design, you can see the stroke is never aligned for all the panels.