DeniseIleen
-
Posts
16 -
Joined
-
Last visited
-
 Dan C reacted to a post in a topic:
Can anyone make a custom Macro or LUT
Dan C reacted to a post in a topic:
Can anyone make a custom Macro or LUT
-
This is difficult to answer since I don't have much photo editing education. Though what I'm looking for is mostly adjustments and not brushes, if that helps at all. I'm basically asking someone to help me who has access to both Photoshop and Lightroom and I don't know which format to tell him to send me the 'adjustments' in. Would you happen to know the options per adjustment types (brushes [if i did need them], docs, presets, etc.)? Thanks again, super thankful for your time.
-
Thanks so much for your time, Dan C. I get how to create Macros by downloading LUTs clearly already. I'm asking more so if there are any other formats *besides* LUTs (.3dl, .cc, .cc, etc) that can be created in Lightroom and/or Photoshop to import into Affinity. Would you happen to have any idea? I'll eventually be creating a Macro in Affinity with this. I'm trying to avoid LUTs as they're more complex and mostly used for film editing outside of Affinity. Thanks again for any direction/tips.
-
Ok thanks. I think I need to paraphrase my question more accurately. I asked a more specific one here:
-
Batch Processing Multiple Photos: Which formats (i.e. LUTS) are compatible with Photoshop and/or Lightroom? Thanks so much.
-
Aside LUTs, what are some other "filter" formats that can be exported from Ligthroom and imported into Affinity? I"m asking because I'm having someone create a "filter" to batch edit some images and LUT seems to mostly be popular with video editing. Though LUTs can also be used for still images, i'd prefer a less video-driven expertise. Thanks so much!
-
No problem at all, thanks so much for the advice. Do you happen to know where I can not necessarily train, but simply purchase a custom LUT? (I already have a plethora of free LUTs but i'm looking for something much more specific)
-
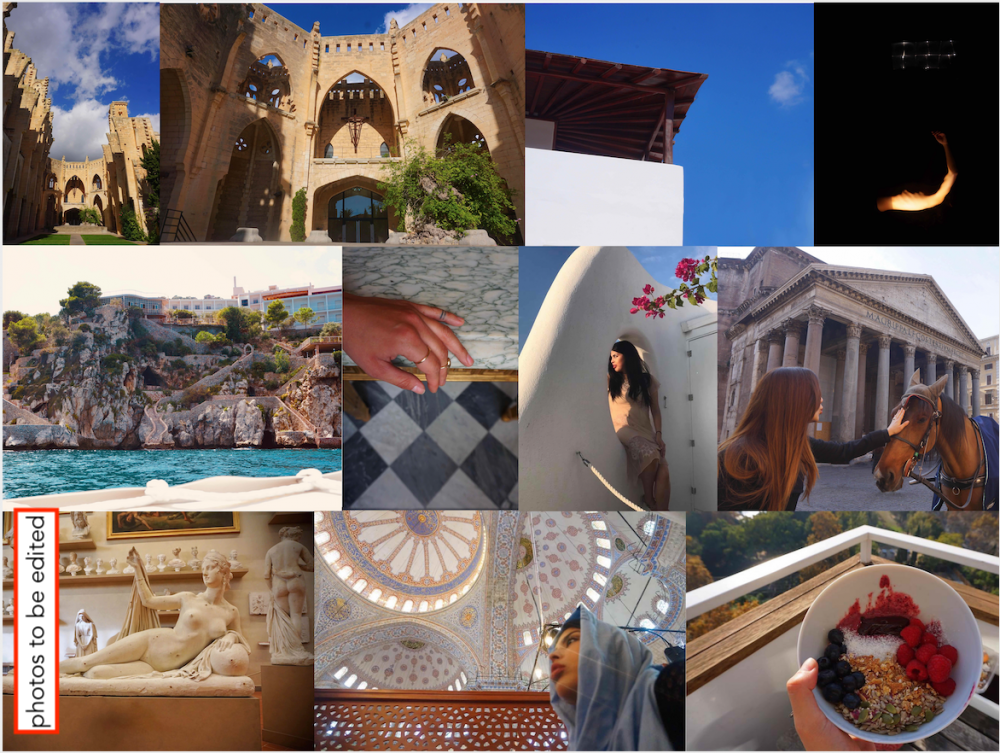
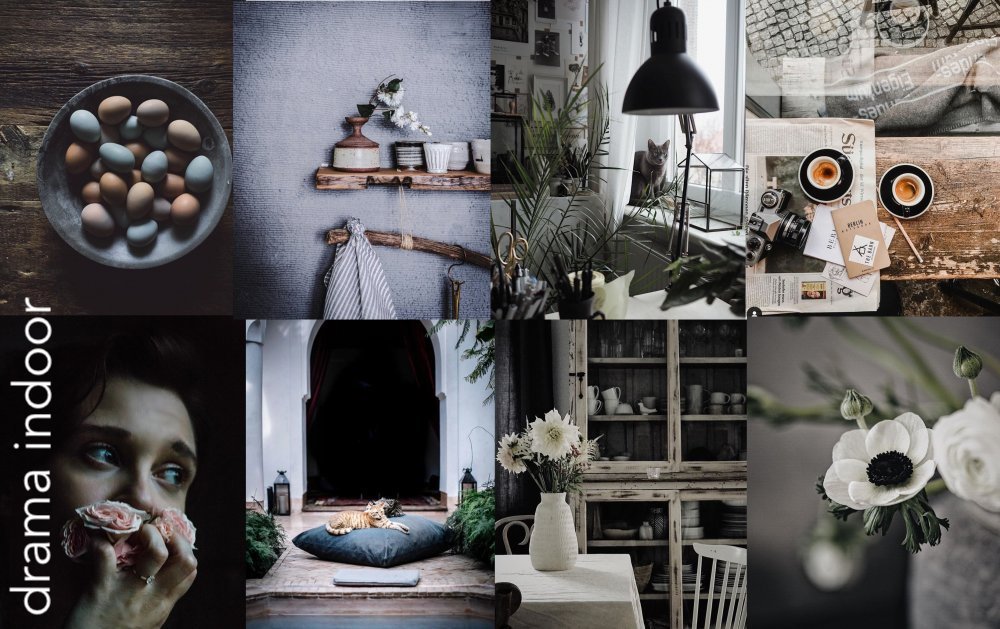
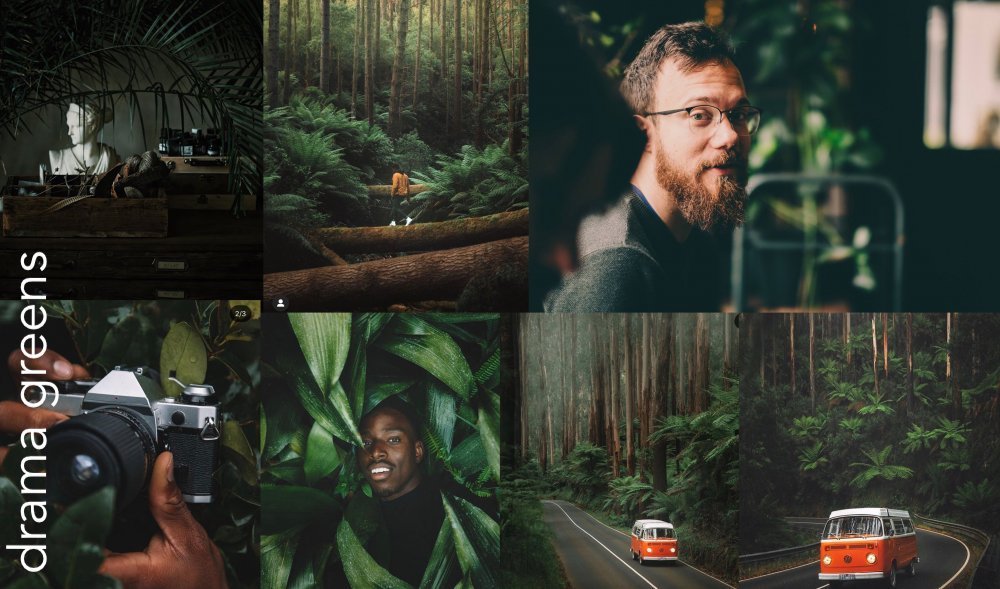
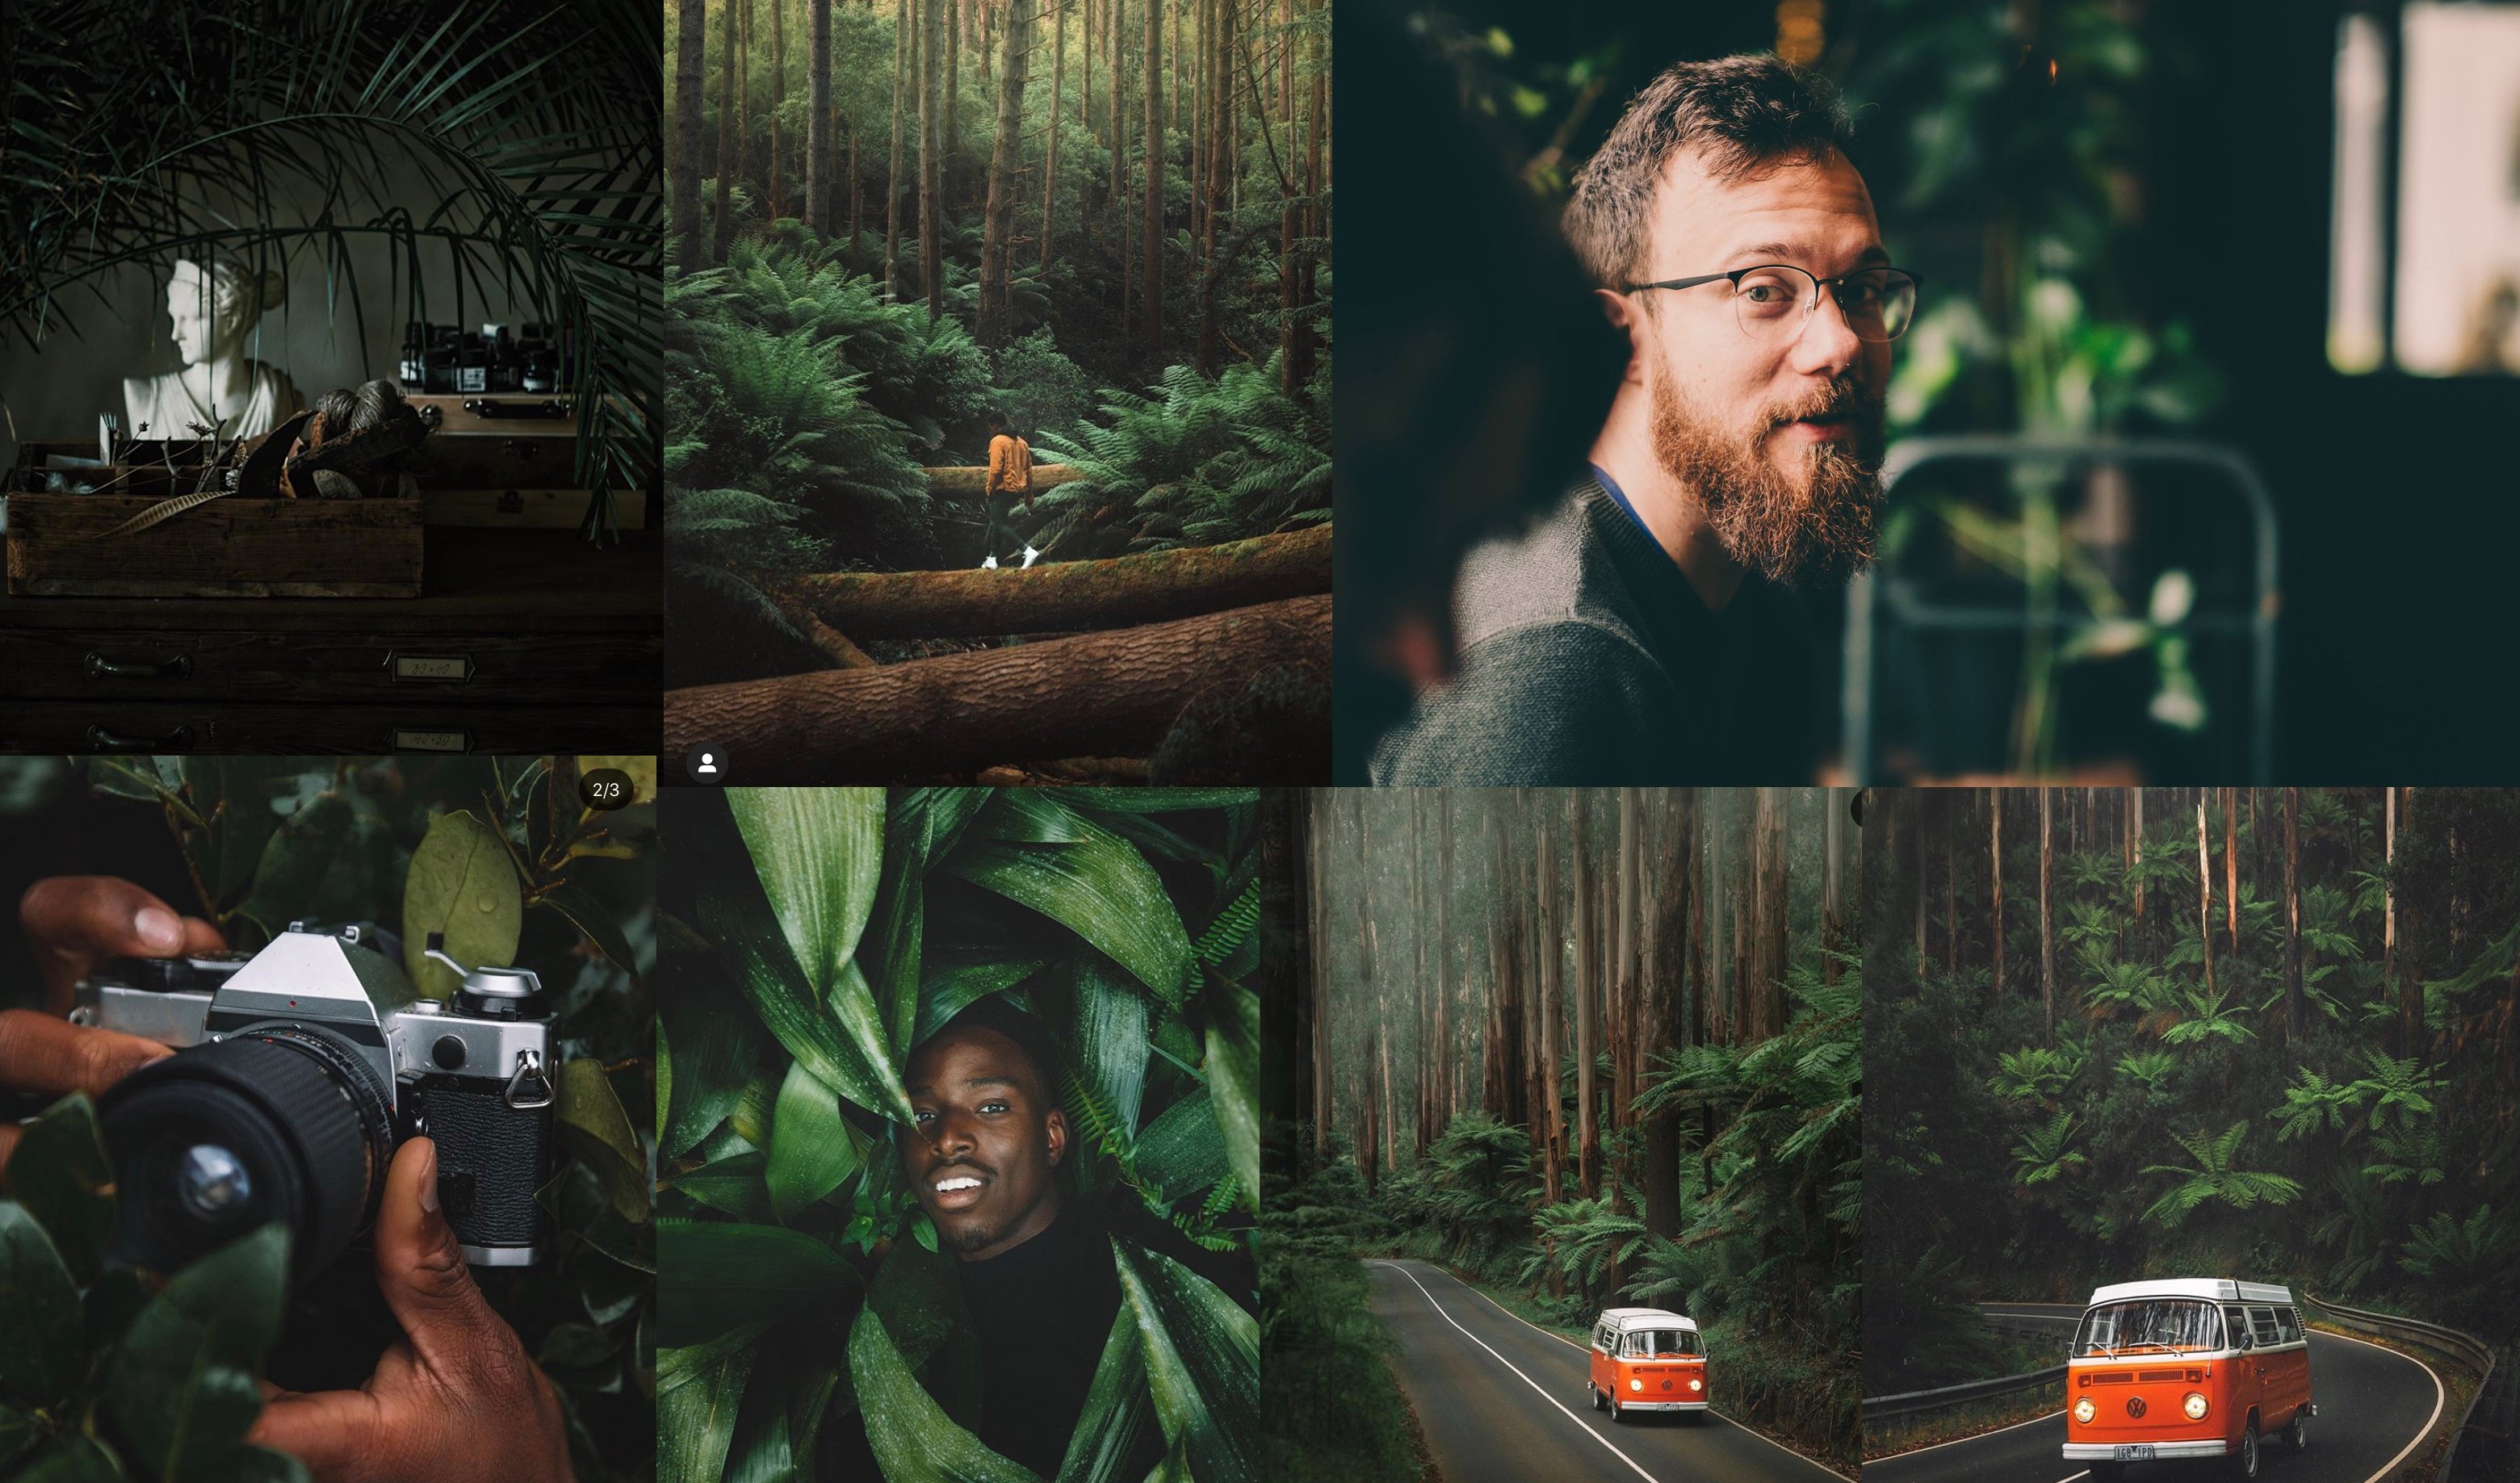
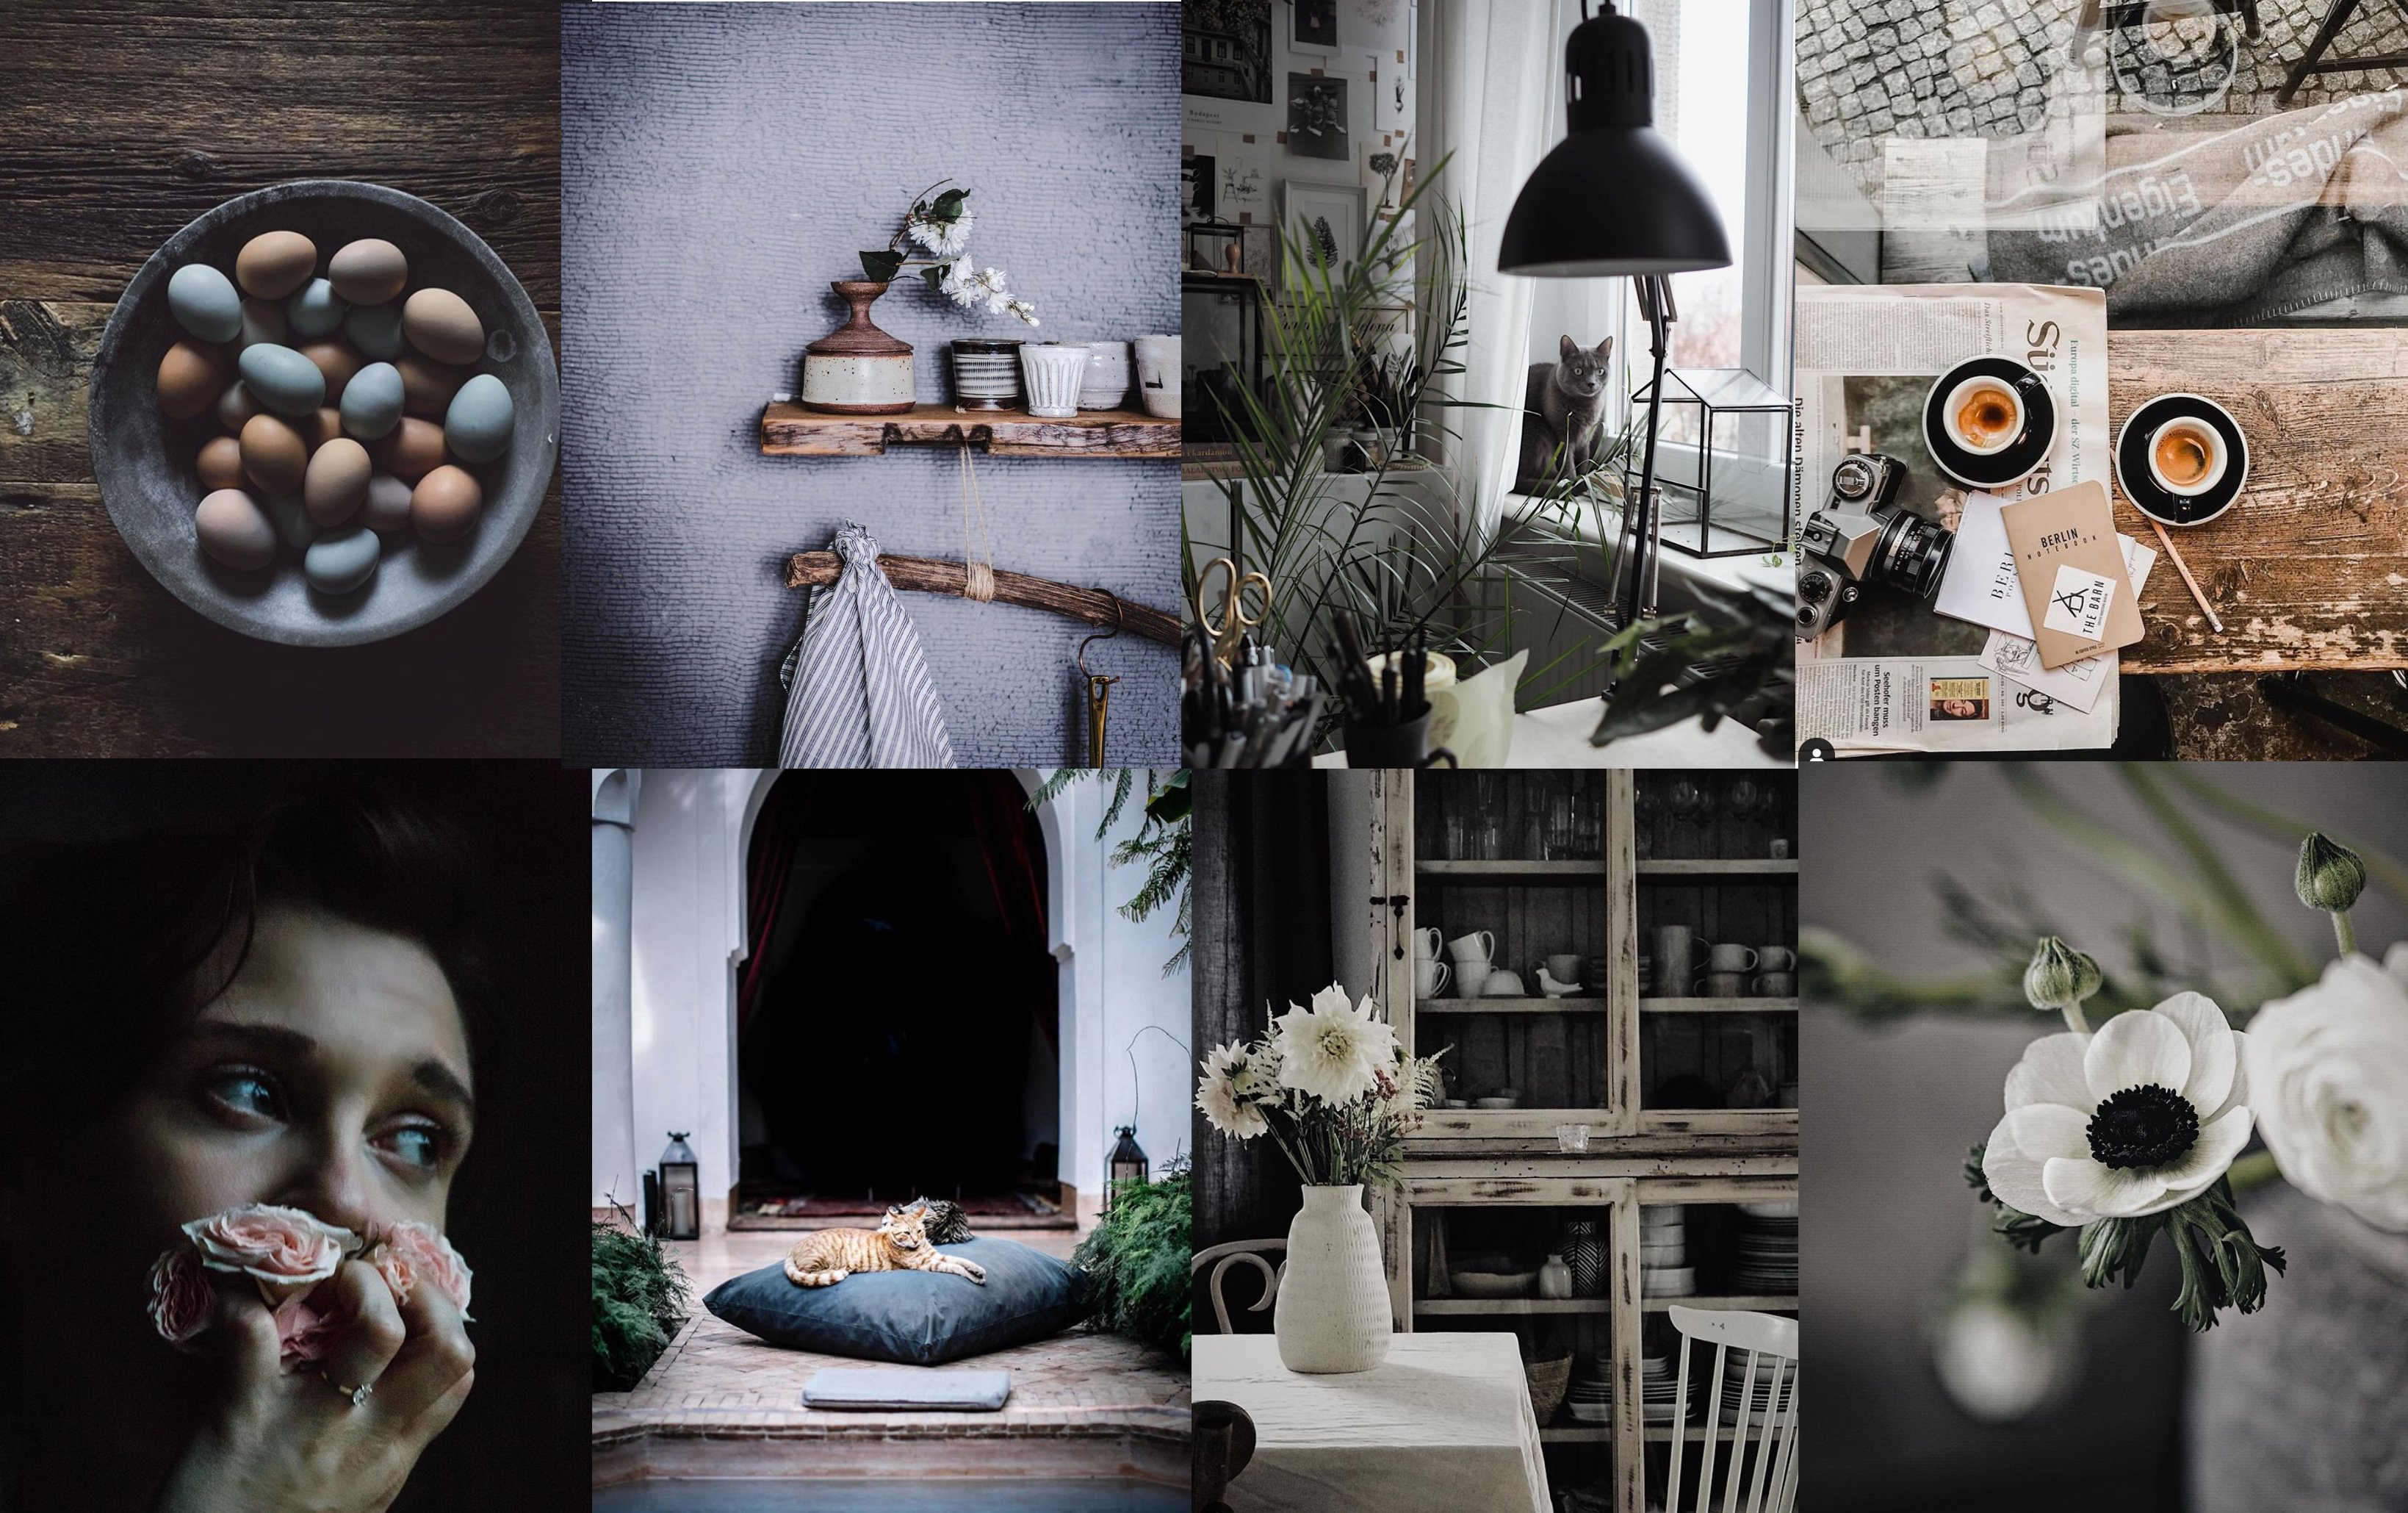
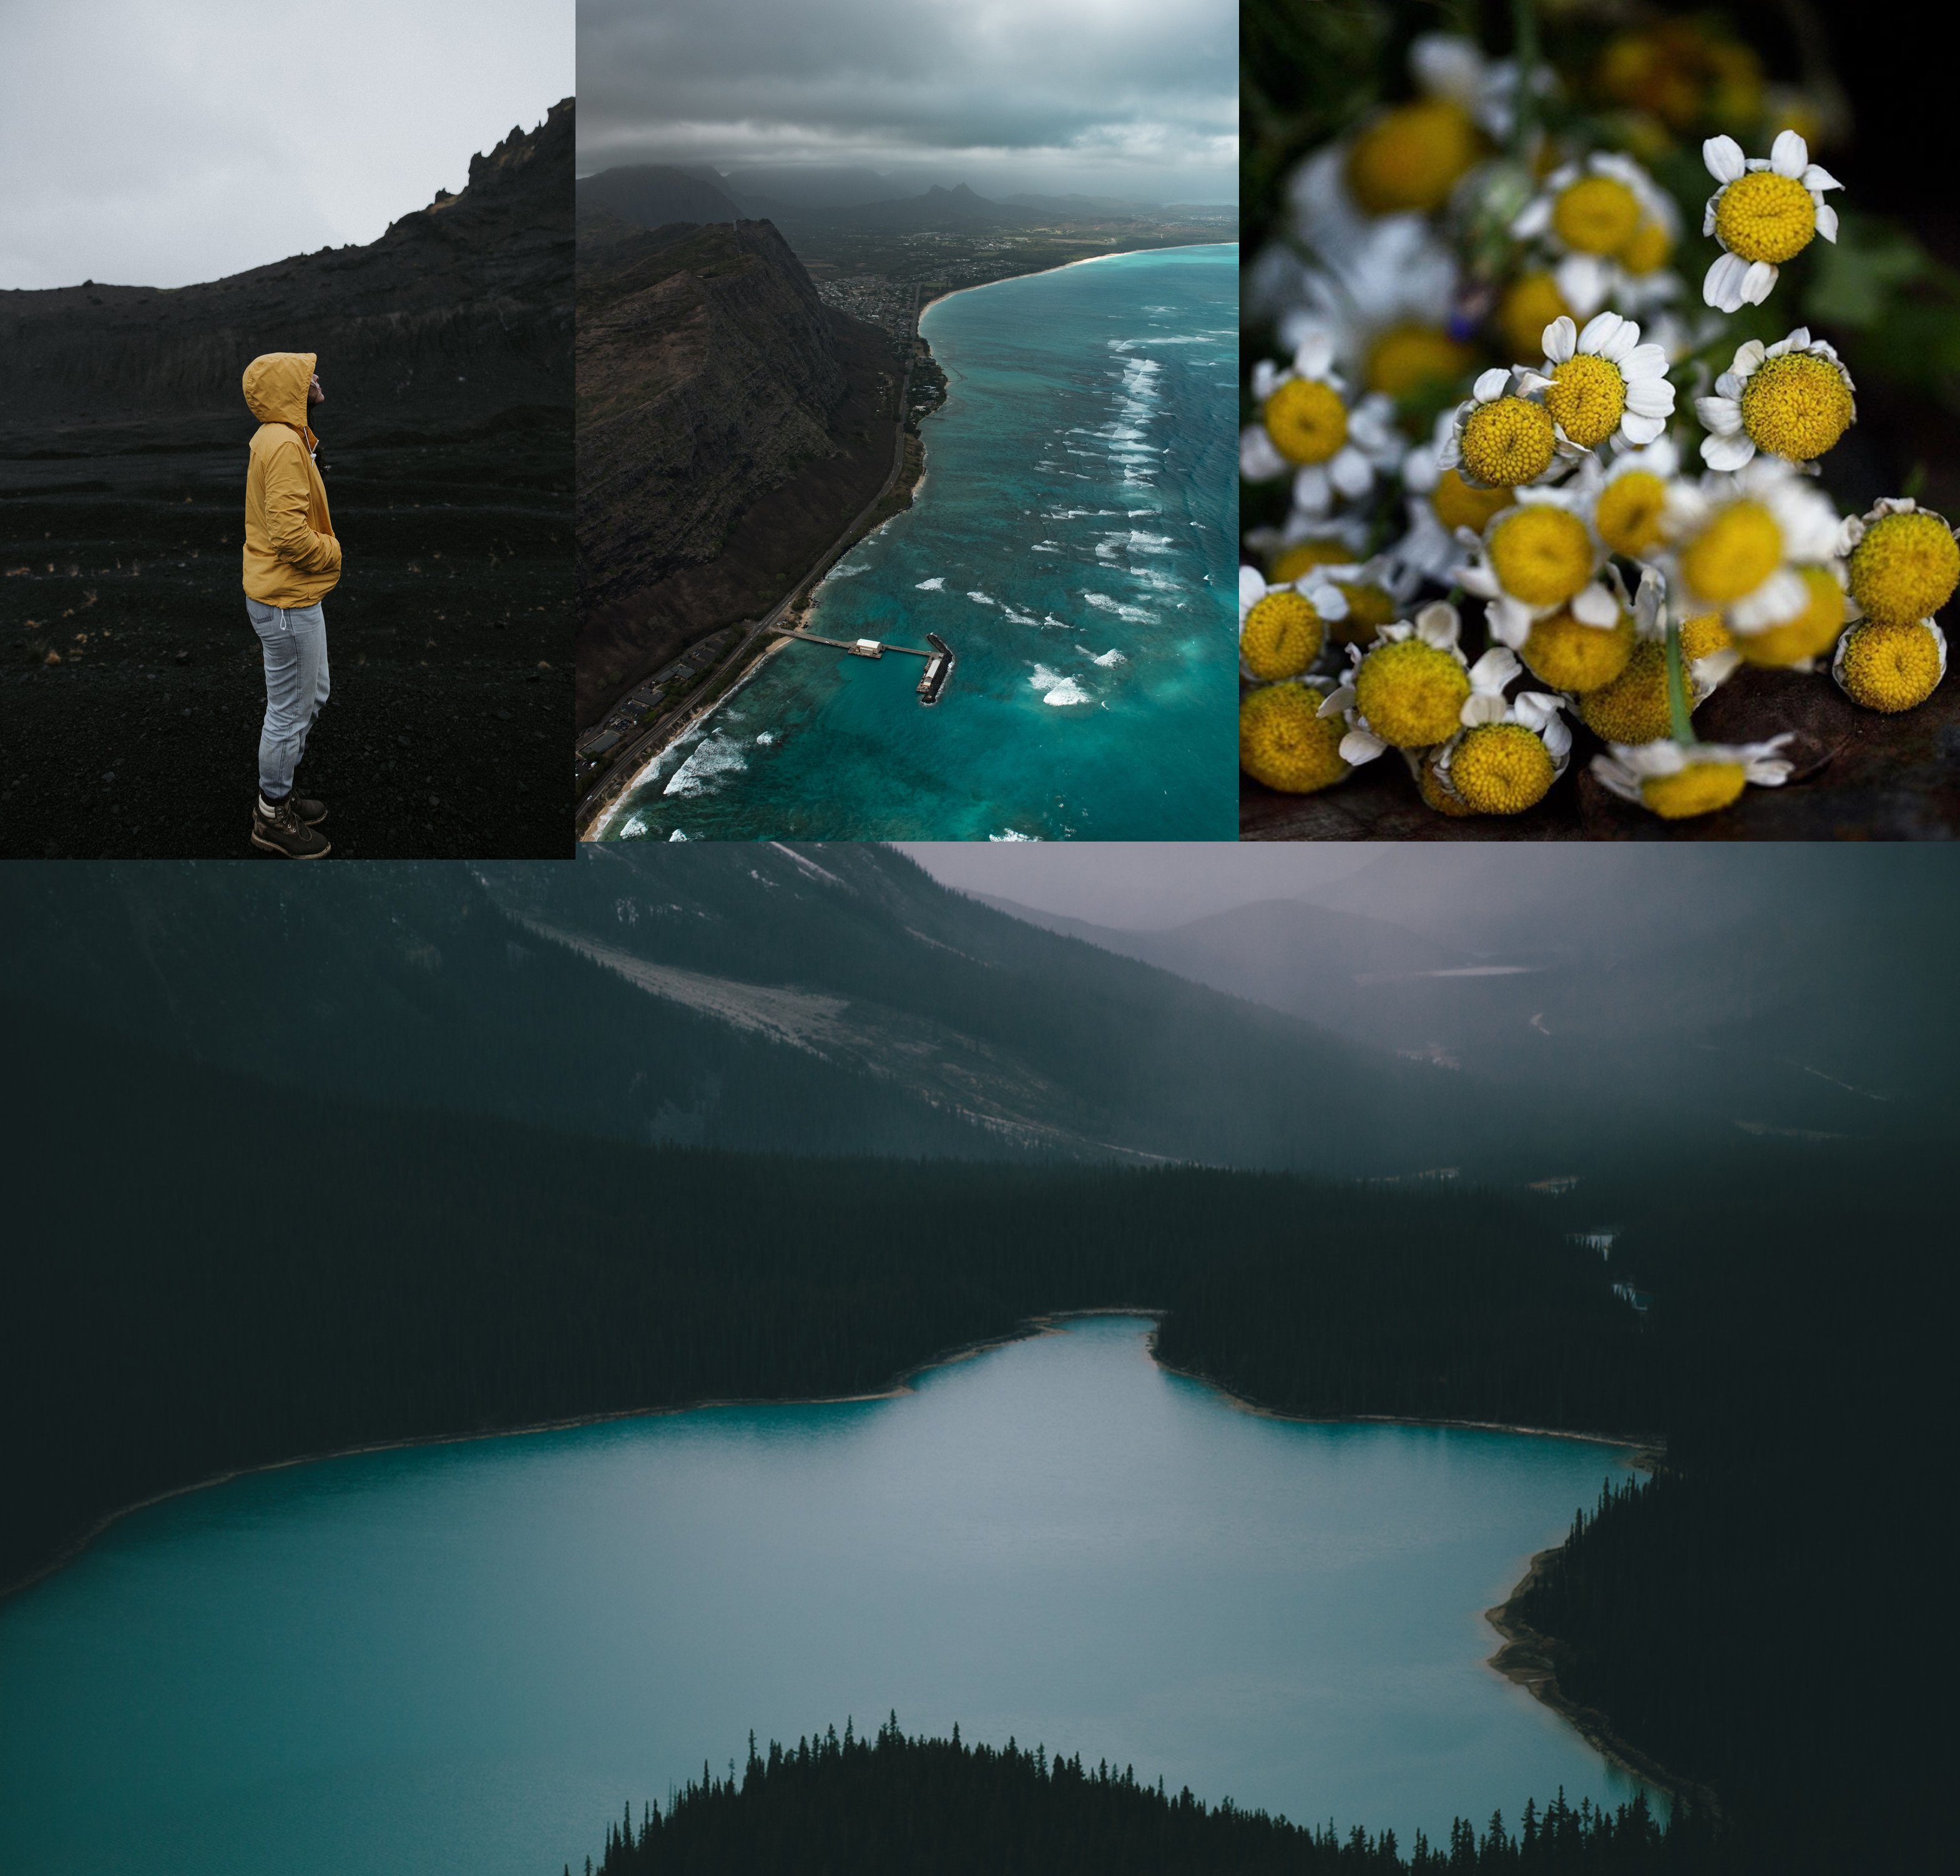
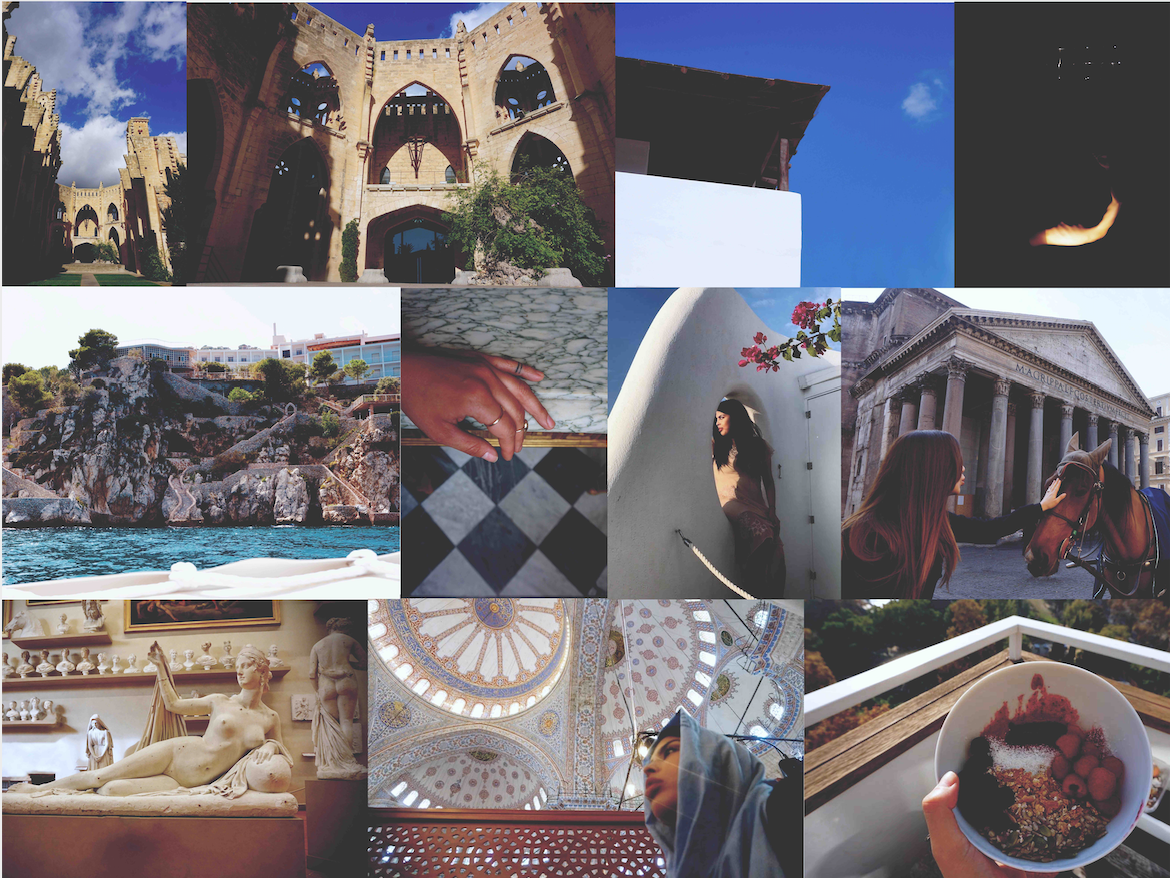
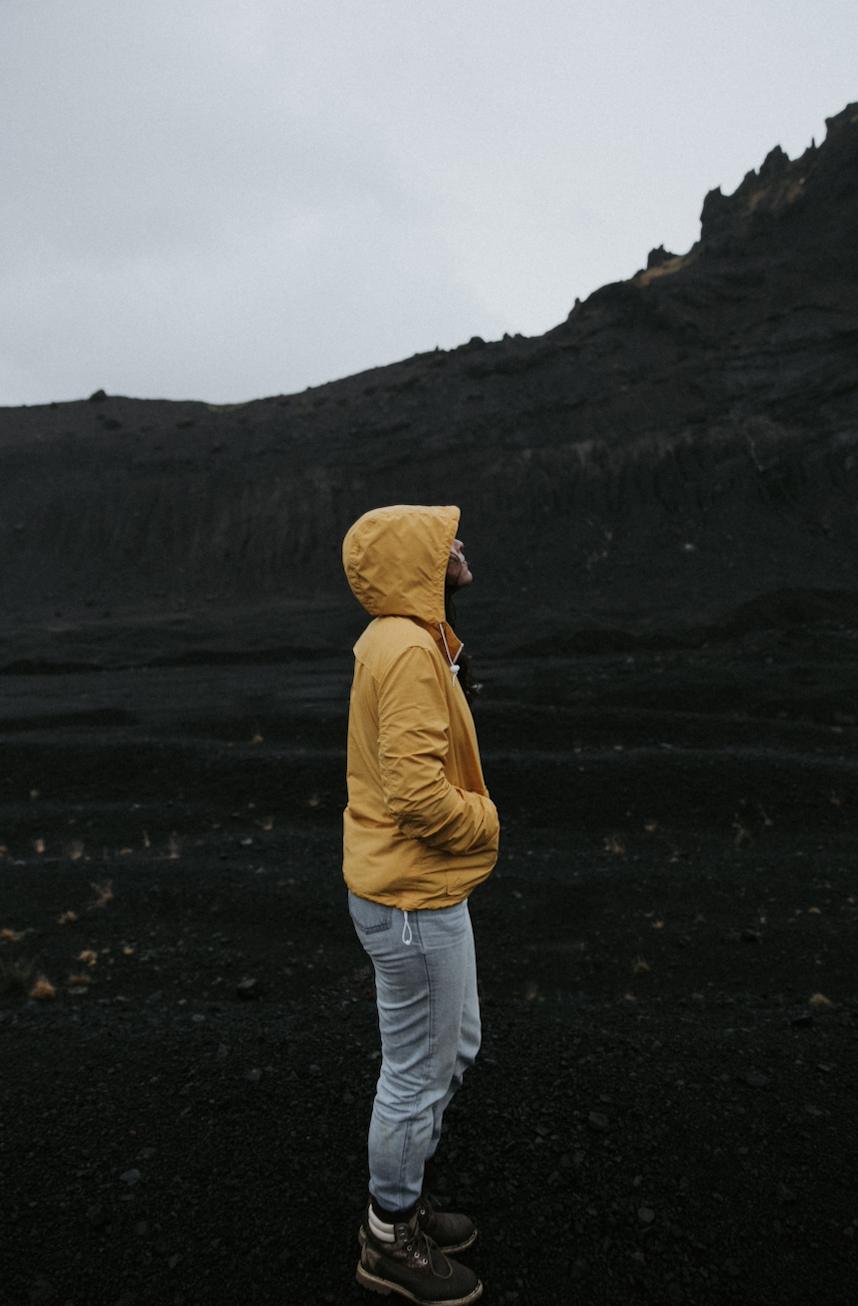
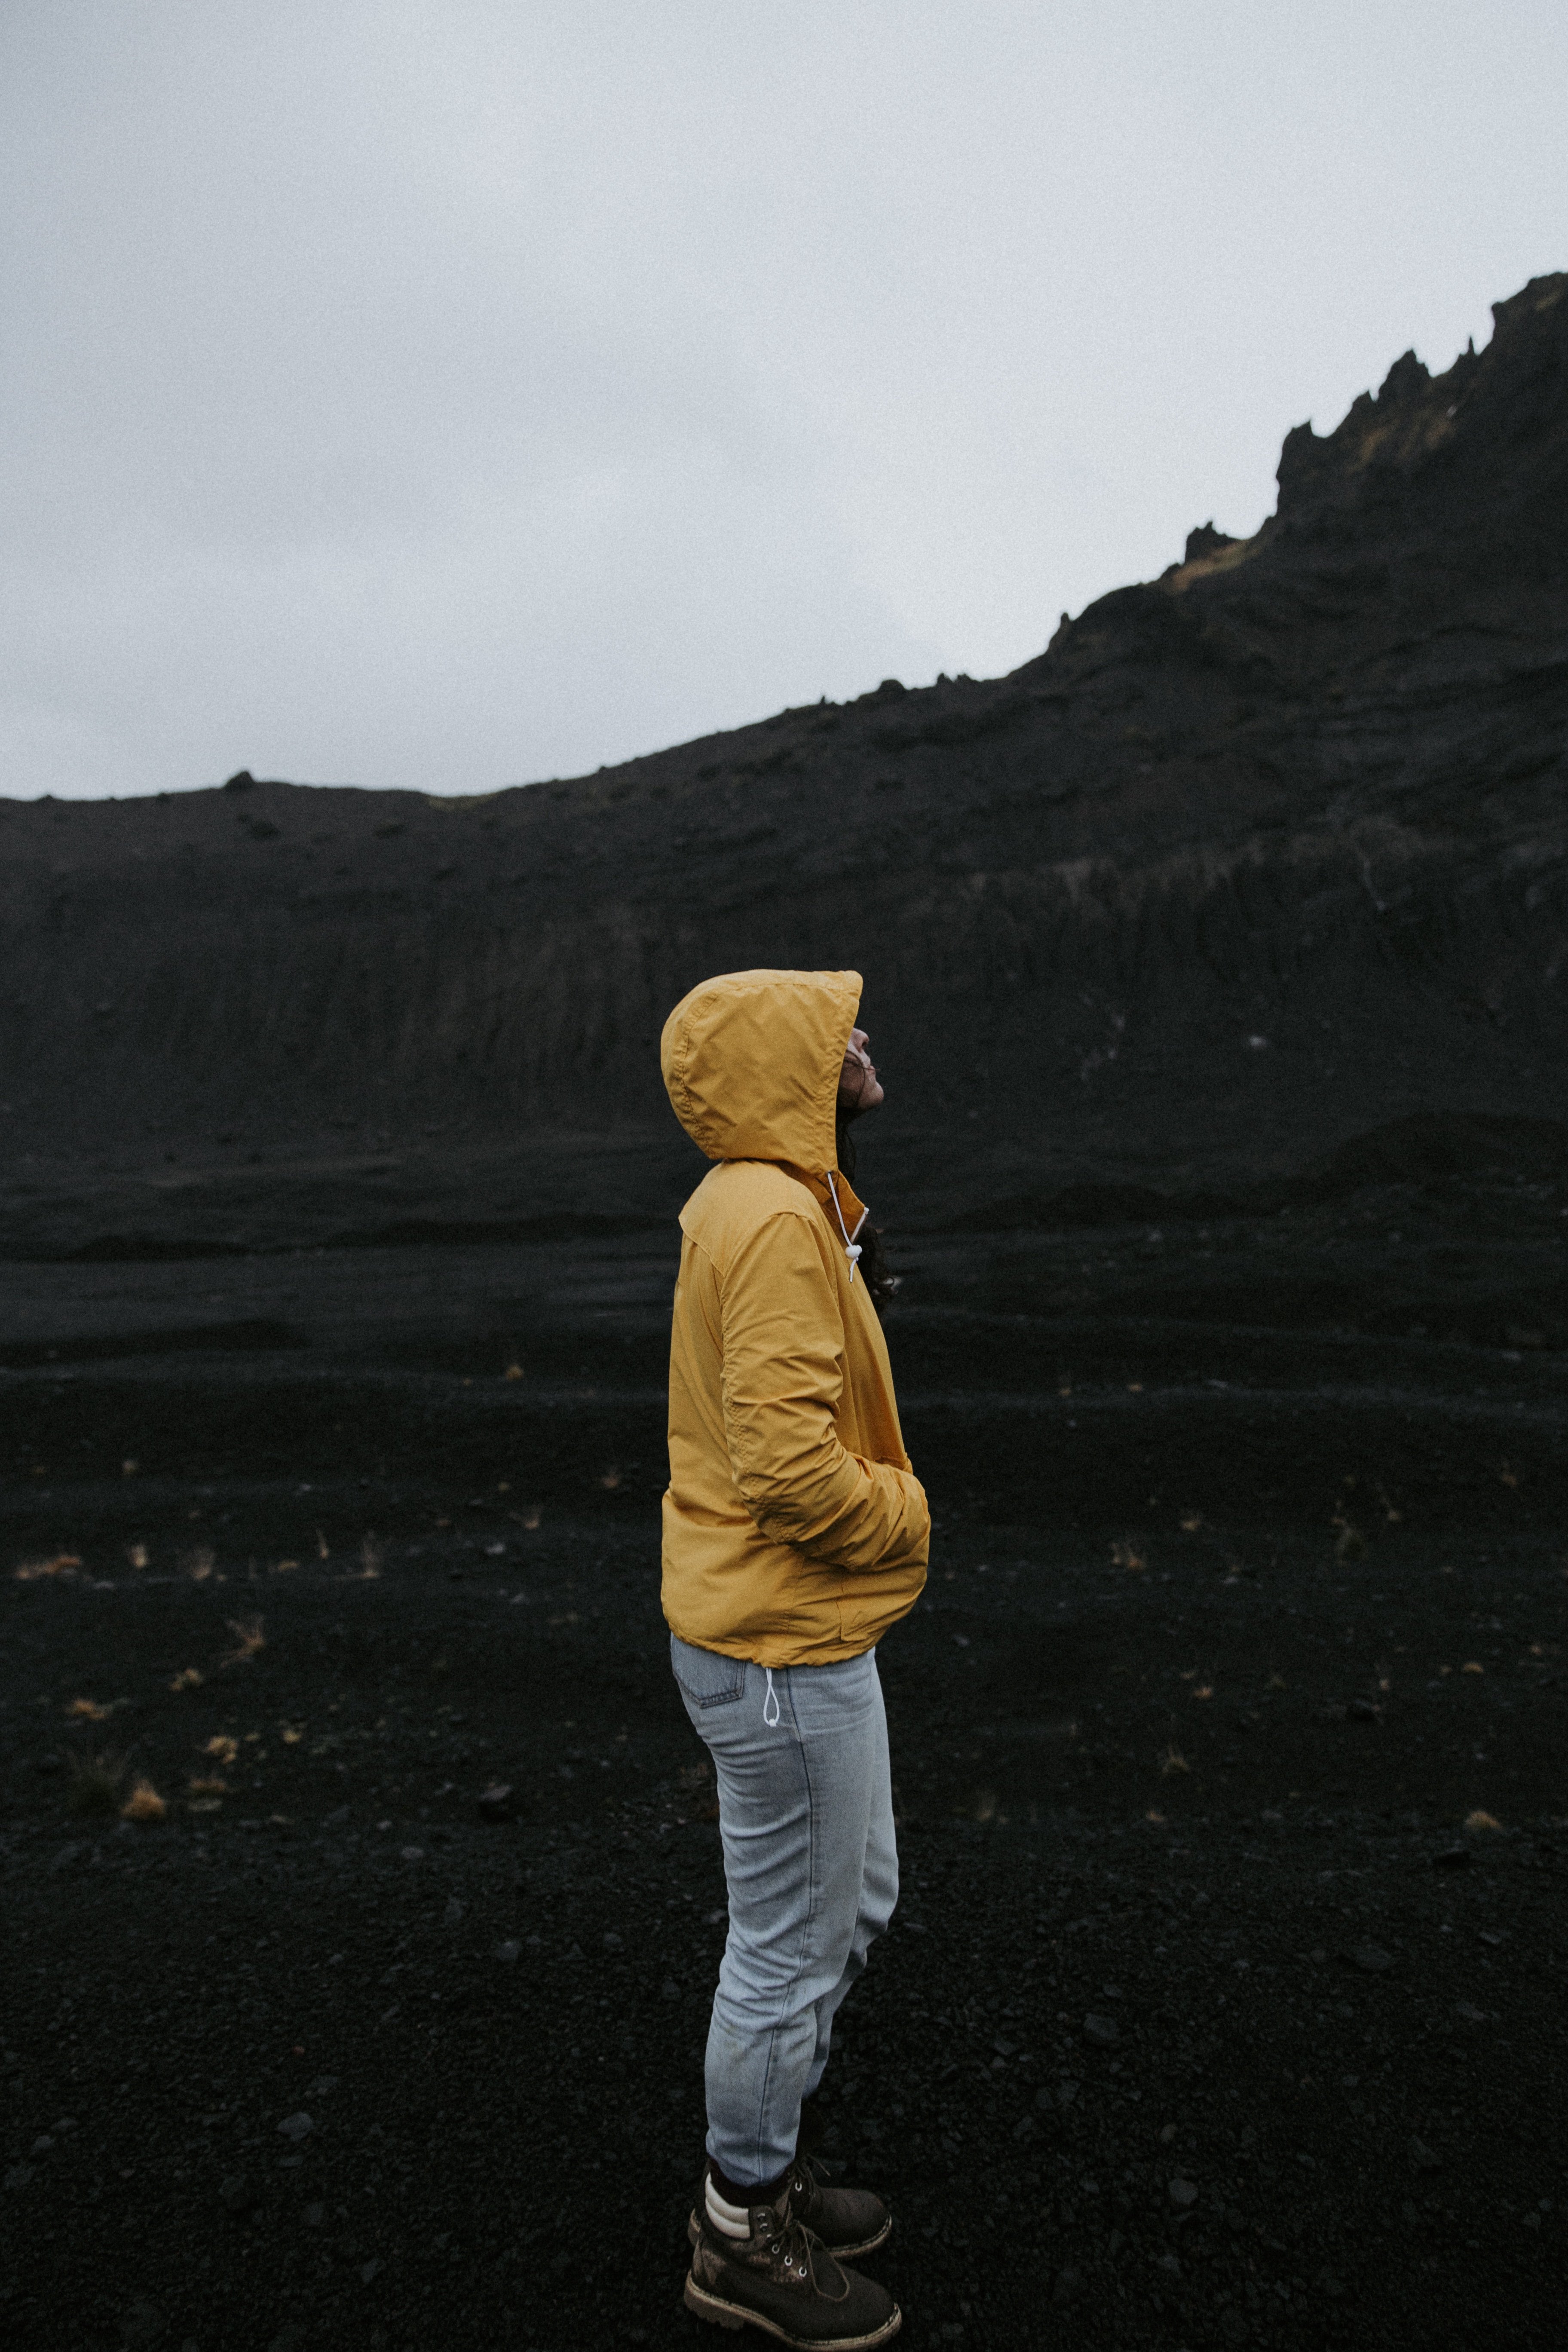
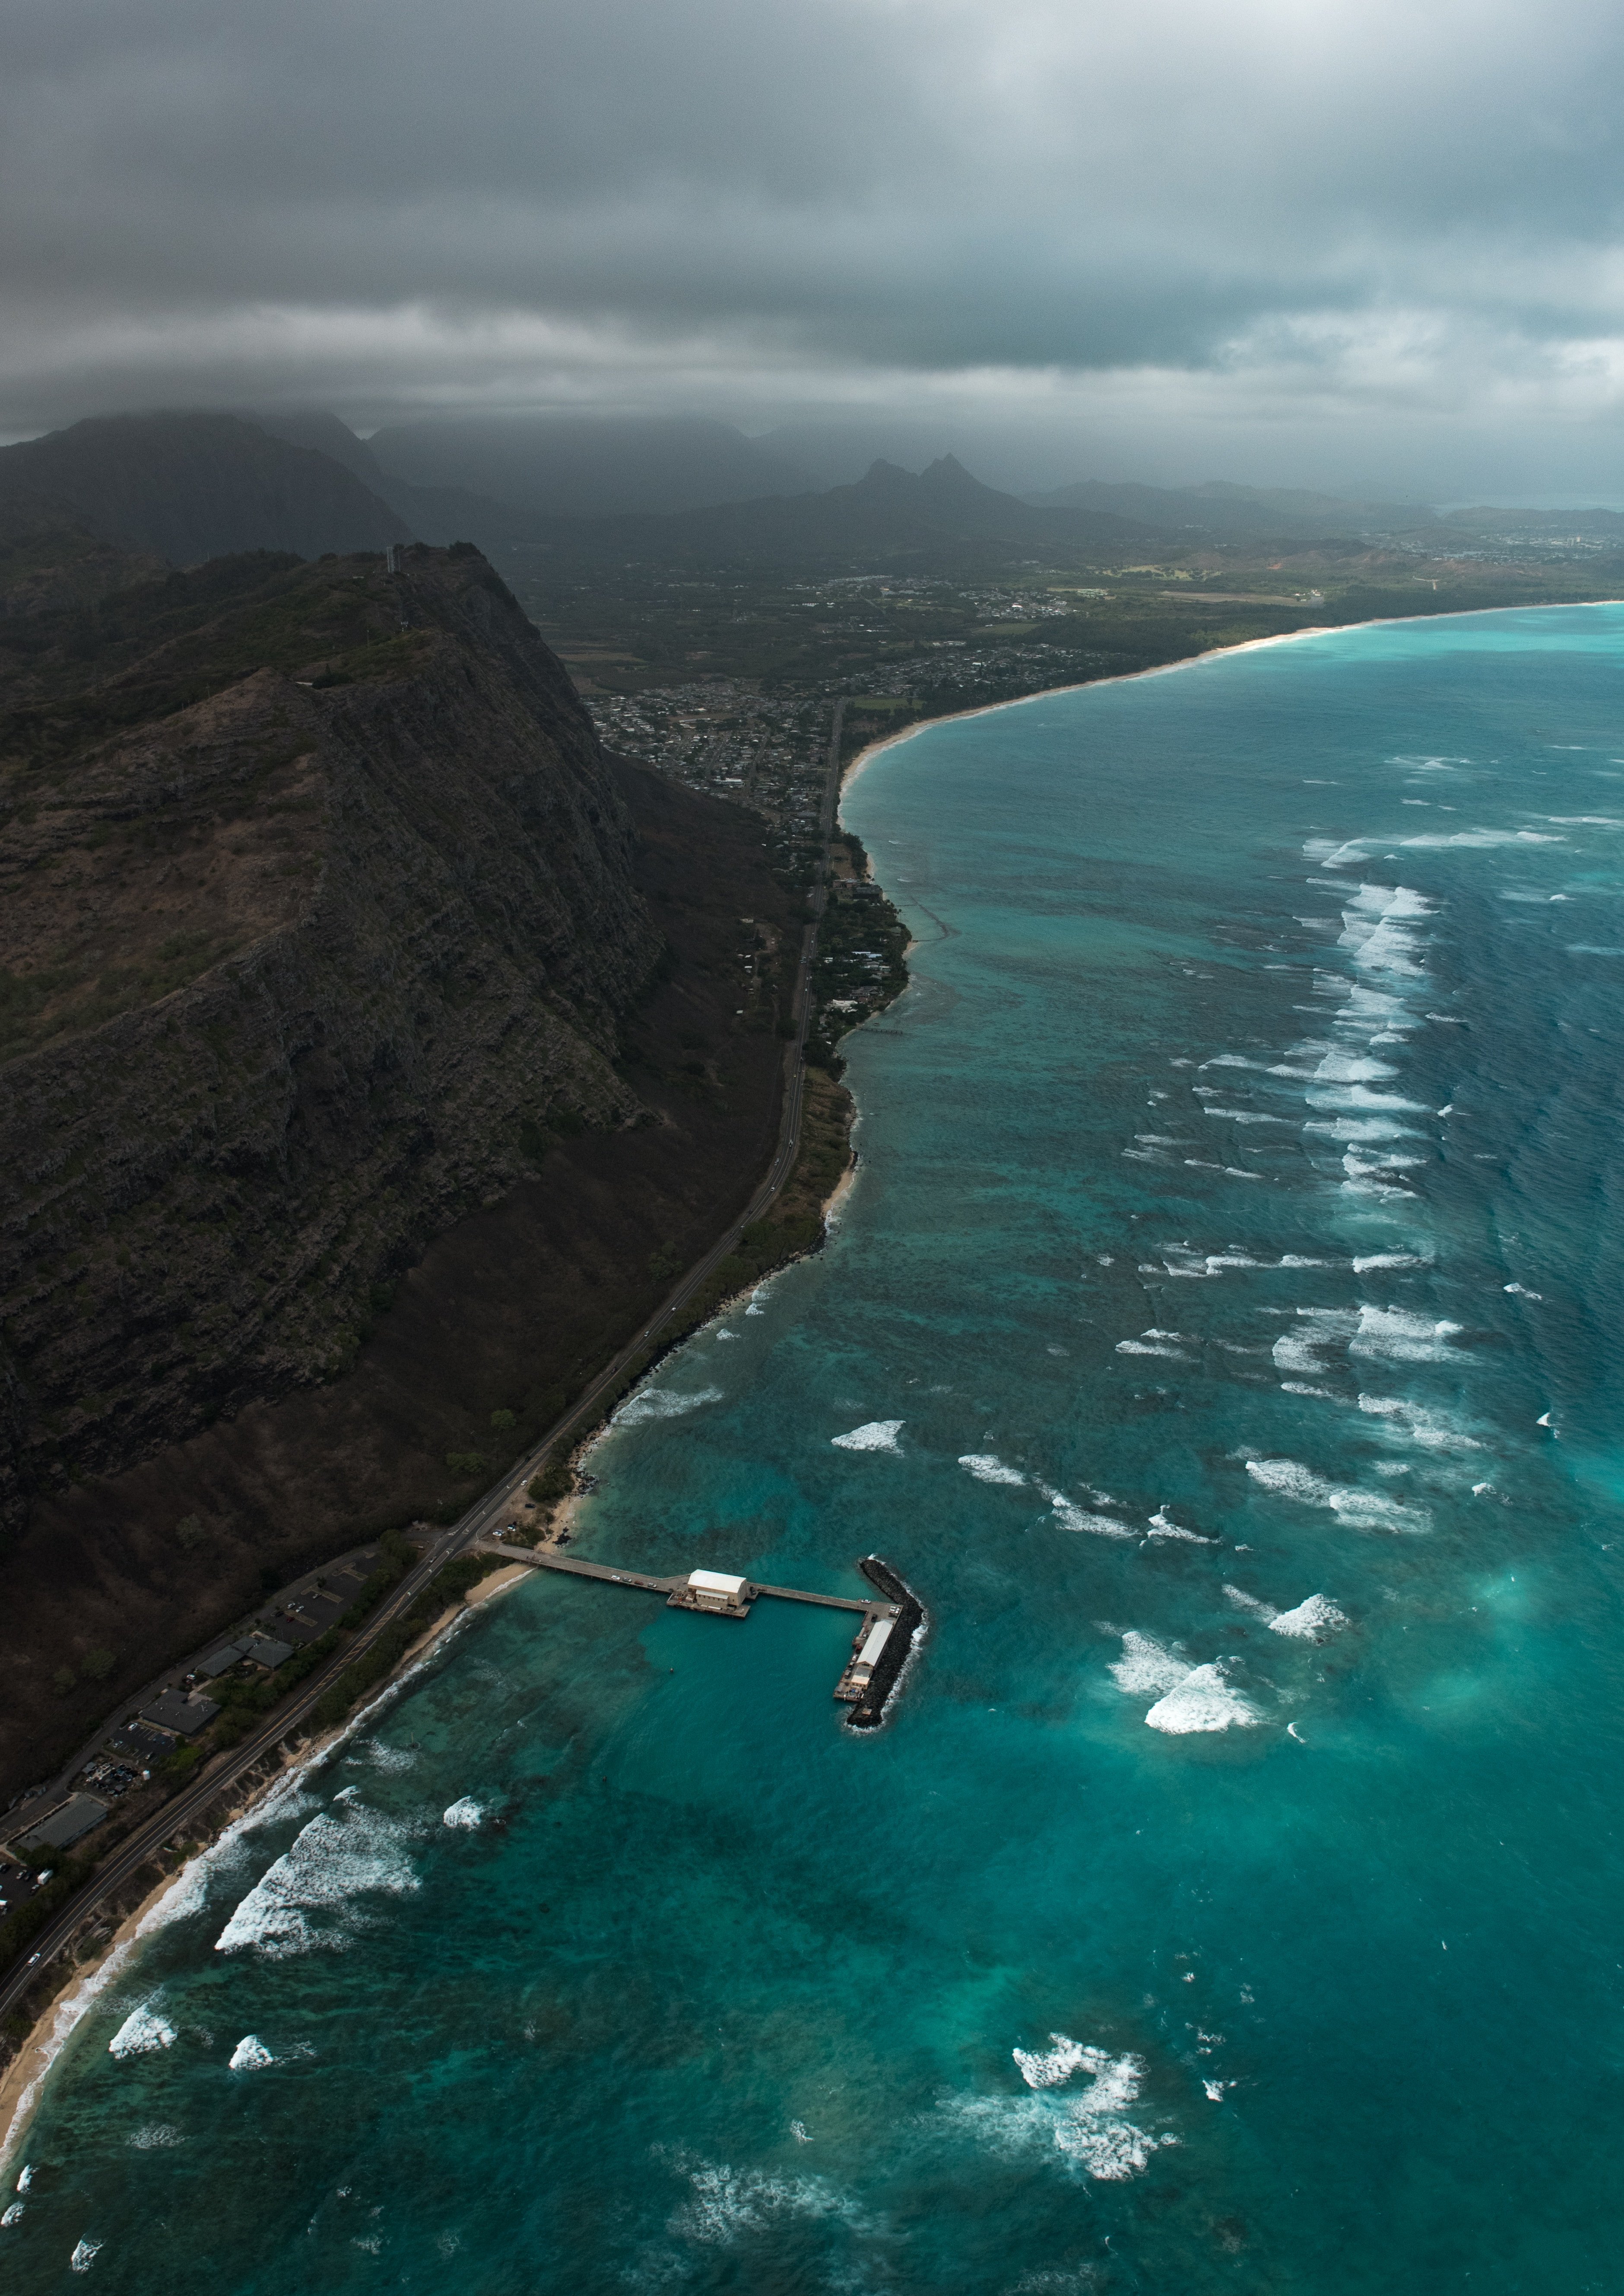
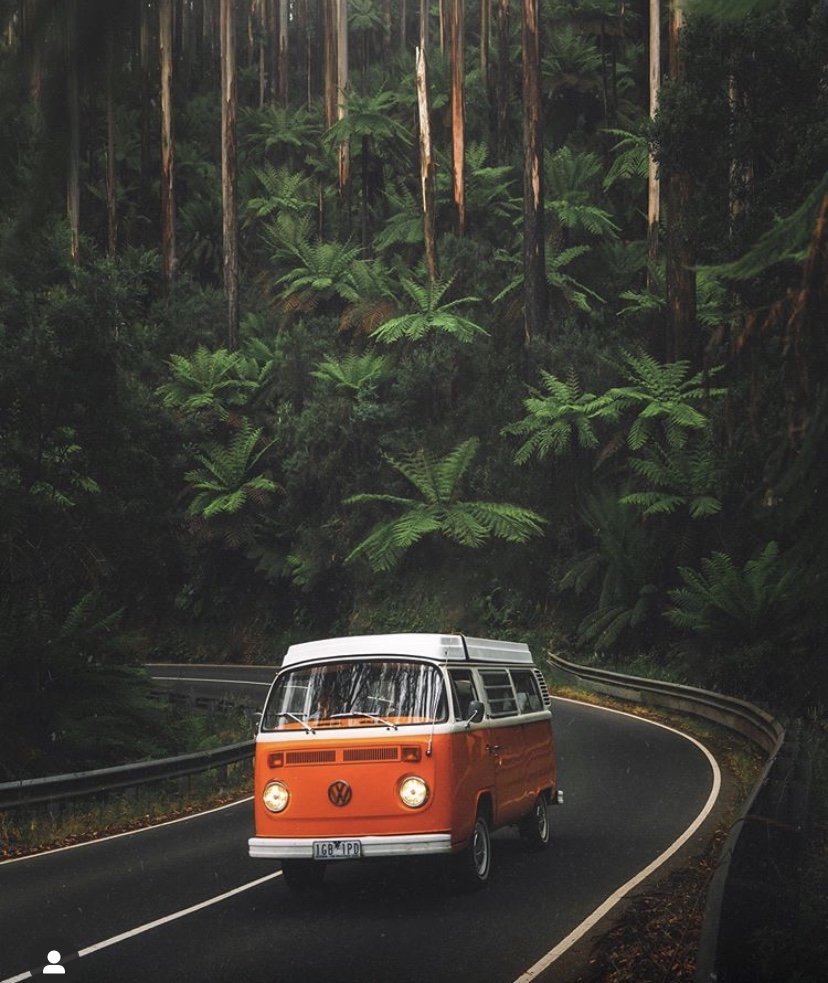
Hello [this is a continuation of a previous topic i posted. Still struggling)I'm looking for advice or for something to create a Macro or a LUT to achieve the desired effects below on the image 'photos to be edited'. I do realize the photos to be edited are shot in different lights and all have extremely different color palettes, though i'm hoping this wide range may serve useful in seeing the effect of the macros and adjustments.Desired effect examples are in images 'drama outdoor', 'drama indoor' and 'drama greens'.Desired Effects:- cool (not warm) filter overall- blues to turn deeper, darker and teal- greens to pop and be vivid, but not overly saturated (as done in 'Drama Green)- skin tones to pop- a matte/ black fade effect without removing depth from the blackThanks so much Denise

-
Thanks so much, but the boost seems to just add contrast - not necessarily more color. From the macros below under JR - Filter Effects (download here: https://affin.co/workflow), I found Technicolor 2-strip, Lab 50:50 and Technicolor 3-strip. Adjusting within any of these 3 macros, do you have any idea how I could possibly: - make the blues more teal - make the greens more vivid - avoid removing all depth in the black - maintain a cool (not warm) color overall or in general just achieving the same desired images i listed. Thanks so much for any help.
-
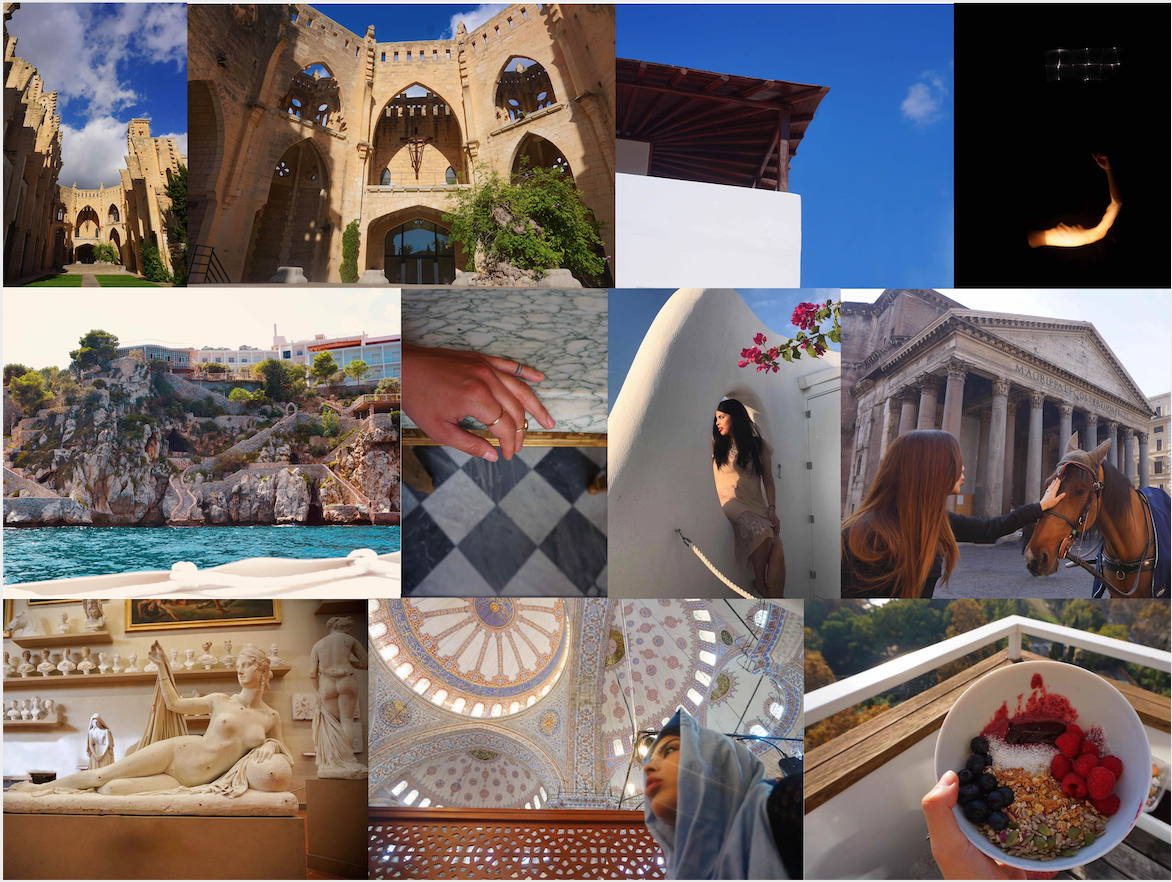
Hi @Dan C, thanks so much for your help. I added your suggestions of White Balance to Blue in my edits below. Super appreciate your time and sending over the LUT post. I had seen this post earlier but am still missing some key desired outcomes. For better communication purposes, I'm providing a sample from the: 1) Desired effect images: greens, indoor and outdoor 2) Original images being edited 3) 'Matte' macro effect + blue added from White Balance Desired effect images: greens, indoor and outdoor Original images being edited Matte' macro effect + blue added from White Balance I do realize that my original images are shot in different lights and all have extremely different color palettes, though i'm hoping this wide range may serve useful in seeing the effect of the macros and adjustments. The closest Macro or LUT I've used so far is the Matte one. I like that: the blues go deeper/darker (not brighter) there seems to be a matte/fade effect i'm noting some contrast creating a dramatic effect ********What is still missing:******** The blacks are too faded, there is not much contrast in among the black shades as they do in in 'Drama Indoor', 'Drama Green' and 'Drama Outdoor' The skin tones and greens don't pop how they do in 'Drama Green'
-
@v_kyr Thanks so much for the reply. The matte effect from the macro is lovely, but I'm looking for something that makes all colors cooler/bluer added as well. Is that possible?
-
Hi there, I'm trying to achieve a visual similar to the images attached. I've tried using Affinity Photo's LUT's, adjustments and tutorials but I just can't get there. I think it would include a minor fade on the black, a deepening to the blues (seeking a teal'ish blue), deep blue and greens (never overly saturated). Anyone know which adjustments I can play with and how to achieve this? Would super appreciate your time. Thank you so much~ - Denise
-
DeniseIleen reacted to a post in a topic:
Affinity Preset LUT's Bundle?
-
That really helped, thank you!
-
Sara72 reacted to a post in a topic:
Isometric Mode to create Patterns and Tessellations
-
 Sara72 reacted to a post in a topic:
How can I fill a shape with an image?
Sara72 reacted to a post in a topic:
How can I fill a shape with an image?
-
Thank you, link for reference here
-
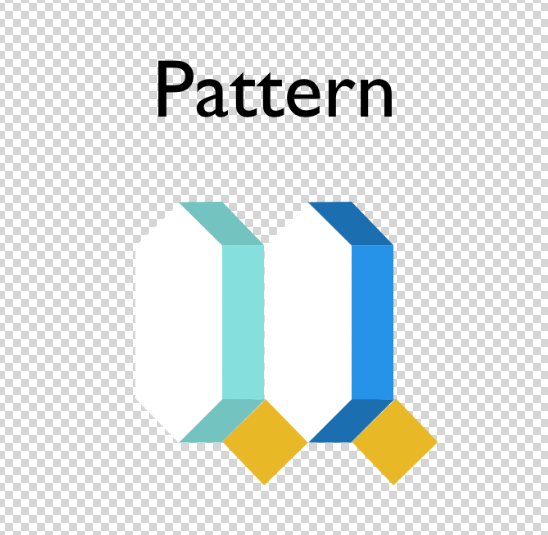
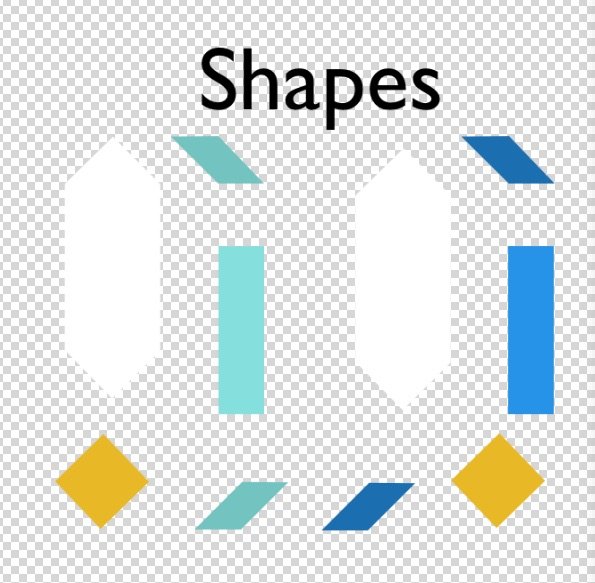
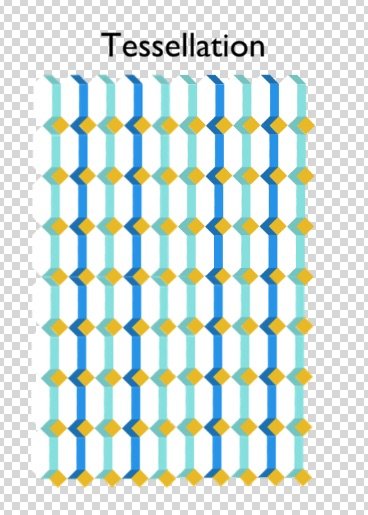
I build Tessellations using Affinity Design in normal mode (not Isometric). To do this, I create Shapes, adjust their size + arrange them to build a Pattern: So that the Shapes snap within a Pattern and so that the Pattern when duplicated, snaps within a Tessellation (as demonstrated in the 3 images below) Below I describe my workflow followed by questions looking to make my process more efficient. WORKFLOW Step #1 - Find Shape Dimensions for Pattern To find the dimensions of the Shapes within the Pattern, I: Create the Shapes, then I Adjust the constrained size + Rotate + Move the Shapes so they snap to each other (this provides the necessary Shape dimensions to fit within the Pattern) Step #2 - Find Shape Dimensions for Tessellation as well The dimensions of the Shapes must snap within the Tessellation too - so I: Duplicate the same Pattern (from step #1) as many times necessary so the duplicates fully surround all sides of the Original single Pattern, then I Adjust the constrained size of the Shapes so that all shapes snap to each other within both the Pattern + Tessellation (this provides the Shape dimensions within the Tessellation) Step #3- Erase the erroneous, extra Shapes that don't fit within both the Pattern & Tessellation Once the Shape dimensions are final (they snap within both the Pattern and the Tessellation), I erase the erroneous, duplicate Patterns, keeping only the Pattern with the correct Shape dimensions that snap within both the Pattern and Tessellation. Step #4- Merge the Patterns into images rather than shapes (so document 's size don't hinder its agility) Once the erroneous Patterns are deleted, I: Duplicate the Pattern one time Hide the Original Pattern Merge the Duplicated Pattern Step #5- Create the Tessellation Duplicate the Merged Pattern enough times so it fills the entire canvas, creating a non-heavy tessellation QUESTIONS for: Steps #1 and #2, is there a more efficient workflow to adjusting the constrained shape sizes, rotating and moving them so one can learn if they fit into both the *Pattern* and *Tessellation* at once? (rather than having to go through both steps). Ideally, I'd create the Shapes & fill with their corresponding image as usual - but then Adjust, Rotate and Move the Shapes within the Pattern and Tessellation so they snap to eachother in one step. Also, this more efficient workflow would allow me to skip Step #3 that would have multiple erroneous shape sizes [How] can I use the isometric panel for this? Step #3, is there a different format or method I can use so that the repeated, individual Shapes and Patterns don't reduce the document's agility? Otherwise, when making modifications the document's large size hinders its speed. Also, if I don't merge the patterns into images, when returning to the document for any additional modifications, I can avoid having to re-create the tessellation. Thank you so much for any feedback or guidance.
-
Sara72 reacted to a post in a topic:
How can I fill a shape with an image?
-
Hi there, thank you so much for the tutorial references. I've watched them and they've helped my workflow a lot. The Isometric panel you referenced looks very relevant to the what I'm trying to achieve. I'm new to this forum but will assume it works similarly to others. Because my new question's topic is quite different (isometric panels and snapping), I am going to begin a new forum question thread.