-
Posts
29 -
Joined
-
Last visited
Everything posted by Sirenetta
-
Thanks everyone! GarryP what settings did you use in your example? Thanks for your examples firstdefense and R C-R. This is very helpful! R C-R, how did you create the "Compound" folder group? I'm familiar with selecting objects and then selecting the "add, subtract, etc.," but I haven't created them in the way you did.
-
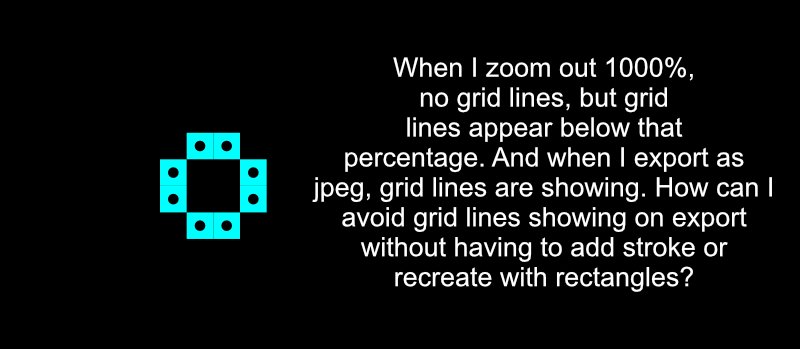
Hi all, I created a shape using eight square 10X10 symbols. I used the grid view and snapped the squares into a 10px spacing grid. Now I notice that when I turn the grid off, there are grid lines around the squares. The grid lines disappear when viewing the document at 1000%. When I export as JPEG, I can see the grid lines. There is no stroke around the symbol, but if I add a stroke, the grid lines seem to disappear. I'd rather not add a stroke unless I need to. And, I'd like to use squares instead of rectangles. Is there a setting I'm unaware of that I should select to remove the grid lines, or is this a bug that hasn't been resolved yet? My file is attached. Thanks for your help. gridlines.afdesign
-
Hello, In AD, I created an artboard that is 8.5" X 11" (standard paper, 3300x2550px) and placed two 5"X7" images (1500X2100px) into the artboard. File attached. When I export to print, I see the option to automatically add crop marks and bleed to the artboard. However, it adds these marks around the artboard and not the actual images. In this situation, is my only option to add the crop marks and bleed to the file by hand? Or, is there some automation feature that could help me with this? If I need to do by hand, is there a preferred way to do that? The result would be a PDF that could be printed using 8.5"X11" paper and have marks where the image should be cut. Thanks! 8.5X11artboard.afdesign
- 2 replies
-
- affinity designer
- bleed
-
(and 1 more)
Tagged with:
-
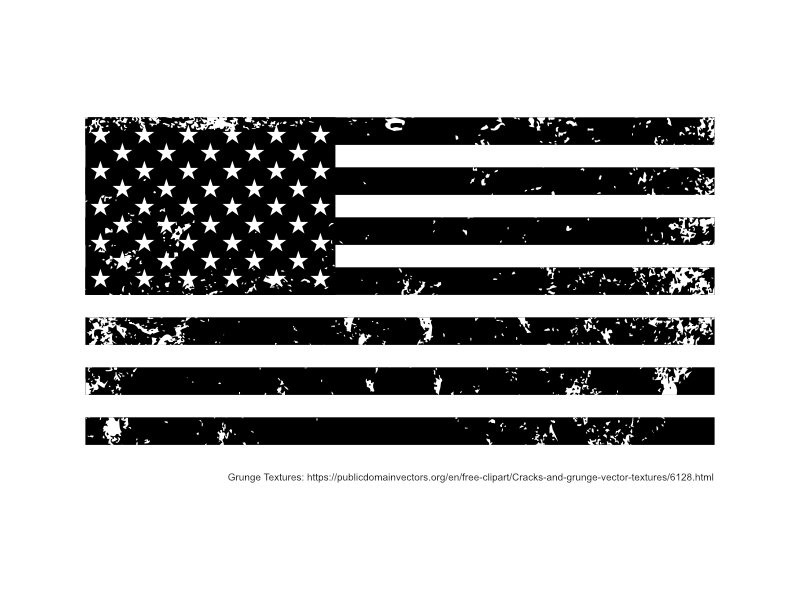
If you are asking how to apply a vector texture to your image, please take a look at the file I attached to see how it was done. The flag group was dragged into the texture group to constrain the textures to the flag.
-
I see! Yes, try experimenting with vector grunge textures. I think a combination of those will help you achieve your flag graphic without having to find or create brushes.
-
Another idea... If you create the flag using basic shapes in AD, you can apply a vector grunge texture on top of the flag to create that look. Attached is an example of an American flag with a vector grunge texture overlay. You can download free grunge textures online to experiment with. I hope this helps! American Flag.afdesign
-
CreateSean, if you download the SVG, you can expand the document dimensions (File>>Document Setup) and then copy/paste the curve as needed until you have the size you need. Then combine the curves to create one background image. The attached file was created this way. It's 720px square, but it can be as large as you want with that method. To size it as a rectangle shape, create a rectangle that size and then in your layer's menu, drag the rectangle over the curve to make the curve constrain to the rectangle. See file attached. I hope this helps. floating-cogs.afdesign floating-cogs_rectangle.afdesign
-
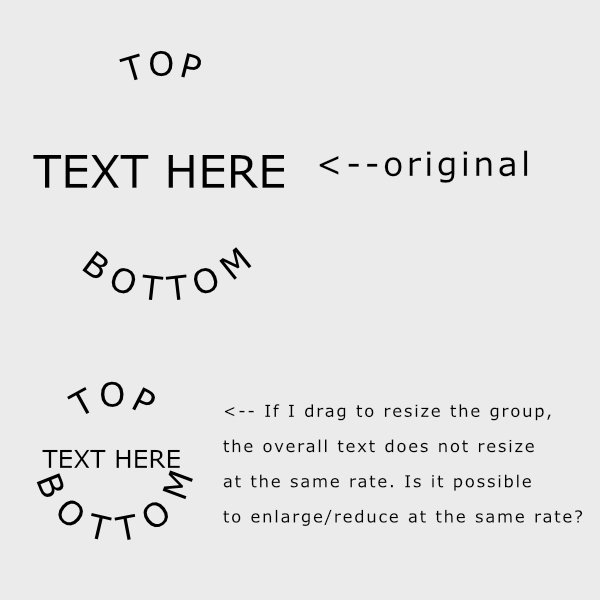
I'm using Affinity Designer. I have artistic text on a circular path and basic text in the center. I grouped all text together, but when I resize the group, the aspect ratio of the text changes. If I expand the group, the center text gets larger and the text on the path gets smaller. And vice versa. But, I'd like to maintain the ratio so that all text expands/decreases at the same rate. Is that possible? Is there a "scale with object" option for this? I will attach my file. text_path_resize.afdesign
- 2 replies
-
- resize text on path
- resize text
-
(and 1 more)
Tagged with:
-
[AD] Distort Shape Options?
Sirenetta replied to Sirenetta's topic in Pre-V2 Archive of Desktop Questions (macOS and Windows)
Thanks everyone for all of these!! I will try all of them. Can someone let me know how to access equations? Is that feature in Affinity Designer? -
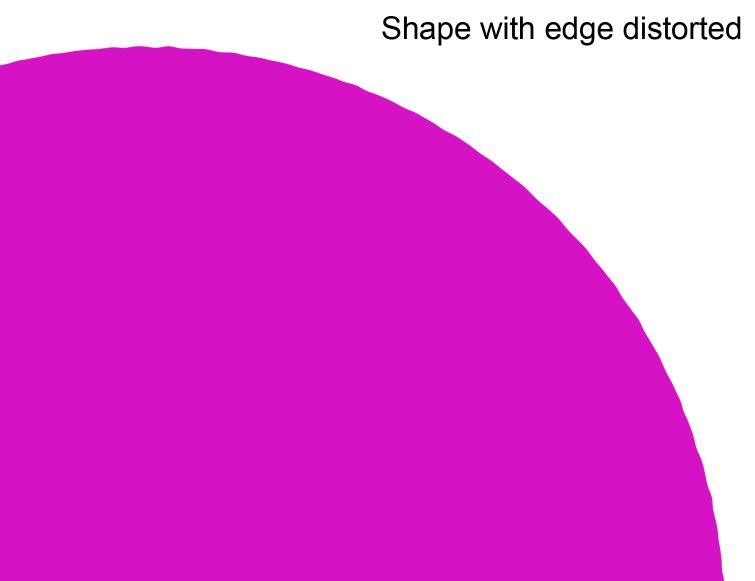
I'm using Affinity Designer. Besides using a textured stroke or manually adjusting curves/nodes, is there another way to distort the edge of a shape? Pic below is similar to what I'd like to accomplish. I could possibly create a textured stroke to mimic this, but are there other ways or anything automatic? Thanks again!
-
Hello, I would like the text centered at the top and bottom of a circular path.I adjusted the red/green arrows to the sides of the circle, highlighted the text, and selected "align center" for the text. This seems to be centered... is this accurate? Thanks! text center on path.afdesign
- 2 replies
-
- circle
- text centering
-
(and 1 more)
Tagged with:
-
Thank you firstdefense on the steps for a custom brush! And thank you gdenby for the advice about the pressure profiles. I was unaware that I could break the shape into line segments and then apply a pressure profile. I like the idea of maintaining pure vector qualities.
- 3 replies
-
- stroke around circle
- circular stroke
-
(and 3 more)
Tagged with:
-
I would like to add a stroke to a circle that is distorted as the example below. I tried using a textured brush stroke but none had the same effect as the example. I was able to edit the pressure of a basic brush stroke to somewhat achieve the effect. But, I wanted to ask the community here if I'm missing another feature in Designer that would achieve that look? How would you recreate this? Is there an easier method?
- 3 replies
-
- stroke around circle
- circular stroke
-
(and 3 more)
Tagged with:
-
Thanks for your feedback! I'm going to try this again!
- 5 replies
-
- vector brush
- eclipse brush
-
(and 2 more)
Tagged with:
-
Hello, I'm using Affinity Designer. I would like to create a vector brush that is an eclipse shape. I followed the tutorial for creating a vector brush except I used the eclipse vector shape instead of a brush. I saved it as a png and then uploaded it as a new textured intensity brush. Unfortunately, when I draw with it, the edges are blurry and jagged. Are there any tips on how I can make this better?
- 5 replies
-
- vector brush
- eclipse brush
-
(and 2 more)
Tagged with:
-
Bug on textured lines
Sirenetta replied to Erider's topic in Pre-V2 Archive of Desktop Questions (macOS and Windows)
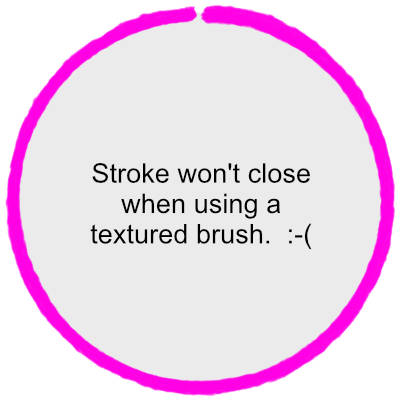
OK, I found that I could convert the shape to a curve, select the node at the gap, and click "break curve". This closes the stroke. -
Bug on textured lines
Sirenetta replied to Erider's topic in Pre-V2 Archive of Desktop Questions (macOS and Windows)
AD Newbie here. Can someone provide instructions for how to do this? I would like to use a textured brush as a border around a circle, but it also has a gap. Is there a way to copy an existing brush and quickly modify it to have closed ends? Or, do I need to create a png of a stroke? What settings should I use? Thanks!


