Tony77
Members-
Posts
78 -
Joined
-
Last visited
Recent Profile Visitors
The recent visitors block is disabled and is not being shown to other users.
-
Astrophoto stacking
Tony77 replied to Tony77's topic in Pre-V2 Archive of Desktop Questions (macOS and Windows)
Hi NathanC thank you for the support -
Astrophoto stacking
Tony77 replied to Tony77's topic in Pre-V2 Archive of Desktop Questions (macOS and Windows)
Hello yes I have seen this video and in one section it talks about what I am looking for but it clearly says that the second set must be aligned by hand, but its second set is completely shot upside down and out of alignment. My second set of shooting is a few degrees moved due to repositioning, I wanted to know if the software can make up for that small difference by making a single stack with two "slightly" misaligned sets. -
Astrophoto stacking
Tony77 replied to Tony77's topic in Pre-V2 Archive of Desktop Questions (macOS and Windows)
Anyone who has any information for me? -
Astrophoto stacking
Tony77 posted a topic in Pre-V2 Archive of Desktop Questions (macOS and Windows)
Hi guys I have a manual winding mechanical type astro-tracker that takes up only 1 hour of integration, to do more hours of integration you need to reload the timer and manually return to the position it assumes after one hour of integration and so on for the following hours. . Obviously the position will not be precise so I have a set of type 50 photos aligned and others and 50 slightly shifted due to the timer reload time and subsequent rotation of 15 ° back to find the position after 1 hour. My question is does the program manage to do all an alignment if I load a set of 50 photos from the first shot and 50 from the second? -
Lab sharpness
Tony77 replied to Tony77's topic in Pre-V2 Archive of Desktop Questions (macOS and Windows)
Thanks Kirk you were very clear I usually prefer to use this LAB method to not have halos around the edges .... but you have a tip on sharpness I gladly accept it. -
Lab sharpness
Tony77 replied to Tony77's topic in Pre-V2 Archive of Desktop Questions (macOS and Windows)
Hi kirk yes I understood that it could be something similar to your explanation (among other things very precise and professional) I apply a lab sharpness by selecting the brightness channel of the lab color space and then I invert the level .... but this last operation leaves me some doubts honestly ... as I saw it on a video tutorial where they apply the sharpness through the lab method. As suggested by another user above ... also you recommend to select the brightness channel and avoid inverting it ??. I had never noticed the sharpening mask but in fact it looks like it should be reversed I attach how the mask looks on my rendering -
 John Rostron reacted to a post in a topic:
Lab sharpness
-
Lab sharpness
Tony77 replied to Tony77's topic in Pre-V2 Archive of Desktop Questions (macOS and Windows)
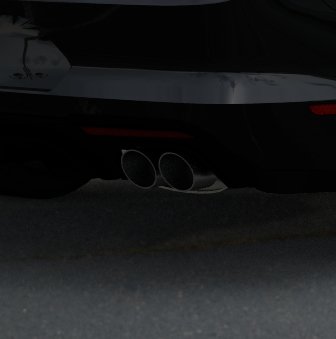
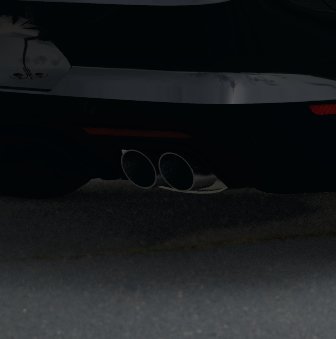
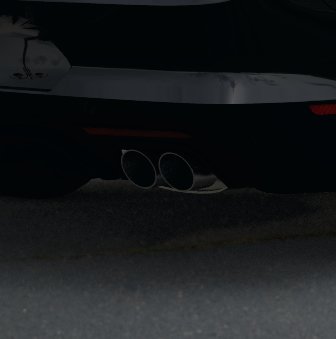
I have attached those three photos because the problem occurs to me with images with dark colors However on my monitor the difference is evident -
Lab sharpness
Tony77 replied to Tony77's topic in Pre-V2 Archive of Desktop Questions (macOS and Windows)
It is the same as I saw .... but there are others that apply the lab sharpness only to the pixels of the brightness channel of the lab color space ... and then re-convert to rgb 16 -
Lab sharpness
Tony77 replied to Tony77's topic in Pre-V2 Archive of Desktop Questions (macOS and Windows)
Hi .... I saw some videos where they loaded the pixels of the brightness channel and then reversed the level .... honestly I also had some doubts but I have seen more than one But now I have seen one that I had never seen and in fact they do not make that passage -
Lab sharpness
Tony77 replied to Tony77's topic in Pre-V2 Archive of Desktop Questions (macOS and Windows)
Hello I redid the test with larger files On the monitor I see that the final file of the reconversion has colors that turn to light blue in the shadows .... this is the problem that I notice if I apply a lab sharpening and then re-convert the colors to 16 or 8 bit RGB I redid the test with larger files -
Lab sharpness
Tony77 replied to Tony77's topic in Pre-V2 Archive of Desktop Questions (macOS and Windows)
Hi to explain better I am attaching the tests I did .... I do not know why it happens but in the end when I want to apply the unsharp mask Lab the final image has a different color in the shadows. The first image is an Adobe rgb 1998 RGB / 8 Jpeg, the second is the same converted to lab and the last is the conversion to RGB / 8 ... as you can see the output colors are different. Does anyone know how to avoid this inconvenience ... otherwise I would have to use a normal unsharp mask without converting the colors to Lab and then converting them back to rgb 8


