
Engine44
-
Posts
214 -
Joined
-
Last visited
Posts posted by Engine44
-
-
38 minutes ago, Alfred said:
Can you provide an example? (I also have an iPad Air 2.)
That might be difficult but I will try,
-
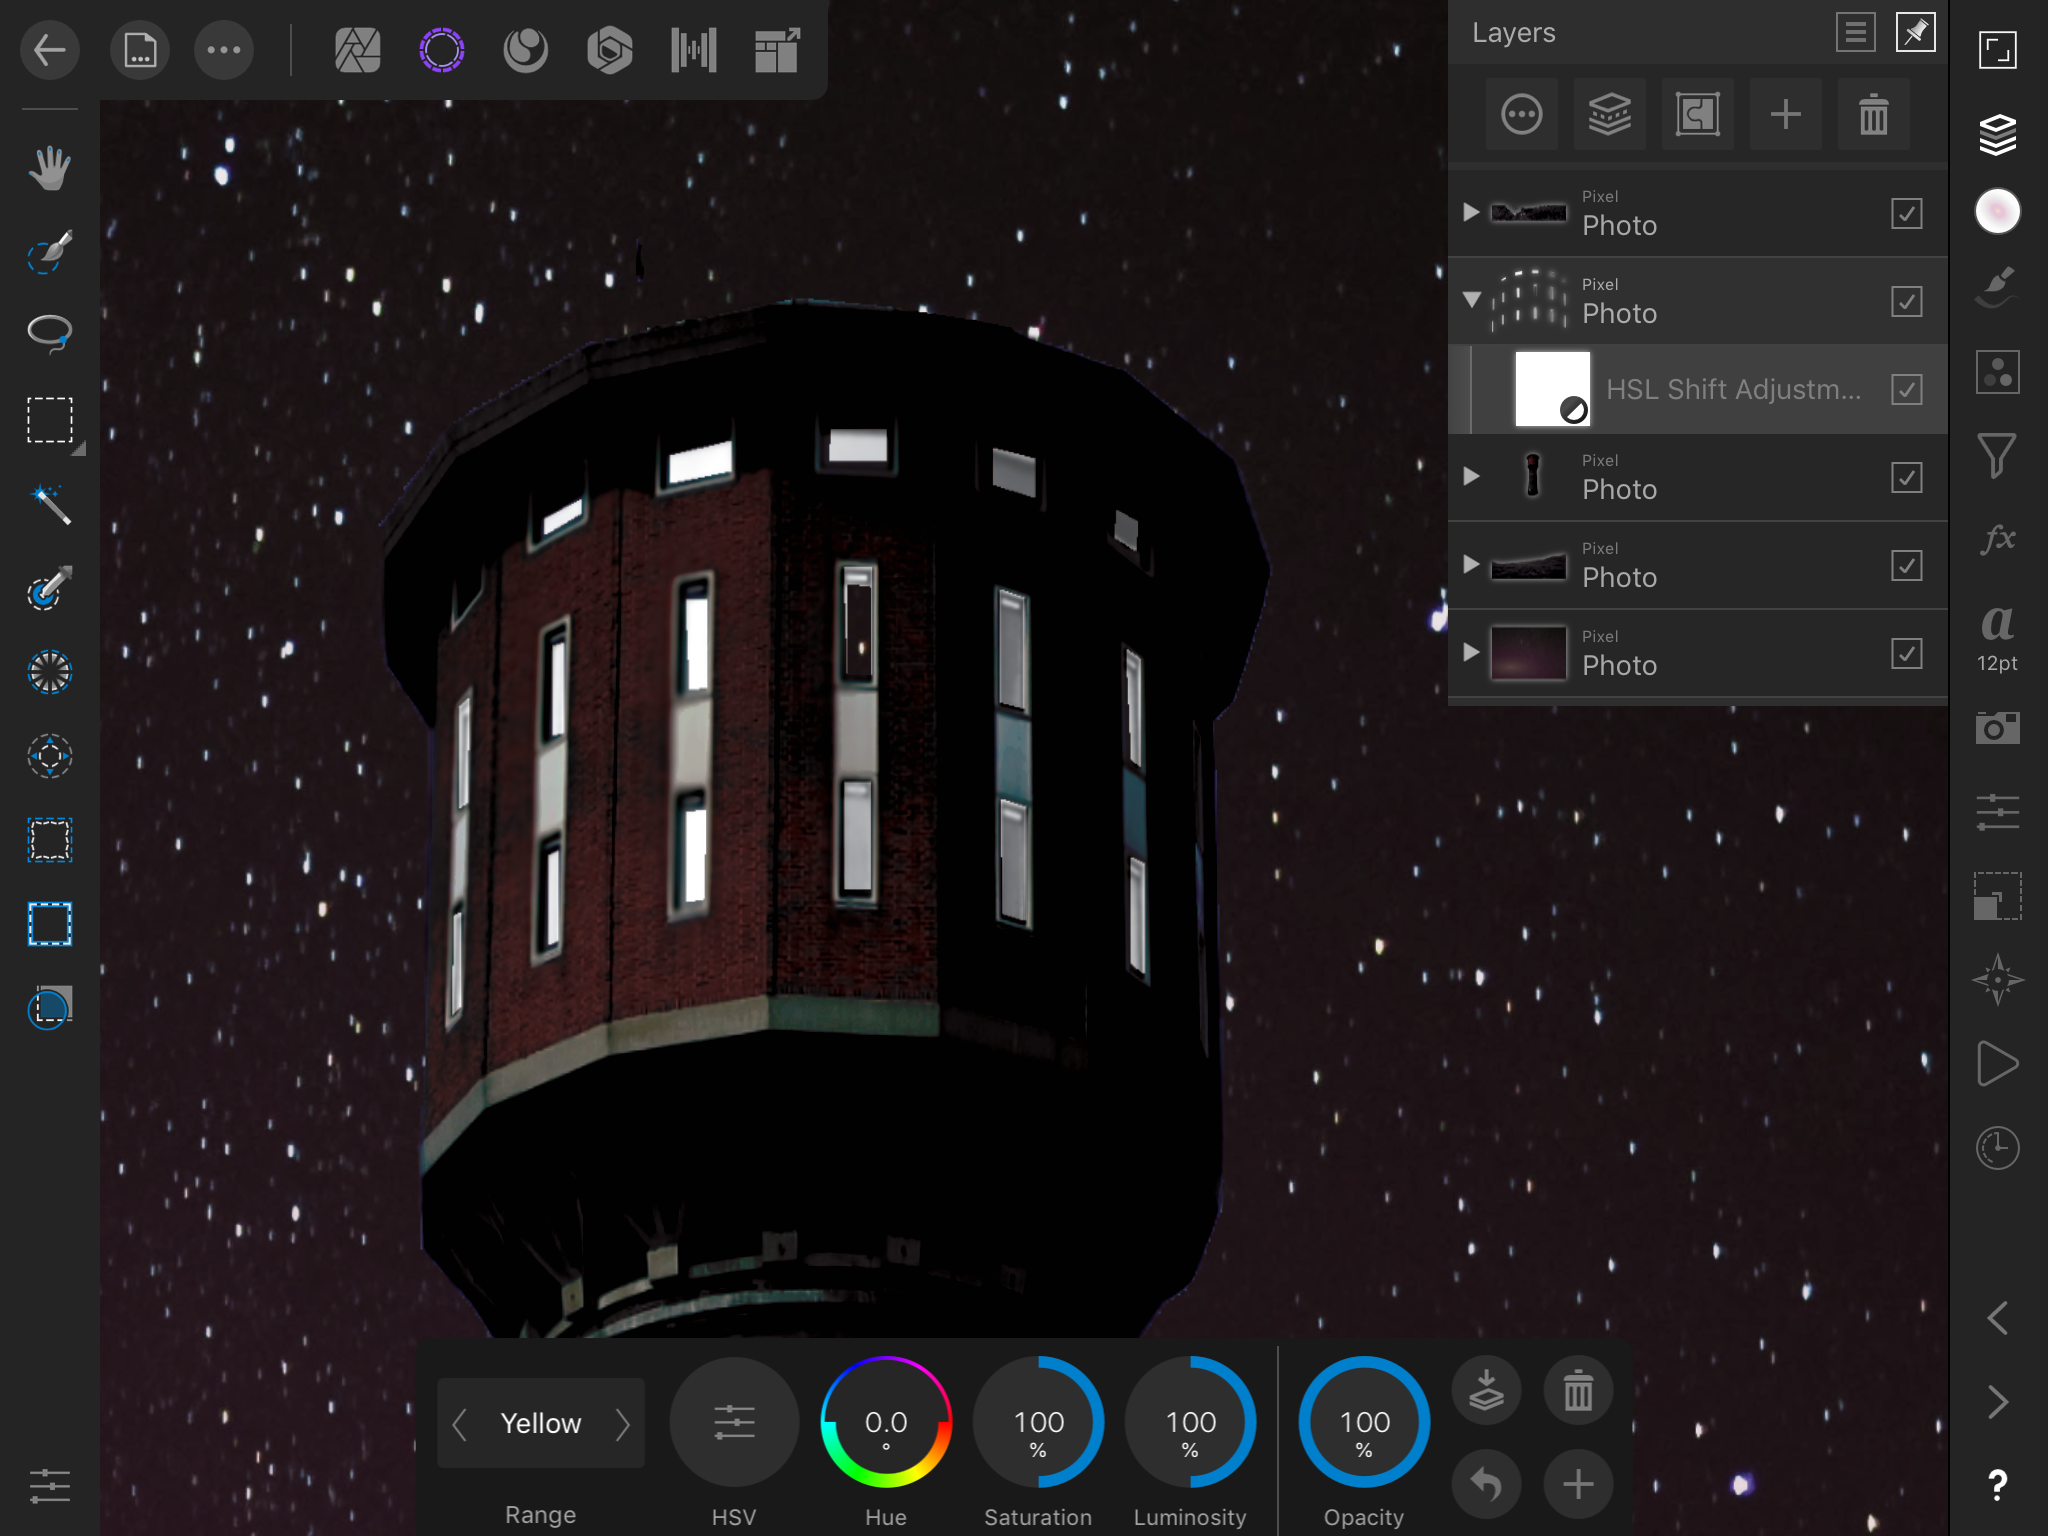
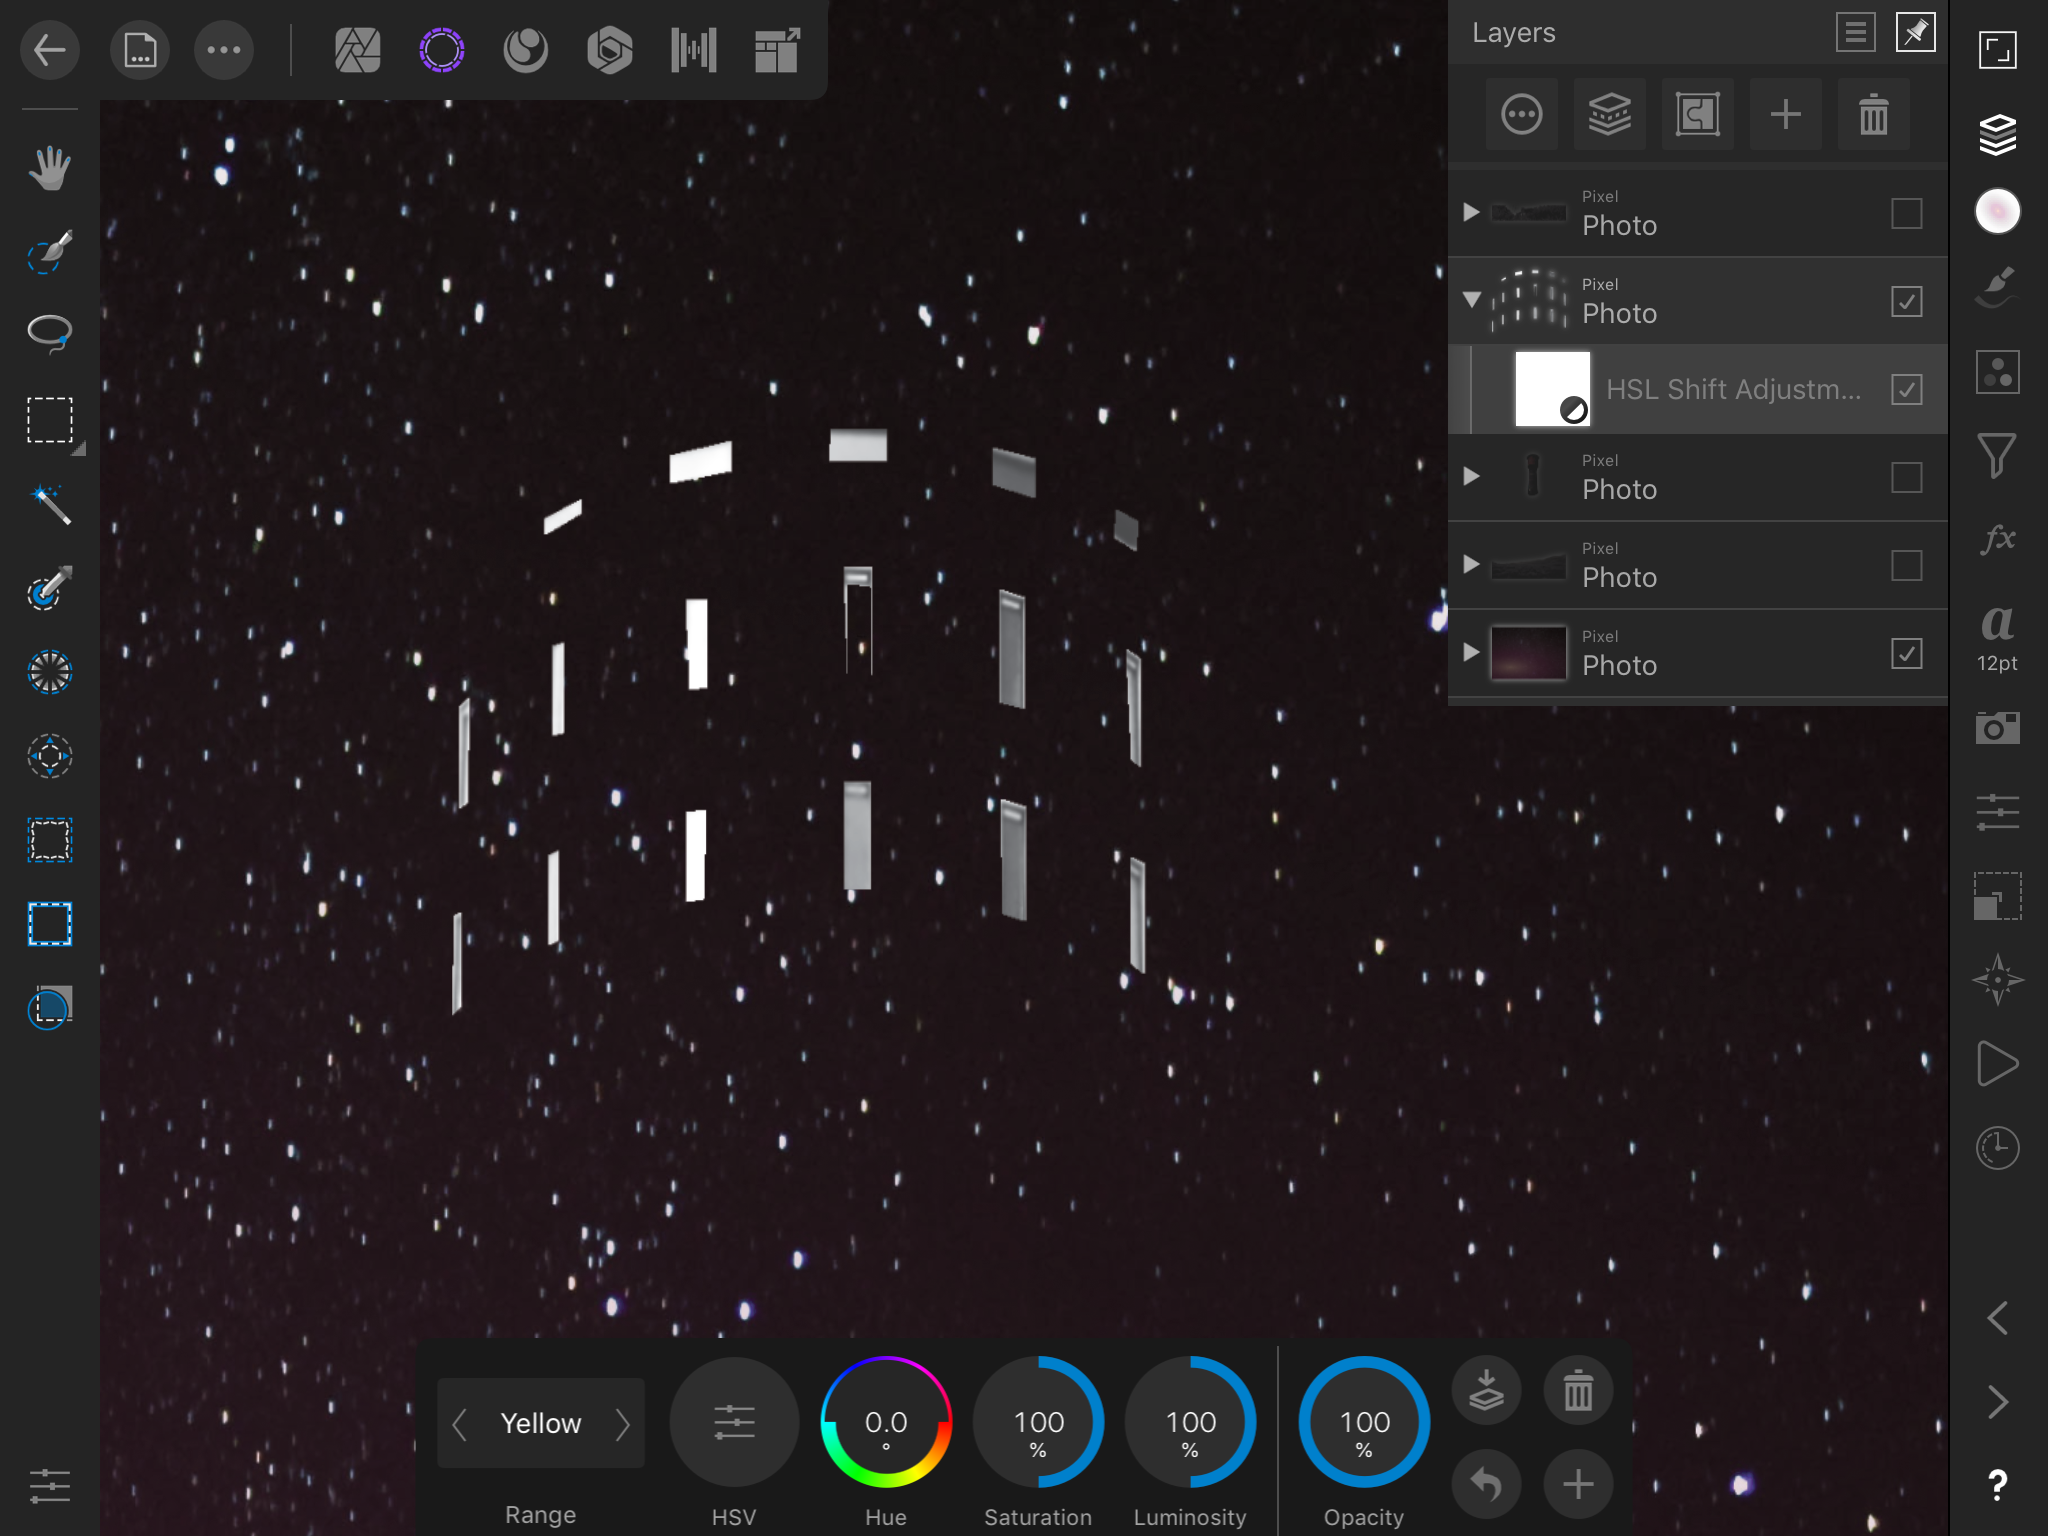
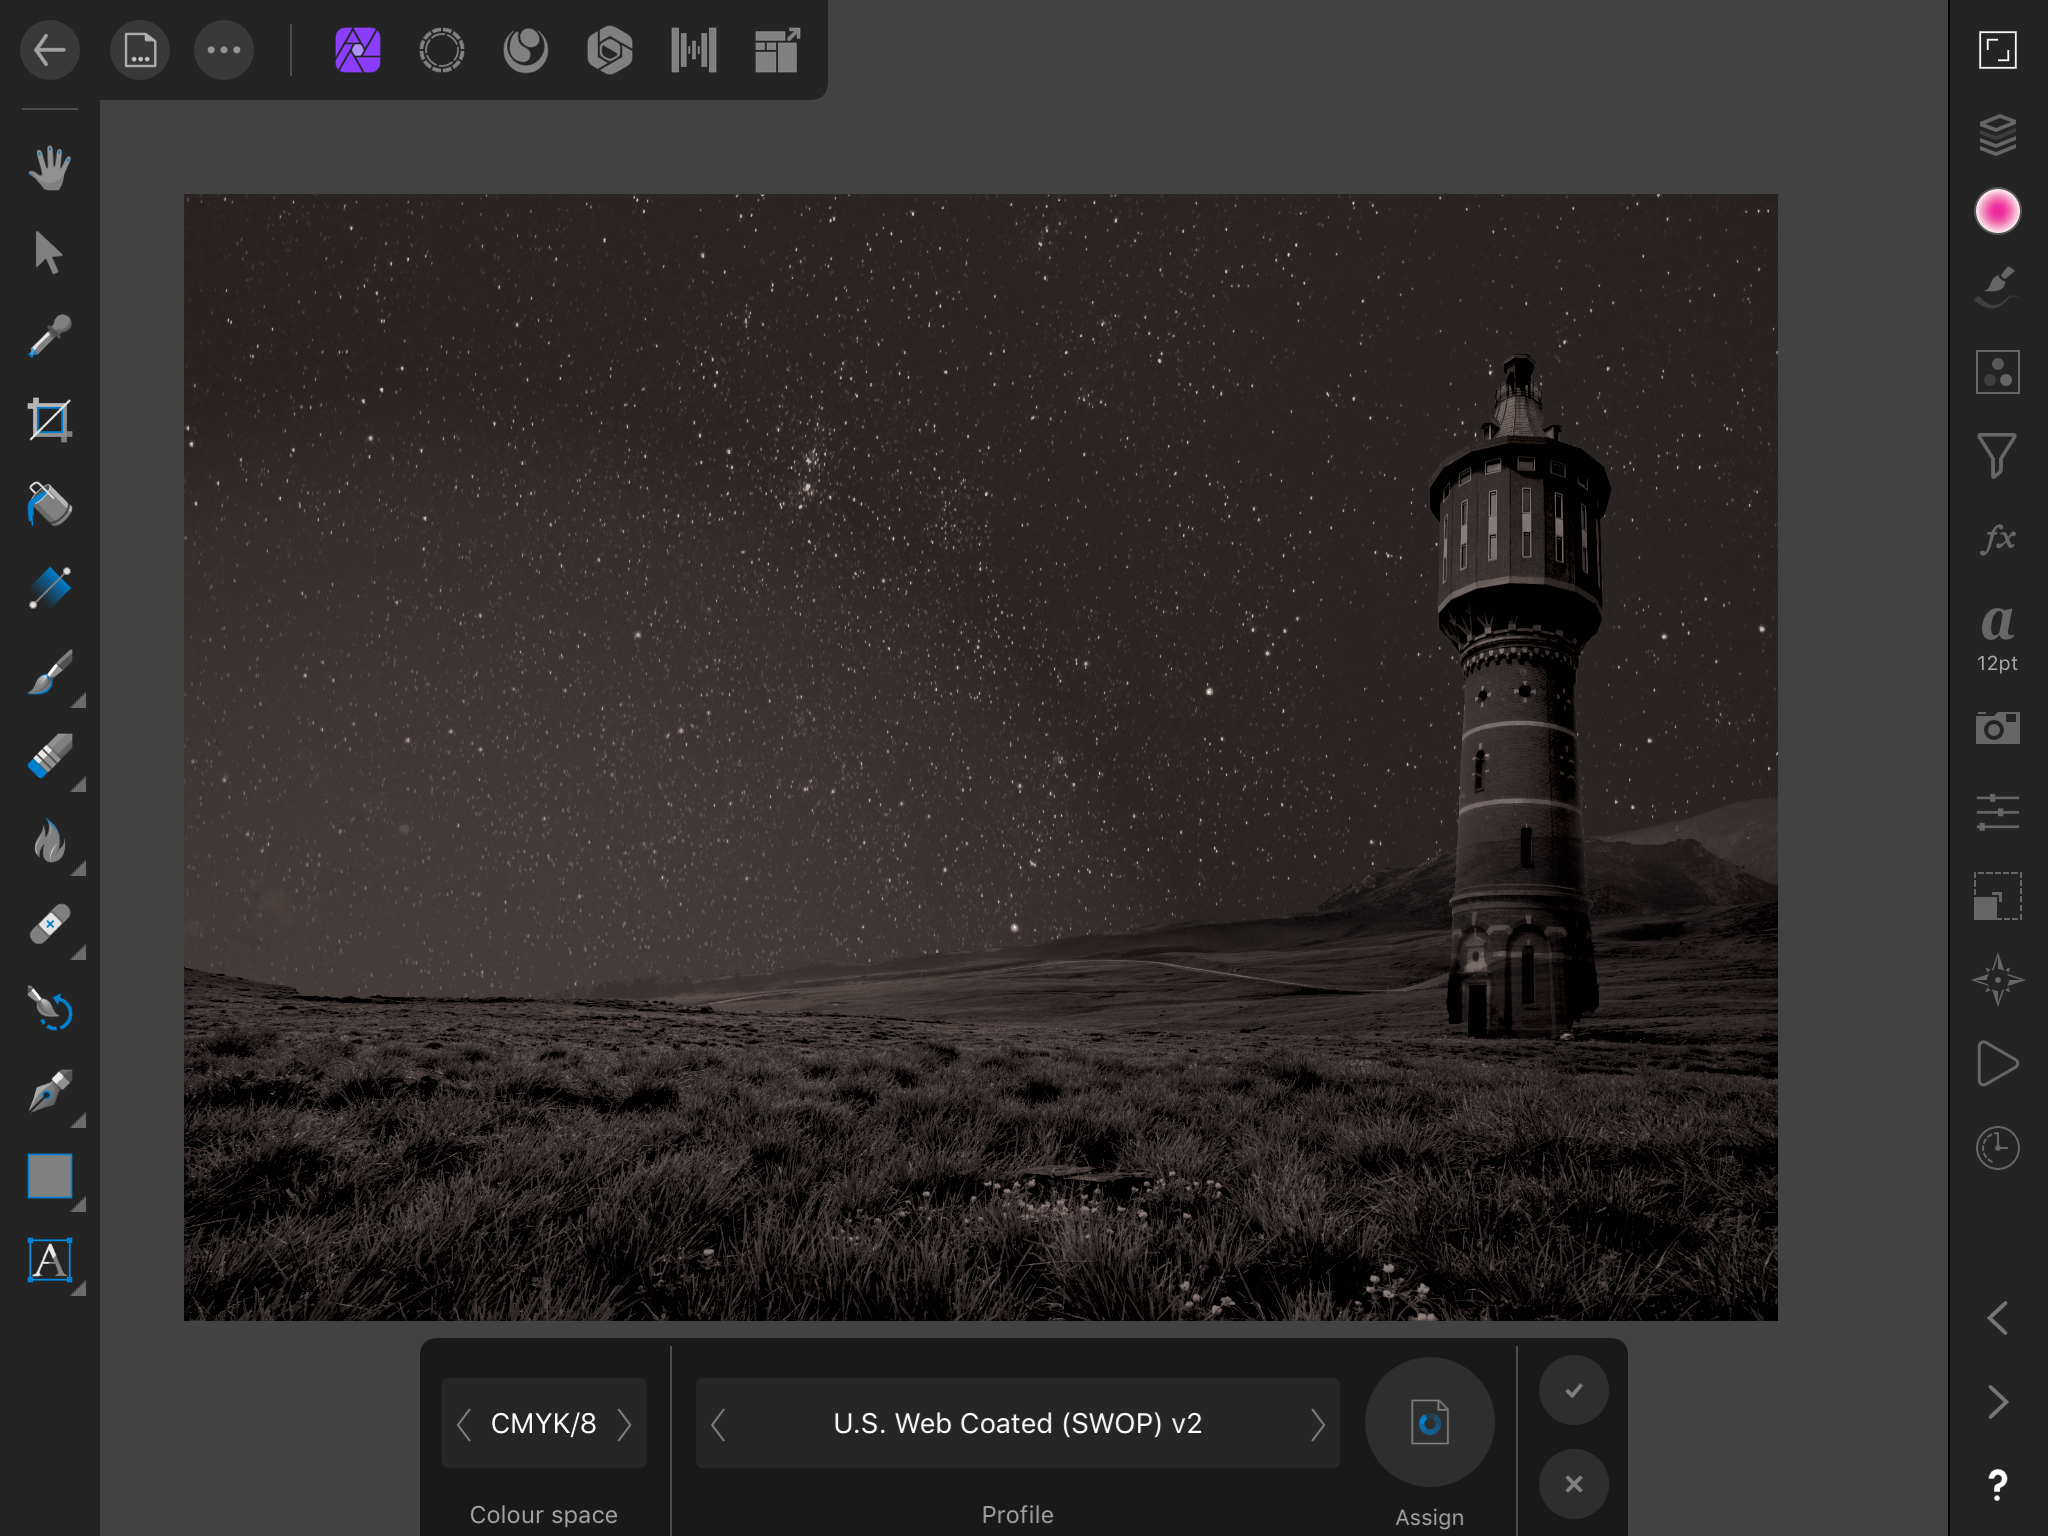
Obviously, I’m doing something wrong. The first image shows a tower with a number of windows. I would like the windows to be lit yellow. I selected the windows and copied them to a new pixel layer. I selected the HSL Adjustment. See second image. I can’t seem to get any colour to show in the windows. Any suggestions please, Thanks

-
I have an ipad air 2. About 20% of the time when I click on an operation, I get either no result or an improper result. Even though I’m new with this app, I suspect either program glitches or my ipad is too slow. Either way I can deal with it.
-
-
12 minutes ago, Alfred said:
To modify an adjustment, double-tap the adjustment layer in the Layers Studio. The controls for the adjustment will be displayed on the Context toolbar.
Interesting but it brings up another point. Let’s say I have a Brightness adjustment set at -100 but that is not enough. If I want to reduce the Brightness further, I apparently need to add a second Brightness adjustment. Is that correct? Thanks.
-
When I apply an adjustment to a layer (e.g. Brightness), once it is set, it can not be modified. If you want to make another change to the Brightness, you need to add a second Brightness adjustment. Is this the way things are supposed to work? Thanks,
-
17 minutes ago, MEB said:
Hi Engine44,
Only whole layers. Copy/paste the (pixel) selection to a new layer so you can limit the effect to the area you want.Thanks
-
29 minutes ago, MEB said:
Both (both support Adjustments).
Thanks. On a related issue, does the fx Studio apply to selections or only to whole layers?
-
39 minutes ago, stokerg said:
Hi Engine44,
Once you've made the selection you can then apply one of the Adjustment layers, to that selection. The Recolour adjustment will all allow you to change the colour of an item. By making the selection and then using one of the Adjustments, this will automatically create the mask from the selection
It worked, thanks.
-
When I make a selection of an object, I would like to be able to modify its colour. Which tools could I use? Thanks.
After watching a video, I get the impression that you have to use a mask to make colour changes to a selection. Is that correct?
-
2 hours ago, DM1 said:
Gradient maps from adjustment studio are useful too. You can select colour ranges for shadow, mid tones and highlights and add additional points. In the channel studio. You can then invert the adjustment layer and use its built in mask and a black paint brush to brush in the effect to the areas you want. I find them useful when colourising b/w photos.
Thanks. I need to learn more about Gradient Maps.
-
2 hours ago, DM1 said:
You could play wth the tower layer blend modes or apply a mask layer and use a soft brush with black colour to paint around the edges to blend in the grass.
Thank you. The PNG idea didn’t work. I’ll try your mask suggestion.
-
-
Hi,
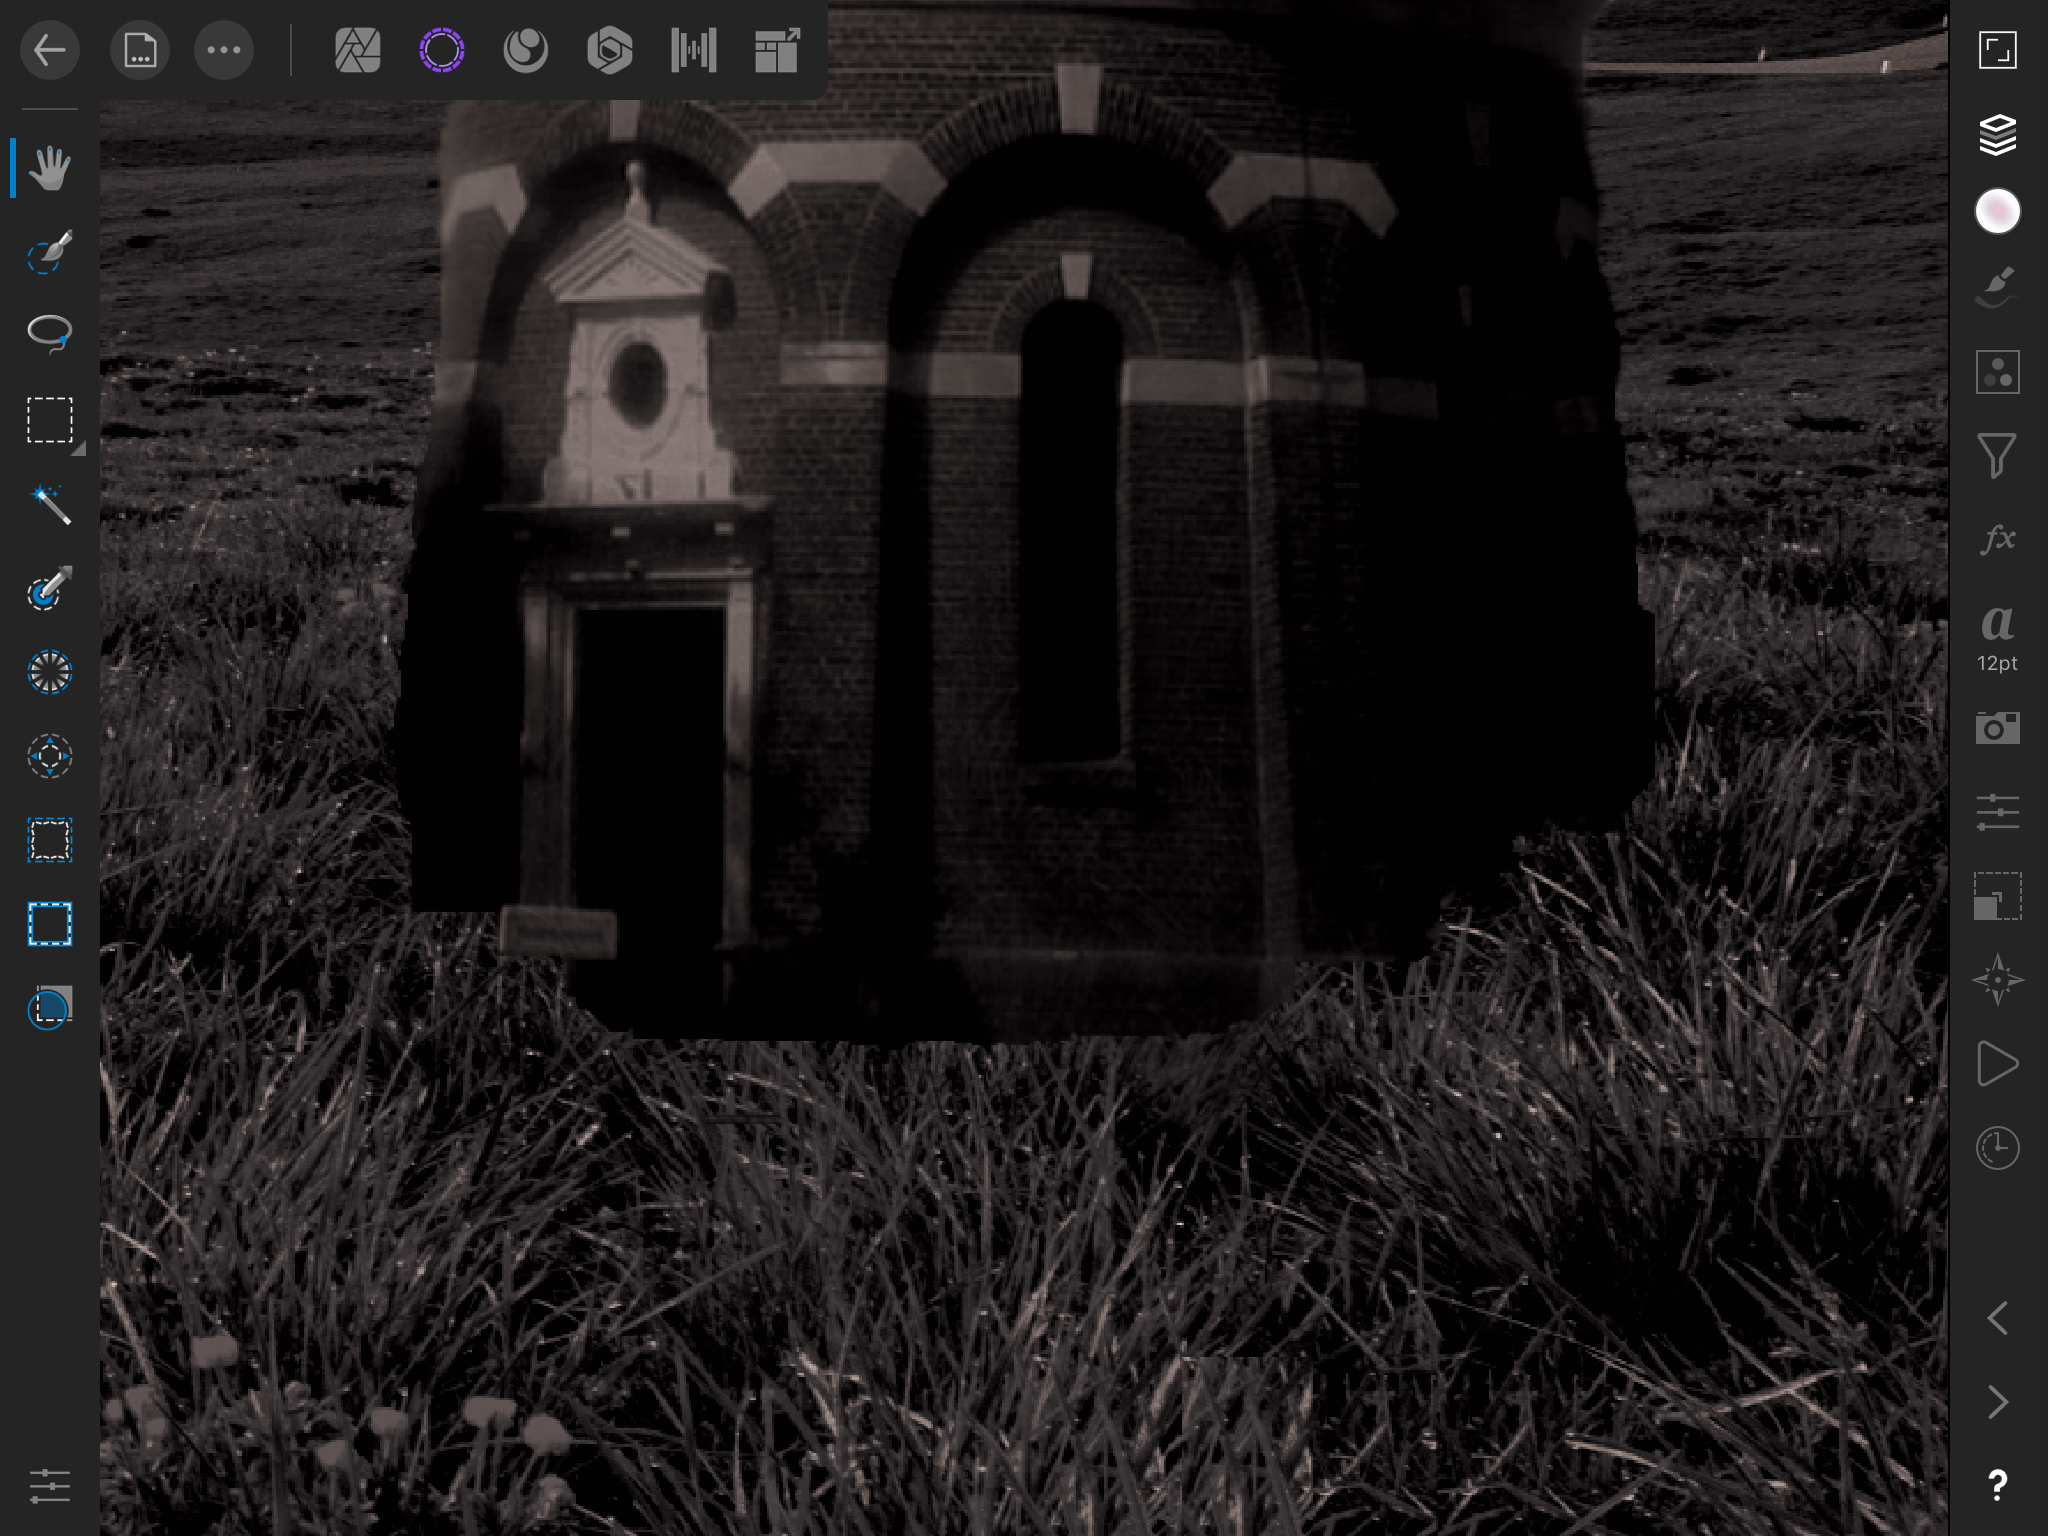
In the attached photo, the tower layer is sitting on top of the grasses layer and doesn’t look natural. I thought of the following solution: On the grasses layer select/save the grass area that is covered by the bottom of the tower. It will be a new layer. Delete the tower parts so only the grasses show. Place the layer onto the main photo and align. In effect, I am creating a png grass only layer.
Can you suggest other methods that are easier? Thanks.
-
I figured it out, thanks.
-
21 minutes ago, Alfred said:
Go to the Document ooze ‘Convert document’ and check the Context toolbar to make sure that the colour space isn’t set to ‘Grey/8’ or ‘Grey/16’.
Here are my settings:
-
I’ve succeeded in setting up a gradient. I used the Fill Tool on the left. Since this is a sunset, I need to add colour. i am trying the Colour Studio, but all I get is shades of grey. Any suggestions please?
-
21 minutes ago, Callum said:
Hi Engine44,
I recommend taking a look at the following video
https://affinity.serif.com/en-gb/tutorials/designer/ipad/video/272740839/
Thanks
Callum
In my post, I should have included AP.
-
Can anyone recommend a complete, in depth tutorial on the use of gradients in AP. Thanks
-
46 minutes ago, DM1 said:
Also worth noting that you are unable to 'select' parts of a 'placed' image until it has been rasterised. The placed layer is an 'image' layer type, not a pixel layer type.
Thanks. Is there a setting where images are automatically rasterised upon placing?
-
6 minutes ago, Paul Mudditt said:
Ok, better description perhaps is scalable raster image which retains it’s original imported resolution until you do a destructive edit or rasterise it to the underlying document resolution. Hope this has helped not created more confusion. Best thing is to experiment with it your self to understand how it works unless a Serif team member wants to step in and elaborate further..
Ok, thanks. I’ll play with it.
-
Just now, Paul Mudditt said:
Perhaps the term vector layer is totally wrong, scalable layer maybe a better description.
Ok, lol. When you import a JPEG raster image, at what point does it become a scalable image?
-
5 minutes ago, Paul Mudditt said:
In this example I have placed a high resolution jpeg onto a small 4”x5” document.
As I zoom in you can see the pixelation as it is mapped onto the underlying document pixel dimensions.
Watch as I enlarge way past the size of the document and where the photo was pixelated previously the image is again now clear.
This shows that the embedded image is a vector layer scalable onto underlying document pixel dimensions whilst adjustments are made.
As you stated, only on a destructive edit takes place do you lose that underlying high resolution photo.
A
7 minutes ago, Paul Mudditt said:In this example I have placed a high resolution jpeg onto a small 4”x5” document.
As I zoom in you can see the pixelation as it is mapped onto the underlying document pixel dimensions.
Watch as I enlarge way past the size of the document and where the photo was pixelated previously the image is again now clear.
This shows that the embedded image is a vector layer scalable onto underlying document pixel dimensions whilst adjustments are made.
As you stated, only on a destructive edit takes place do you lose that underlying high resolution photo.
You seem to be saying that even though you are importing a JPEG raster file, AP creates a vector file from it. And it remains a vector image until you perform a destructive edit.
-
8 hours ago, Paul Mudditt said:
You can apply adjustments to an image layer and adjust its dimensions without losing its original resolution, only when you make destructive edits will it be rasterised to a pixel layer. Notice how the embedded photo remains a full resolution a image layer for adjustments but is automatically converted to a pixel layer when an operation requires it.
I was thinking about this last night and would like to clear up something. In your video you show how the image can be enlarged without losing clarity. That is before a destructive edit. But in my original example, the typical JPEG image is already rasterised when it is placed. If you enlarge it enough, it will become pixelated. This is before any edits. Please explain. Thanks.


Using HSL Adjustment
in Pre-V2 Archive of Affinity on iPad Questions
Posted
So your saying that HSL Adjustment is the wrong tool?
I put a rectangle yellow rectangle around the windows but they came out different shades of yellow. I would like them to be the same shade.