pmcabinet
-
Posts
28 -
Joined
-
Last visited
Recent Profile Visitors
1,042 profile views

-
Placing cutout selection into new image
pmcabinet replied to pmcabinet's topic in Desktop Questions (macOS and Windows)
OK, the video speed control was hidden behind a right click; half-speed helped to follow the sequence, but I still get a different result. One attempt to copy and paste between images caused Affinity (and the whole PC) to freeze completely; I had to force a shutdown, not something I like to do. (I recently bit the bullet and updated to W11 Pro - a few strange things have been happening since then, including having to reinstall a broken Affinity Photo 2.) I will upload a recording of my attempt(s) asap. -
Placing cutout selection into new image
pmcabinet replied to pmcabinet's topic in Desktop Questions (macOS and Windows)
The PNG export works perfectly and is straightforward. It would be nice to use Ron P's copy and paste method but I get wrong results when I try it; I don't know if it's different on a Mac (is it a Mac?) but the sequence from making the dog selection mask to copying and pasting in the landscape image loses me. The mask layering seems to be different as well on my Windows machine. You (hello Ron P) seem to be copying the landscape image, then switching to the dog selection file and pasting - but the moves are too fast to follow, especially the switching between files. But a great method if I ever get to work out the middle bit! -
Placing cutout selection into new image
pmcabinet replied to pmcabinet's topic in Desktop Questions (macOS and Windows)
Thanks for the response. I'm not sure where 'copy merged' is found (or at what part of the process it would be used). I have a rather rough recording attached of what I've been trying to do - would appreciate any comment. Affinity Photo is top notch but as you see I'm not an experienced user. Placing a cut-out - Made with Clipchamp.mp4 -
I make a selection of an object in an image and create a mask with transparent background. I export the masked cutout to a folder on the desktop. I open an image in Affinity and 'place' the cutout; but the whole canvas (with, in this case, white background) is placed, not just the cutout. Clearly I'm using the wrong method - can one of you experts tell me where I'm going wrong? Thanks.
-
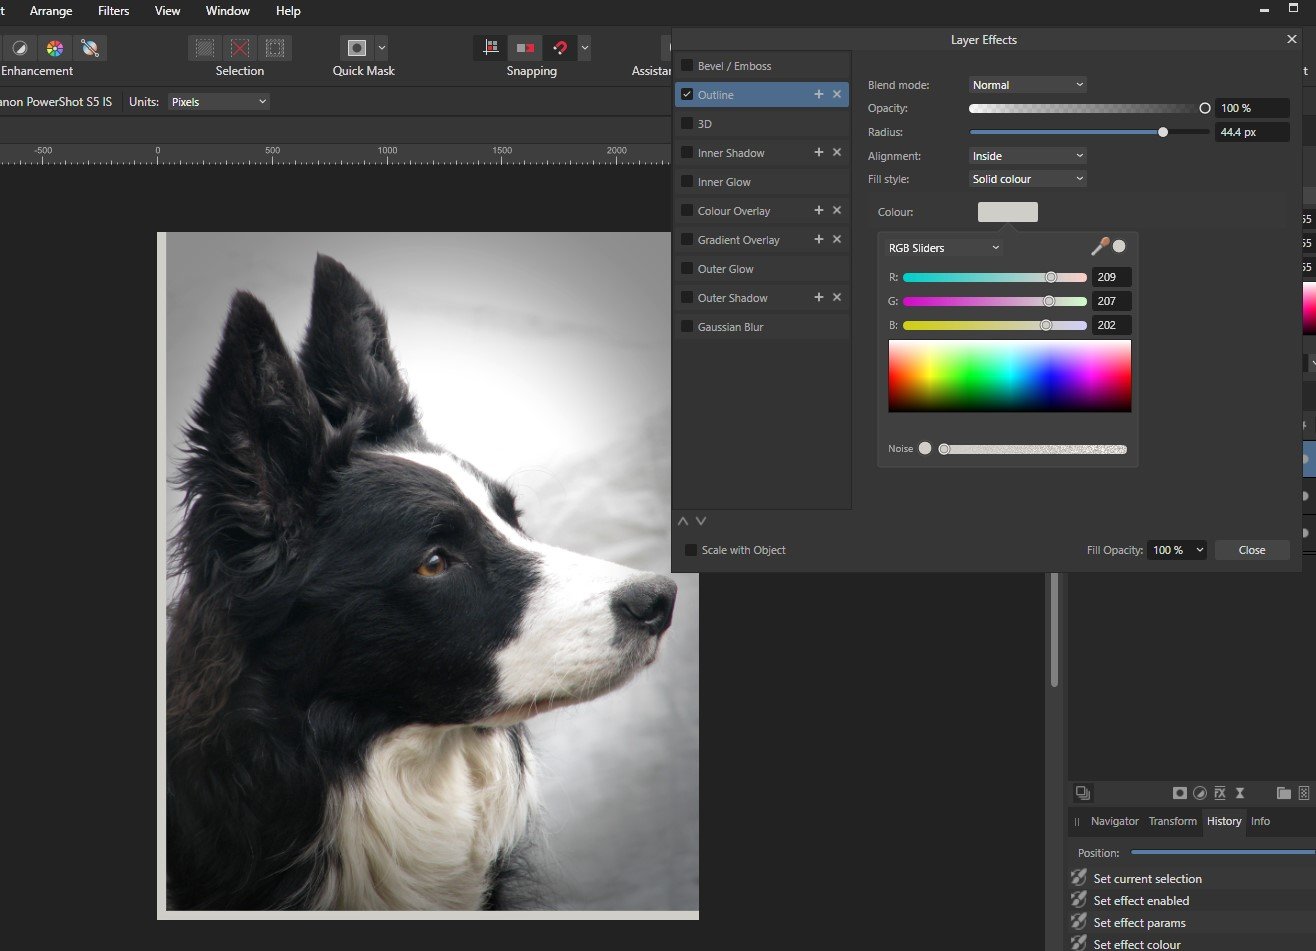
I open an image in Affinity Photo 2 and make an unconstrained crop. Then I add a vignette (new live filter layer>colours>vignette). Now when I try to add an effect (layer effects>outline>inside) I get the 'border' on only two sides - the sides that were unchanged when I cropped the image. I have tried rasterising the cropped layer to get rid of the 'saved' portion of the original image, but that doesn't make any difference. If I go back to the uncropped original then I get the full border outline. Clearly my process is not correct - what should I be doing instead?

-
Image size reduction
pmcabinet replied to pmcabinet's topic in Desktop Questions (macOS and Windows)
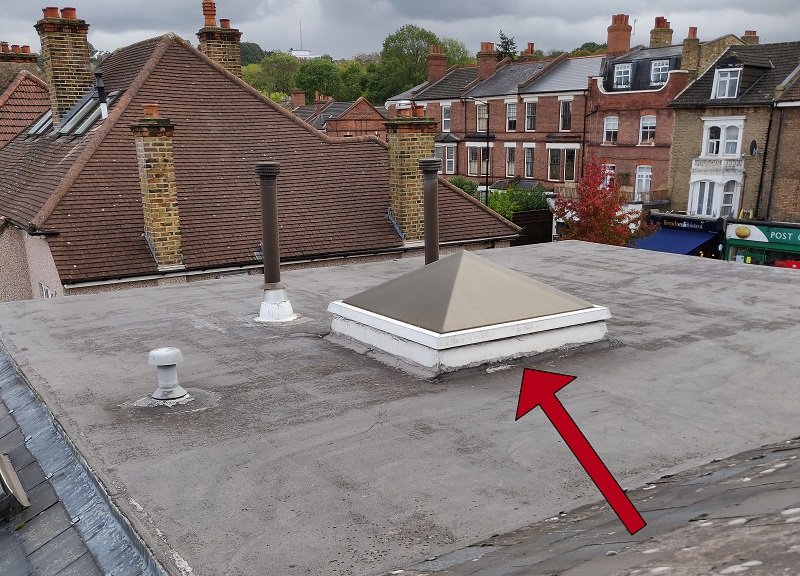
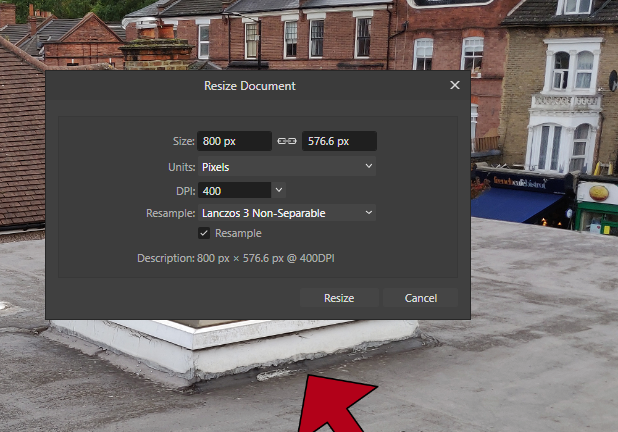
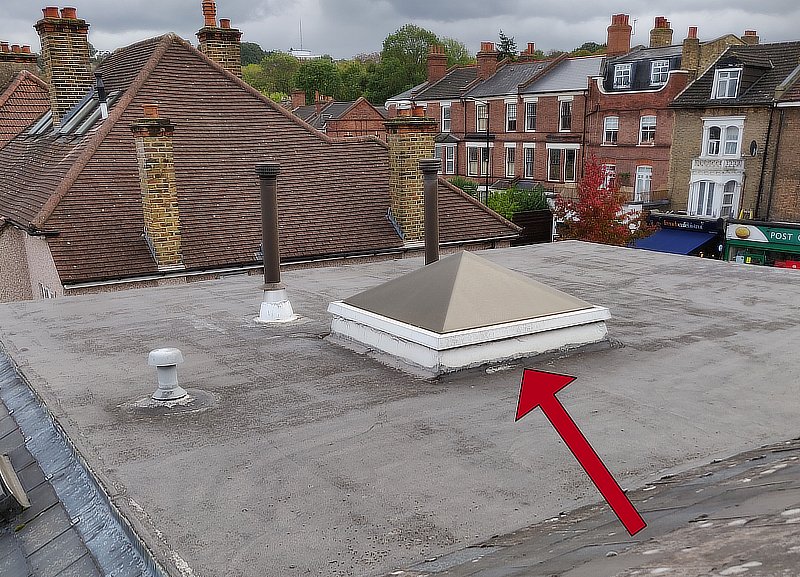
This is the image (original size 3456x2491) that I wish to reduce: And here is the image reduced to 800x576 px in MS Paint: Now a screenshot of the resize settings: And the result in Affinity: Zoom each reduced image to 200% and it's clear the MS Paint version is much better quality. I tried reducing in Affinity by specifying a centimetre size and unchecking 'resample', but the result was no better. Any idea why this should be so?
-
I can use Microsft Paint to reduce an image size quite considerably (3456x2491 px to 800x576 px) without any noticeable loss of quality (no apparent pixellation). If I try to do this in Affinity Photo 2 (Document<Image size) the result is lousy, no matter, it seems, what settings I use. Clearly, as a relative newbie, I'm not using the right method; can a kind soul give me a way to use AP for this? Surely it cannot be that MS Paint will do something not possible in Affinity!
-
Zoom in to a selection only
pmcabinet replied to pmcabinet's topic in Pre-V2 Archive of Desktop Questions (macOS and Windows)
Thanks everyone for your suggestions; I should have enough to work on for now! PS: JimmyJack, where can I see this 'pretty cool interactive version'?! -
Is there a way to zoom in on a selection as if using a magnifying glass over the selected object? Leaving the background at its native resolution, that is. I created a donut shape, selected it, inverted the selection and used a live filter to blur the background, as shown. But I'm curious whether it's possible to zoom in on just the area inside the donut - and how I would deal with the donut if such a method exists? Maybe isolating the subject, saving it, then placing the image on the blurred background?
-
Thanks for confirming, Peter. Using AP without hardware acceleration is rather unpredictable (crashes on complex processes) so if you find any answers do post here! Happy New Year Peter (me!)
-
This issue occurs in Windows 10 Pro (x64) v2009 (build 19043.1415) with NVIDIA GeForce GTX1050 GPU. System is fully updated with latest Studio Driver from NVIDIA. Earlier versions of NVIDIA driver also suffer. I'm relatively new to AP (v1.10.4.1198) so have only started to use brush tools recently. Finding the blur brush tool not working I did some searching and discovered reports of issues with hardware acceleration going back quite a long time. HSL dialogue also seems to suffer. It was reported that disabling HA cures the problem, which indeed it does; but then other processes become decidedly less friendly (i.e. slow!). I've not found a topic that addresses directly the GTX1050, hence this post. Since this seems to be a long running affair, is it something we have to live with or can we expect a fix? I really don't want to go back to Lightroom or Photoshop!
-
Alfred, you haven't wasted my time at all. I've learned a great deal in the process! But I still can't upload the d****d screenshot.
-
Yes, I'm dragging it to the correct place. See my reply to Alfred for explanation.
-
Well, I'm puzzled because I've been very careful to place the file in the right area. I'm dragging a 1.00 MB PNG from Windows Explorer. So I've just tried again and notice that left-clicking on the file and dragging shows a thumbnail with an arrow and 'move'. I've not seen that before. Alternatively, clicking 'choose files' just takes me back to the beginning of the conversation! Is that a Windows issue or a Firefox problem, or a Forum glitch? I don't know. Anyway, I'll have a look at the tutorial and let you know if it gives me the answer. Many thanks for your help so far.
-
Sorry about the file size Alfred. I didn't notice it was a BMP rather than a PNG! I'll be more careful next time. OK, so I have filled the ellipse (and applied a Gaussian blur to see the effect) - but it's the opposite of what you say should happen; that is, the oval is now solid white while everything outside is visible. When I try to drag a screenshot, or choose the file to show you, it just fills the browser window and I lose my reply. Any idea what's going on there? Sorry to be a pain.