lettergothic
-
Posts
116 -
Joined
-
Last visited
Everything posted by lettergothic
-
How do I choose to position an object stroke on the inside or on the outside of a shape (i.e. a square or a circle or irregular shape)—rather the default stroke that straddles the shape border? Neither he Stroke panel nor the Appearance panel seems to offer this choice. Is it someplace else? I've been using "stroke alignment" options as long as I can remember in Quark. Thanks, lettergothic
-
Inset Path Tool
lettergothic replied to lettergothic's topic in Pre-V2 Archive of Desktop Questions (macOS and Windows)
G13RL, Thanks very much for responding Your solution looks like it ticks all the boxes! I'll be trying it right away. Thanks for the diagram. This looks like a alternate way to achieve my goal. Now, all I need is for Affinty to implement a simple, 1-click solution for this. lettergothic -
Inset Path Tool
lettergothic replied to lettergothic's topic in Pre-V2 Archive of Desktop Questions (macOS and Windows)
-
Inset Path Tool
lettergothic replied to lettergothic's topic in Pre-V2 Archive of Desktop Questions (macOS and Windows)
GarryP, Thanks for responding! Your solution looks like it ticks all the boxes! I'll be trying it myself, right away. Thanks as well for the helpful, annotated screen shot. Now, all I need is for Affinty to implement a simple, 1-click solution for this. lettergothic -
Inset Path Tool
lettergothic replied to lettergothic's topic in Pre-V2 Archive of Desktop Questions (macOS and Windows)
-
Inset Path Tool
lettergothic replied to lettergothic's topic in Pre-V2 Archive of Desktop Questions (macOS and Windows)
firstdefence, Thanks for sticking with it! Your solution looks like it ticks all the boxes! I'll be trying it myself, right away. Thanks as well for the helpful diagram. Now, all I need is for Affinty to implement a simple, 1-click solution for this. lettergothic -
Inset Path Tool
lettergothic replied to lettergothic's topic in Pre-V2 Archive of Desktop Questions (macOS and Windows)
-
Inset Path Tool
lettergothic replied to lettergothic's topic in Pre-V2 Archive of Desktop Questions (macOS and Windows)
GarryP, Thanks for responding. "you might need to be a lot more precise when you talk about “inside”, “between”, “identical”, etc." I'm not sure I know how to be more precise, but I'll give it another try: First and foremost, above all, I want to be able to do, in Af Designer, what I've always been able to with the A. Illustrator "offset path" effect. Imagine a closed, irregularly shaped path on a transparent b.g. with a stroke width (no fill) of 6 pts. I want an identically shaped stroke inset (inside of the orig. path) 6 pts from the original path with a 3 pt stroke width {no fill) on the same transparent b.g.. So, using your example, I want no gray fill; I want the inner cyan stroke to be half the thickness of the outer cyan stroke; I want the corner miters on the inner path to be identically scaled versions of the outer stroke corner miters (not rounded corners on the outer stroke vs. sharp corners on the inner stroke). I'd draw an example but I don't know to accomplish it--hence my posted question. I hope that this is "a lot more precise". I can't think of a clearer way to say it. 😞 many thanks, lettergothic -
Inset Path Tool
lettergothic replied to lettergothic's topic in Pre-V2 Archive of Desktop Questions (macOS and Windows)
thanks, firstdefence, This is great (how do I do this?) BUT, what I really need now are two identical paths, one inside the other (no fill). For example, in your demonstration (above), I would want a second--let's say identical, but thinner, cyan path--inside inside the existing cyan path--with the gray background visible in between the two paths (and how to do it...). many thanks, lettergothic -
Inset Path Tool
lettergothic replied to lettergothic's topic in Pre-V2 Archive of Desktop Questions (macOS and Windows)
Thanks for responding. The inner path is similar to the outer path but obviously it's not a smaller size duplicate of the outer path. I need the inner path to be an exact, smaller version of the outside path, as it is in Ai. Is that possible? thanks, lettergothic -
"A true outline tool is in the Affinity Designer roadmap, and will arrive some time before version 2.0 . . ." an Inset Path Tool for irregular shape path inset — PLEASE! This is basic and an essential tool for logo design. Thanks, lettergothic
-
Hey MikeW, Thanks for responding and attaching the link In QXP, I used Item>Convert Text to Boxes so that I could use Item>Merge/Split Paths>Intersection to clip a portion of my letterform in a circle (to make my logo). To my knowledge, I can't Merge/Split a path w/o first converting a letterform to Boxes. Yes? I was trying to get the EPS into AfDes to see If I could do a color overlay on the logo. As far as I know, EPS conversions can only be black. Are you saying that if I export a (colored in QXP) file as a EPS, it will retain the color? I guess that I could start over and build the logo in AfDes . . . if that meant that RGB and a CMYK versions could be exported as an EPS that retained color. Is that possible? Thanks, i'gothic
-
Thanks for responding. I had already tried that, with the same result, as described.
-
Hi, I modified a single letterform (changed to paths) in QuarkXpress 2017. I exported the letterform (3 inches x 3 inches @ 100%) as an EPS. I created a new document in Designer. I selected "place", navigated to the .eps file and clicked "open". The "place" window turns all white, the beachball starts to spin and Designer hangs, requiring a "force quit" Is there a way to get this to work? My reason for bringing it into Designer was to see if I could use "color overlay" to change the black eps letterform to a color. thanks, lettergothic
-
installing product updates
lettergothic replied to lettergothic's topic in Customer Service, Accounts and Purchasing
Thanks for responding. Why don't the apps automatically update upon opening as per the information/instructions on the Affinity site? do downloaded DMG's (?) install over the top of the existing, installed version? thanks -
installing product updates
lettergothic replied to lettergothic's topic in Customer Service, Accounts and Purchasing
all three were downloaded from Affinity. 10.11.5 -
Hi, I own Designer 1.7.1, Publisher 1.7.1 and Photo 1.6.7 and want to update them to the most current (1.8?) vers.. I looked up on the Affinity site about getting updaters: "If you’ve purchased from the Affinity Store—each time you start the software it will check for updates and offer any available update, or in the application main menu there is an option Check for Updates." – none of my applications have ever updated when I open any of the applications. – none of the application menus have a "Check for Updates" option. How do I get my applications to automatically update? Thanks for your help. David
-
In the "help" file, keyboard commands are given as: To loosen spacing, press . option - right arrow To tighten spacing, press . option - left arrow For even looser spacing, press . option - command - right arrow For even tighter spacing, press . option - command - left arrow Nowhere, that I can see, is a description of how many 1/000ths of an EM is "looser/tighter spacing" and "even looser/tighter spacing" • What are the numerical increments of these vague semantic descriptions? • Are the basic increment units and the multiplier/divider modifier (command) user customizable in a measurements preference? • Do the kerning key commands produce the same increments when one selects a line, paragraph, column or story to track for fit? thanks, lettergothic
-
The link doesn't work. Where are these brushes available? thanks, lettergothic
-
I'm new to Publisher. i was exploring how to hang a open quote mark in the margin in a 2 line display head. I went to Character>Optical Align>Type>Manual, as per the "help" page. I selected the first default, which seemed to be quote marks but it didn't have any effect on my selected type. In exploring the panel for a solution, I inadvertently made all 5 of the presets disappear! 1) How do I get those 5 default presets back? 2) How do I get the Hanging Punctuation to work? I read the "help" page for Optical Alignment over and over and I still can't figure it out. I use "Hanging Characters" settings in QXP all the time, but I just can't figure out how to do it in APub. Thanks ahead of time for the assistance. lettergothic
-
Great! Good for you! I need help to find out what I'm doing wrong. thanks, lettergothic
-
R C-R, Thanks for responding. It's not a dumb question. Thank you for asking. Unfortunately, for the sake me being able to solve this problem, the pixel layer is—and has been—selected when I hit "delete" . . . I attached the image in question to my original post—if that's of any help. Thanks, lettergothic
-
RHKLN, Thanks for responding. The Layers Panel says it's a pixel layer. Thanks, lettergothic
-
thanks for responding, Walt. The layer in question is a pixel layer. It's simply a 1 layer image that I opened in Af Photo. So, why can't I select the bg and delete it—like I can when I use the wand? thanks, lettergothic
-
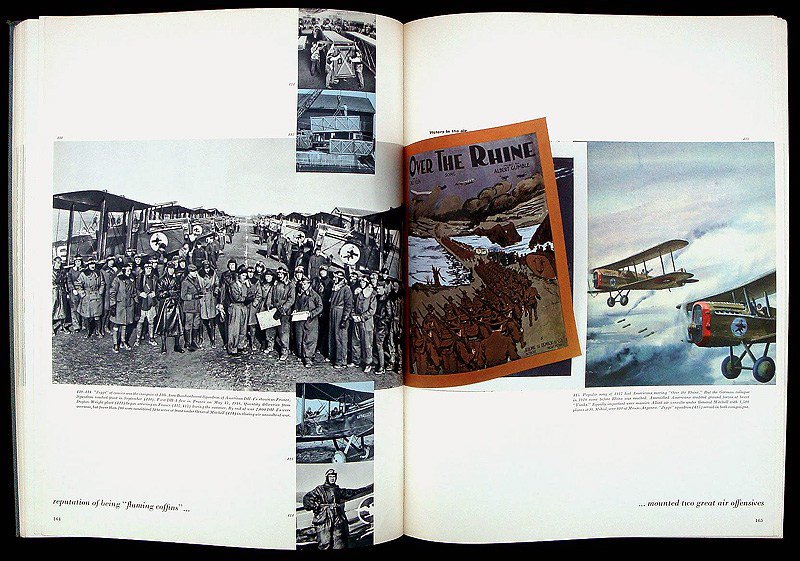
I want to eliminate the a black background bg. of an open book lying on a black ground, so I just have the irregular shape of the open book. I've successfully done this on about 6 of them just like this one, using the wand. I can't (or don't know how to) use the wand on this one because of the B+W image (bottom center) abutting the blk. bg. The wand selection enters the image and I can't seem to get the "wand-subtract" setting to eliminate the inadvertent selection of portions of the image. With the magnetic lasso, I can switch to manual mode right before the problem area, trace the edge of the page across the problem area manually and them resume "magnetic" right after the problem area. When I close the selection, I get the marching ants around the book spread. I choose "invert selection" to select the blk. bg. I hit "delete" (as I do, successfully, with the wand) and nothing happens—the bg is not deleted. How do I get the bg. of this magnetic wand selection to delete? How come the selected bg of the image does not delete with the lasso but does delete with the wand selection? thanks, lettergothic