amnesia
-
Posts
11 -
Joined
-
Last visited
Recent Profile Visitors
895 profile views


-
With AP do I need Light Room?
amnesia replied to amnesia's topic in Pre-V2 Archive of Desktop Questions (macOS and Windows)
Yes I will be processing RAW from the Fujifilm XT1. 1389 -
With AP do I need Light Room?
amnesia replied to amnesia's topic in Pre-V2 Archive of Desktop Questions (macOS and Windows)
1135 When I bought the Fujifilm XT1 and the 10 -24mm lens the guy in the shop said that you can add some kind of plug ins???? and Light Room will adjust to you camera??? Sorry for being totally vague but this is all so new. I wanted to see if Affinity Photo can do this as well. -
I have had Affinity Photo for a few months now and finally bought a camera that is not an iphone (Fuji XT1 with 10-24mm for real Estate photography). Having never used Light Room does AP cover all that Light Room does specifically relating to Real Estate photos? thanks in advance 1086
-
1811 I am looking to get the Fujifilm X Pro 2 too and would love the RAW to work in Affinity Pro.
-
Hi Still new to Affinity but I want to see if I can get Real Estate Photo Retoucher by SparkleStock to work in Affinity Photo to install in AP. Any ideas? Here are the instructions Real Estate Photo Retoucher by SparkleStock Installing the Photoshop Actions:Double-click on the ATN file then open the Actions panel in Photoshop (Window > Actions). If you don't see any actions, click on the panel menu located on the top-right of your Actions panel. Select Load Actions then browse for the ATN file and click OK. Click on any action then press the play button located on the bottom of the Actions panel. OR Double-click on the ZXP file and follow the installation instructions. You will need the latest version of Adobe Extension Manager CS6 or newer to use the ZXP file. Open Photoshop then go into your Actions panel (Window > Actions). Important: Do not skip this step. In your Actions panel, click on the panel menu located on the top-right. Select Real Estate Photo Retoucher by SparkleStock. The actions are now loaded into your Actions panel. Click on any action then press the play button located on the bottom of the Actions panel. Action List:Volume Deformation Many interior real estate photos can only be captured with wide angle lens. Unfortunately, this can cause distortions that can make TVs, fireplaces, tables, etc. look too long. With Volume Deformation, you can correct these issues without resorting to expensive 3rd party software. After playing the action, simply select the layer that you want to use and delete/hide the rest. Improve White Walls Lighting can cause color casts on white walls. This action restores the neutral color on white walls and ceilings. After playing the action, paint over any white walls. Make sure that your brush opacity is set to 100% on the option bar located near the top of your interface. Neutralize Colors Improve the look of stainless steel appliances, countertops, and any neutral-color objects by removing color cast. After playing the action, paint over any white/gray/black areas including white or stainless steel appliances, faucets, etc. Make sure that your brush opacity is set to 100% on the option bar located near the top of your interface. Blue Skies Make any photo look like it was shot on a sunny day! This action turns overexposed or cloudy skies into beautiful blue skies. On photos that already have blue skies, it can deepen the color similar to what a polarizing filter does. After playing the action, paint over any sky. Adjust the intensity of the saturation, sky gradient, and restore sky layers simply by changing the opacity. Enhance Foliage This action makes grass, trees, and other foliage more vivid without affecting other colors. After playing the action, paint over any green/red foliage. You can adjust the intensity by changing the layer opacity. Twilight Turn night photos into twilight photos or use this action to enhance the intensity of your already-twilight photos. After playing the action, paint over any sky. Adjust the opacity of the Twilight Color and Brightness/Contrast layer. Increase Edge Contrast Edge contrast can dramatically improve any real estate photo - especially if you any in-camera HDR feature. After playing the action, doubleclick on the "Unsharp Mask" smart object layer inside your Layers panel and adjust the radius. Dynamic Range - Auto DRI Play this action to automatically recover the maximum amount of details in your photo. This action is usually subtle and if your image has no recoverable data, nothing will happen. The most significant changes are usually in the very deep white and black areas. Dynamic Range - Boost DR This action works similar to the DRI effects used in many digital cameras. It automatically reveals detail lost in the dark and light areas of your photo to make it look like it was taken with a better quality camera. Dynamic Range - Boost Shadows Brighten dark areas only. Dynamic Range - Restore Highlights Darken bright areas only. 19
-
Obviously new to Affinity Photo and I am loving it but one thing I would love to see is Open Recent for me I see IMG7733, IMG7214 etc It would be cool if a little preview came up so visually see what photo you want to edit. Yes I know I should name my files but it would just be a nice smart extra addition. 1283
-
Sorry for the noob question. I have been learning Affinity for 3 days, cameras etc etc Am I right in thinking Develop persona = Light Room? 1182
-
Danke Alex! 1177
-
I have iphone images running in Affinity Photo but when I try and use the Nix Collection plug ins the image is upside down. I then made the original image upside down and tried again and the Nix plug in still shows the image upside down??? Any ideas or help would be greatly appreciated. 998
-
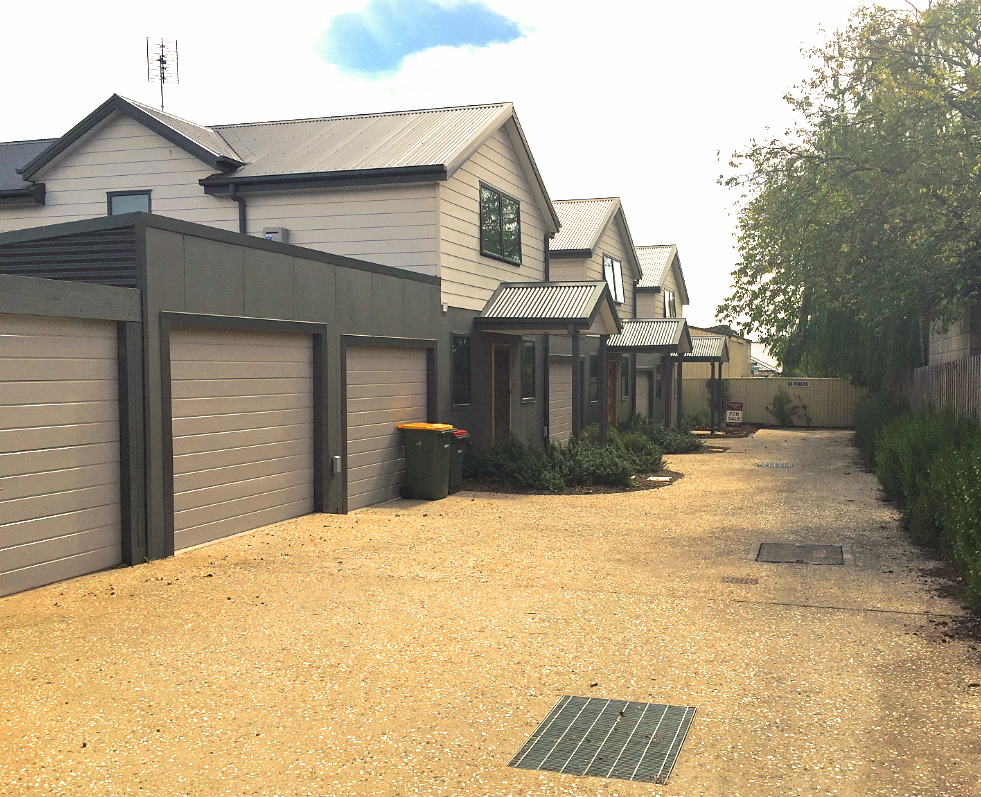
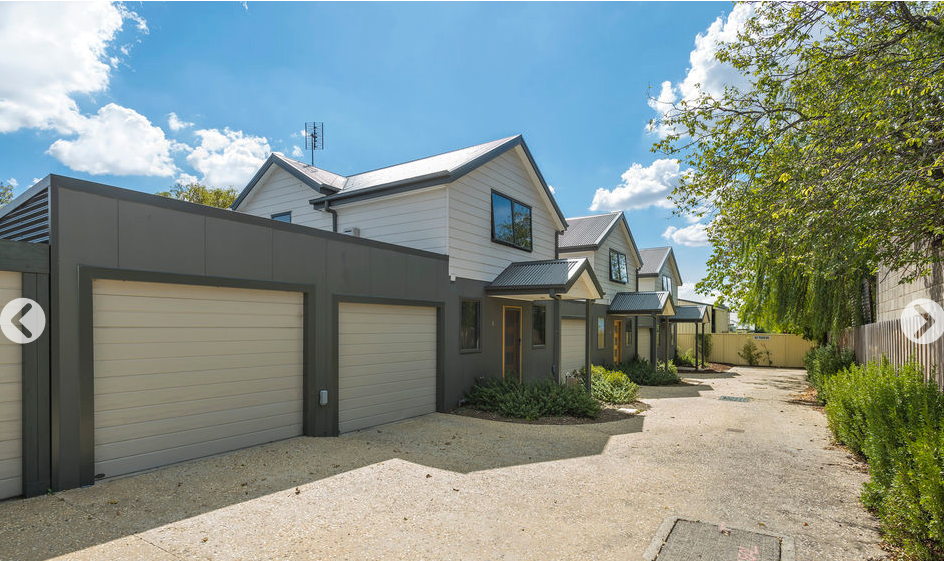
Real Estate photos
amnesia posted a topic in Pre-V2 Archive of Desktop Questions (macOS and Windows)
I am trying to work out ( apart from wide angle lens) How to get my photo closer to the pros realestate photo. ( see mine and pro shot attachments) In Affinity what enhancements would I use? TIA 405
-
Hi Just bought Affinity today and have lots to learn.... On a Mac how do you import your IPhone photos from your computer? On Affinity I go to Open. I go to Pictures folder and can see Photos Library but I cant import. TIA 392