Roberto1972
-
Posts
83 -
Joined
-
Last visited
Recent Profile Visitors
1,462 profile views


-
 lacerto reacted to a post in a topic:
Shifting color of multiple objects
lacerto reacted to a post in a topic:
Shifting color of multiple objects
-
lacerto reacted to a post in a topic:
Shifting color of multiple objects
-
 loukash reacted to a post in a topic:
Shifting color of multiple objects
loukash reacted to a post in a topic:
Shifting color of multiple objects
-
Shifting color of multiple objects
Roberto1972 replied to Roberto1972's topic in Desktop Questions (macOS and Windows)
Attached an editable Affinity Publisher document containing the color swatches / wells in a layout suitable for print tests. ColorSwatchesRGB.afpub -
Shifting color of multiple objects
Roberto1972 replied to Roberto1972's topic in Desktop Questions (macOS and Windows)
Hi lacerto, I overlooked the pdf you created and attached! Thanks for that: importing it to publisher all color swatches are indeed vector rectangles each containing the individual colors with the intended color values. Certainly a useful pdf for future use as well 🙂 Cheers, Roberto -
Shifting color of multiple objects
Roberto1972 replied to Roberto1972's topic in Desktop Questions (macOS and Windows)
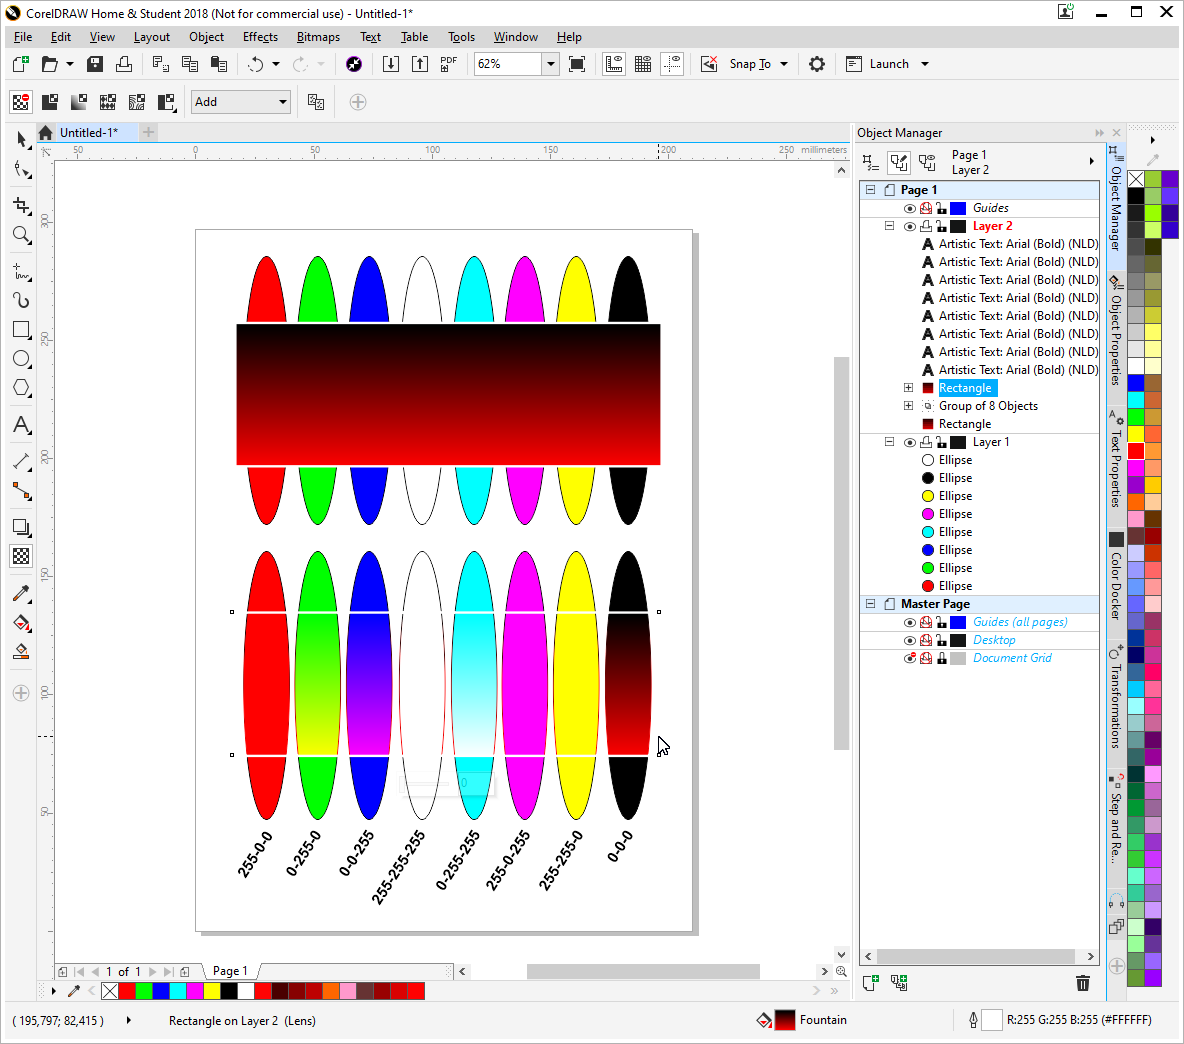
Hi Lacerto, Are you saying you could not blend the red at all in CorelDraw or did you not export it succesfully? I just tried in CorelDraw and both blend modes "Add" as well as "Logical OR" work. However, I think technically they are not the same: if writing out the values (8-)bit wise e.g. 60-100-150 OR 20-0-0 turns out 60-100-150 and not 80-100-150 like 'add' would. I think using the Logical OR blending mode in a gradient one would get bands of colors instead of smooth gradients. Oh my, that code is exactly what makes computers interesting: you put in the creativity -exactly as imagined- and the machine does the work and fast 🙂 That's different from software which can leave one with workarounds more than occasionally 😕 Writing and testing the code is a different story, though: usually time consuming as well.
-
loukash reacted to a post in a topic:
Shifting color of multiple objects
-
Shifting color of multiple objects
Roberto1972 replied to Roberto1972's topic in Desktop Questions (macOS and Windows)
Oh, shoot. Yes, then it makes totally sense 'add' x,0,0 to nothing doesn't leave much else than just resulting in x,0,0 🙂 Well, the red rectangles and not to mention the good old 'copy and paste' did the job in a breeze 🙃 Cheers!
-
Shifting color of multiple objects
Roberto1972 replied to Roberto1972's topic in Desktop Questions (macOS and Windows)
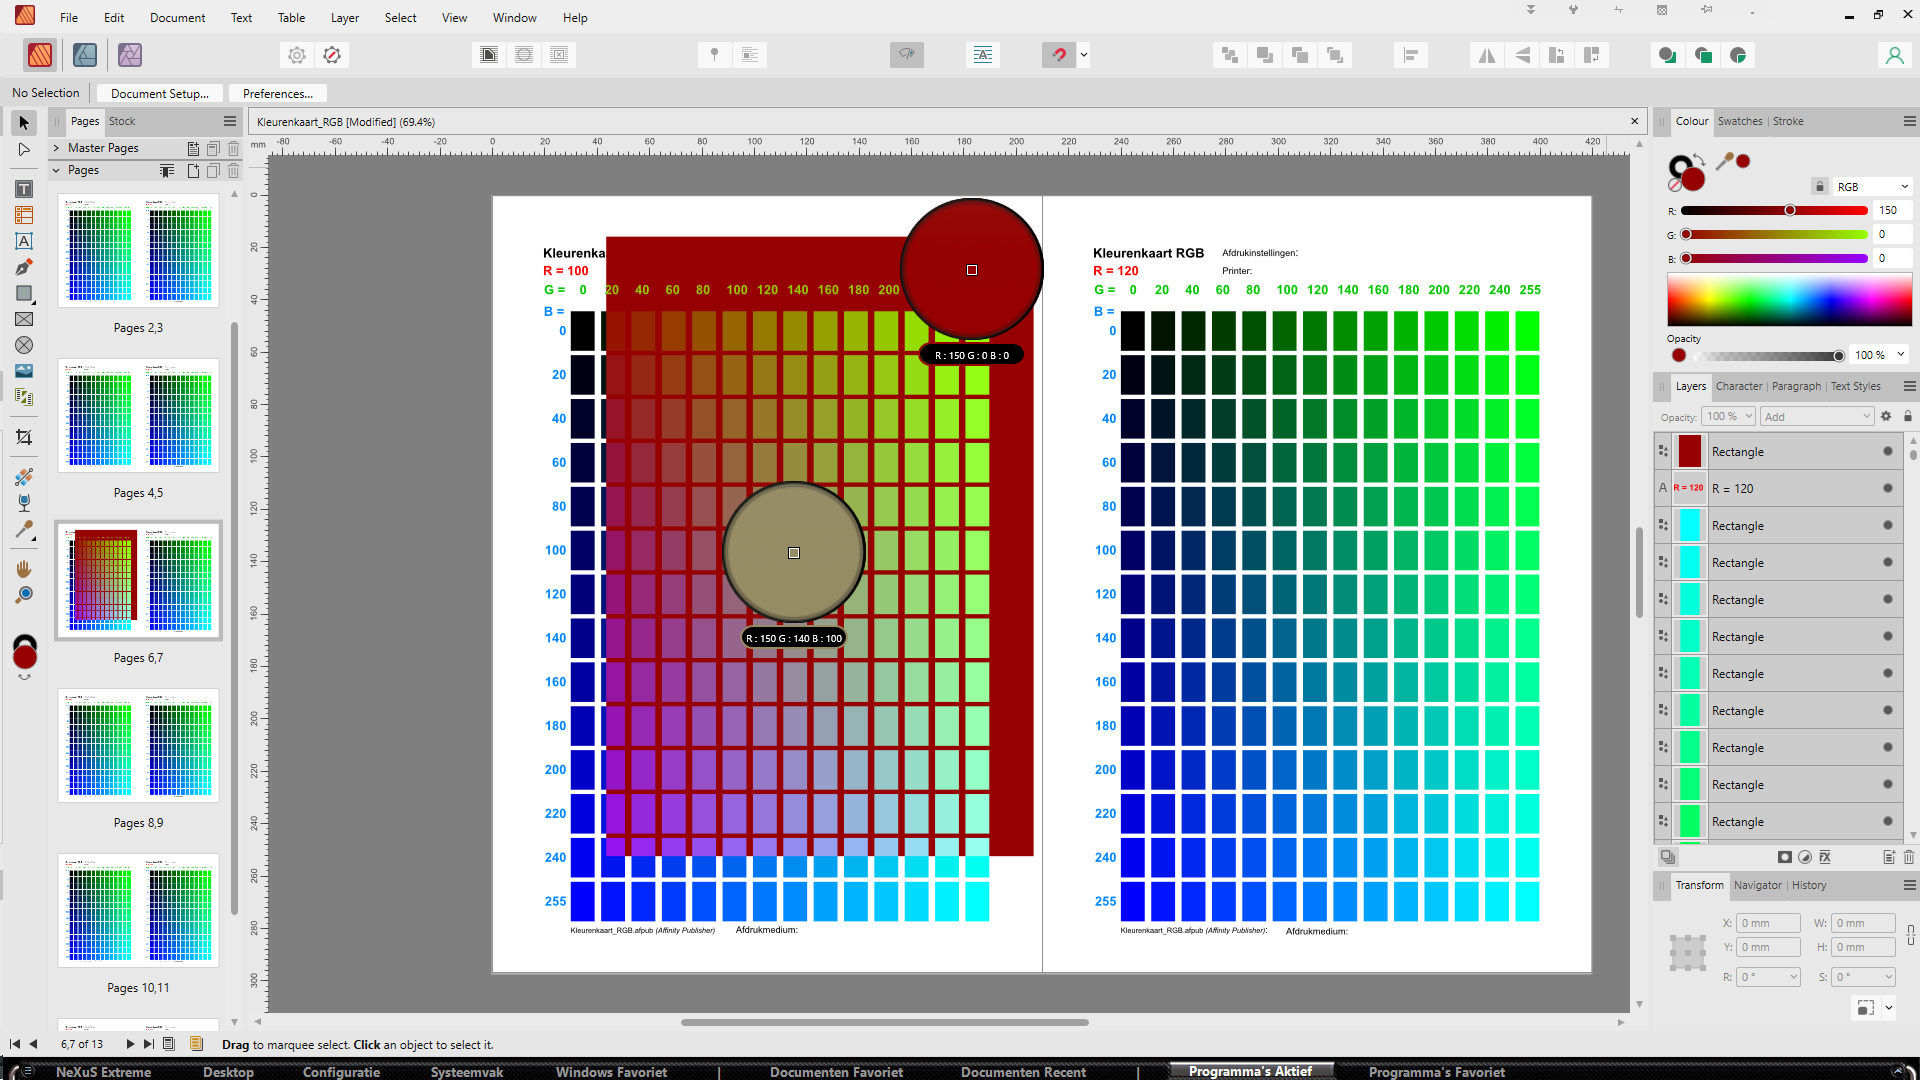
Thanks for the replies. Yes, the rectangles with color fill are all vector objects. The layer blending option 'add' looks like actually doing exactly what I asked for BUT I get different results than your example (I use Affinity Windows v 2.03): When I place a large red rectangle with blending 'add' the pure white areas (255-255-255) get x,0,0 (x=value red channel of red box) instead of white. See attached: this is not correct behavior since -all- other colors do well. Looks like a bug or a fluke of the day: perhaps tomorrow it works. A workaround could be blending many little red boxes instead of a single large one. Initially these color charts are not supposed to be exported. The swatches getting rasterized would be a pitty so I experimented a bit with adding, substracting, etc. objects but it isn't going to work. My main problem with the vectors becoming rasters is that it might affect print results while these color charts are intended for picking exact colors from prints: I know from (way) back in my CorelDraw days documents containing both vectors and bitmaps containing identical colors showed totally different colors when printed. Prints looking different from display always was and still is but both raster objects and vector objects having exact same colors (values & look on display) looking different on print is something I haven't tested yet in Affinity. Anyway, the blending option 'add' will do the trick for now as long as I stick to using the original Affinity documents 🙂 Cheers!
-
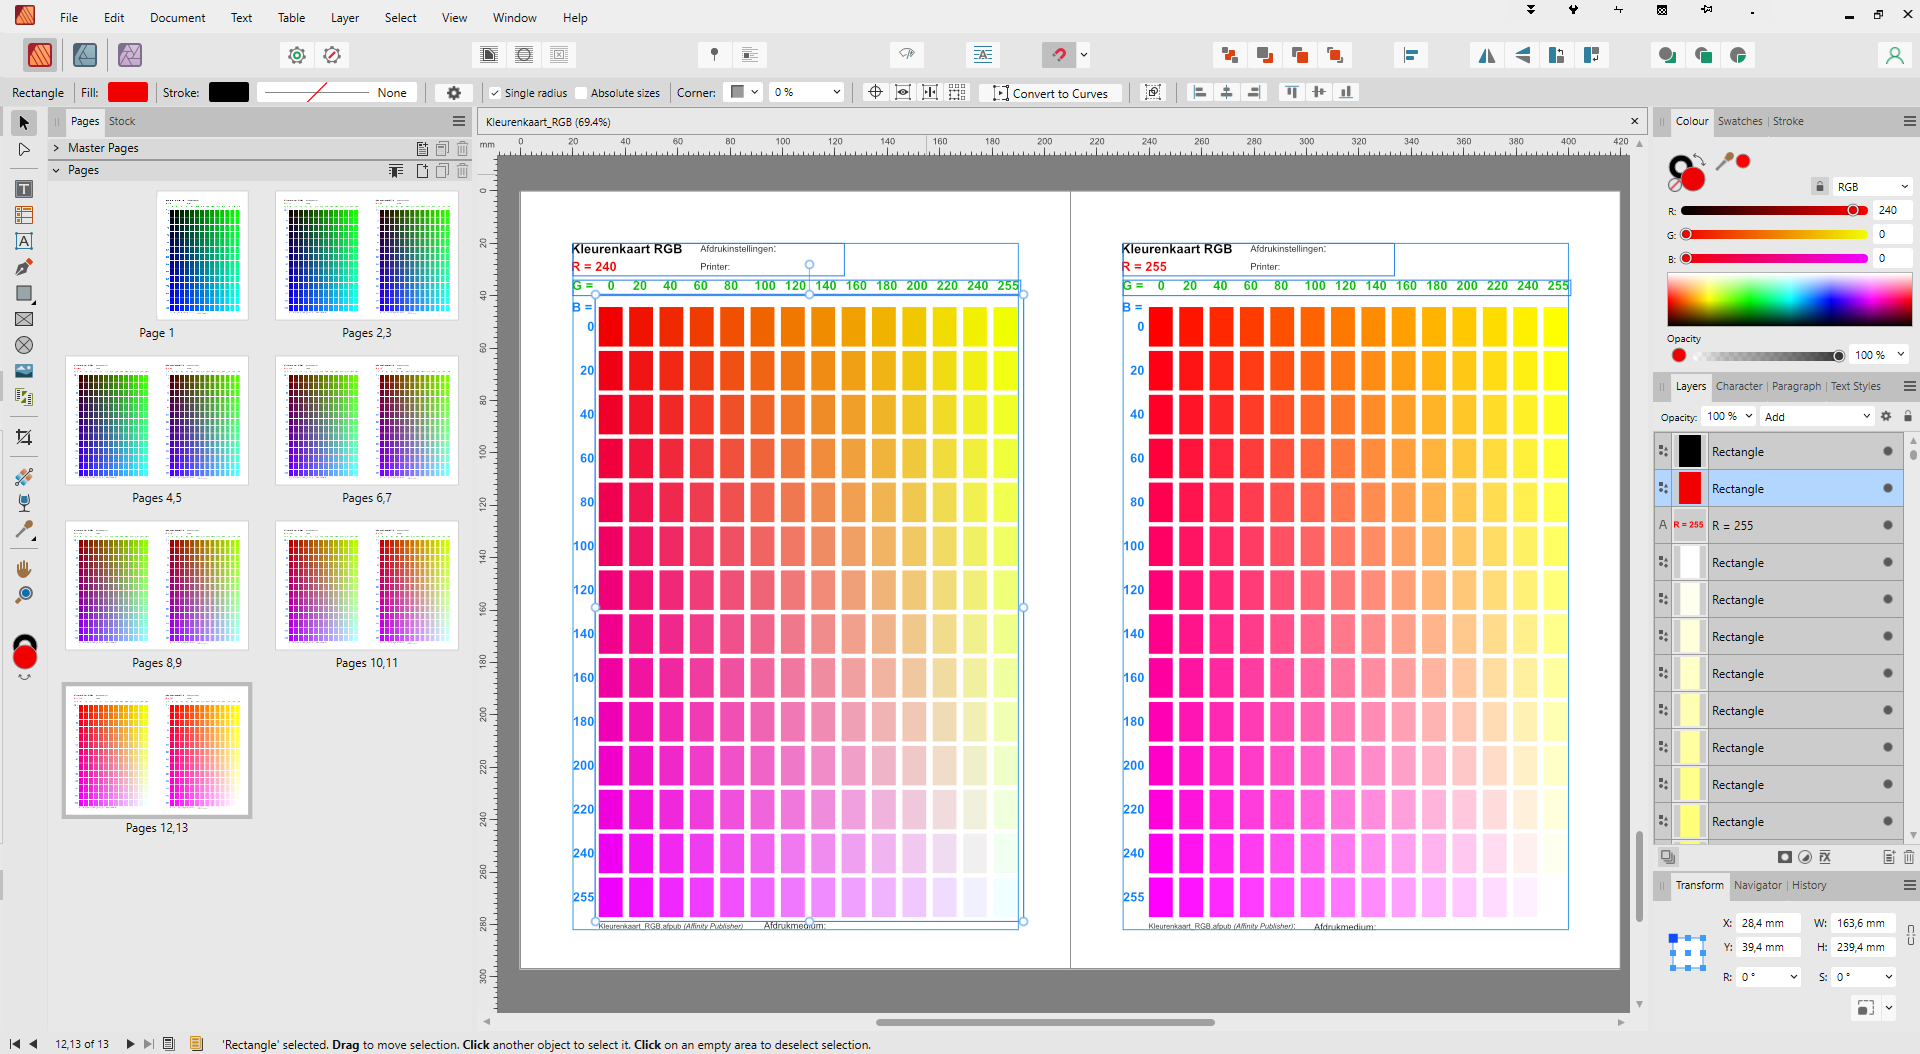
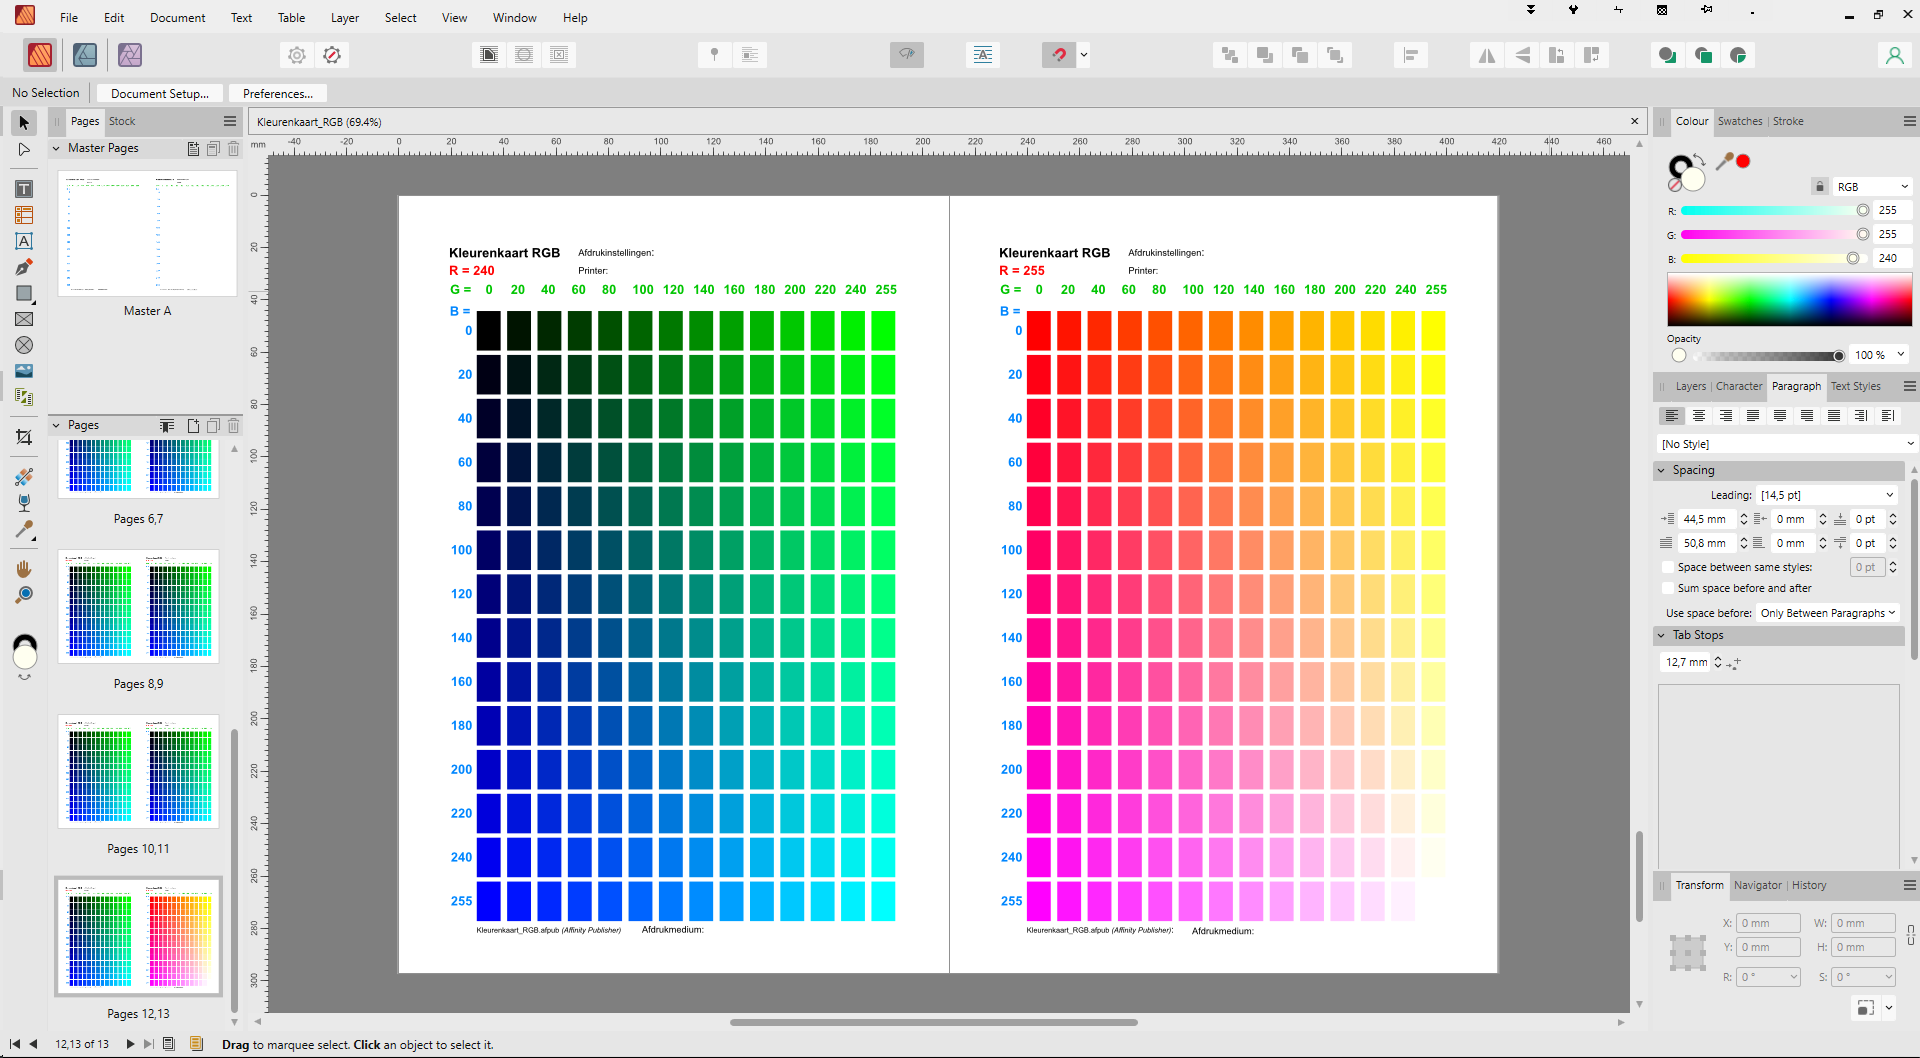
Hi, Is it some way possible in Affinity Publisher to select multiple objects with different colors and set the exact value of a single color channel? So basically unchanged color sliders c.q. color channels should remain their value. Currently if I select multiple different colored objects and change a single color slider all objects get the same color (which normally makes sense using a color panel). Example project (see screendump attached): one page contains many color boxes with different G and B values (colors set manually). I copied that page multiple times and on each page I intend to change the R value a bit for all color boxes on that page. Is that going to be a manual thing either or can some software trick take over the work? Roberto
-
jimfbk55 reacted to a post in a topic:
Feature request: toolbar button for Plugin list
-
Hi mrqasq, Haven't heard from AutoIt before but looking at the website it indeed seems to be an other interesting toolbox! Thanks for the tip
-
To start a plugin one needs to click Filter, go down to Plugins, click on Plugins, move mouse to list of plugin categories, click plugin category name, move mouse to list of plugins in category, move mouse to plugin and click desired plugin. Part of this ritual can not be avoided but the list of Plugins being accessible with a toolbar button would already save a heck of annoying clicks for users of plugins. A little button is not in the way of those not using plugins. Alternative would be a keyboard shortcut to Filters - Plugins but that is 'not possible'. Plugin users consider plugins as an important part of the image editor just as much as the other basic tools. Therefore a Plugin -Studio- would be the ideal option but that's likely never going to happen.
-
Hi Walt, Yes, that did the trick; thanks! No idea if you use Filter Forge but here's the document I just finished and had trouble with exporting correctly: Filter management options for Filter Forge 9. Perhaps it is of any interest Roberto
-
The whole document was exported; it's just that each pdf page contains two Publisher pages. Only the title page (has no facing page) is full-size. At least when I open the pdf in Sumatra pdf or in Vivaldi web browser. Workaround: turning 'facing pages' off Publisher rearranges everything to single pages while maintaining the correct 'facing pages' master pages layout. Exporting to pdf from here produces a correct pdf file but the original file contains single pages. Works but the rearrangement of the original file is not desired.
-
Hi, After finishing a document, set to 'facing pages' I exported it to pdf. The resulting pdf file shows 2 facing pages on a single page. The first (right side of facing pages) page is exported full size, though. The number of pages in the pdf is nearly half of the number of pages in Affinity Publisher. According to the rulers in Affinity Publisher the facing pages are correctly sized: one of the facing pages has the size of a whole page. Can this behavior be changed to facing pages each having the size of a full page?
-
Oh well; started to use the cut/paste approach. Guess tomorrow I'm at the same point as I started this evening. There's a bit of re-adding pictures, applying layer effects and rearranging involved.
-
Hi walt.farrel, The help only discusses linking and unlinking. All related options maintain text flow either within or along frames. Nothing described gets into the actual text being separated. Imagine you intend to write a lenghty text: each chapter as single text but flowing through multiple frames/pages. Then you discover accidentally two chapters are one flowing text flowing through multiple frames. How to fix this in order to get individual unlinked text for each chapter?
-
Hi, Publisher indeed. Thanks for the replies: Ross: yes but still lets the text flow as a single text. I wanted to split the text in two separate texts. Old Bruce: a column or frame break just seemingly interrupts the text while the actual text is still flowing among frames. A column or frame brake can easily be undone by deleting 'characters'. h_d: that would be a possible workaround I used before but in this case it's a bit tricky: long text in a 2-column layout including images. If text overflows a frame it easily is set to flow to a next frame. I suspected two obvious kind of opposite cases would also be covered in Publisher: either text remains but frames are not linked anymore (resulting in first frame containing overflowing text OR frames remain but text is split (text flow undone; no visual changes). UPDATE: cut selection and pasting it again results in only text being pasted. Inlined images need to be added manually again.
-
Hi, Is there any way to break the text flow through frames? If I use the red 'eye' symbol the text in folowing frames is deleten and added to the initial frame (causing it to overflow). I would like to keep frame contents: the actual text should be split in two independent frames.