h_d
-
Posts
1,629 -
Joined
-
Last visited
Everything posted by h_d
-

Reinstall softwares with all his preferences
h_d replied to sansnom's topic in Desktop Questions (macOS and Windows)
If you use Migration Assistant when you first start up your shiny new Mac, it should transfer all your applications, preferences and settings automatically without any need for you to make any manual changes. It takes a bit of time but it is very efficient. -
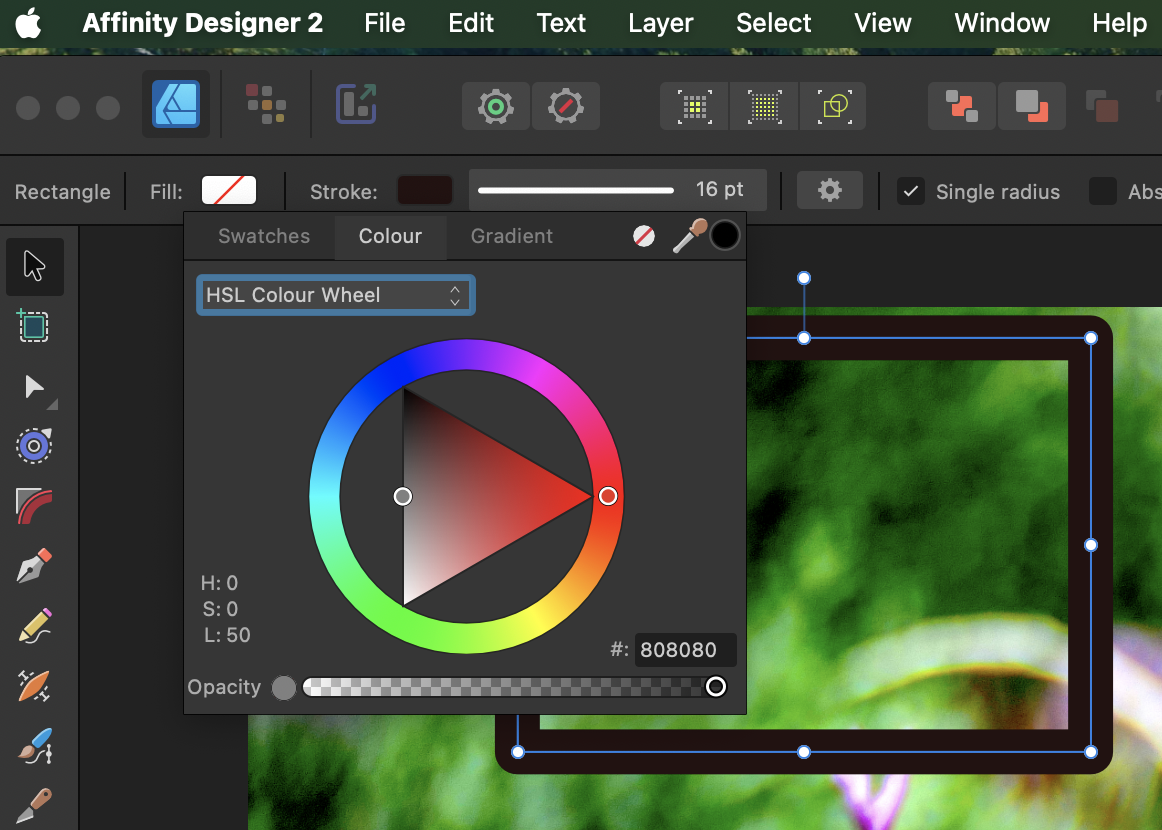
After you've sampled your colour and released the picker, click the eyedropper icon once to apply the sampled colour.
-
You can add the parameter -overwrite_original to the command if you don't want it to. Worth reading this for more detail about the way ExifTool edits pdf metadata.
-
Set the fill to empty by clicking the white circle with the red line through it (next to the eyedropper). (You don't say which Affinity app you're using, but this works in any.)

-
Hi @PureMinty and welcome! The Affinity Photo pen tool doesn't draw paths, it draws Curves, which are essentially vector shapes. And unlike the pen tool in Photoshop, it doesn't draw non-contiguous curves. So as @firstdefence says, you've almost certainly drawn two unfilled, unstroked Curves. They should both be there in the Layers panel. In Affinity Photo, unlike Photoshop, as far as I'm aware there's no one-hit way of converting a curve to a pixel selection. Here's a get-round/alternative workflow. Draw the two curves. You'll see them as two separate objects in the Layers panel - I have filled them to make them easier to see: On macOS, hold down the cmd key (probably ctrl on Windows) and click once on the thumbnail of the first Curve in the Layers panel. This will create a 'marching ants' pixel selection on this Curve layer. While still holding down the cmd key, hold down the shift key and click once on the thumbnail of the second Curve in the Layers panel. This will give you a marching ants pixel selection of both Curves. You can now delete or hide the two curves layers (the marching ants will keep marching). If you want, you can Feather or Smooth the selections using the Select menu. Then select the image layer, and apply your sharpening (remembering that you will best see the true effect of sharpening at 100% magnification). If you use a Live Filter layer this will automatically create its own mask, so you can deselect your pixel selection and will get a better idea of what's happening round the edges. However... All of this is pretty long-winded, and I think you'll get faster (and probably better) results using Affinity Photo's selection tools, especially the Selection Brush. This works non-contiguously, giving you an accurate selection of both eyes without using the pen tool at all.
-
Affinity Publisher Image import
h_d replied to duke22's topic in Desktop Questions (macOS and Windows)
The original file name is used as the layer name in the Layers panel (Window>Layers). More information (including file path, image size, colour space etc) is displayed in Window>Resource Manager... -
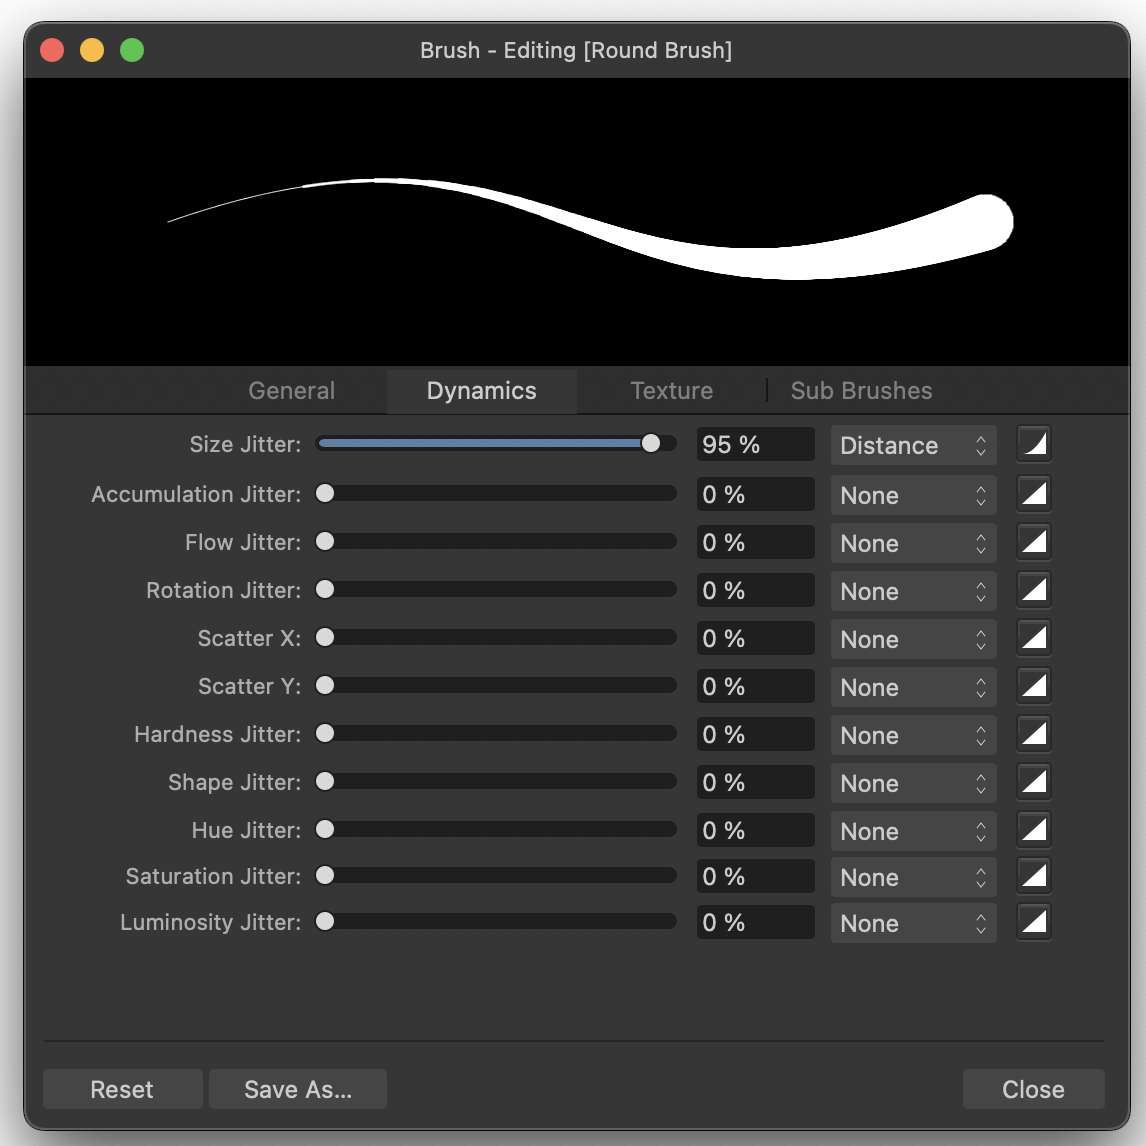
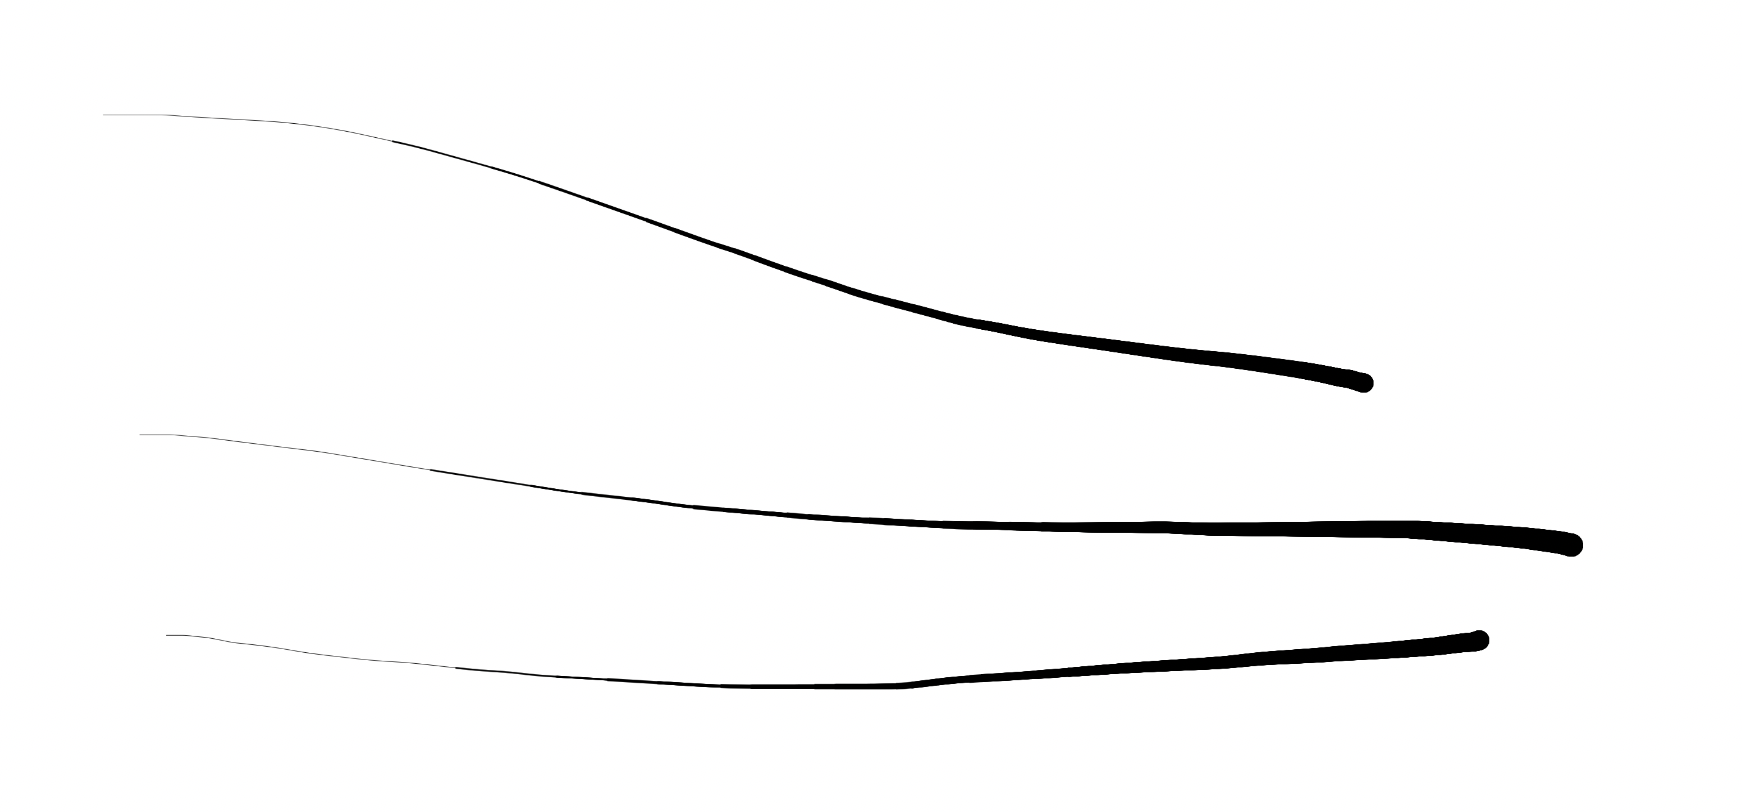
If you edit a round brush (I used the 29px), go to Dynamics and set the Size Jitter to a fairly high figure controlled by Distance: You can paint strokes like this: It's not very controllable though: you'd probably have better luck with a graphics tablet and the controller set to Pressure.
-
Not personally, but search these forums for Digital Asset Management (or DAM) and you'll find some suggestions.
-
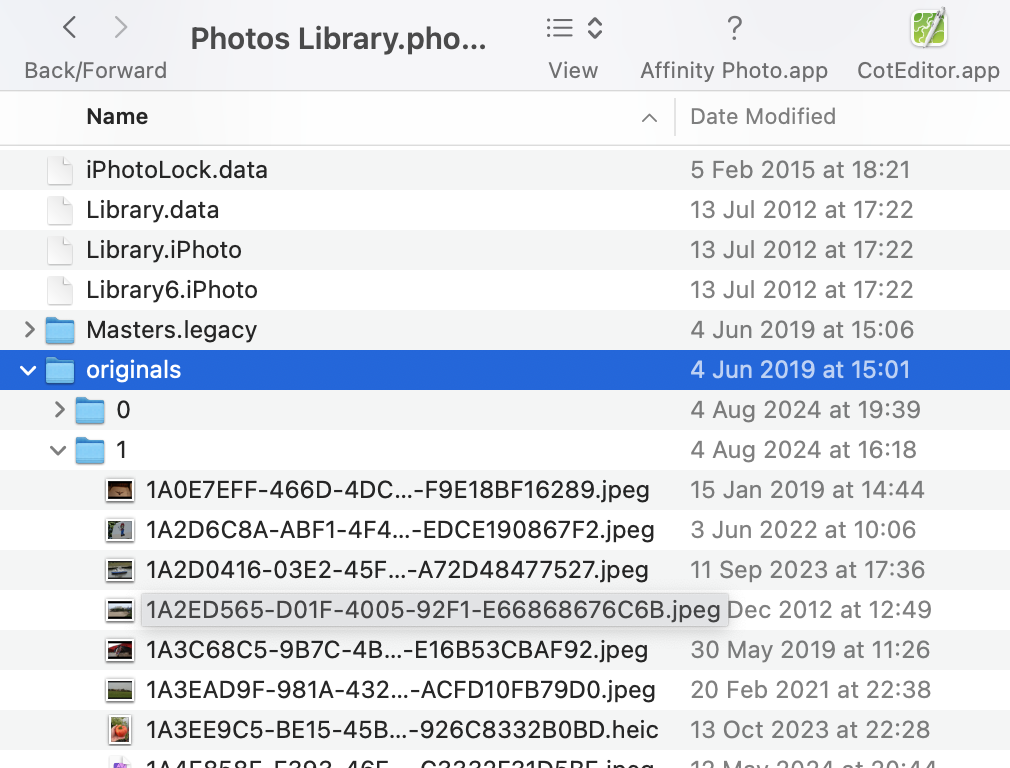
The 'long names' are the filenames in the Apple Photos database structure: (Not to be messed with under any circs...) 100% agree with this.
-
A couple of side-thoughts on this. 1) Your problems are not connected with your machine, or your OS, or iCloud, or the length of the filename. 2) I've used the workflow outlined above almost every day for the years over different versions of macOS and different machines and apart from a few teething problems many years back it's always worked really well. 3) The Media>Photos option in the macOS Open dialog works if you want to embed images in another application (for example Apple Pages). But using it to open images for direct editing is going to lead to the problems you have experienced. 4) The name you're seeing in Apple Photos (R0000504.JPG) is the Image Display Name, not the file name. It is the same as name of the original file you imported from your camera/memory card (unless you change it to something more descriptive in Apple Photos). But the actual permanent file name (in the Apple Photos database) is 3B9C7E25-D523-41AC-B7BC-8624BB149A6A.jpg. As @R C-R says, "Sharing" back to Apple Photos will create a new image file with a new file name, generated by Affinity Photo and based on the current date and time, which will be used by Apple Photos as the display name of the image. This will be a duplicate of the original. 5) Images edited in Affinity Photo using the workflow I've described retain their original display name and underlying database file name. They have the added bonus that in the Apple Photos' browser window they display a little icon that looks like three sliders: to indicate that they've been edited. The fact that you can't see it if there's sky or any sort of light background at the top of the image is one of the less impressive elements of Apple's UI design. (The other icon indicates that the image has an associated GPS position.)
-
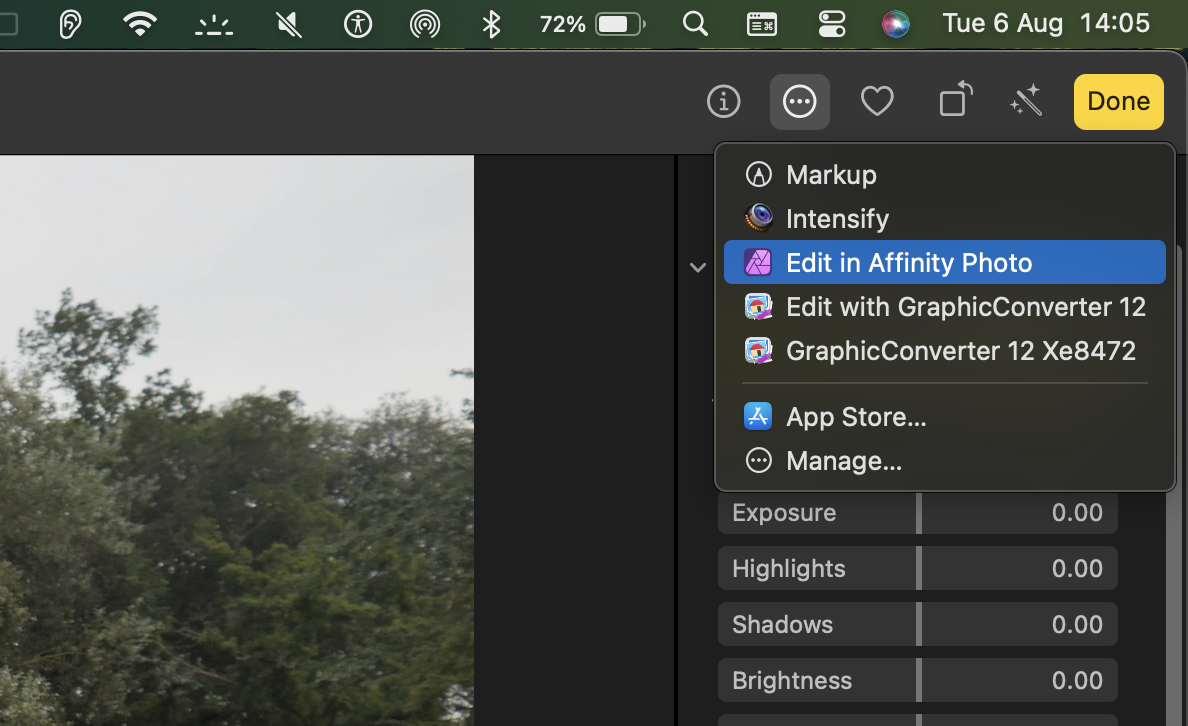
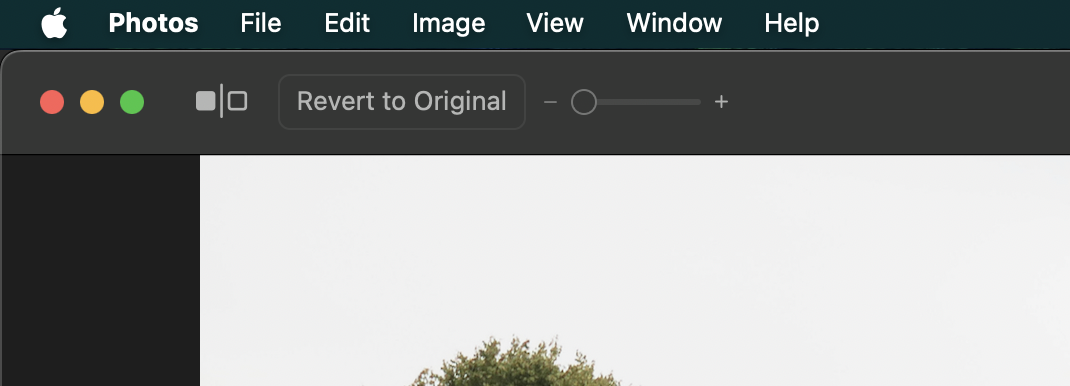
Apple Photos has its own internal database of images, thumbnails, originals, edited versions, dates, more. Without going into a lot of detail, if you go through the route you describe, making edits and trying to save it back into Photos, you risk at least creating duplicates (as you've found) or at worst knackering your Apple Photos database. I would strongly advise you not to continue with that way of working. The simplest and safest workflow if you want to edit Apple Photos images in Affinity Photos is to start in Apple Photos itself. Find the image you want to edit in the Apple Photos browser, click once on it to select it, then press the Enter key to switch to Apple Photos' editing environment. Now click on the three dots in the top right corner of the editing screen and choose Edit in Affinity Photo: Make your edits in Affinity Photo, save and close. No need to flatten the image or anything - Affinity Photo knows it's an Apple Photos image and will do that in the background. You'll now be taken to a screen in which you are asked if you want to save back into Apple Photos: Click the Save Changes button in the top right and this will take you back to the Apple Photos editing environment. Click Done and your changes will be saved as the edited version in Apple Photos. You can revert it to the original in Apple Photos by clicking the Revert to Original button in Apple Photos' editing environment: ADD: Another word of warning: don't be tempted to right-click on images in Apple Photos browser window and choose "Edit with Affinity Photo". Again, it will cause you more trouble than it's worth. Reasons here.
-
everything disappears when i use minus
h_d replied to Anthony1's topic in Desktop Questions (macOS and Windows)
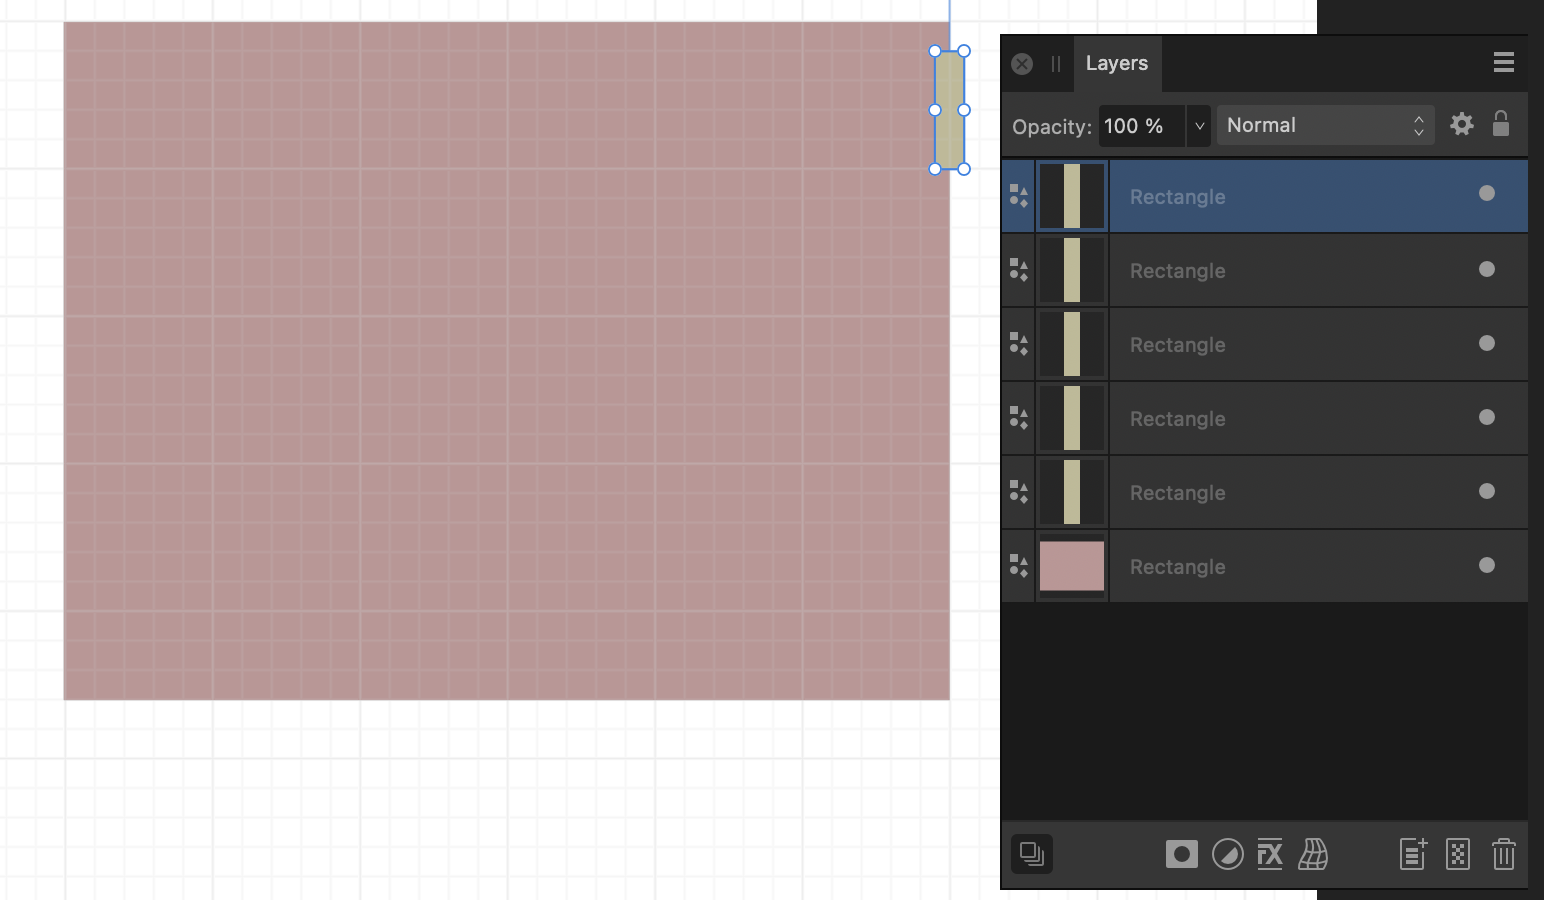
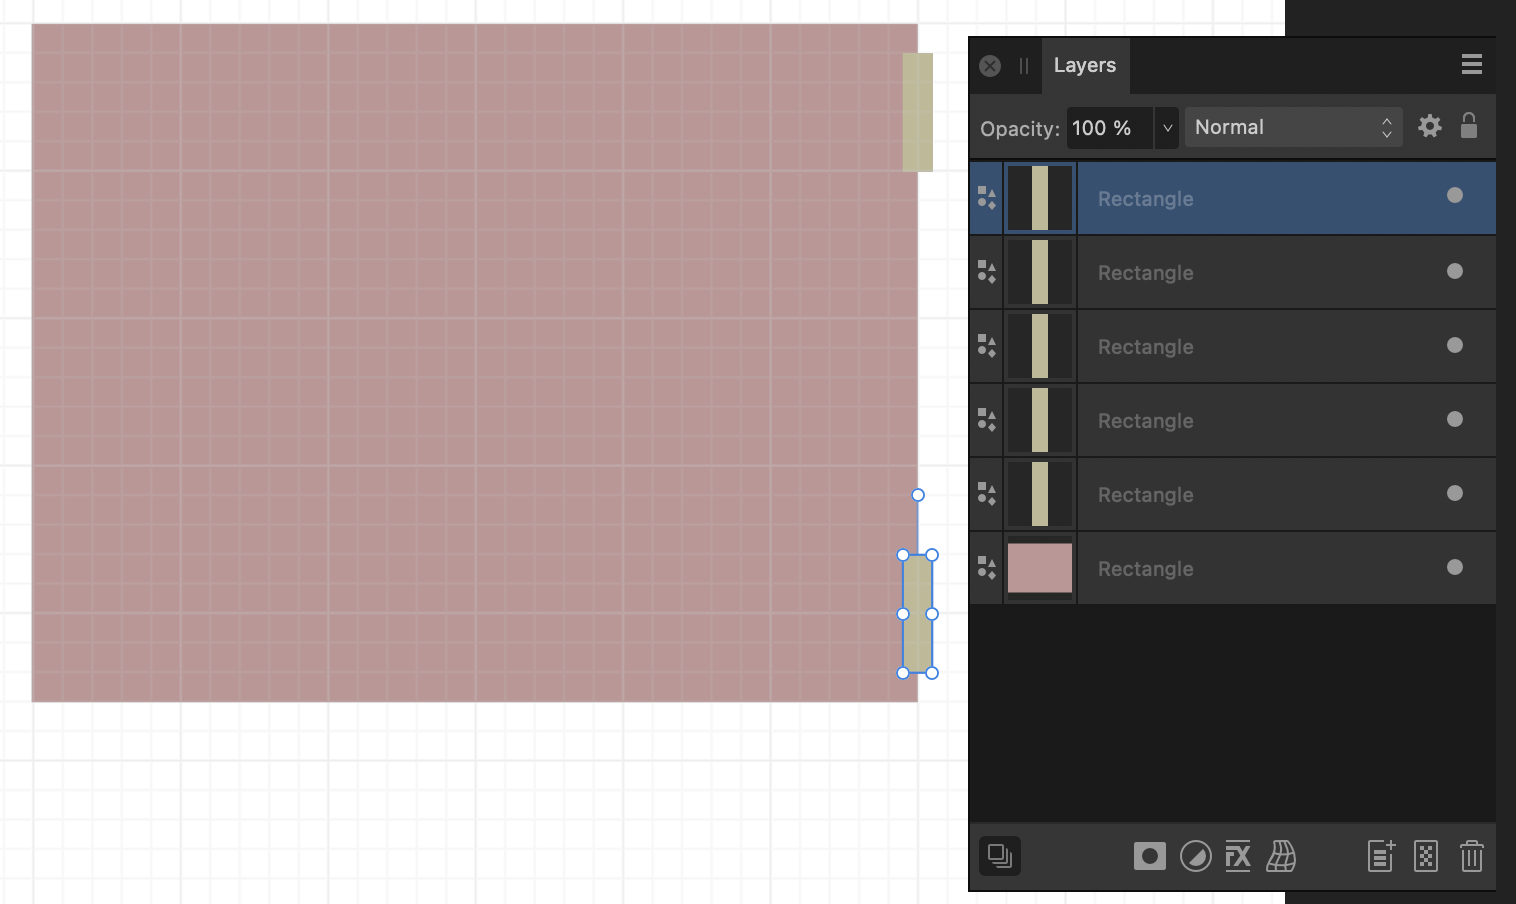
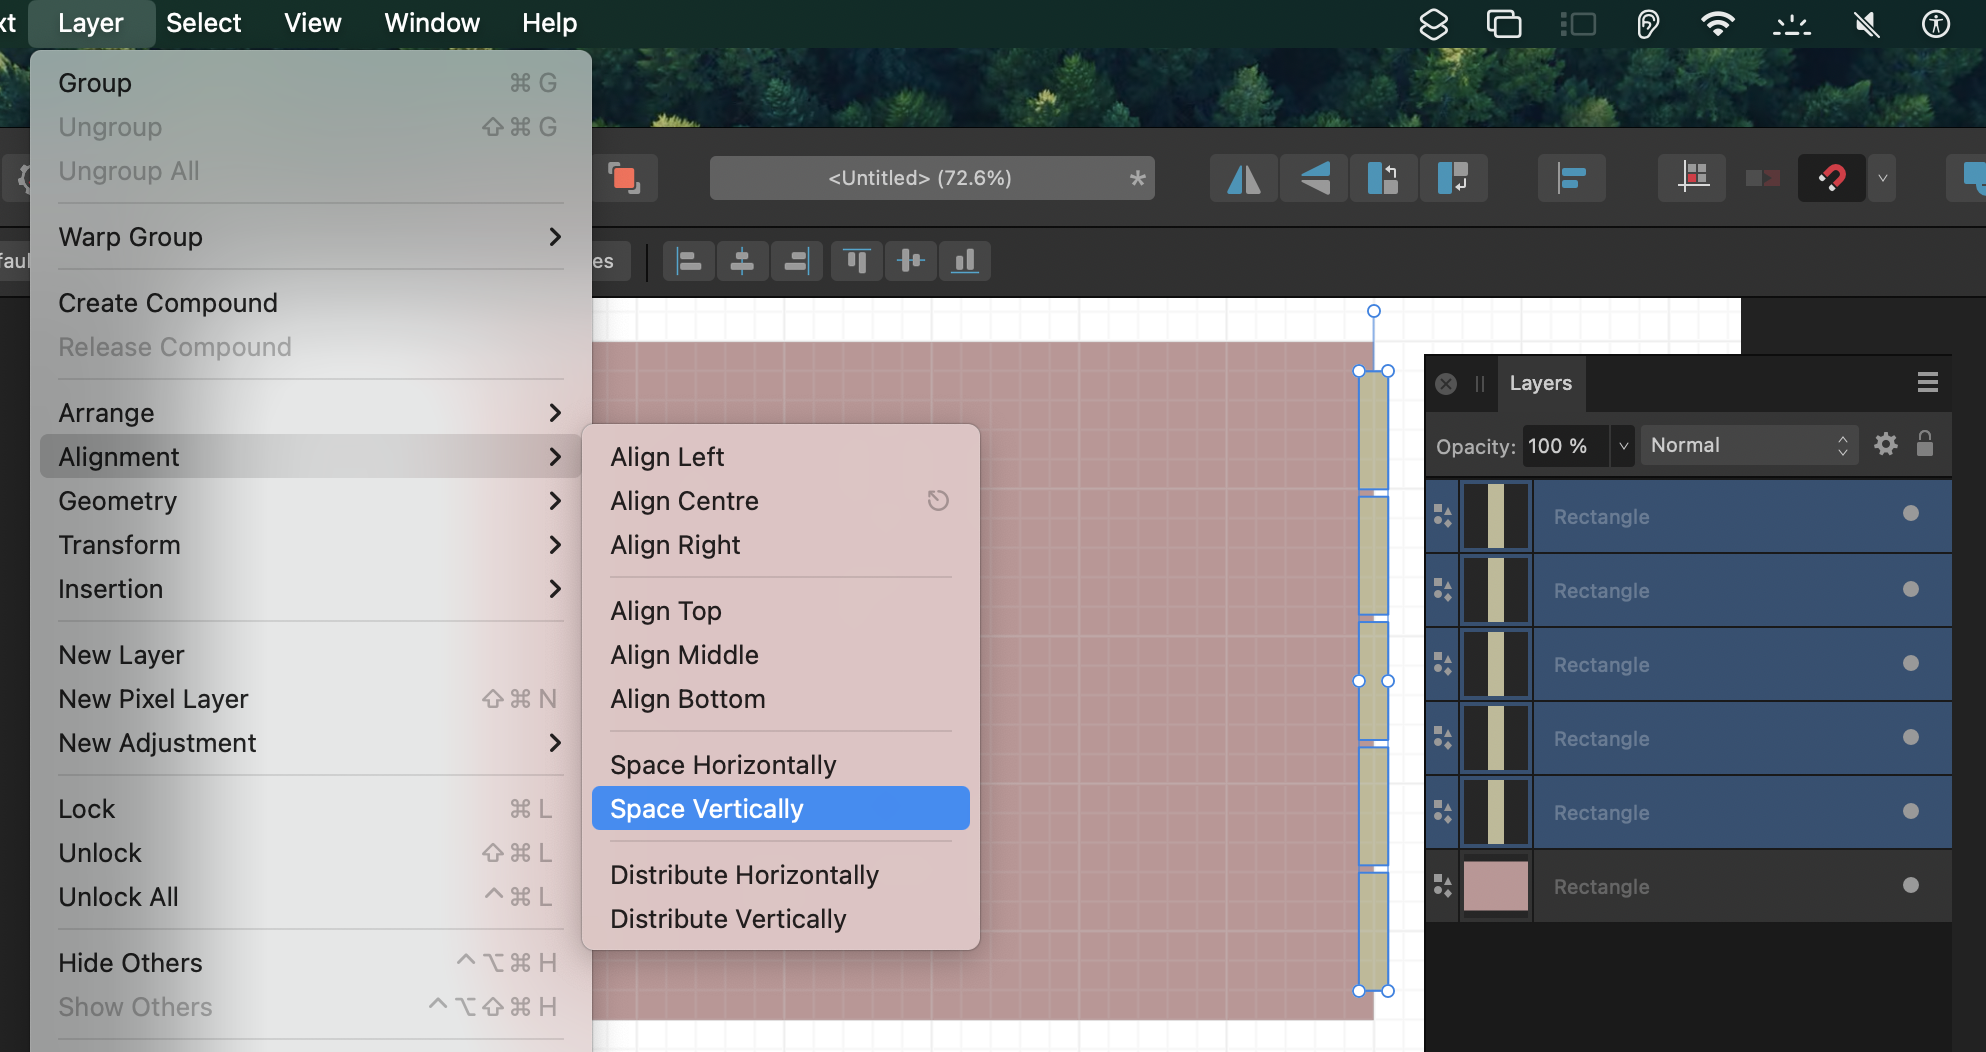
Draw the first one, duplicate the next four in place with four whacks of cmd-j (macOS) or ctrl-j (Windows): Select the top one in the Layers stack and drag it down on the document to where you want it to be in relation to the large rectangle: Select all the small rectangles (but not the large one), then Layer>Alignment>Space Vertically: Enabling Snap to Guides helps keep things lined up.
-
Colour Replacement Tool Works Incorrectly
h_d replied to Mummblingme's topic in Desktop Questions (macOS and Windows)
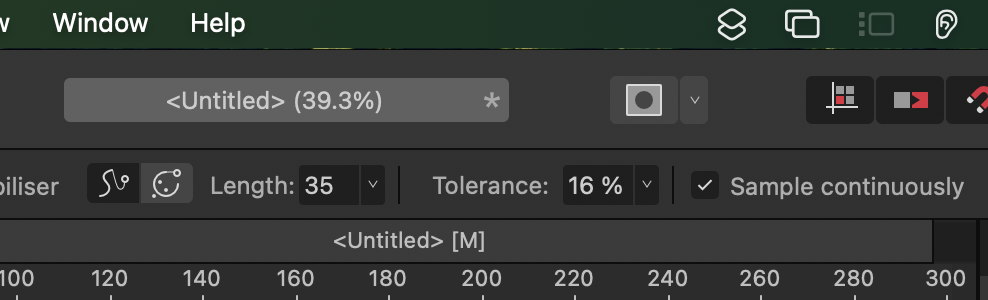
...not quite understanding how the CRT works. 😉 From the Help: In your first example (white on red) the white foreground colour has no hue, so the hue is removed from the red leaving just its saturation and lightness values (ie grey). The same thing will happen if you set the foreground colour to black. The tool needs a foreground colour, not an 'absence of colour', to work as intended. In your second example (aqua on red) the red has slightly varying hues, and the CRT is picking up only those values that match the point where you first click. You may get closer results to your intention if you check Sample continuously in the context menu bar, or adjust the Tolerance level: (TBH though I reckon the CRT is a bit of a blunt instrument, and if you want to change the colour of the red brushstroke while leaving the white background unchanged, you would have more control applying an HSL Shift Adjustment to the red area.)
-
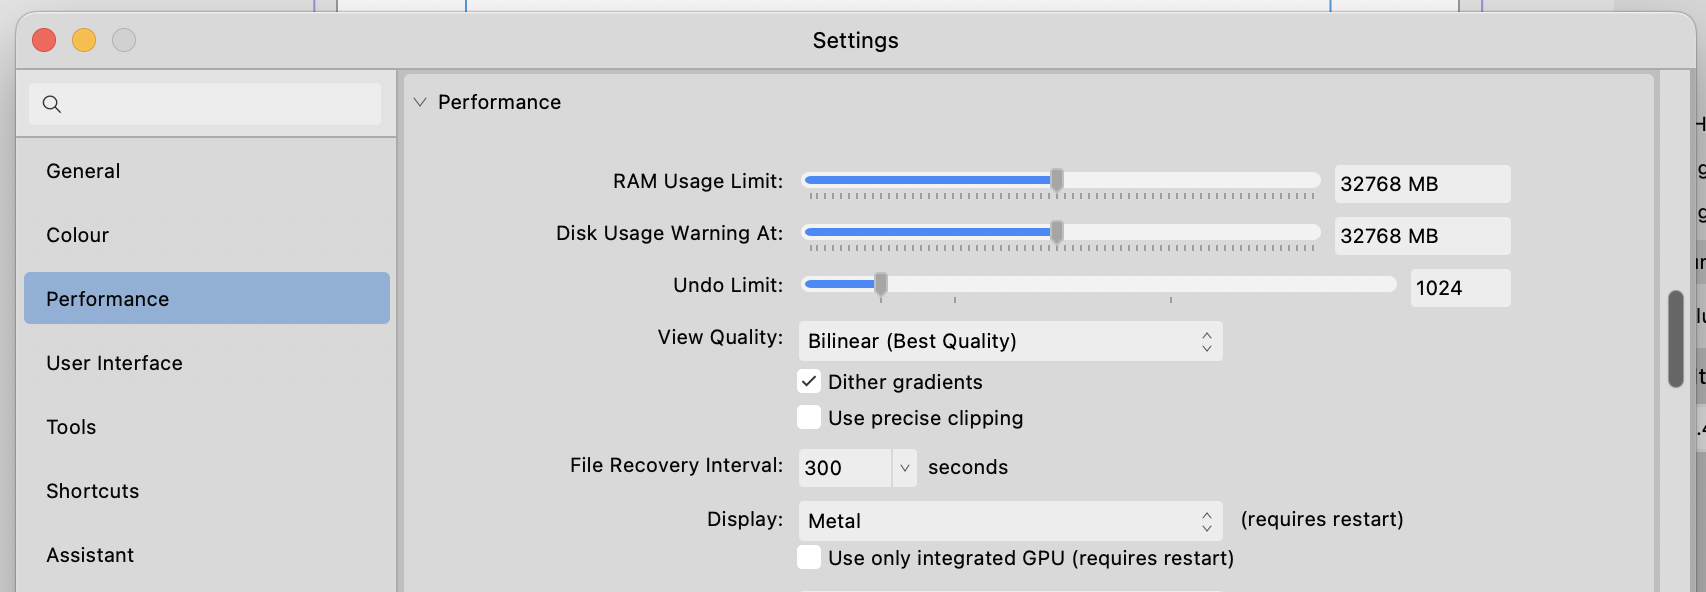
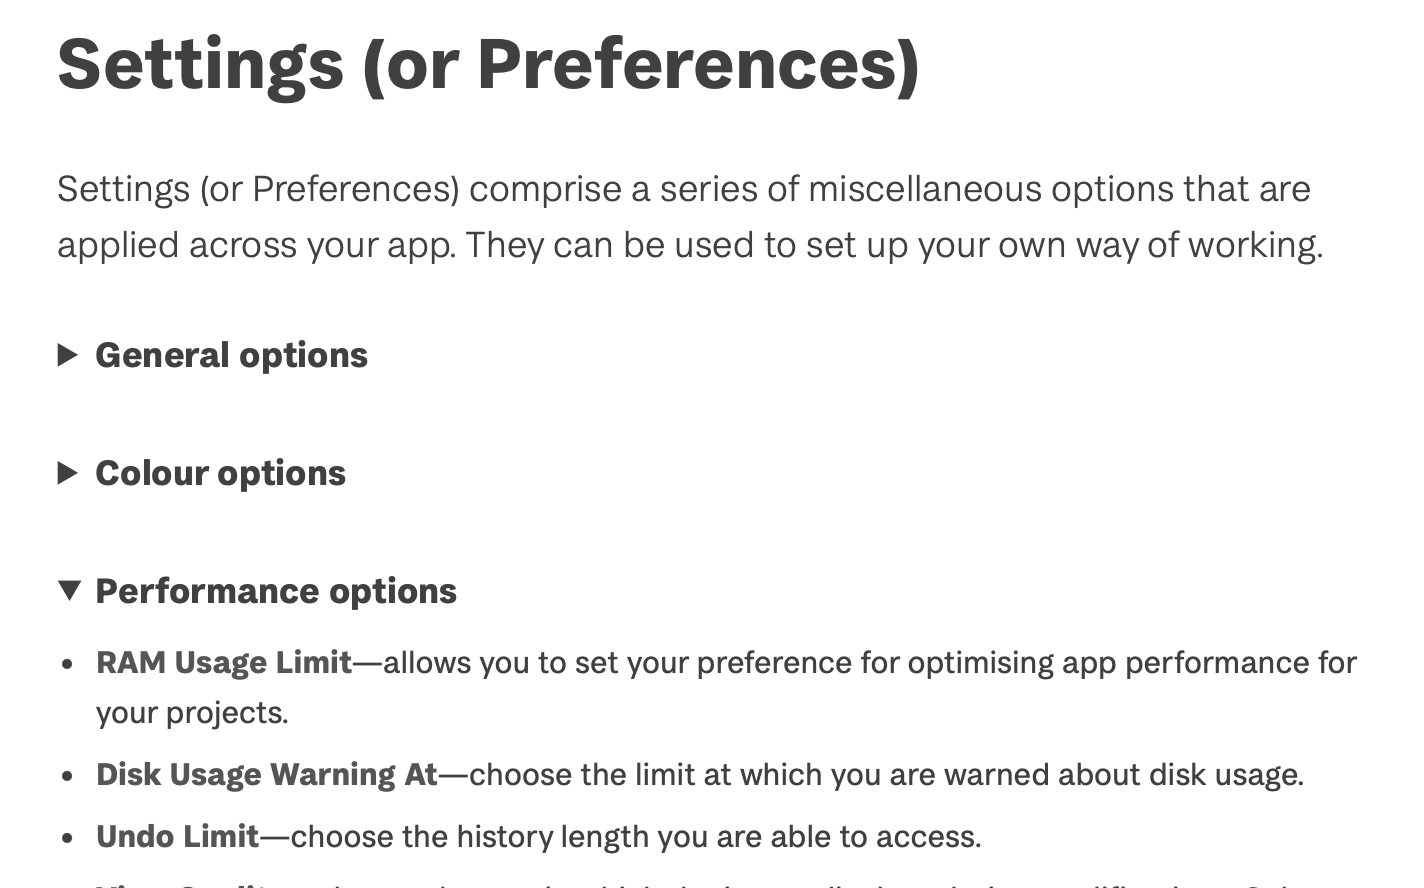
All I know is that the Disk Usage Warning limit can be changed in Settings>Performance. These are the defaults: The help files don't offer much useful information: How large is your Publisher document? Are the images linked or embedded?
-
Problem with the names of the artboards.
h_d replied to josue_mp's topic in Desktop Questions (macOS and Windows)
FWIW, it's the word 'Frontal' transliterated into the Greek alphabet. (Latin uses Latin script, as do we.) -
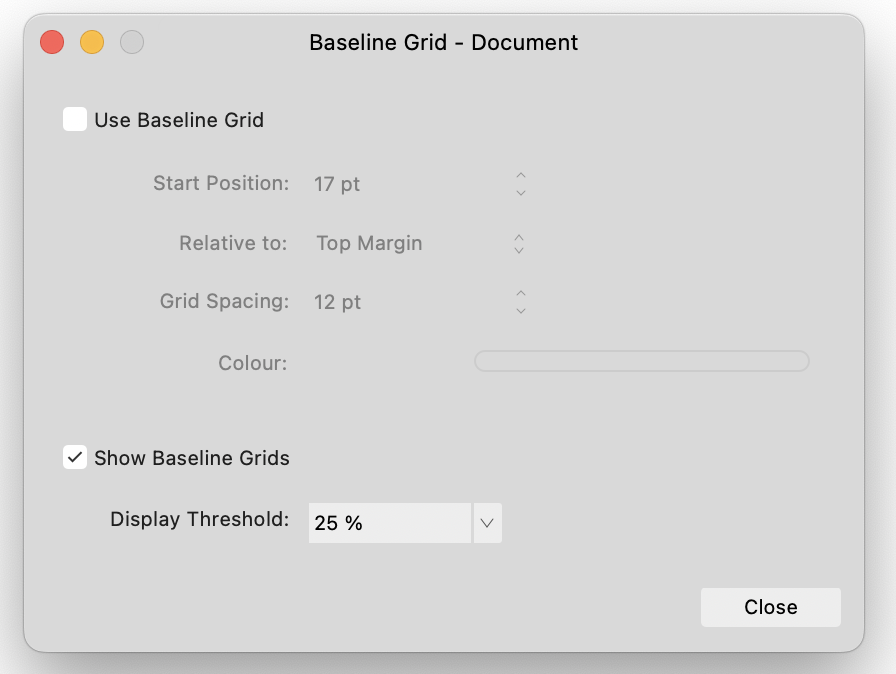
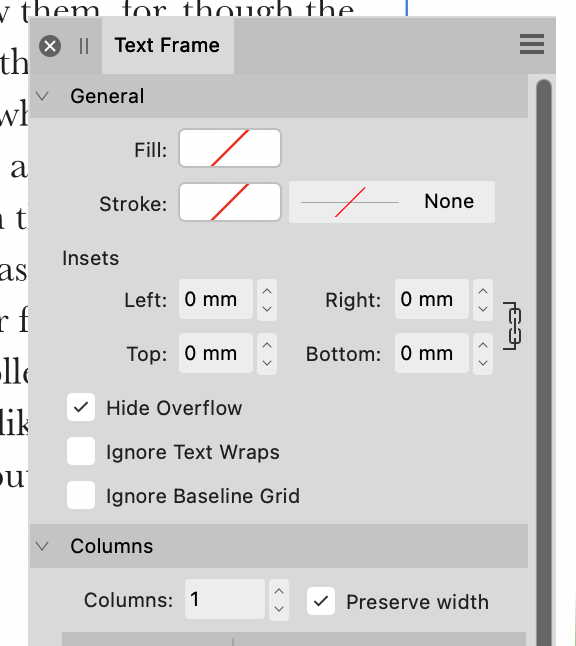
Might be the baseline grid overriding the leading. What happens if you turn it off at document level via View>Baseline Grid...: You might also want to check Ignore Baseline Grid in Window>Text>Text Frame
-
When can we buy a copy of Affinity Suite V3?
h_d replied to Archangel's topic in Desktop Questions (macOS and Windows)
I believe it may work with a jailbroken Nokia E6. -
Ideas Needed: Text Divider Lines
h_d replied to SunnySis's topic in Desktop Questions (macOS and Windows)
An alternative approach is to pin an image in its own paragraph, with the alignment set to centred : Screen Recording 2024-07-27 at 15.22.02.mov I copied and pasted this one in then adjusted the size to suit. It's a raster image but pretty good quality and doesn't show much pixellation even at high magnification. The image is from Vecteezy. -
Use the 'burger bar' (three lines just above the red box in your screen shot) to create a preset. This should then 'stick' for subsequent exports.
-
Affinity Pub 2.4 show word count is not accurate?
h_d replied to kat's topic in Desktop Questions (macOS and Windows)
This setting will give you an immediate word count with filler text.
-
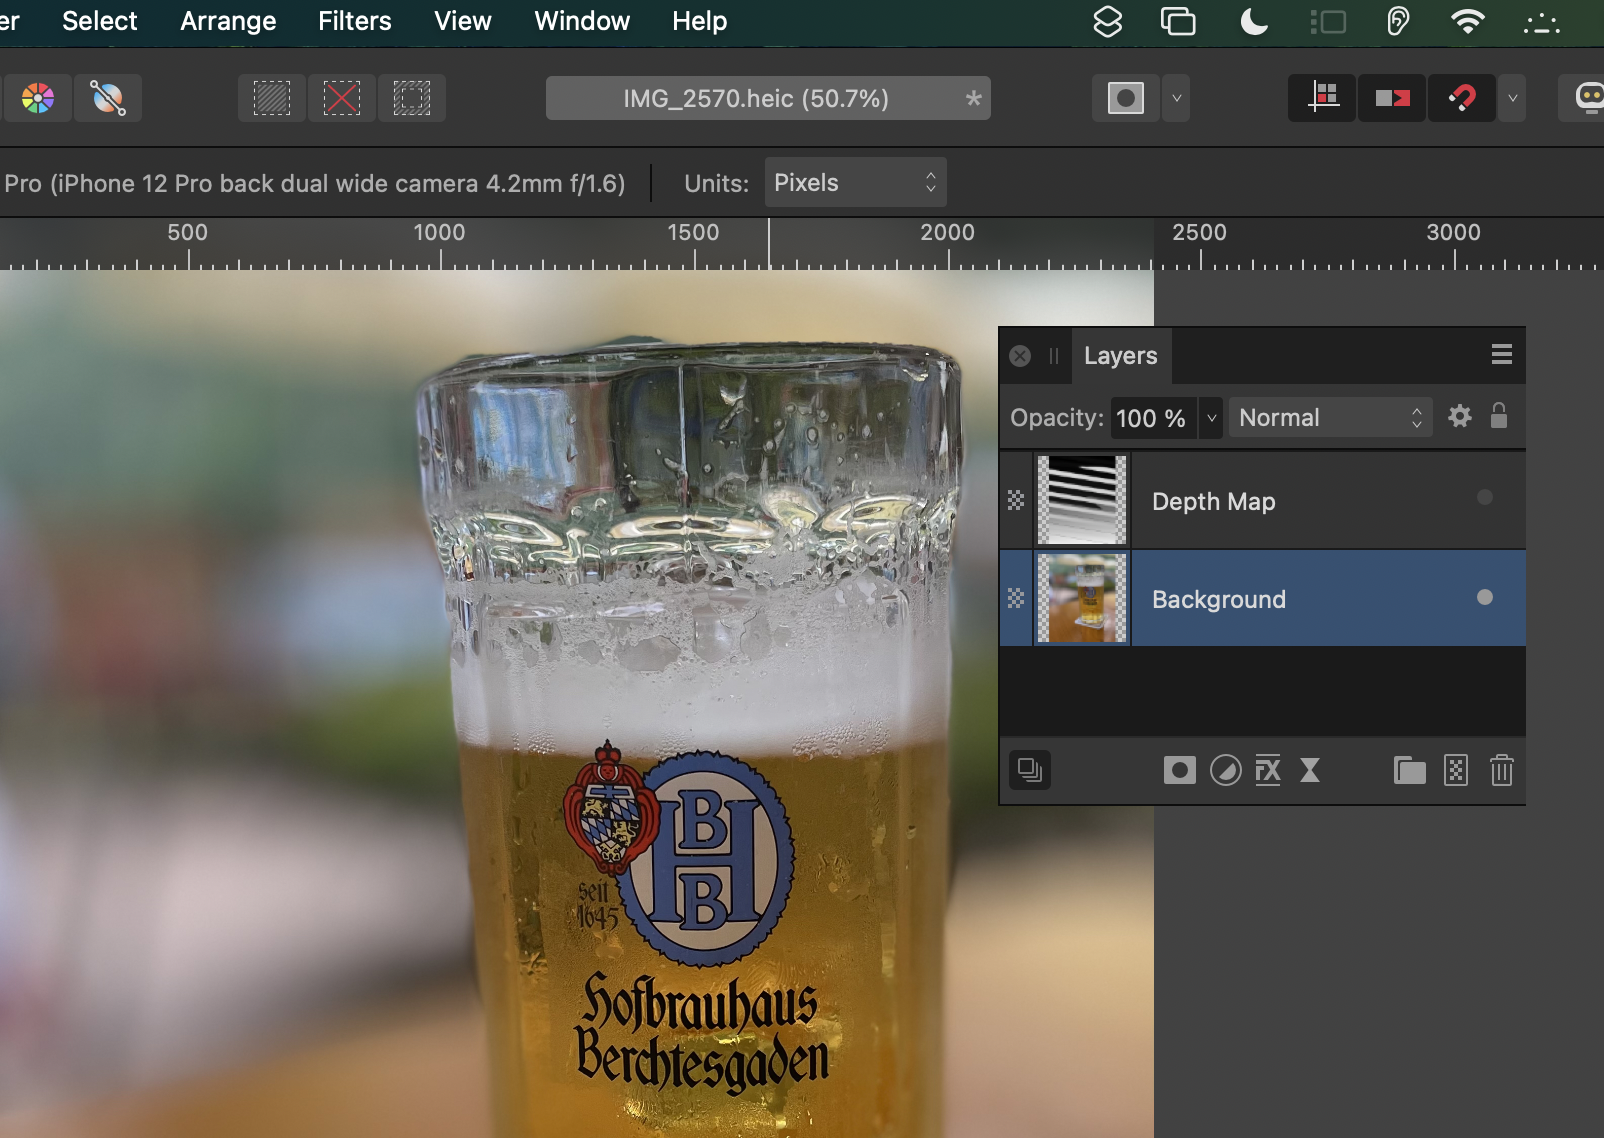
Last thought... Even if you do successfully open the file with the two layers as I have done, they will be totally independent of each other. Affinity Photo treats them as two separate pixel layers, and modifying the depth map layer has no effect on the image layer. As far as I can see, the image layer as displayed in Affinity Photo has already had the depth map applied and baked in.
-
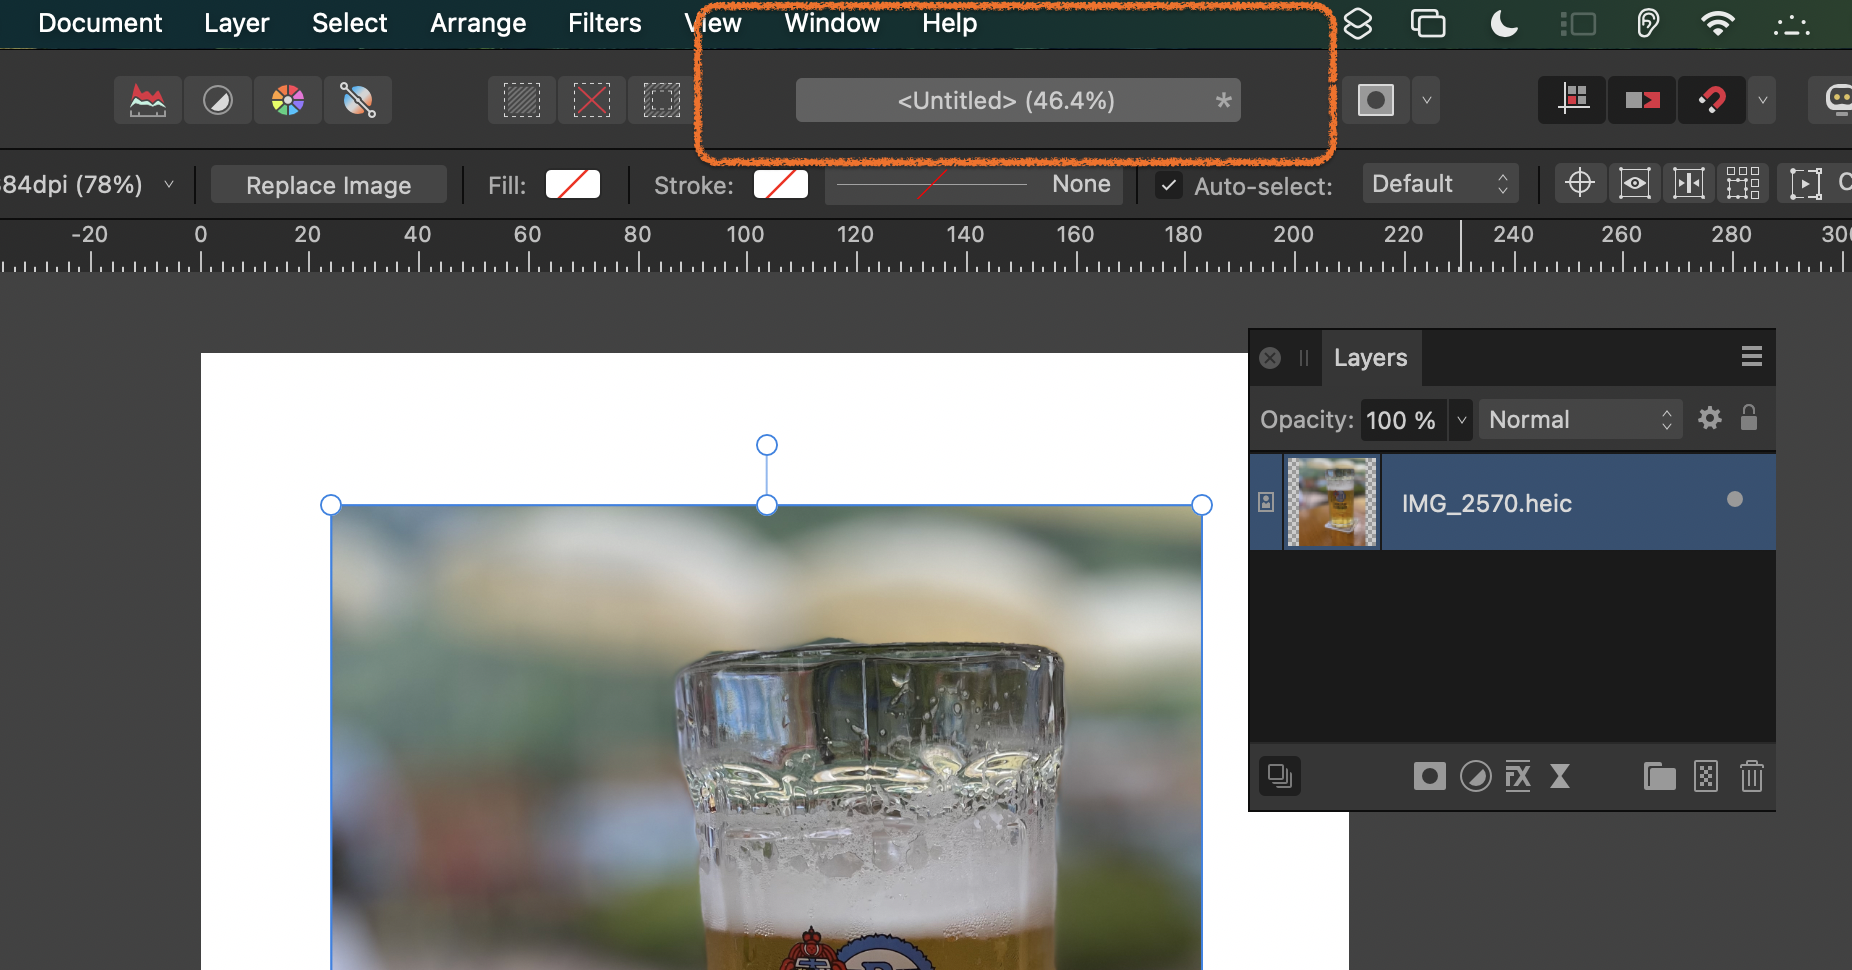
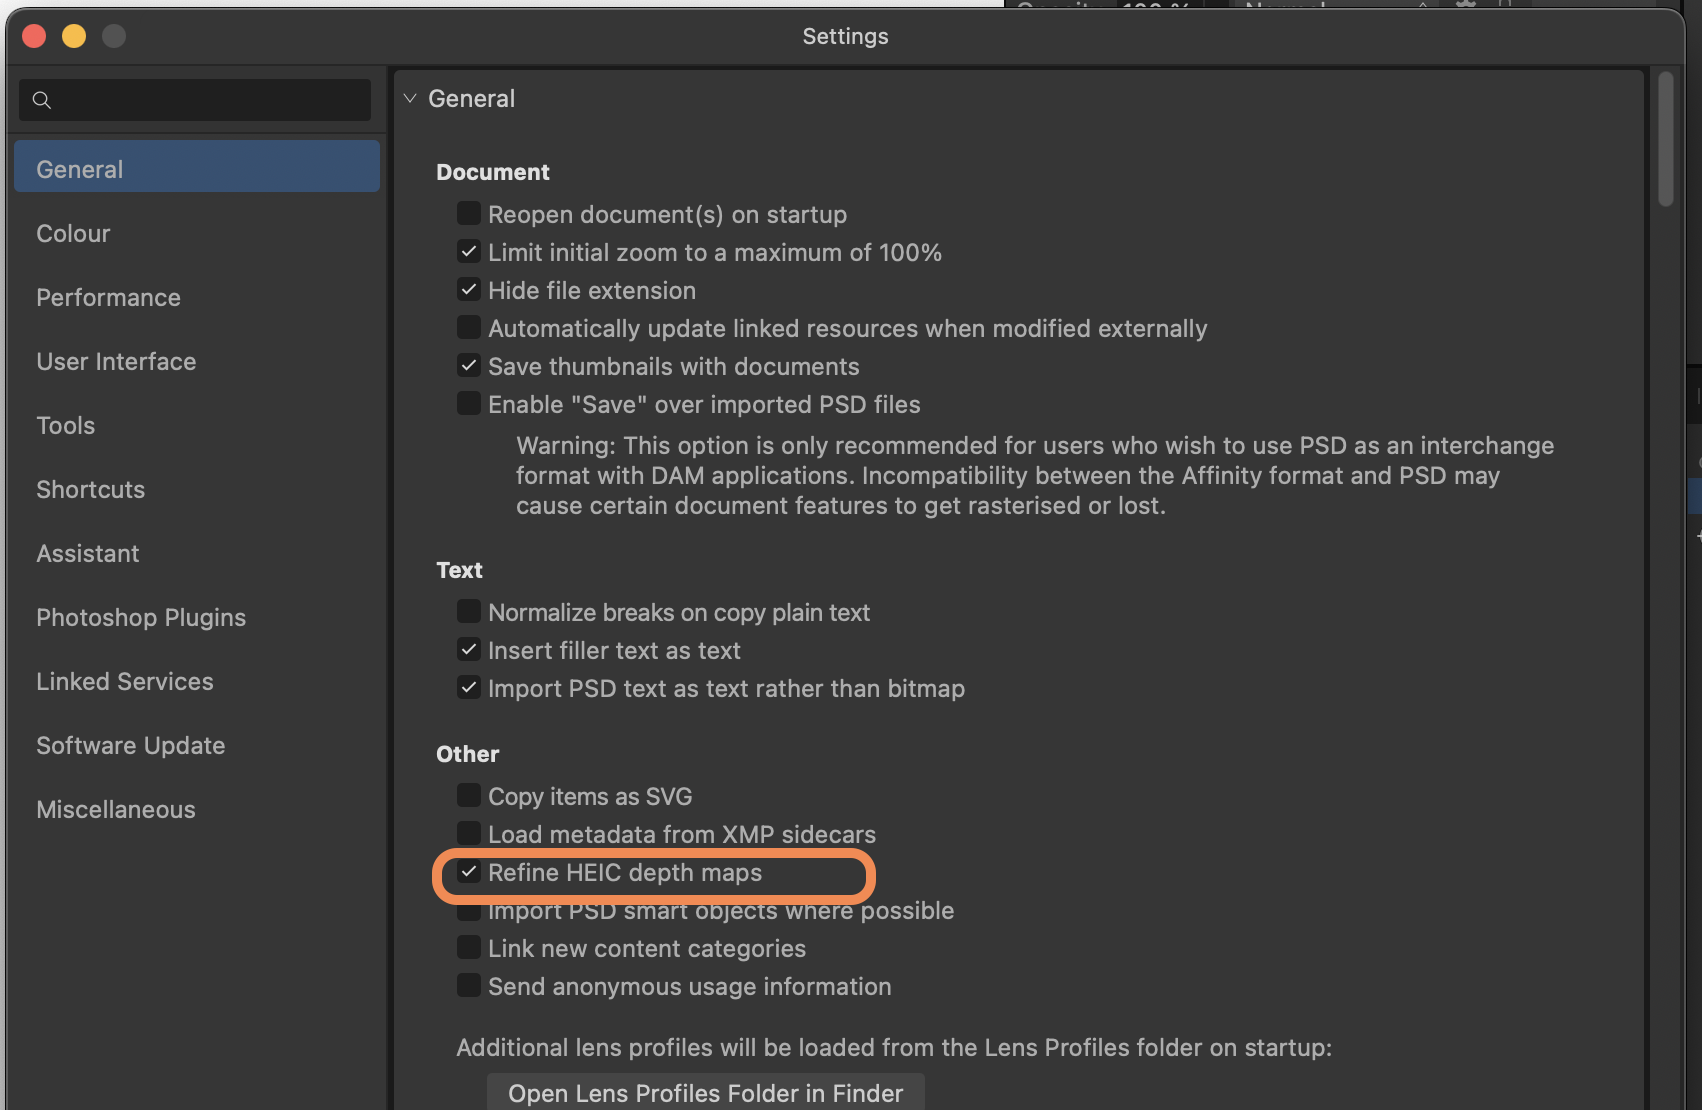
I don't know how you are opening the file in Affinity. Are you definitely opening the .heic (by double-clicking, or by right-clicking and choosing Open with Affinity Photo 2)? If you create a new untitled document and then File>Place, you won't see the depth map: Also, I don't know if the following setting makes any difference but it might be worth trying: Beyond that, I'm out of ideas 😞
-
Works for me (macOS 14.5, Affinity Photo 2.5.3):
-
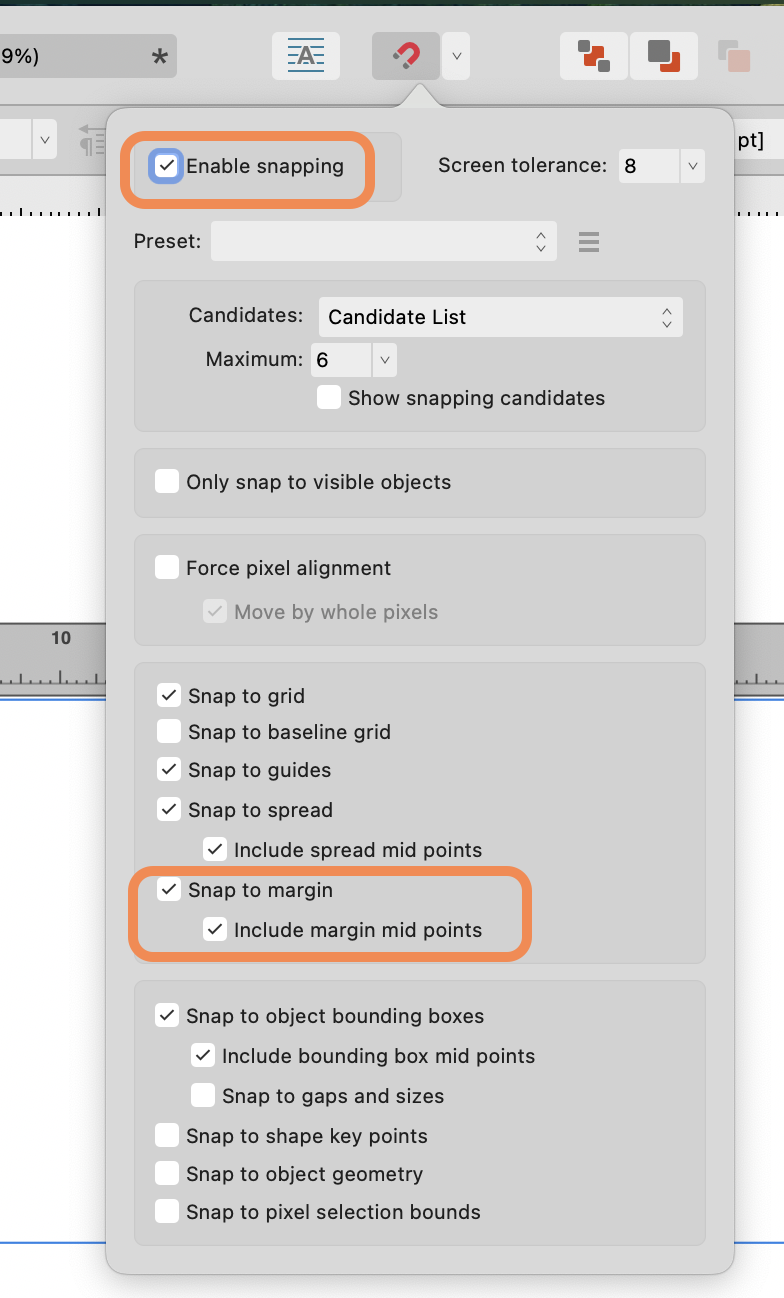
You may need to adjust the Screen tolerance depending on your preferred zoom level.
-
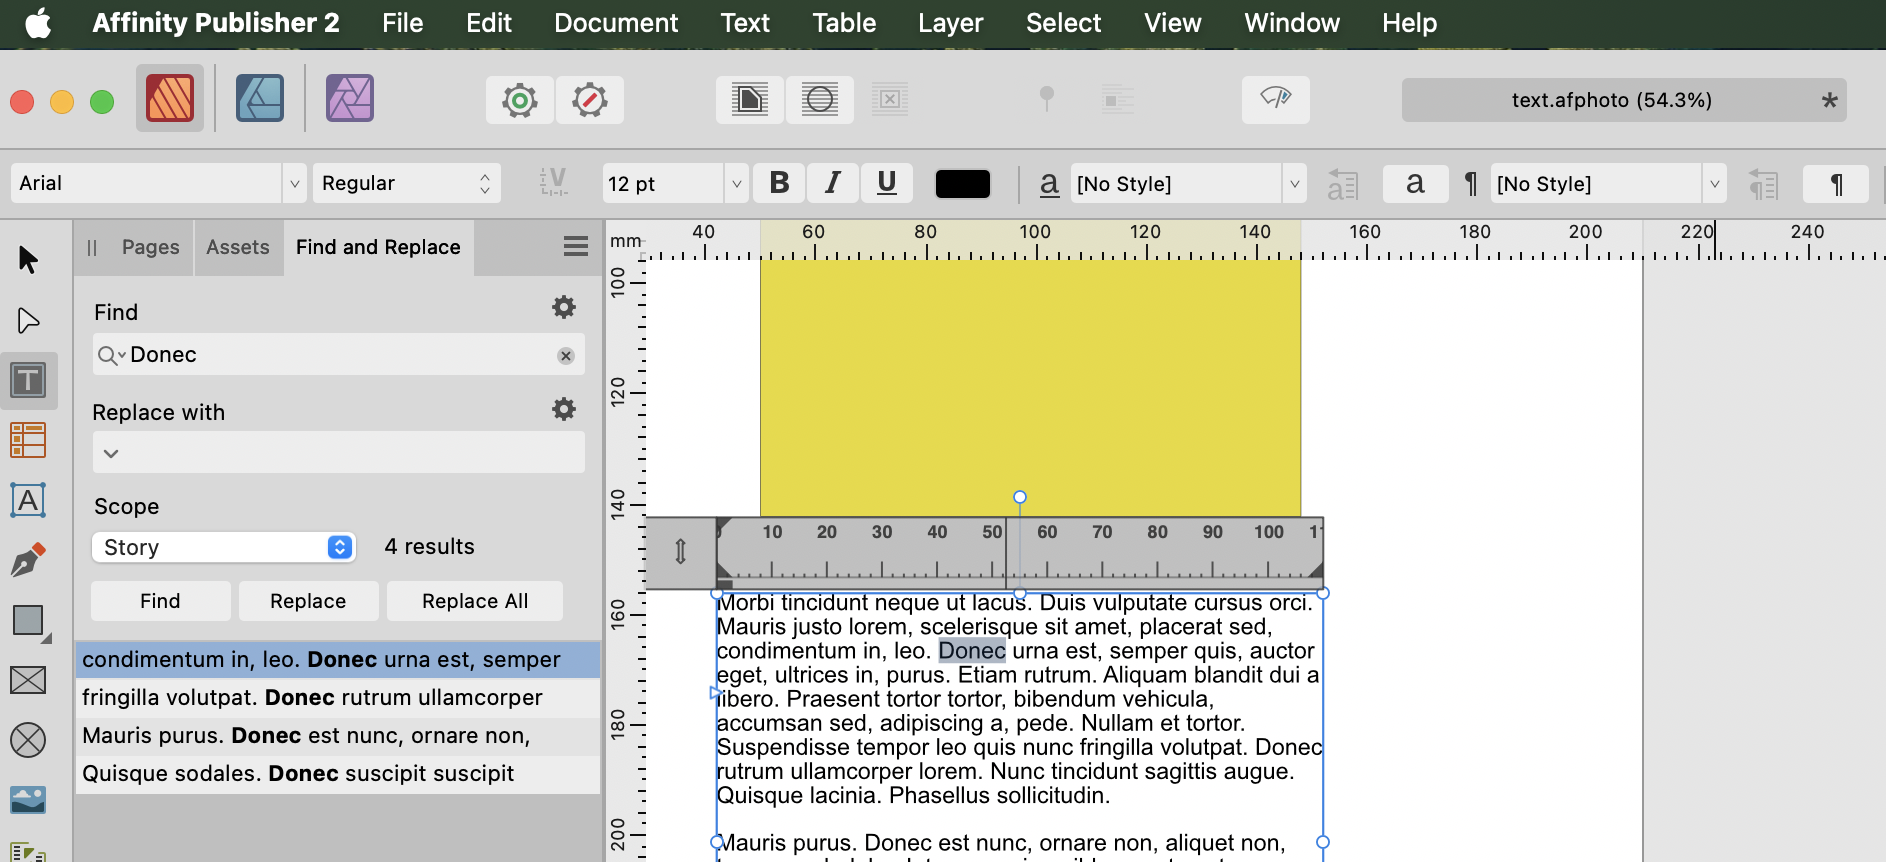
I can edit the auto-generated text in both Photo and Publisher. But I could not search on it in an .afphoto document opened (not placed) in Publisher. However... I have since changed my Affinity Photo settings under General - Text and checked 'Insert filler text as text'. (I already had this checked in Publisher.) This text can now be searched when the document is opened in Publisher. Sorted: