SonjaThompson
-
Posts
27 -
Joined
-
Last visited
-
Surprising behavior. Thanks for the workaround in the meantime. Sonja Thompson
-
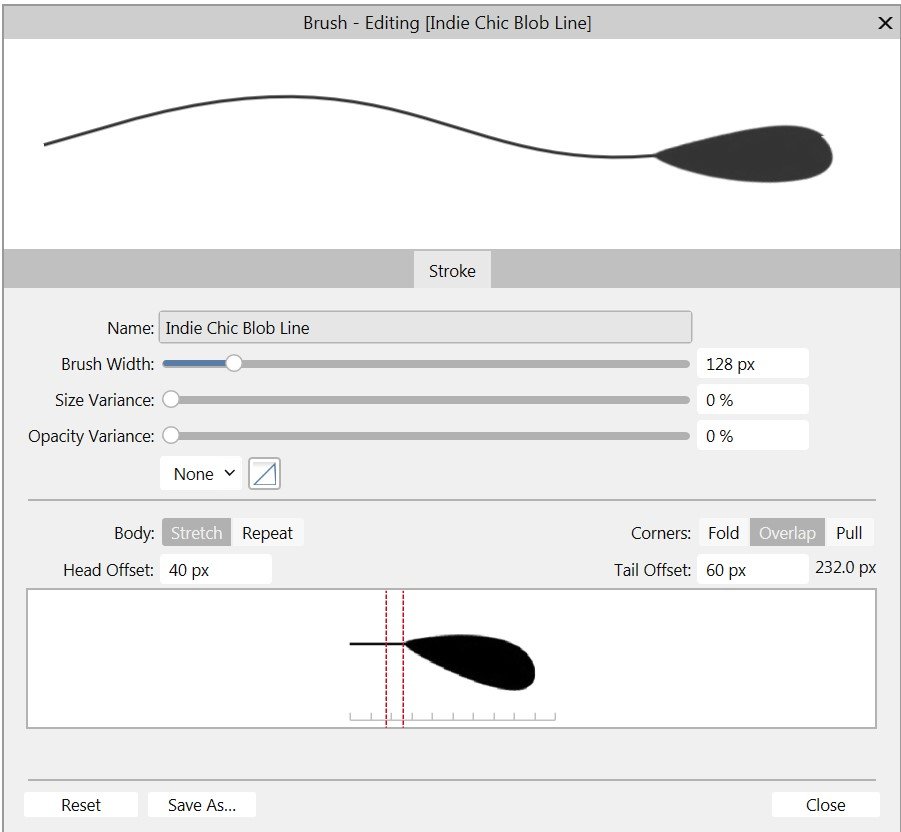
Hi. I'd like to report a problem in Publisher/Designer. I'm currently using version Beta 2.2.0.2005. I create a "textured image brush" using this image. This dialog appears and I fill it in: Is there some reason the image doesn't appear in the offset box near the bottom of the dialog box? It always appeared there before this version. I was expecting to be able to see it. Can you help?

-
Hi...I'd like to report a problem with Textured intensity Brushes in Designer. I'm using Designer Beta 2.2.0.2005 at this time. Here's my brush image: Here's how I set it up in Designer as a "New Textured Intensity" brush: Note the slightly noticable glitch on the outer edge of the tail. Here's the preview under Brushes - note the more pronounced glitch on the outer edge of the tail: Here is tail applied in a document - note the same pronounced glitch: Here are the line settings used: I'm not sure why it does this, but the behaviour is unexpected. Can you help? See attached document. Thanks in advance for your help with this problem. Brush - Textured intensity - problem.afpub
-
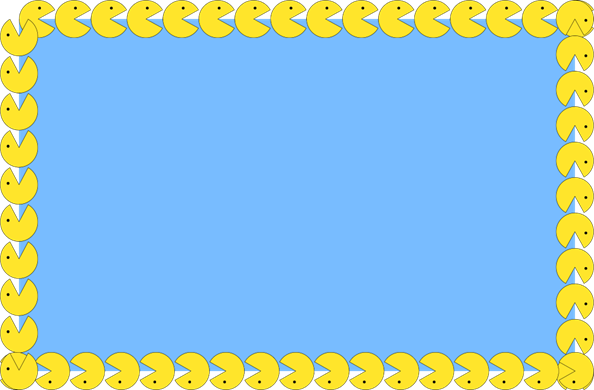
This may be more of a curiosity, certainly an annoying one, but I gotta know: I created a vector image brush in Designer (beta): I created a rectangular object and applied it to the line around it (and flipped the object so the line was right side up – we’ve already discussed that elsewhere): Then I tried to move the line to the outside of the rectangle: That was really weird, so out of curiosity, I tried to move it to the inside of the rectangle: Just as weird. So, my question is this: What purpose does this behavior serve? Does it have a purpose, or is this a bug? Thanks. Brush line problem.afassets Brush line problem.afpub Brush line problems.afbrushes
-
 walt.farrell reacted to a post in a topic:
Filter Forge Plugin - Error Bug
walt.farrell reacted to a post in a topic:
Filter Forge Plugin - Error Bug
-
Filter Forge Plugin - Error Bug
SonjaThompson replied to adam1762's topic in V2 Bugs found on Windows
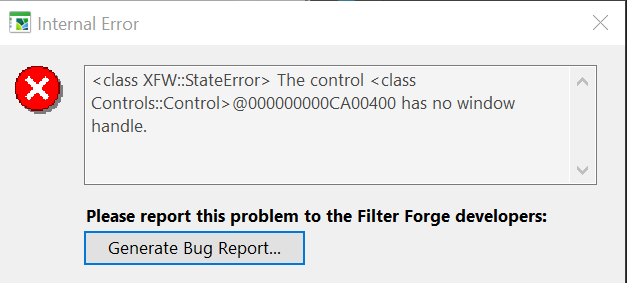
Oh, okay, I didn't know I had to do all that. So I tried that, and could at least select it. Next, I got this message: So I generated the bug report and sent it.
-
Filter Forge Plugin - Error Bug
SonjaThompson replied to adam1762's topic in V2 Bugs found on Windows
I've installed FilterForge 12 (for the first time) to use with Serif Affinity Photo. I don't have FF 11. I have set the preferences and even tried setting independent UI to True as above, but all I see is the Filter Forge 12... link and I can't even select it. -
The shape brush image turns rightside up when I flip it though:
-
Marking "Scale with object" fixed the brush appearance on both the image and the shape. Thanks!!! But the image is still upside down on the shape:
-
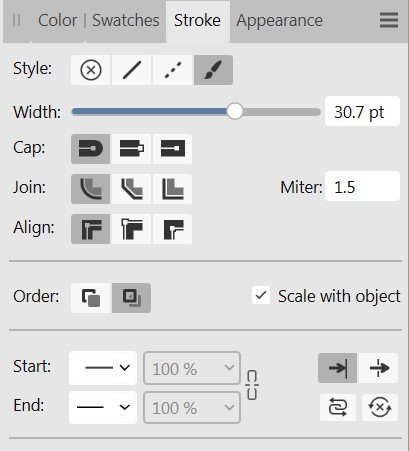
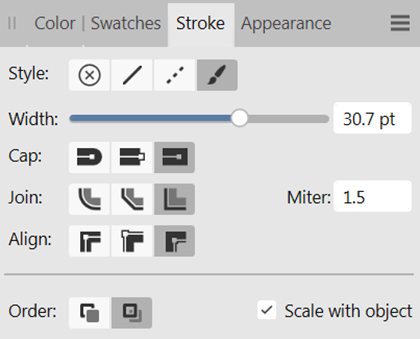
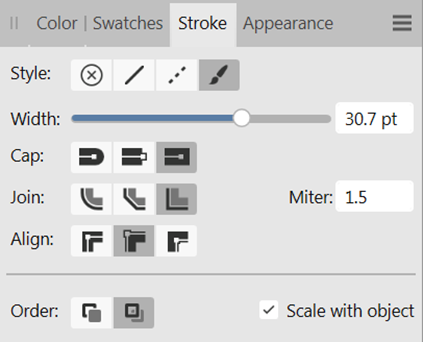
Brush settings:
-
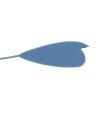
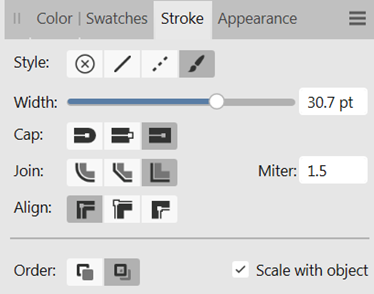
I’m having trouble with Vector brushes attached to borders of images. Here’s the problem: Here’s the Vector Textured Image brush I created: I am going to use it as a stroke around my objects presented below. Stroke settings for both of these are exactly the same: Here’s the brush used as a border around a 3-inch square filled shape: Here’s the brush used as a border around a 3-inch square image: Why is the brush upside down, as well as slightly squashed on the horizontal sides, of the shape? Why is it squashed by a factor of about 60% on the image? Is there a pixel shape problem? How do I correct it?
-
What does the "Fold" Corners option do when creating a vector brush? How is it different from Pull?
-
Yeah, I've been brushing up on what I thought I knew...and I have been operating on some wrong assumptions. I better go do my homework better before I try this again. Brushes are total different in Affinity... Thanks for your patience with me.
-
Photo V2.1 macros not applied before batch
SonjaThompson replied to SonjaThompson's topic in V2 Bugs found on Windows
Okay, so this is where I "eat a little crow." After reading all the responses, I tried one more thing. If I change my document profile to RGB/8, masks with black at RGB 0 0 0 will block completely. That really threw me for a loop. See, I like to build scrapbooks, so it makes sense to use CMYK as my document profile. But I want RGB 0 0 0 in my masks to block completely... Maybe I'll have to care less about using CMYK for these things. I still don't understand the macro not working in my batch, but I can live with this for now. -
Photo V2.1 macros not applied before batch
SonjaThompson replied to SonjaThompson's topic in V2 Bugs found on Windows
Thanks for that. It looks like the color black issue is known, at least. FX 3D is known to cause a problem. I'm using FX Color Overlay in my macro, not 3D. But it doesn't explain why my macro to do an FX color overlay of CMYK 100,100,100,100 in a batch process produces images with RGB 0 0 0 (in other words, no change). Especially since I can make it work manually with images one by one, if I save as JPEG. Unfortunately, I didn't have the same result manually trying to save a PNG. If masking recognized RGB 0 0 0 as a pure black for masking and some of the other effects, it would solve MY problem, but perhaps open Pandoras box for other folks. I'd rather see the batch processing apply my macro. -
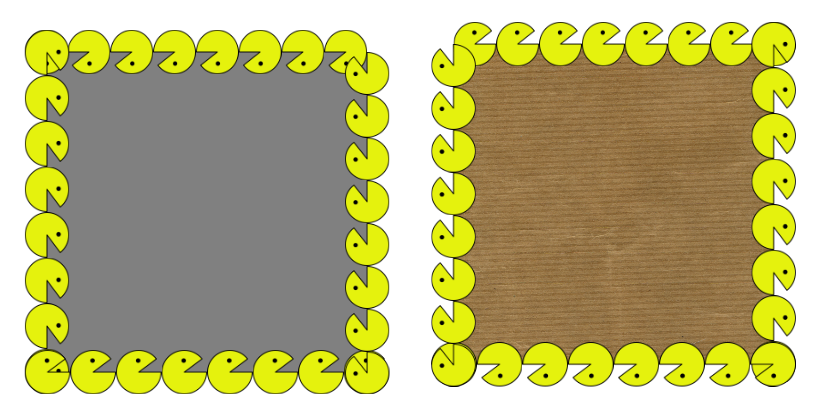
Wow, thomaso, that was realy great information! I know I have a lot to learn. I'm not a Mac user, so there may be some differences. It's too bad you never knew CraftArtist. It was a really fun and intuitive tool! I could really focus on my projects. You are right about CMYK 0,0,0,100 being lighter than RGB 0,0,0, but I've also discovered since my last post that CMYK 100,100,100,100 is darker than RGB 0,0,0. I guess the CMY values do matter after all. So I tried the Erase blend mode on the brush edge, which was cool. Thanks for the tip on that. There's a couple of problems. It looks like some brushes are fine, but once in a while I get a bad corner. I don't know what to do about that. When I use MY brush this way, the tops of the brush edge get cut off. I've tried all the alignments, and it's the best I can get with my brush. The vertical stretching of the brush image is still annoying.