

augustya
-
Posts
1,030 -
Joined
-
Last visited
Posts posted by augustya
-
-
3 minutes ago, DM1 said:
Hi augusta, Alfred referred you to the freehand selection tool set to type 'Polygonal', mode to Add. That will do what you want.
The pen tool selection can’t be added to a previous selection made with the smart selection brush as you are working in a different persona. Outputting pen to selection, replaces the existing Smart Selection.
If you prefer using pen tool (rather than freehand selection tool), just refine and output the initial Smart Selection brush tool selection to a new layer first, then when happy with the node adjustments, output your finished pen selection to a new layer. With the two 'selection output' layers visible, you will get the combined selection of Smart Selection brush and the Pen tools selection. You can leave them as seperate layers or merge the two layers into one.
As I said earlier lots of ways to reach the same end result.🙂
Ok so let me just check here if I have understood you well. You are saying I should first use a Smart Selection Tool (And I can use which ever as my first selection tool right ? Doesn't matter Pen Tool First or Smart Selection first ) Right ? I should make the first selection go to refine output as new Layer then use the second selection and then output that as a New Layer aswell ? And by doing this way both the selections will be merged ? is that what you are saying ? To merge the selection I do not need to do anything special after I have made the selection Output as new layer ?
-
On 8/6/2021 at 12:50 PM, augustya said:
So I was trying this on a project I first used the Smart Selection Tool on a Subject, then switched the Pen Tool, Laid Points and then went to Node perfected the curves, came back again to Pen mode and chose change to selection, but there is no way to add this selection made by the pen tool to add to my previous selection made by Smart Select ? There is no "Add" option to add to previous selection in Pen Tool ? then how do I do it ?
Guys please help.
-
On 7/21/2021 at 4:20 PM, Alfred said:
Exactly as you have described. Choosing ‘Add’ mode (instead of the default ‘New’) for the Freehand Selection Tool will mean that the ‘smart’ selection of the person will not be replaced by the polygonal selection of the stool.
So I was trying this on a project I first used the Smart Selection Tool on a Subject, then switched the Pen Tool, Laid Points and then went to Node perfected the curves, came back again to Pen mode and chose change to selection, but there is no way to add this selection made by the pen tool to add to my previous selection made by Smart Select ? There is no "Add" option to add to previous selection in Pen Tool ? then how do I do it ?
-
2 minutes ago, DM1 said:
Same with Node tool. 'Handles' are simply how you adjust nodes regardless.😁
So you are saying even in the Edit Tool you do not need to touch the handles and still adjust the curves and lines created ?
-
6 hours ago, DM1 said:
The Node tool offers a lot more option (smooth, smart node conversion, joining, breaking nodes etc). Most times the Edit tool is enough for me but Affinity offers many ways to get the same result. Be flexible in your methodology.😁
But also is it that? with the Edit Tool one has to know how to use the Handles coming out of the Points that you have laid down ? to turn your line desired way ? and so that way the learning curve becomes stiff in using the Edit Mode ?
Where as in Node mode it is simple. First you lay down all your points and do a rough curve using the Pen Tool and then hit Node tool and adjust it according to your Liking ?
-
On 7/30/2021 at 5:10 PM, DM1 said:
Doesn’t need to be accurate. Just get the loop completed then adjust as needed.
@DM1 Actually I missed this Video looks like you put it afterwards.
So is this also the way to get your Curves at the desired angle in the Pen Mood, I see you are not going into the Node Mode ? Are you ? and in the Pen Mode only you have started to edit hitting the Edit Button ? So is this also the curves can be adjusted to one's liking ?
Because what @Alfred showed me was first do a rough selection and then hit the Node Mode and then start adjusting the Curves ? I wonder if each has its own use case and condition to use it ? or how is it ?
-
7 minutes ago, Alfred said:
Ok I did not understand this on the Serif Website for the Hardware Requirements it says require Windows 10 but at the same time also says available for Windows 7.
So will it work on Windows 7 or no ?

-
Can someone please tell me which is the latest version of Affinity Photo (Desktop) for Windows ? And what are the Minimum Hardware Requirements needed to run Affinity Photo smoothly on Windows.
-
16 minutes ago, Alfred said:
I’ve attached a simple example with a Gradient Map Adjustment layer (disabled) at the top of the stack.
1. Tap on the checkbox to enable the adjustment layer.
2. Drag the adjustment layer downwards.
3. Drop it (not nested!) between the blue layer and the green layer.
4. Drag it down again but drop it onto the green layer to nest it.
Each time you drop the adjustment layer in a new position you should see changes in the document.
That is a very good way of explaining things. But it seems, I think I did not explain my question correctly. Let me rephrase my question, so I got the point when you explained this with the help of those diagrams where you drag the adjustment layer in between Blue and Green all the layers below change their colours and if you Nest only the one Layer which has been nested changes the colour. I got that Point.
What I was curious to know was what could be other scenarios ? where only nested layer is helpful (which I had the use case where I only wanted to change the colour of Pixel Layer and not the background colour) the same way what could be other scenarios where you want all the Layers below a certain layers to change for e.g. It could be Background colour, Pixel Layer similarly in what other conditions, scenario this arrangement is helpful like to change Brightness ? or Maybe Clone something or Maybe I dont know what could be other use cases scenarios ? That is what I wanted to ask you.
But if you are having tough time explaining that...That is ok..Never Mind. Not anything which I want to do with it immediately
")
I was trying to understand it from a concept point of view which can help me in future.
-
11 minutes ago, Alfred said:
If you nest an adjustment to another layer, it will only affect that layer. If you put an adjustment layer on top of the layer stack, it will affect all the layers below (i.e. not just the one layer immediately below).
I understood that.
I am saying can you think of an example on how does it affect other layers ? What could be the other example of that ?
-
6 minutes ago, Alfred said:
Both methods will work equally well in your case, but method 1 will work even if you have additional layers below the pixel layer.
How does it matter ? Can you give an example ? what do you mean by that ? in a use case scenario ?
-
Hi Guys,
So just wanted to confirm this again.
If I have changed a background of an image and I have two layers now, with the pixel layer and the background (Fill) layer.
And if I want to apply an adjustment layer only to the Pixel Layer this can be done in 2 ways right ?
1. Make the Adjustment Layer a child Layer of the Pixel Layer
2. Drag the adjustment Layer below the (Background) Fill Layer and on top of the Pixel Layer (Even if it is not a child layer) and the adjustment layer will only be applied to the pixel layer ? right ?
So there are two methods to do this isnt it ?
-
2 hours ago, DM1 said:
Doesn’t need to be accurate. Just get the loop completed then adjust as needed.
27 minutes ago, Alfred said:If you don’t completely connect the dots you’ll end up with a straight line between the last one and the first one, so you’ll want to close the curve to allow adjustment of that segment.
You guys are such a big saviour on this forum !!
You guys are really Stars of this forum !!
-
1 hour ago, DM1 said:
Doesn’t need to be accurate. Just get the loop completed then adjust as needed.
And adjustment of the curve drawn by the Pen Tool should only be attempted after joining the dotted line like completely connecting the dots right ?
-
21 minutes ago, Alfred said:
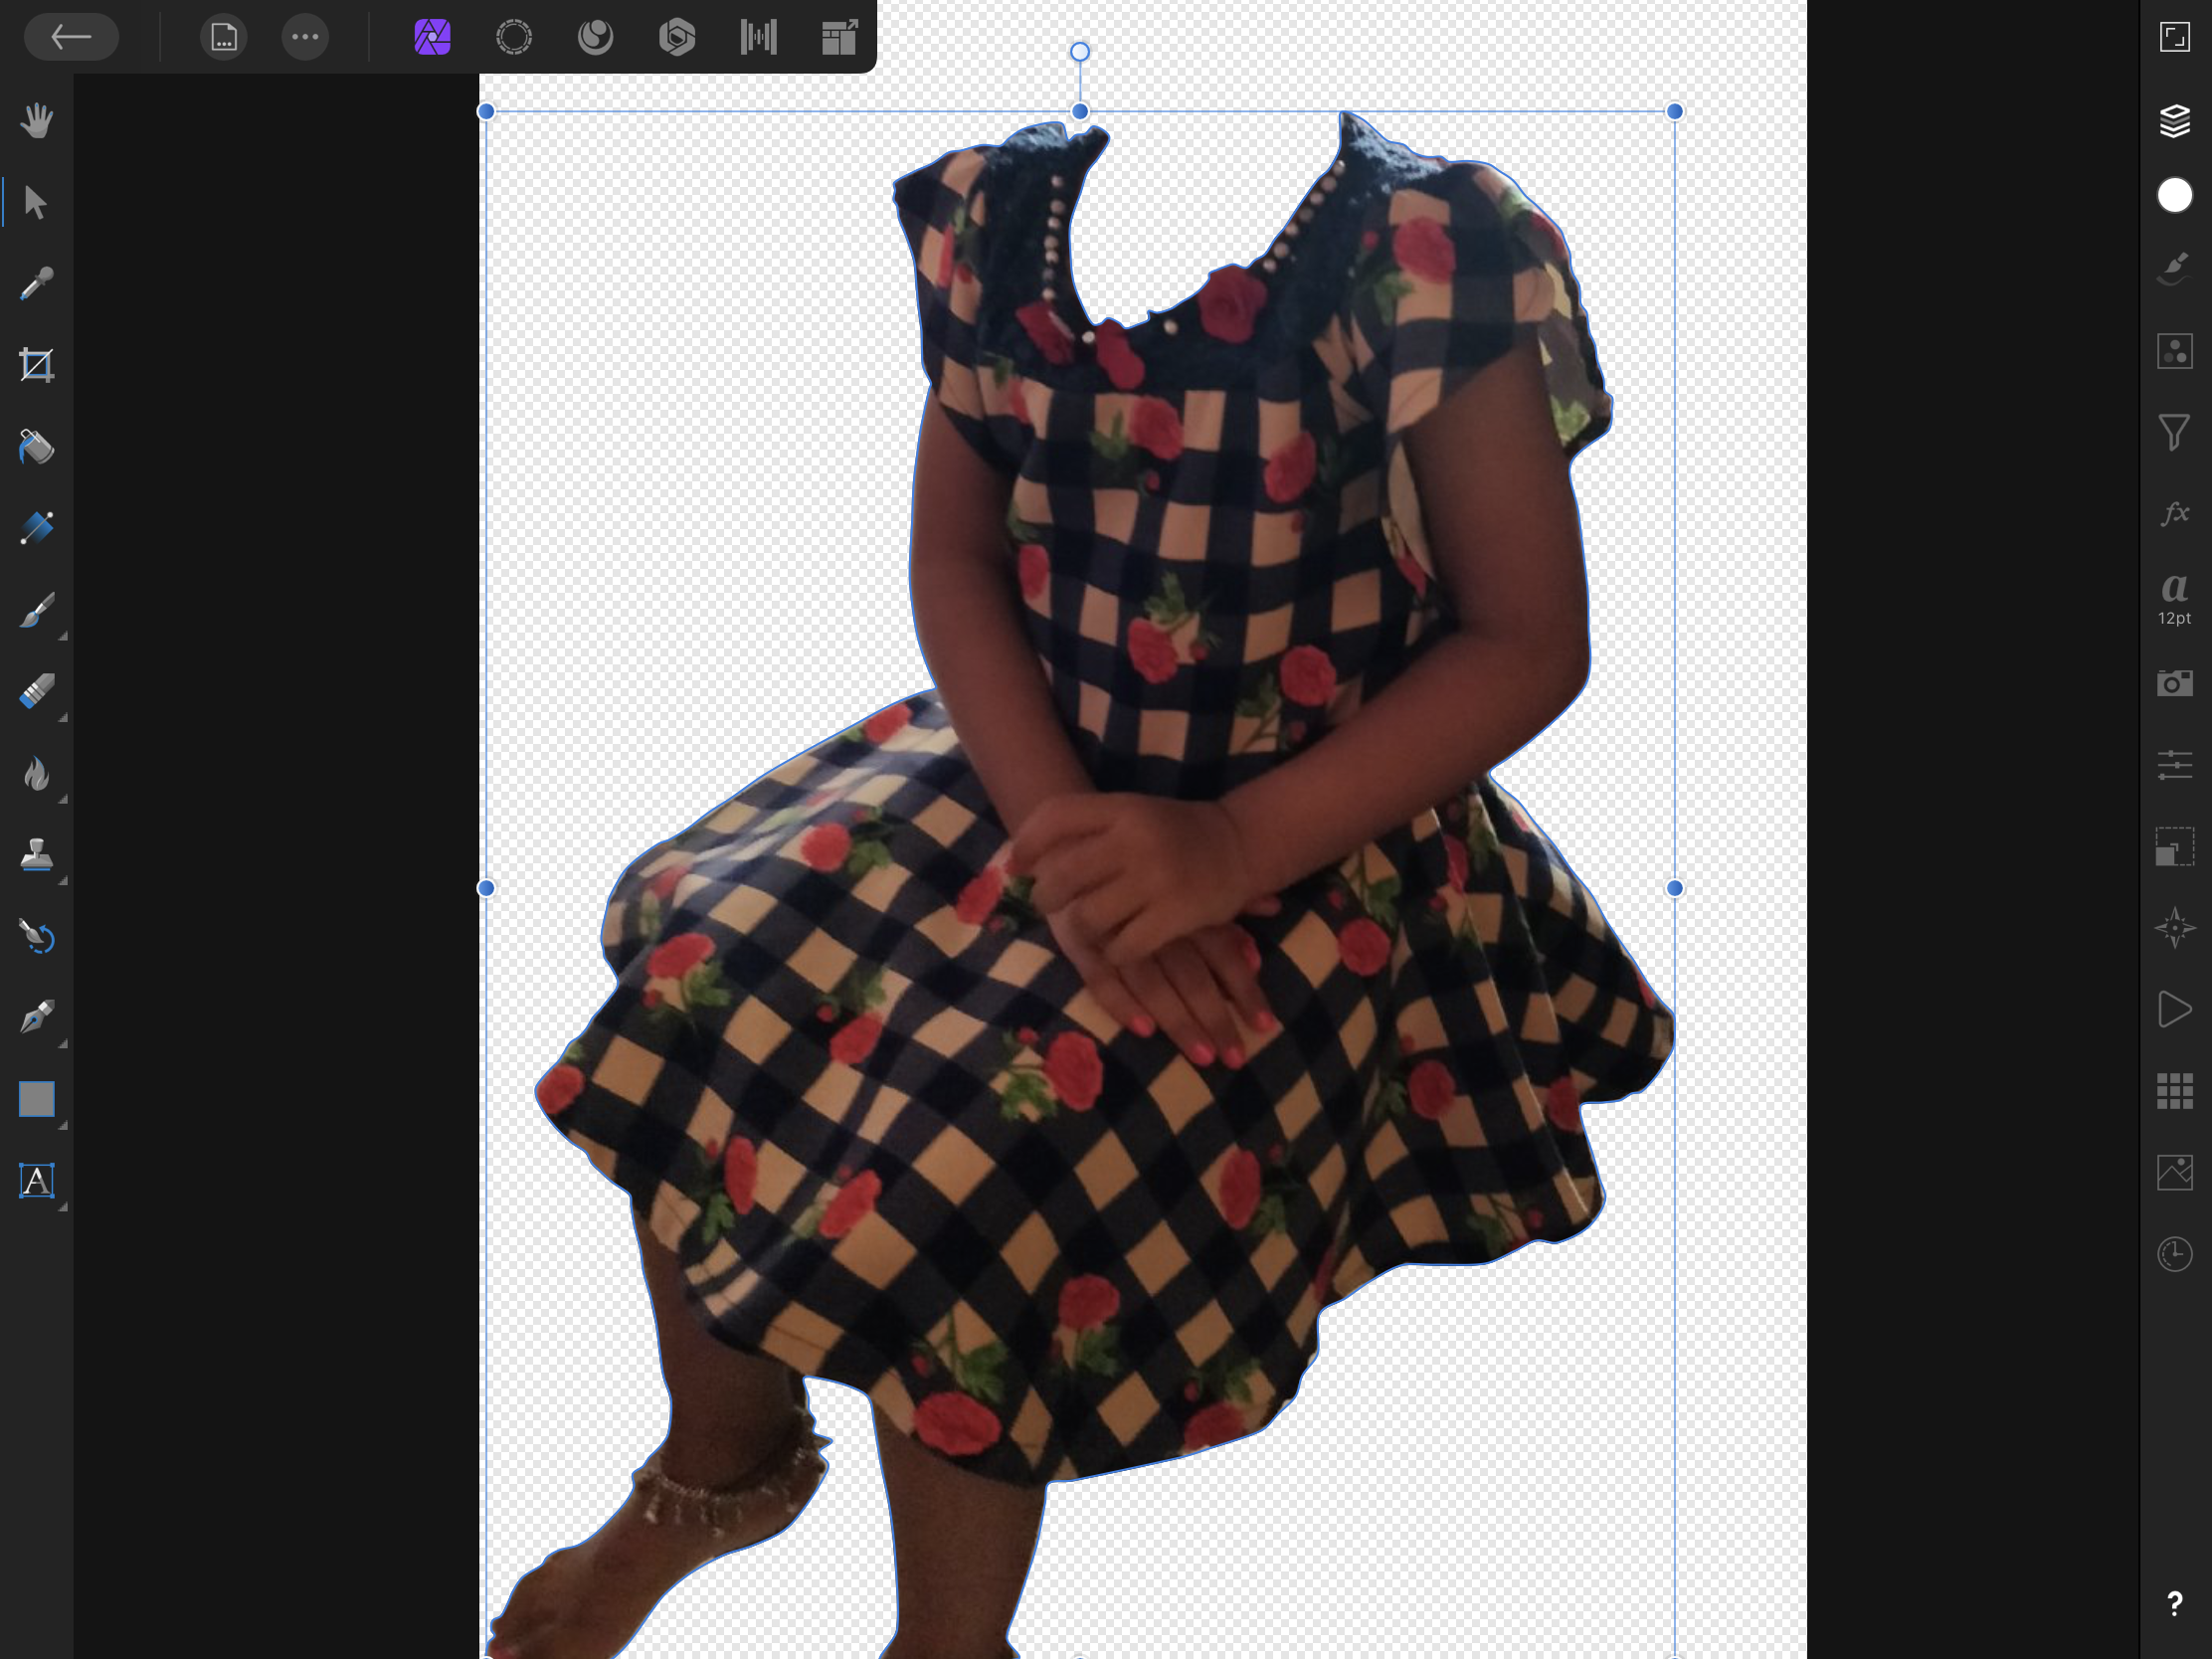
Instead of switching in and out of Edit Mode while you have the Pen Tool selected, finish drawing the shape and then choose the Node Tool to edit it. Drag anywhere between two nodes on a curve or a straight line to change the curve: don’t just click without dragging (unless you want to add extra nodes).
Ok so you are saying first do an entire selection by dropping the dots ? even if it is not accurate ! and after I have done that from anywhere in between the curves between two nodes just drag according to desired point but do not click on it ? Just drag it ? After selecting the Node Option ? Am I correct ?
-
My big problem here is if I have to align the lines to the edge of the subject. How and where do I need to hold and touch the lines so that they start turning according to my intention ?
-
55 minutes ago, DM1 said:
Yes😁but give smart a go too.
49 minutes ago, Alfred said:In the screenshot, Edit Mode is off (as it should be). If it were on, the button would have a blue outline.
Guys I am still not able to get this thing going ?? How do I get this ? What I am doing is selecting the image then putting the first dot then the second Fit and then the third, then trying to align the lines perfectly to the edges of the hand and in doing so, the nodes Stare breaking out making the lines go haywire !! Do I not need to touch the nodes in between to align the lines perfectly ? If no ?? Then how else do I need to do it ?
How do I align the lines perfectly to the edges of the hand after I have placed the dots? Where do I need to hold or touch the lines ?
-
14 minutes ago, DM1 said:
Leave the Pen setting as pen. When you close the pen loop double tap the node to join it to the start node.
The handles that appear when you select a node are adjustment handles. You get them when you touch a node or tap a line to create a new node. You can rotate them and or shorten/lengthen them to fine tune curves. Placing nodes closer to each side of the elbow and 'nudging' the line between them with the Apple Pencil should reduce the occurrence of handles but touching any node will make them appear. They can be useful for fine tuning.🙂Practise and you will soon get the hang of it. Try the smart mode as well. Make lots of small dots around the shape and see what effect you get accuracy wise. A quick effort shown below.

No Still did not get it. So I keep the First Mode as "Edit" and Second Mode as " Pen" is that what you are saying ?
Please check the screenshot.
-
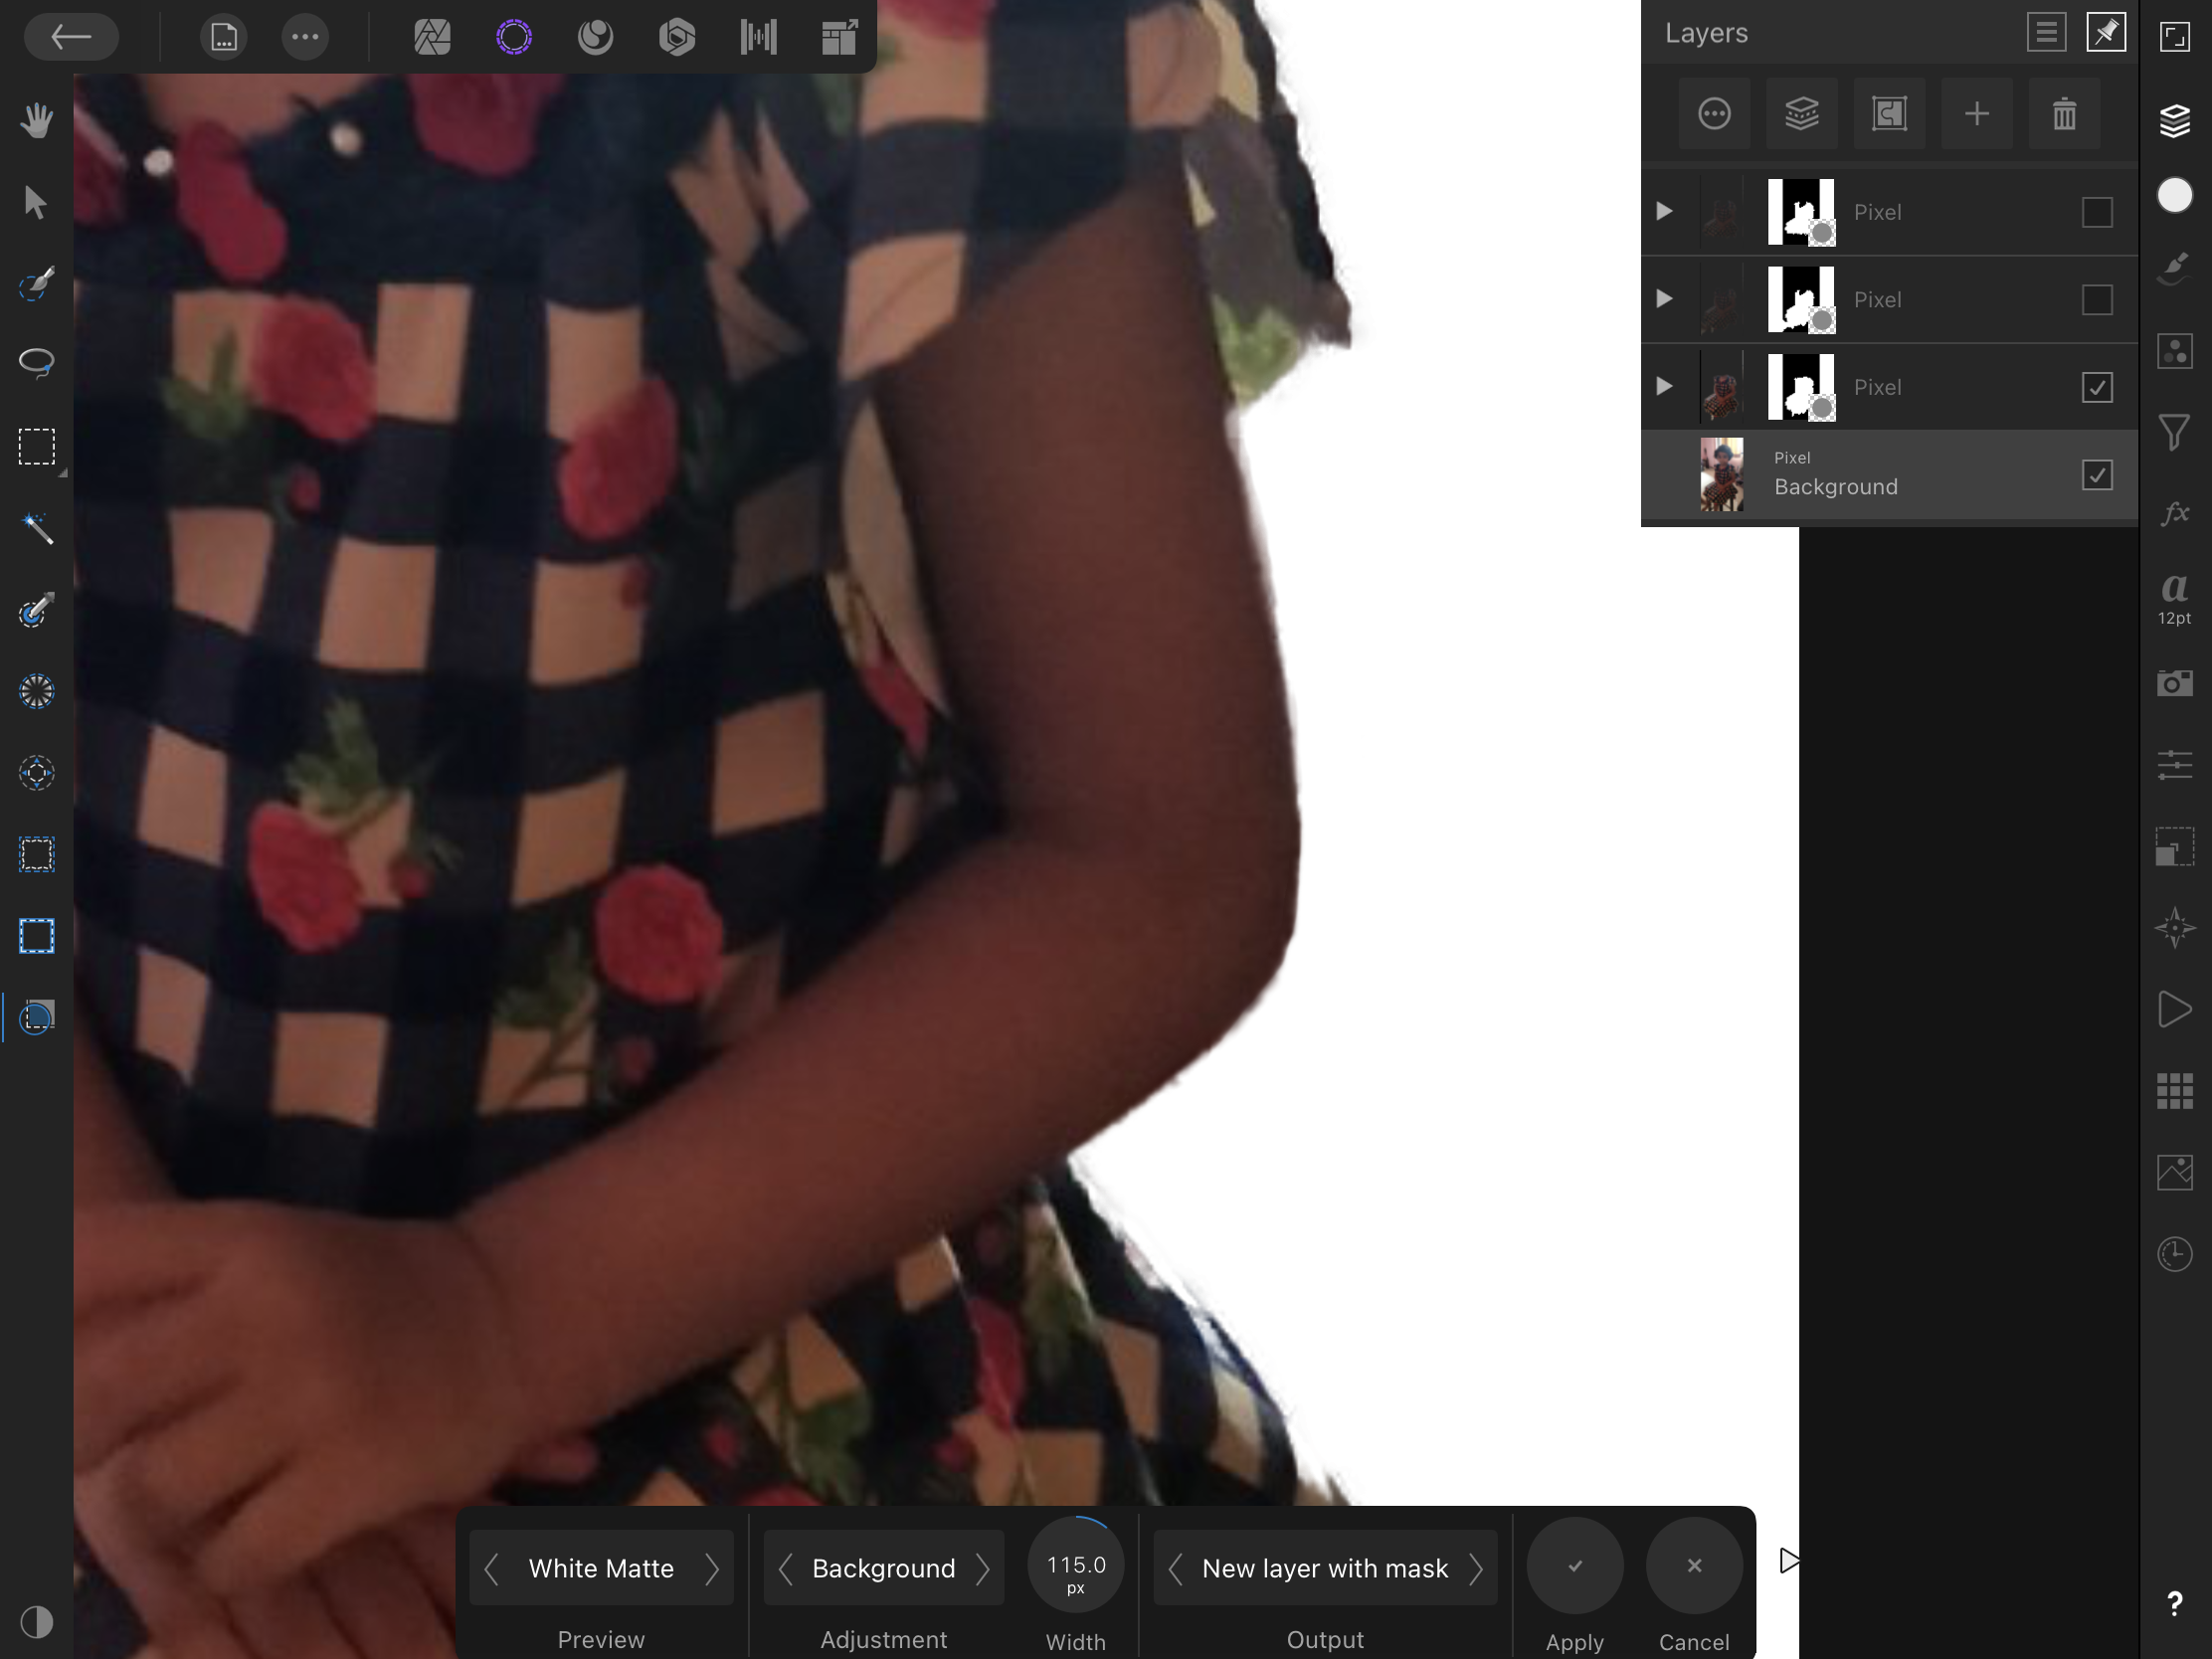
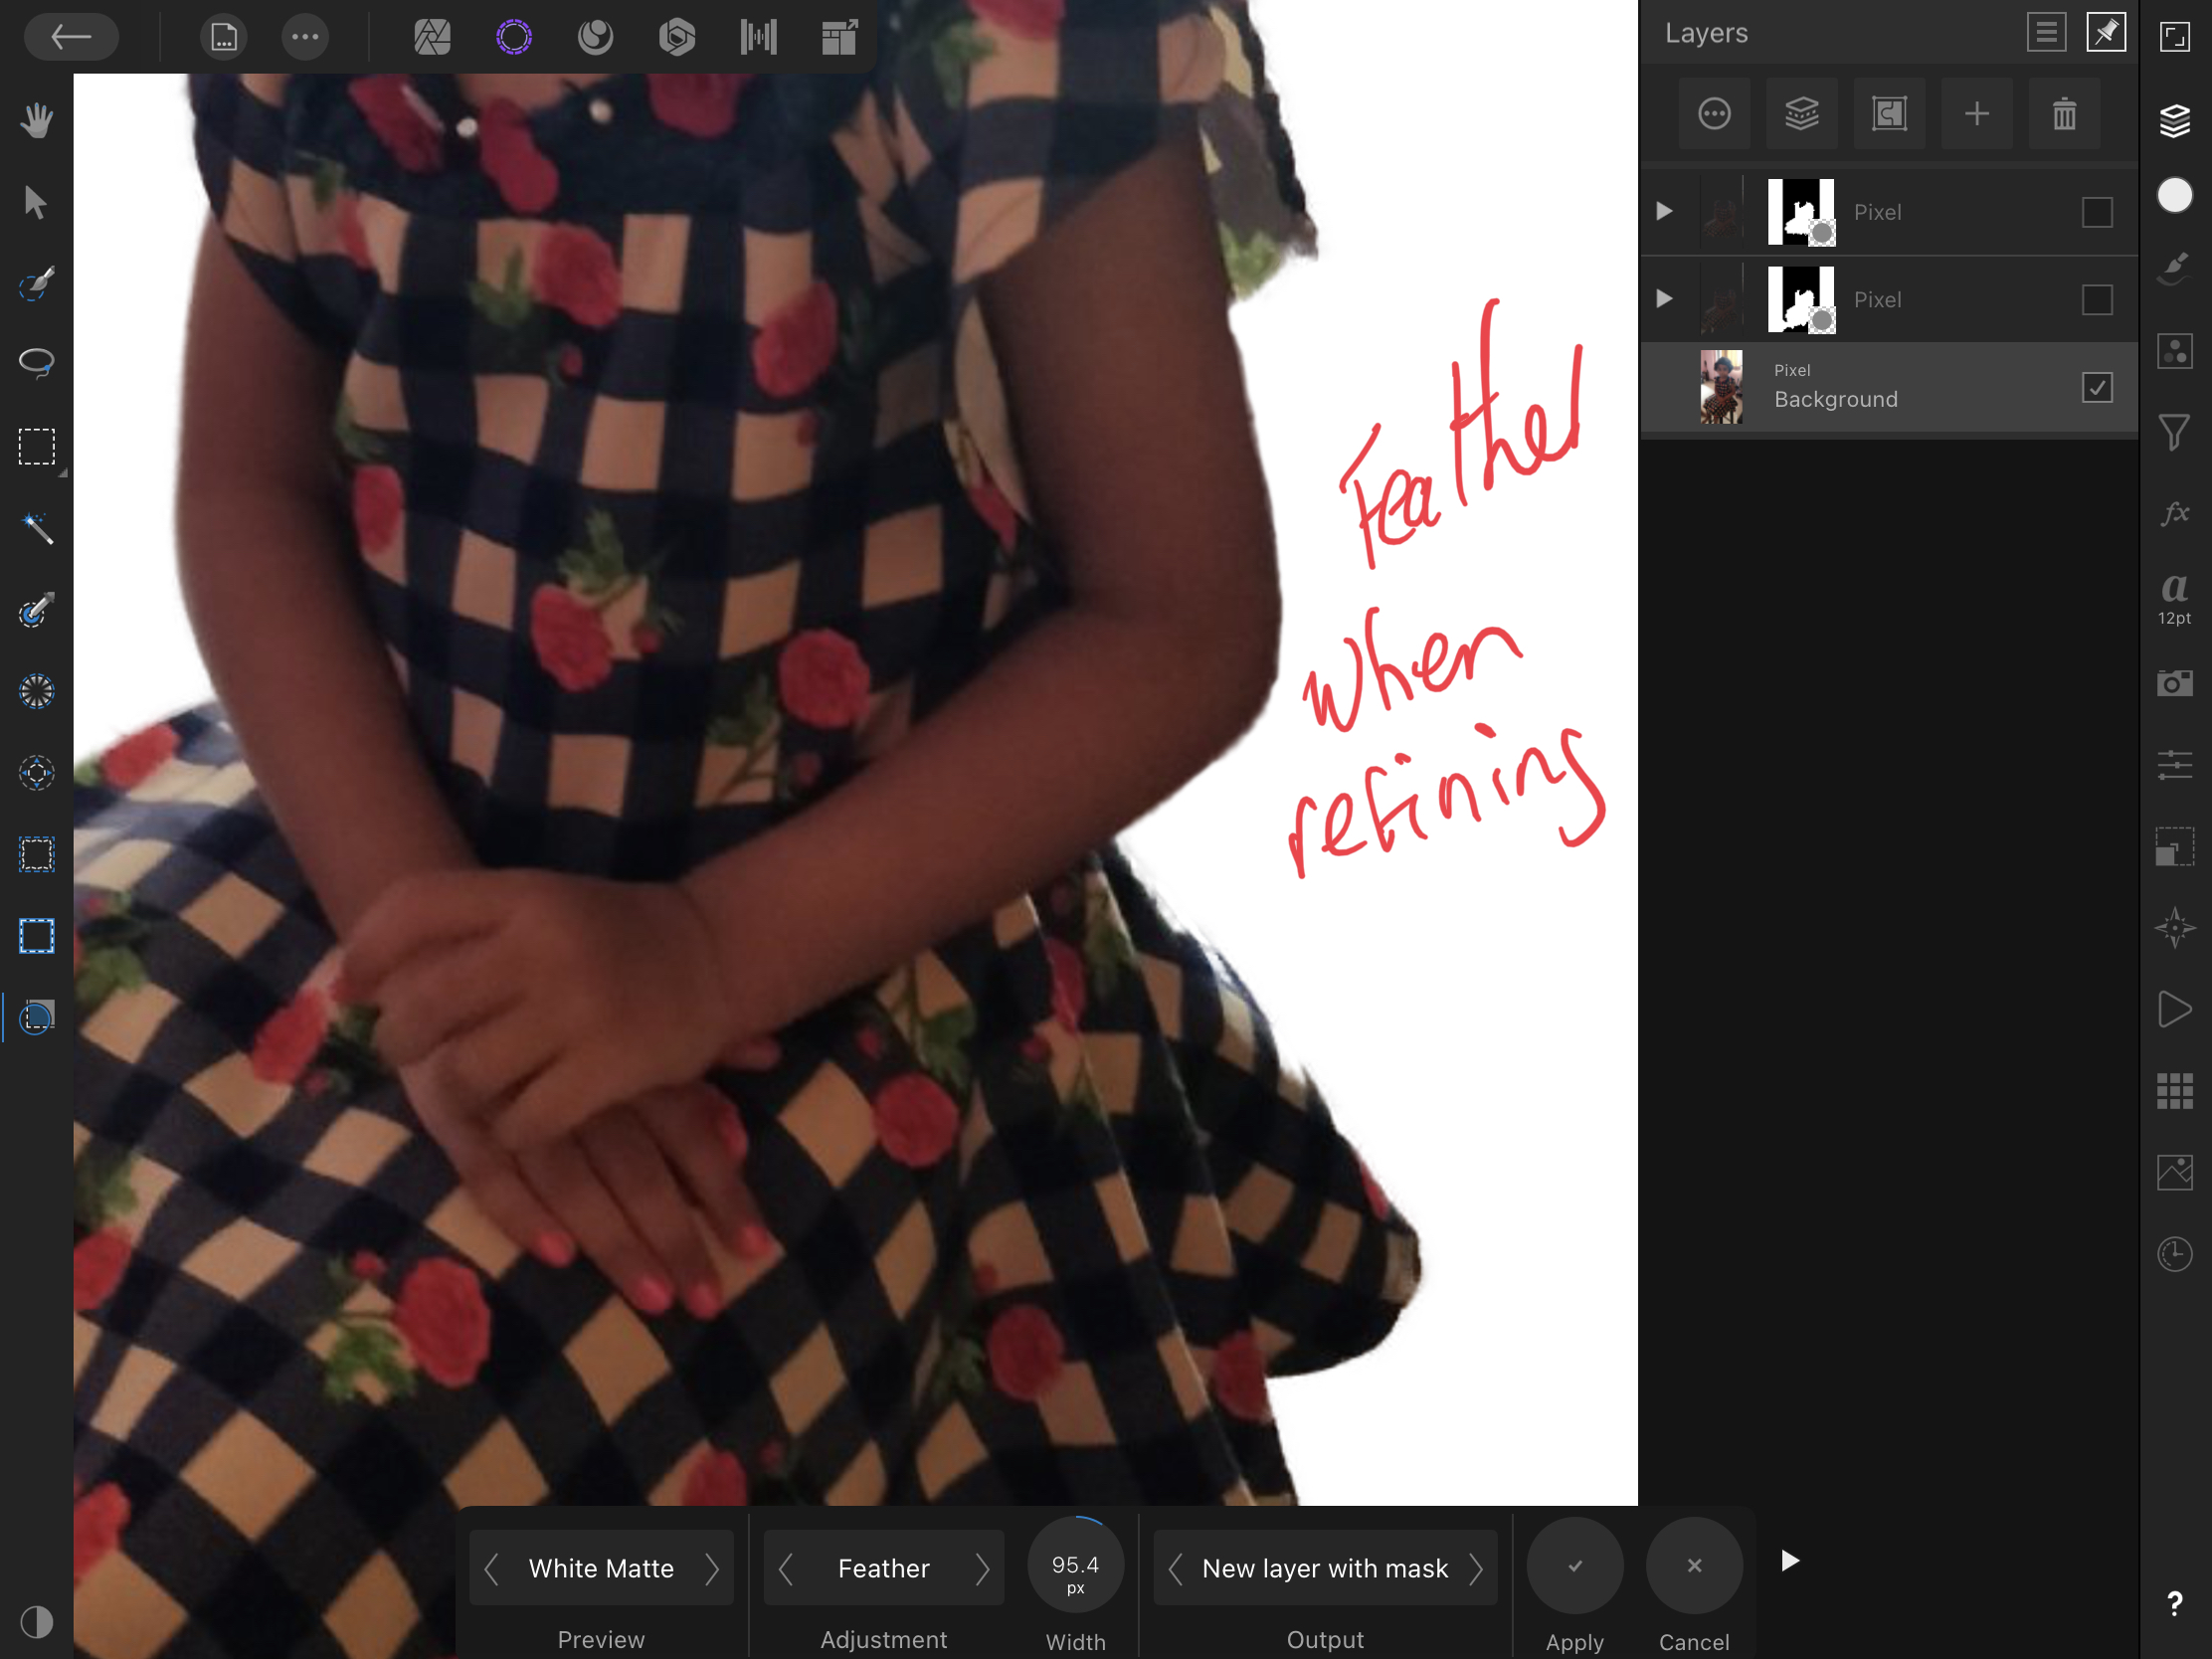
16 hours ago, DM1 said:
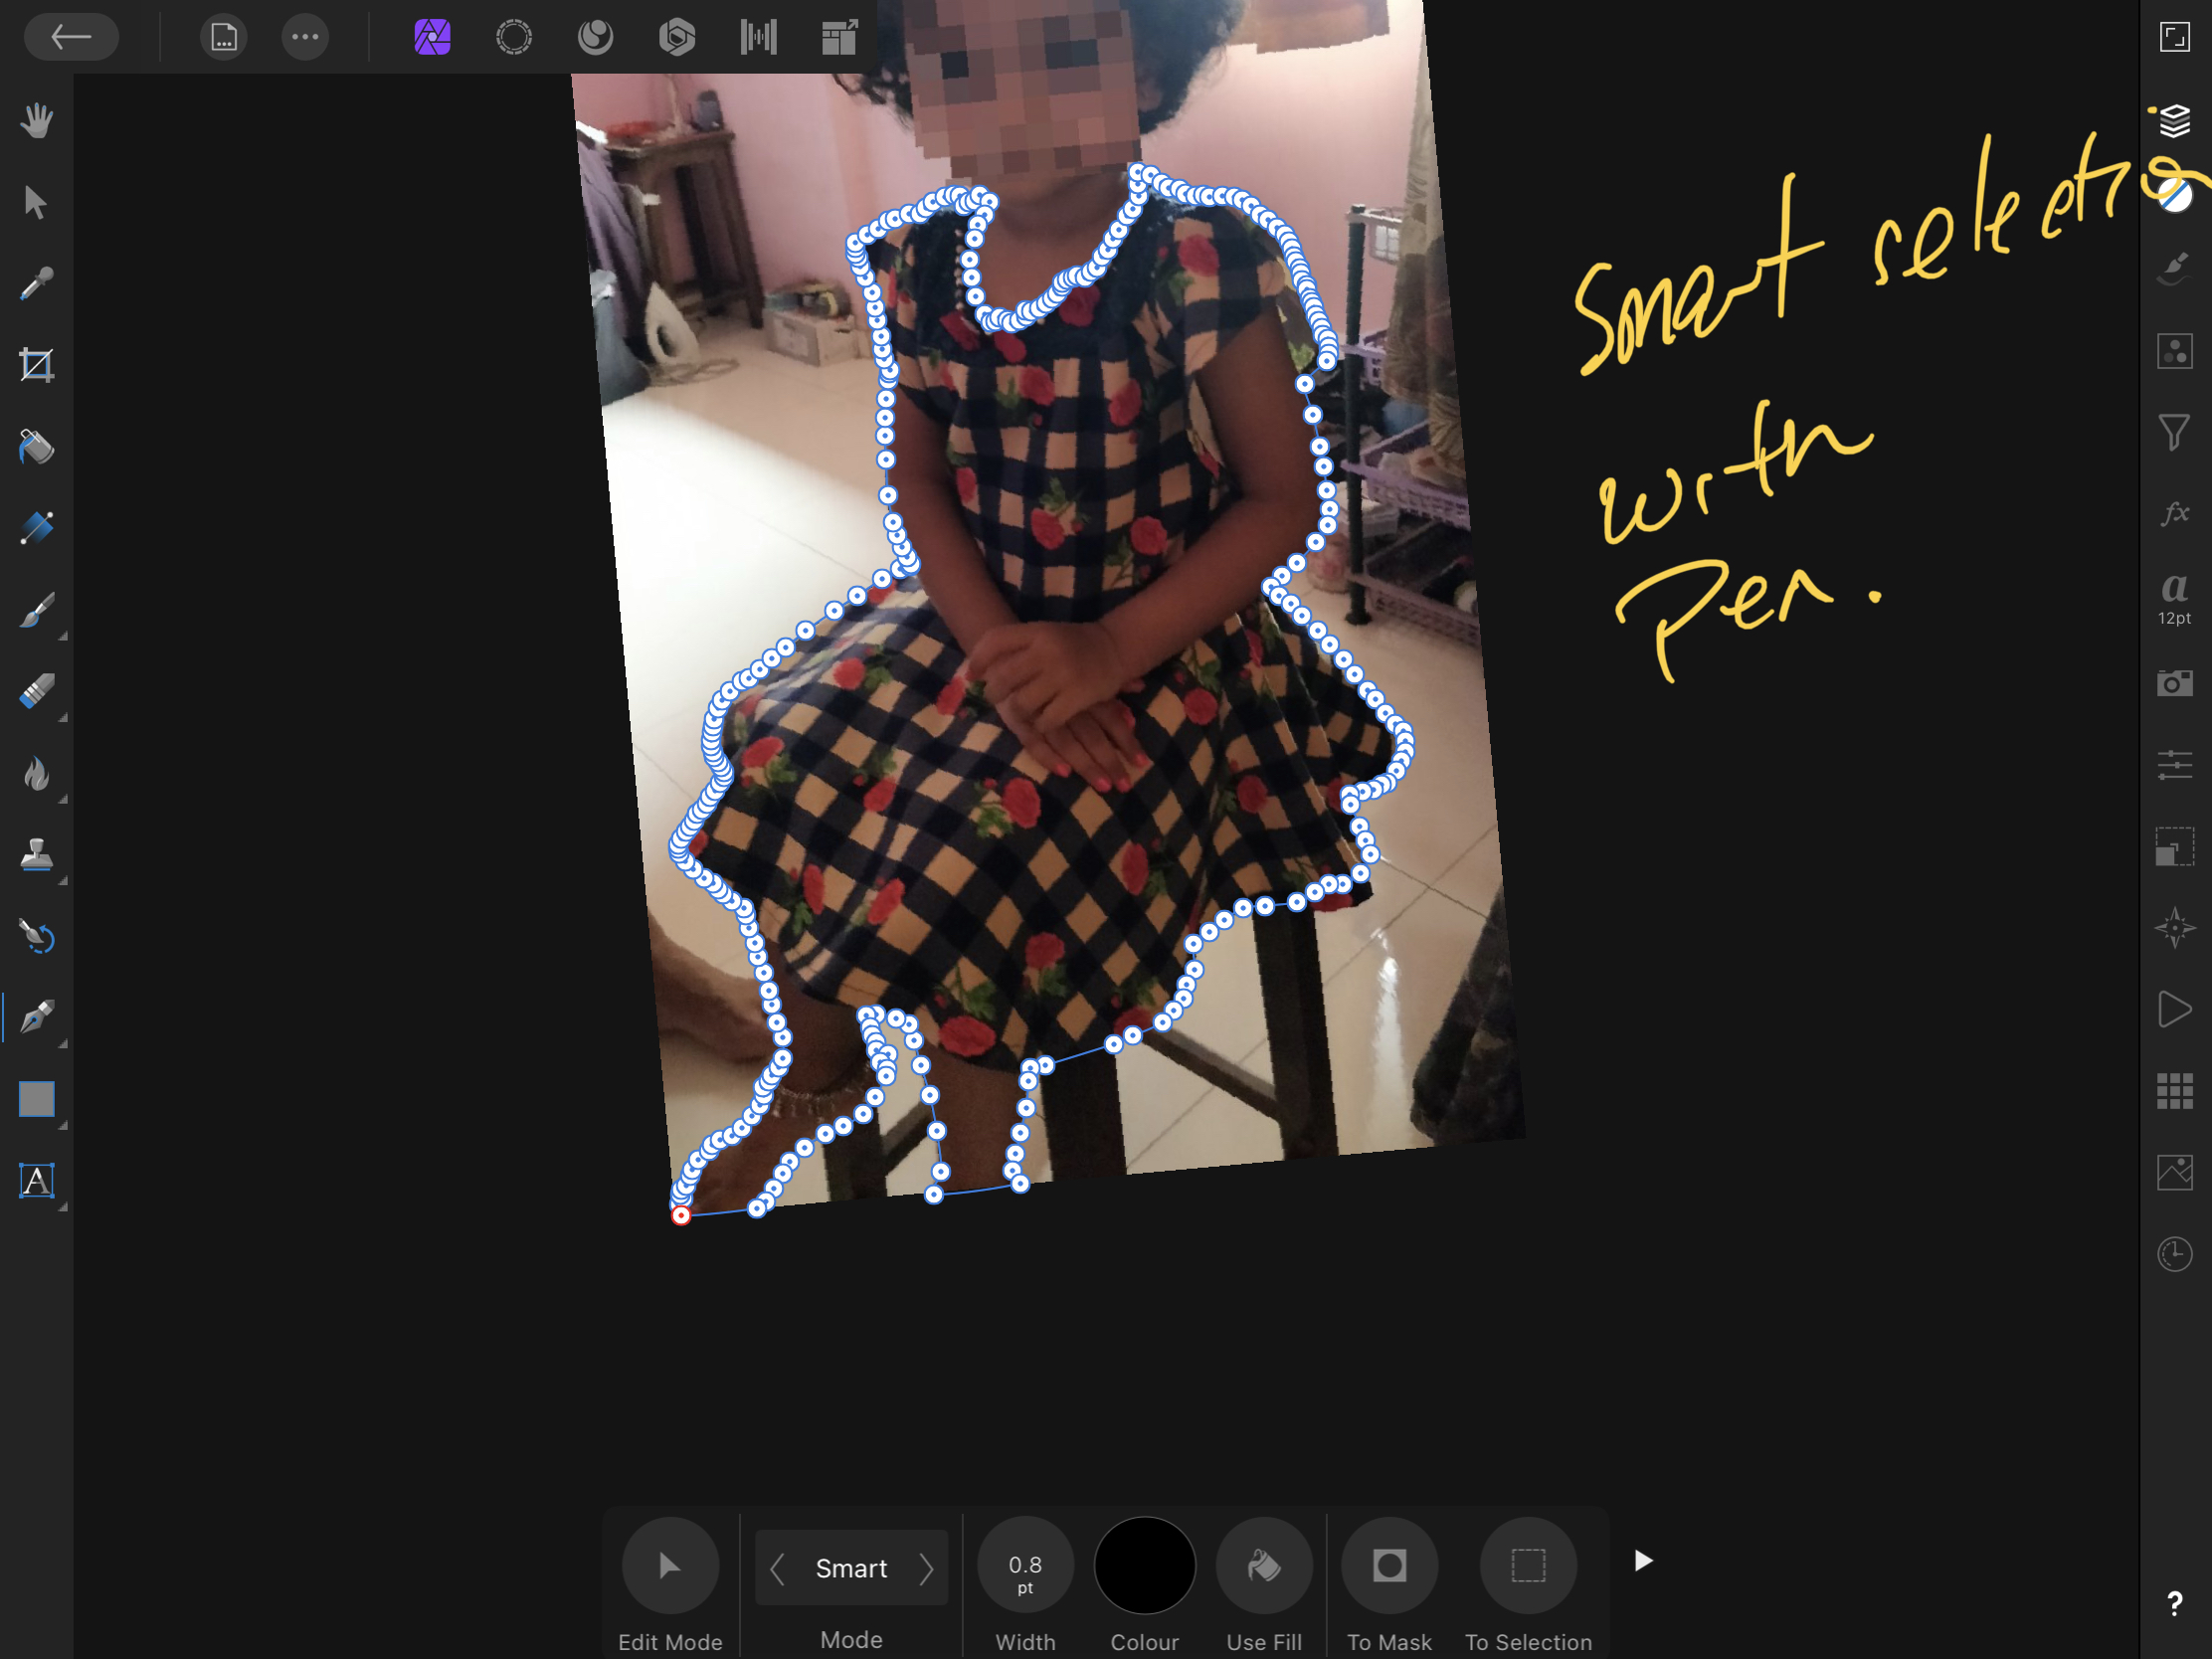
As stated above, when you finish the selection using Smart Selection brush, you will need to refine the selection. This will also refine the area selected previously by the pen tool and the end result will be the same as using Smart Selection for the whole image.🙂 The whole purpose of pen selection was to avoid refining the selection which results in the poor definition around the arm. But if you don’t refine you will get poor selection around the rest of the image. This image therefore needs the extra step. Either manually edit the mask (my preference) or replace the bad part of the refined selection with the layer created using pen selection. That was what I attempted to show with the various methods used in the video😁.
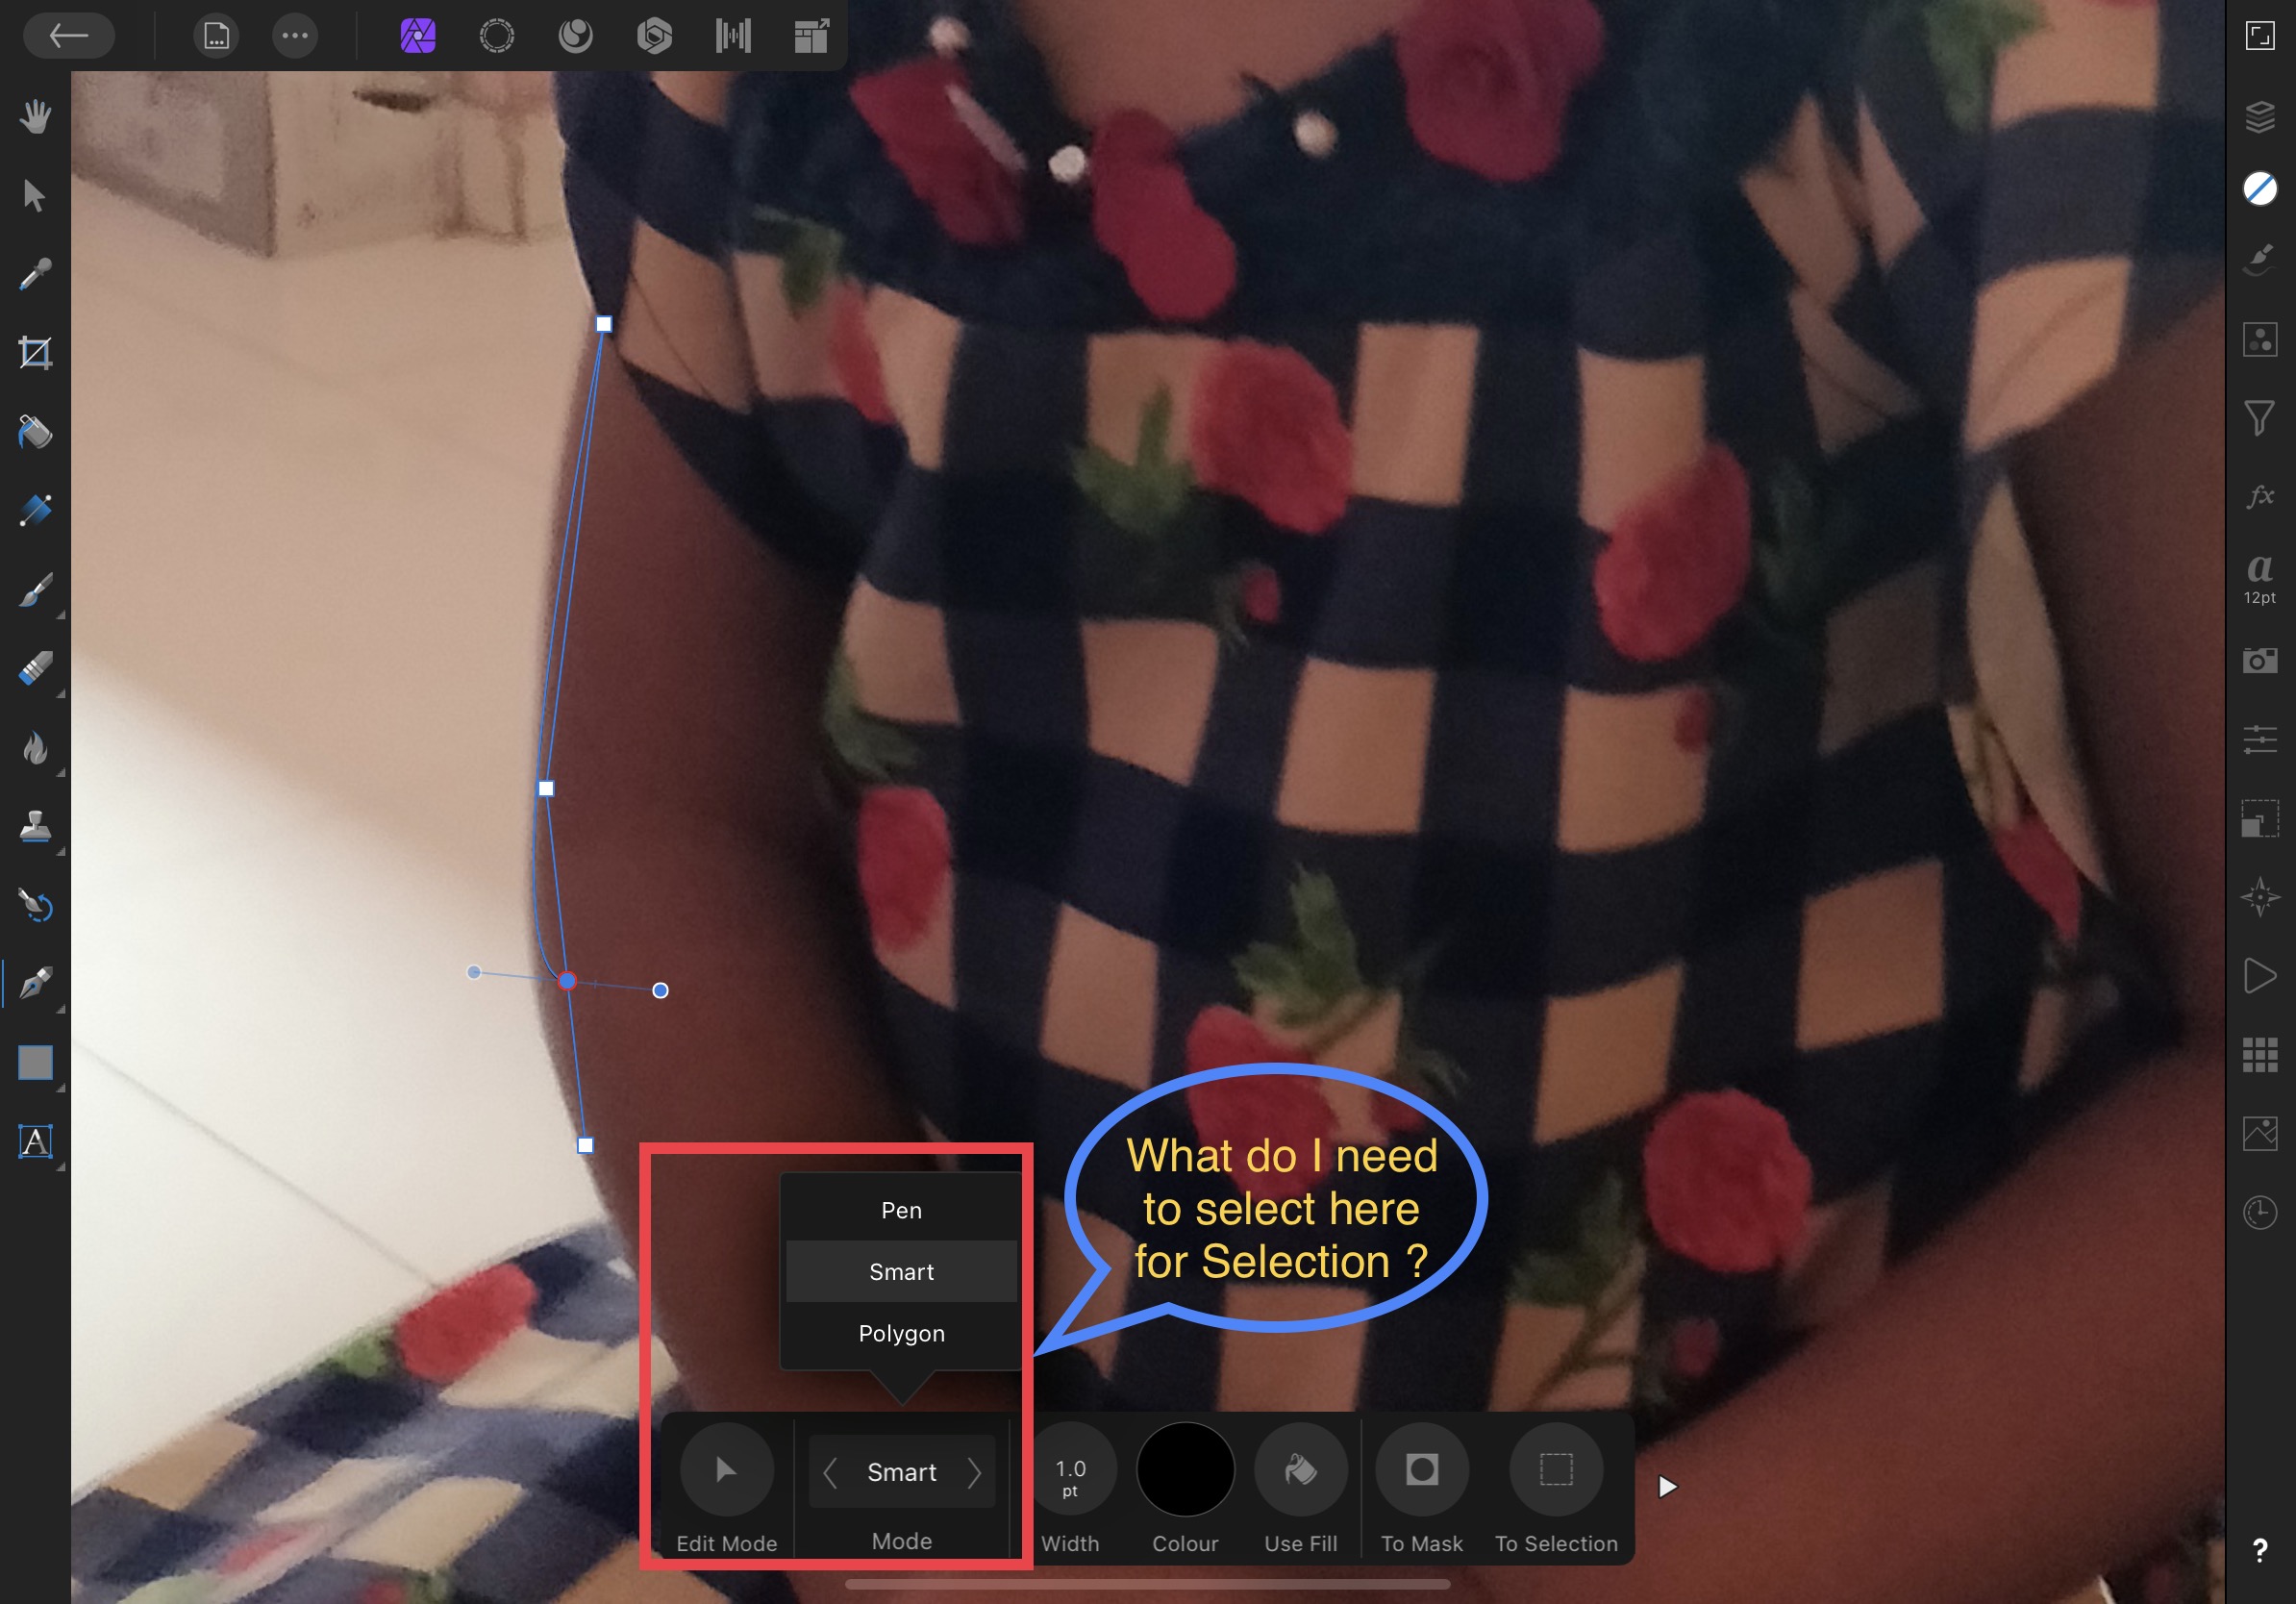
You know I tried this but I am having some issues, firstly when I draw lines on the subject with Pen tool and I try to align it properly, it starts breaking into different modes? How is this supposed to work ? I don’t know ? how it is made to work ?
And is it something that I need to change the mode to maybe keep it in edit mode ? or select something in the Pen mode ?
What do I need to keep this Settings ? if I just want to make a normal Selection using the pen tool ?
Please check the screenshots !
-
36 minutes ago, DM1 said:
Rather than respond to personal message I’ll post the example here as others may wish to comment.
The approach taken in this instance to improve the selection around the right arm was to select the centre section with the pen tool and duplicate it as a separate layer for use later. Having done that the video goes on to show how to switch from pen selection to Smart Selection. In the example after making the Smart Selection I switched back to pen tool to output the selection as a new layer without having to refine it (which is required if in Smart Selection). Again this is just to demonstrate options available with tools. Using Smart Selection and not refining gives a poor result as can be seen. The problem with this photo is that parts of it respond poorly to Smart Selection but other parts extract very well. My final approach would be to use Smart Selection and simply overlay the bad areas with layers from pen selection, as shown in the example (actually I prefer to paint on the mask but that is not what has been asked for😁).
Ok, I have a question here...Instead of going this Hardway where you are first making a selection using a Pen Tool Creating a First(Separate Layer out of it) Then again Making a Second Layer using the Smart Selection Tool and creating a Second different Layer out of it. And increasing the Stack of the Layers, instead why not have the same one Layer where you first make a selection using the Pen tool and then in the Selections Persona change the Mode to Add and the continue selecting the rest of selection using Smart Selection Tool ?
What is the problem with this easier approach ?
-
5 hours ago, DM1 said:
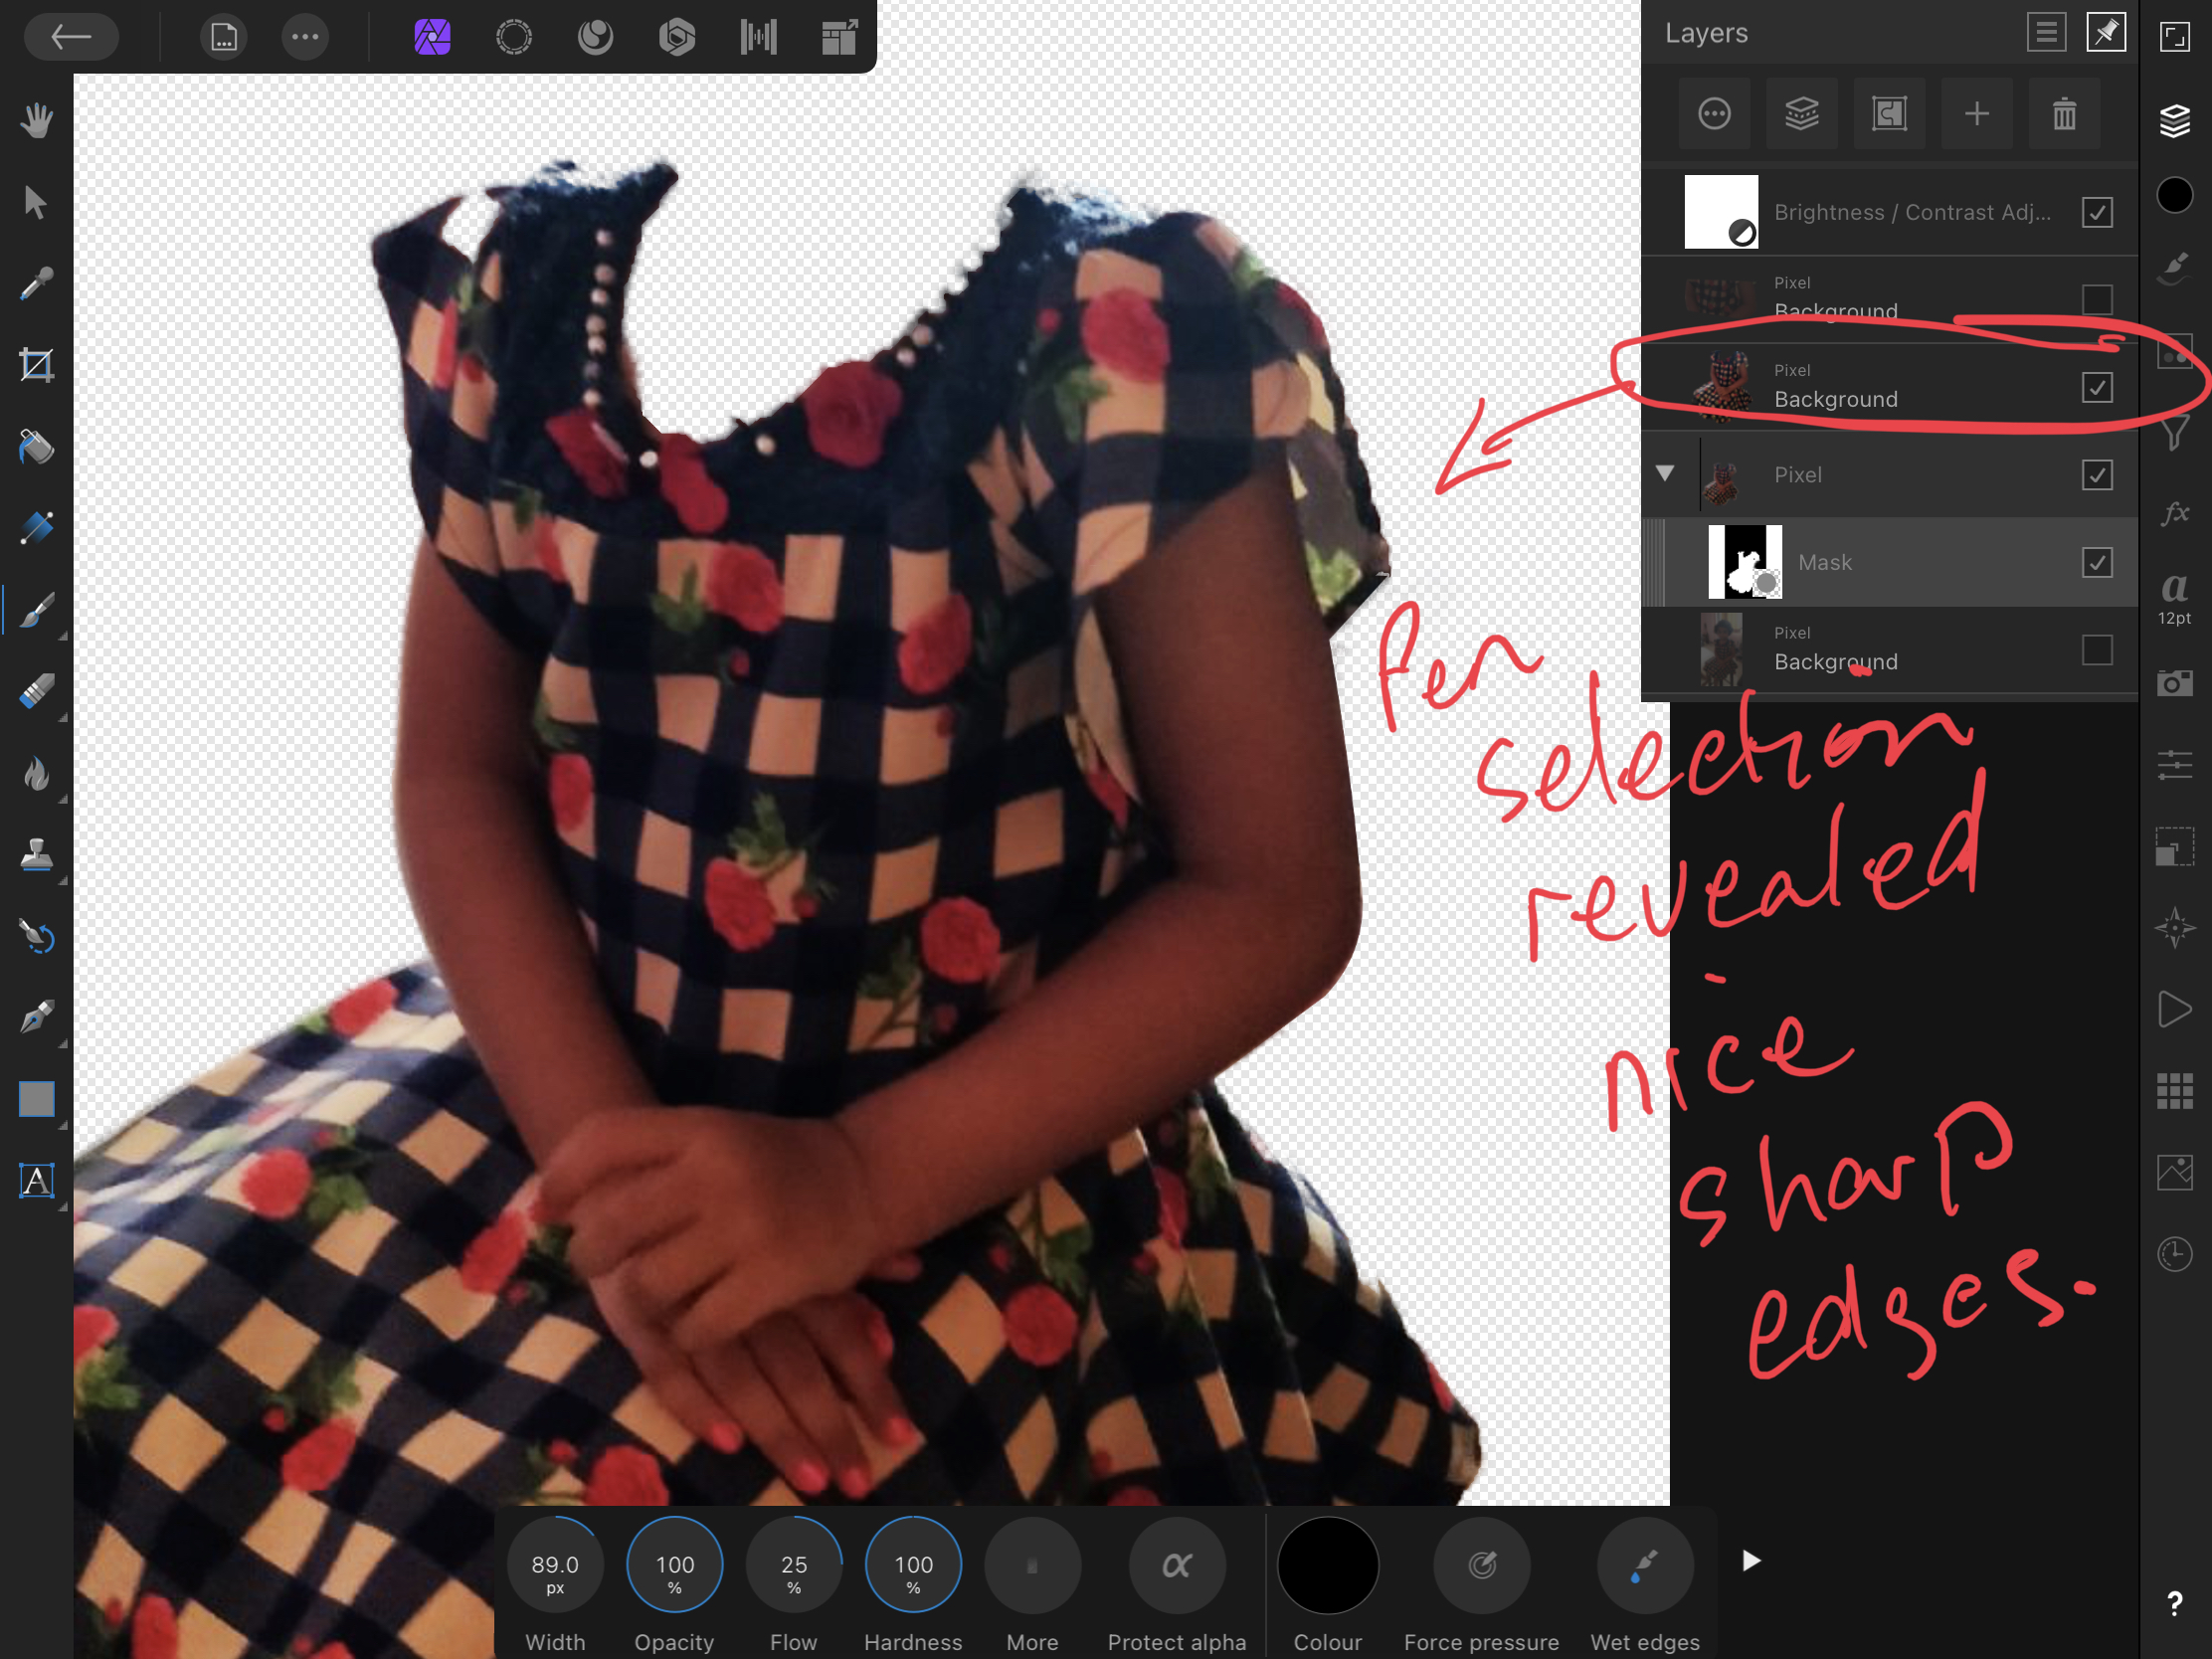
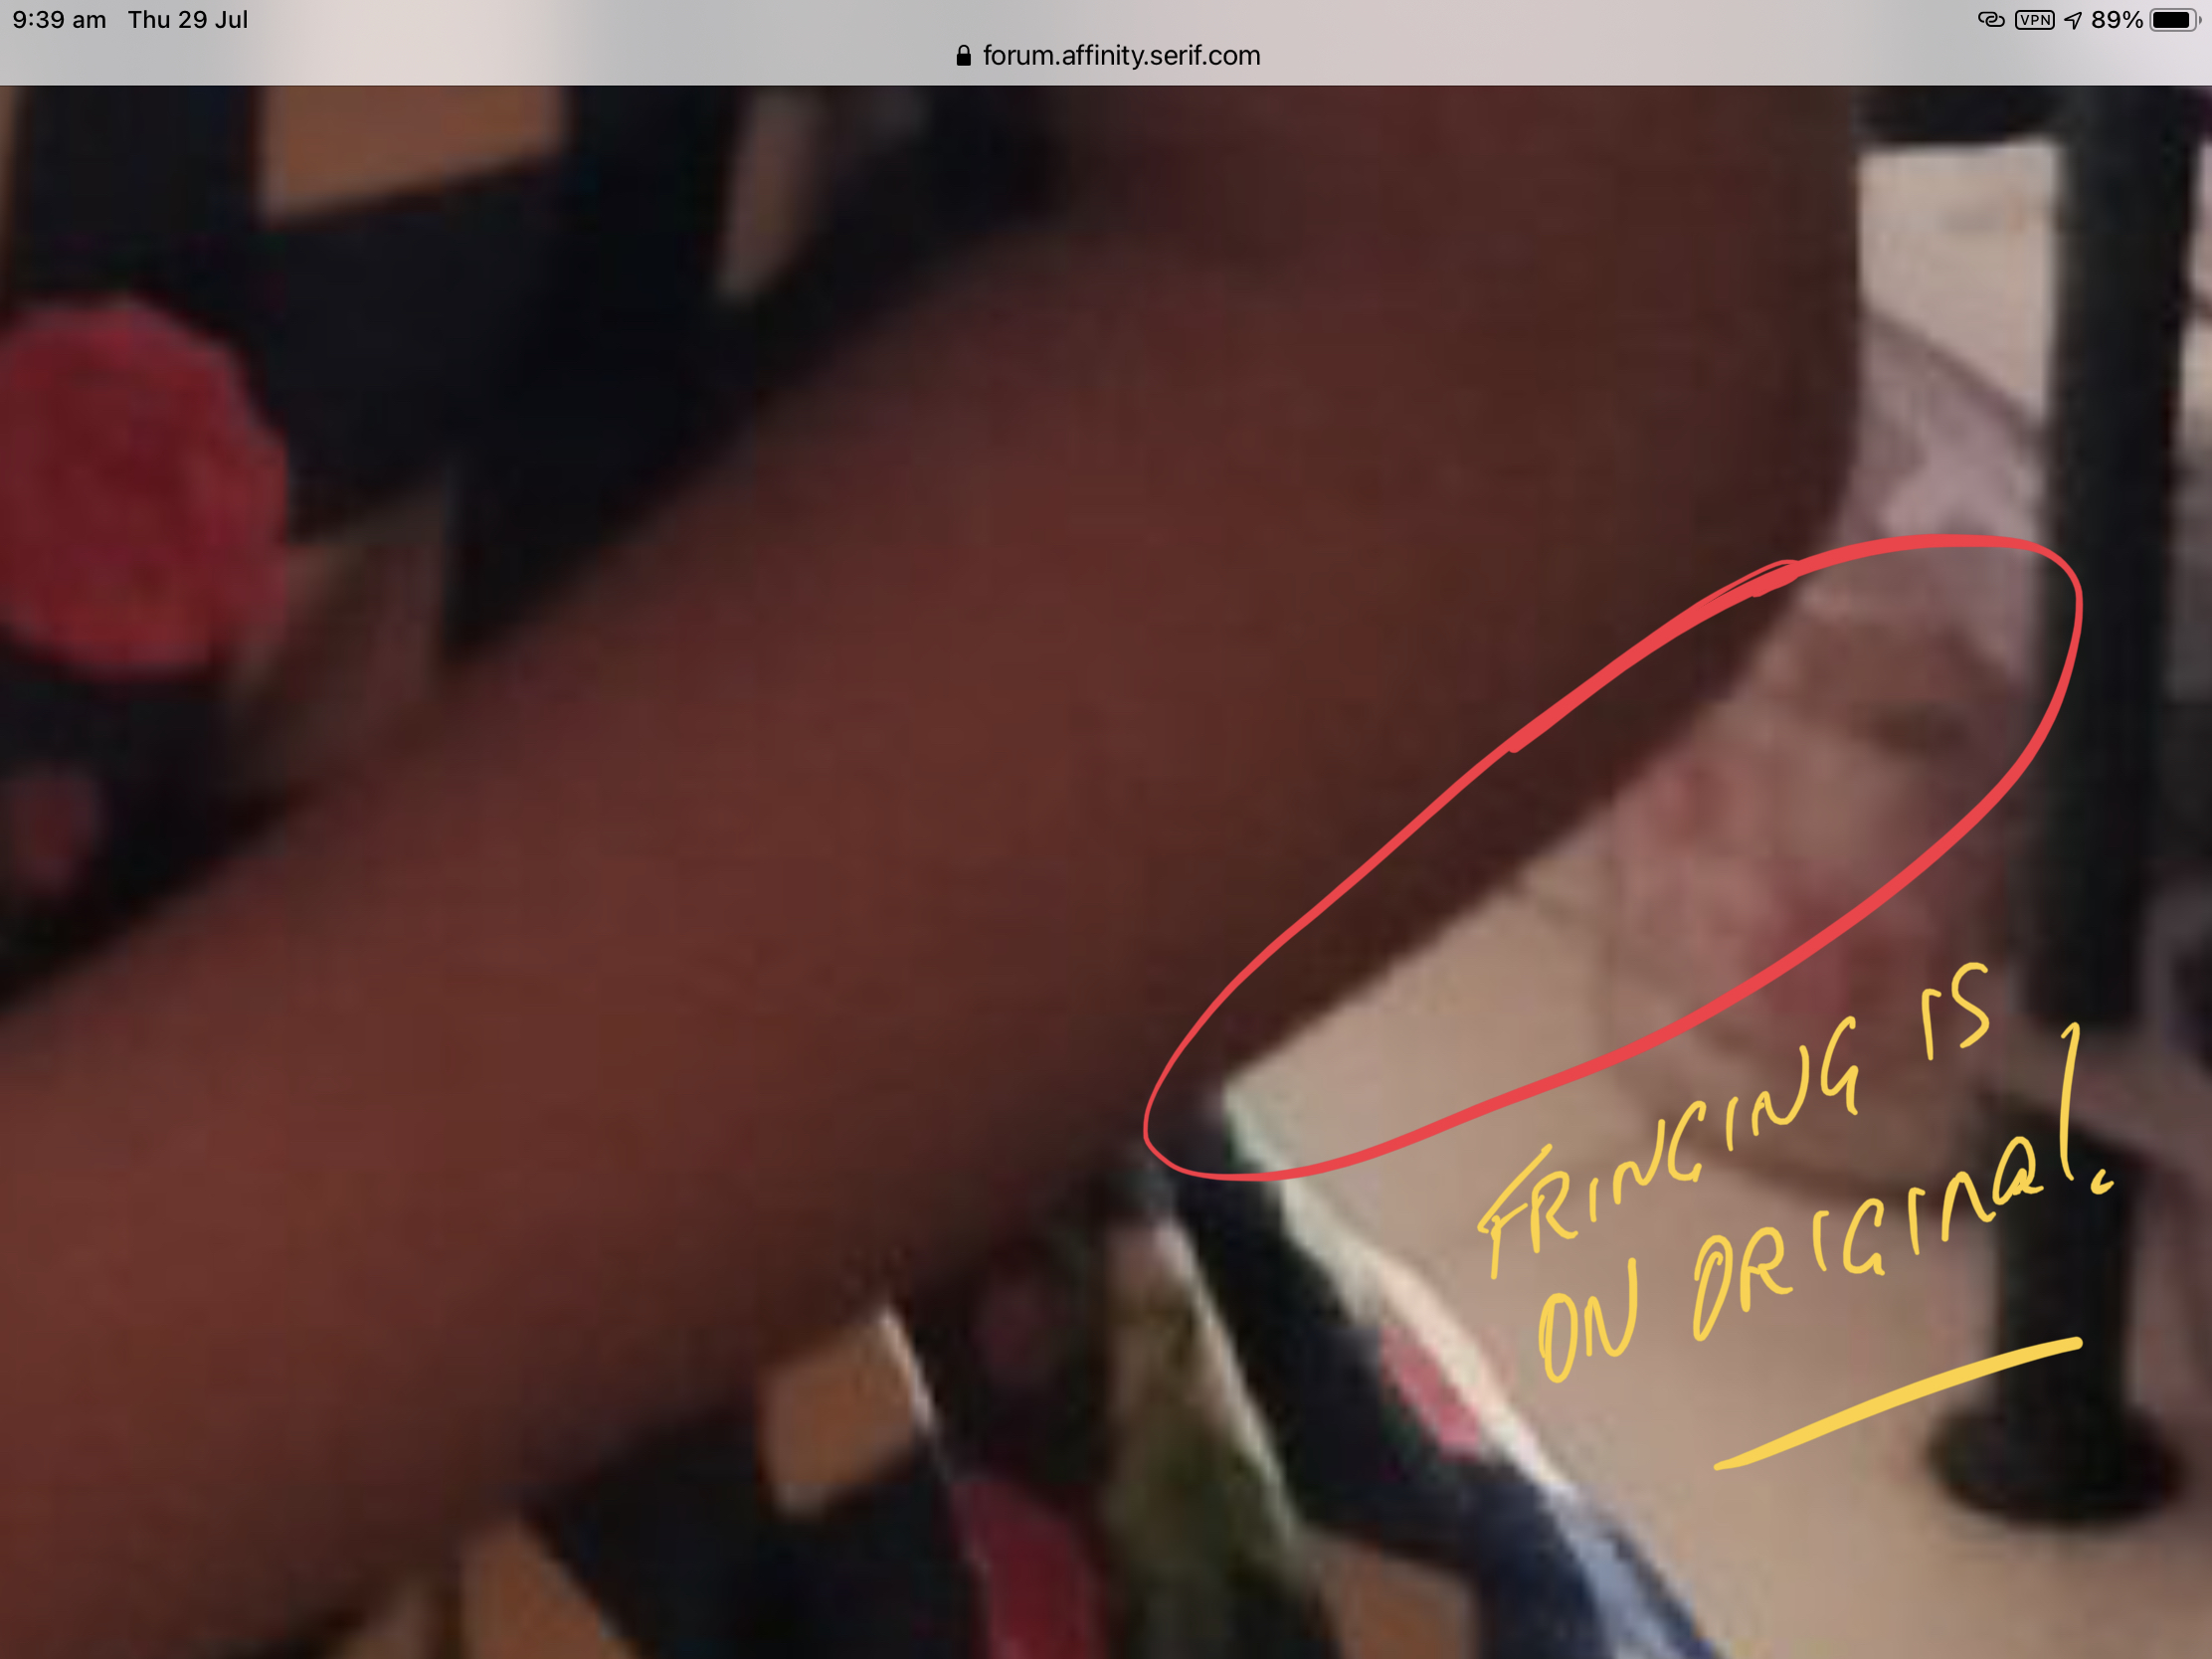
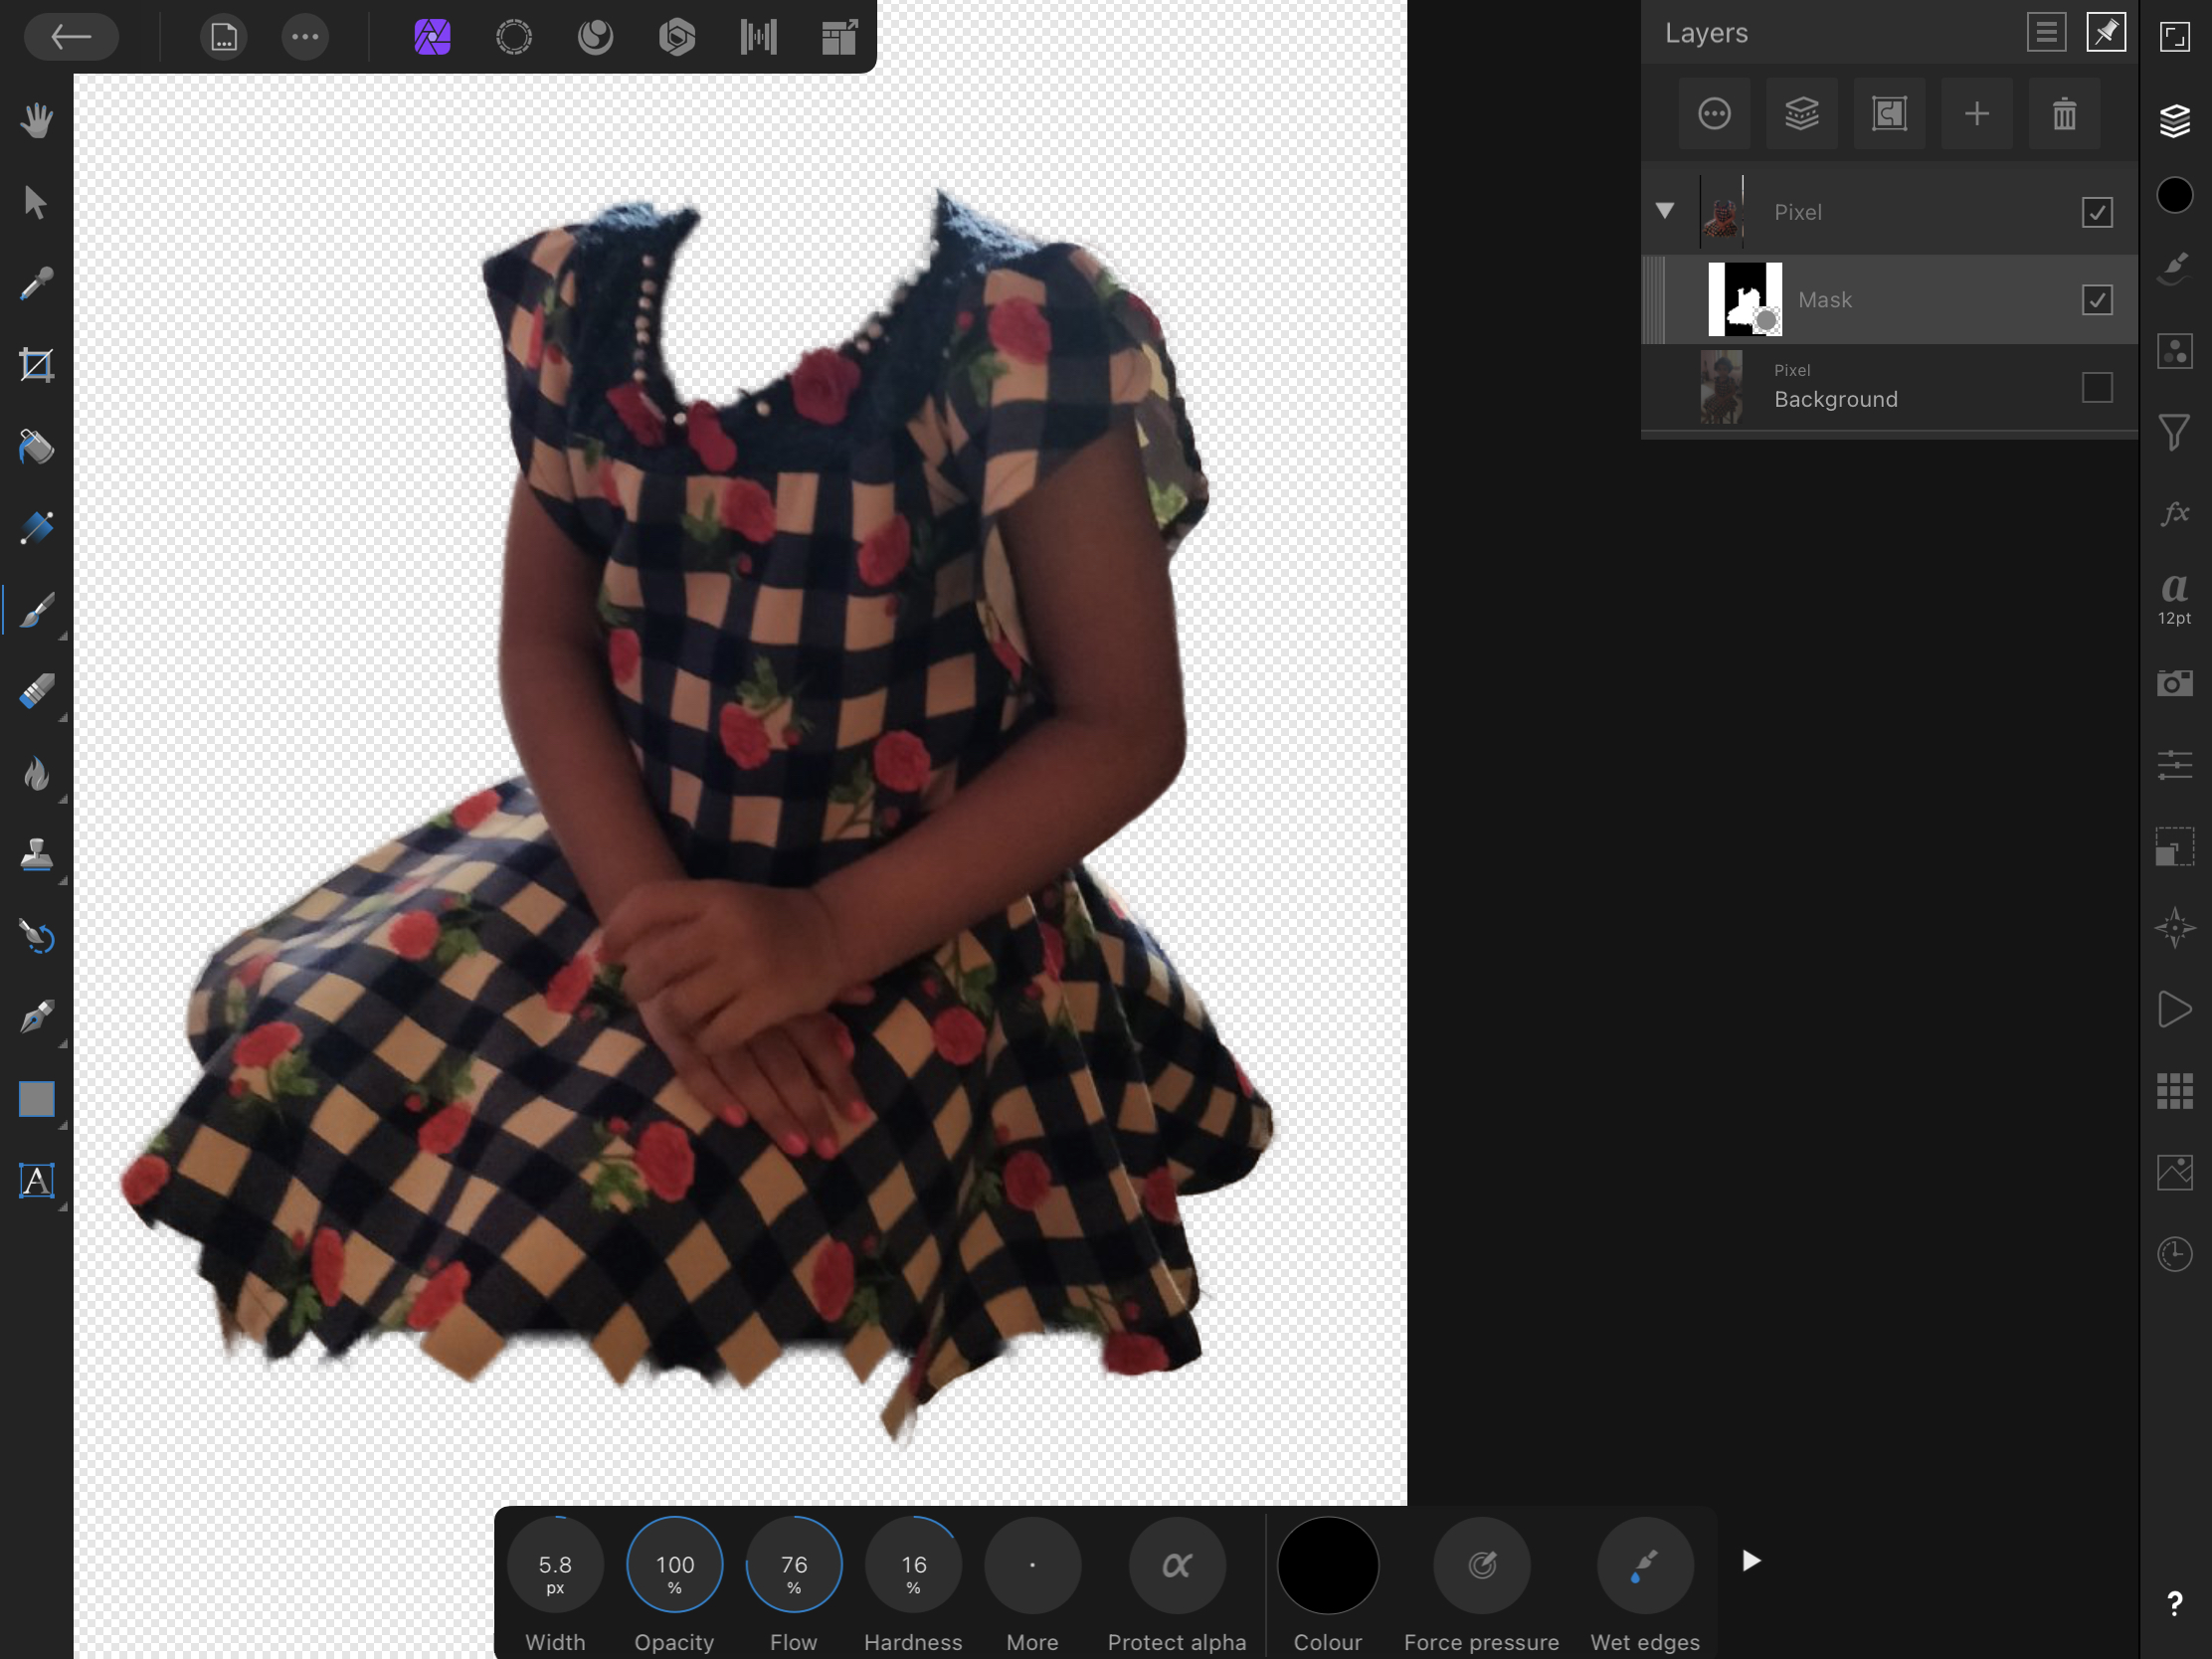
If your original photo is high resolution, has high contrast with background the edges will be sharp. Unfortunately your original photo shows the same fringing around the elbow prior to selection so you will need to do a tidy up on mask (as shown below in second image), or try Paul’s suggestion.
I found that resizing (resampling) the original to 600dpi then doing the selection with Smart Selection brush, switching to refine, setting overlay to white and adjustment to background then painting around the arm gave a better initial result. But it's still extra work. Even with the best algorithm, with low quality in you get low quality out.🙁
When you say you did resizing (Resampling) to 600 DPI was it increasing the Resolution of the image or decreasing it ?
-
4 hours ago, Dan C said:
Hi @augustya,
Many thanks for your feedback here!
Our developers have previously confirmed that we're focussed on the primary functions of the Affinity apps before implementing any AI functionality.
We certainly may look to add these in the future, as I can understand how they would improve workflows in Affinity, but unfortunately we have no eta for this at this time.
In the meantime, I'll be sure to move this thread to the Feedback section of our forums, so that our devs can see and consider your request.
I hope this helps
But C'mon we all know Affnity Photo is a Straight Copy of Photoshop, so if it does openly, publicly !! Why not fully copy it ?? Why do a Half Job of copying something ?

-
7 minutes ago, DM1 said:
Smart select brush
.……and the background?
This one...
-
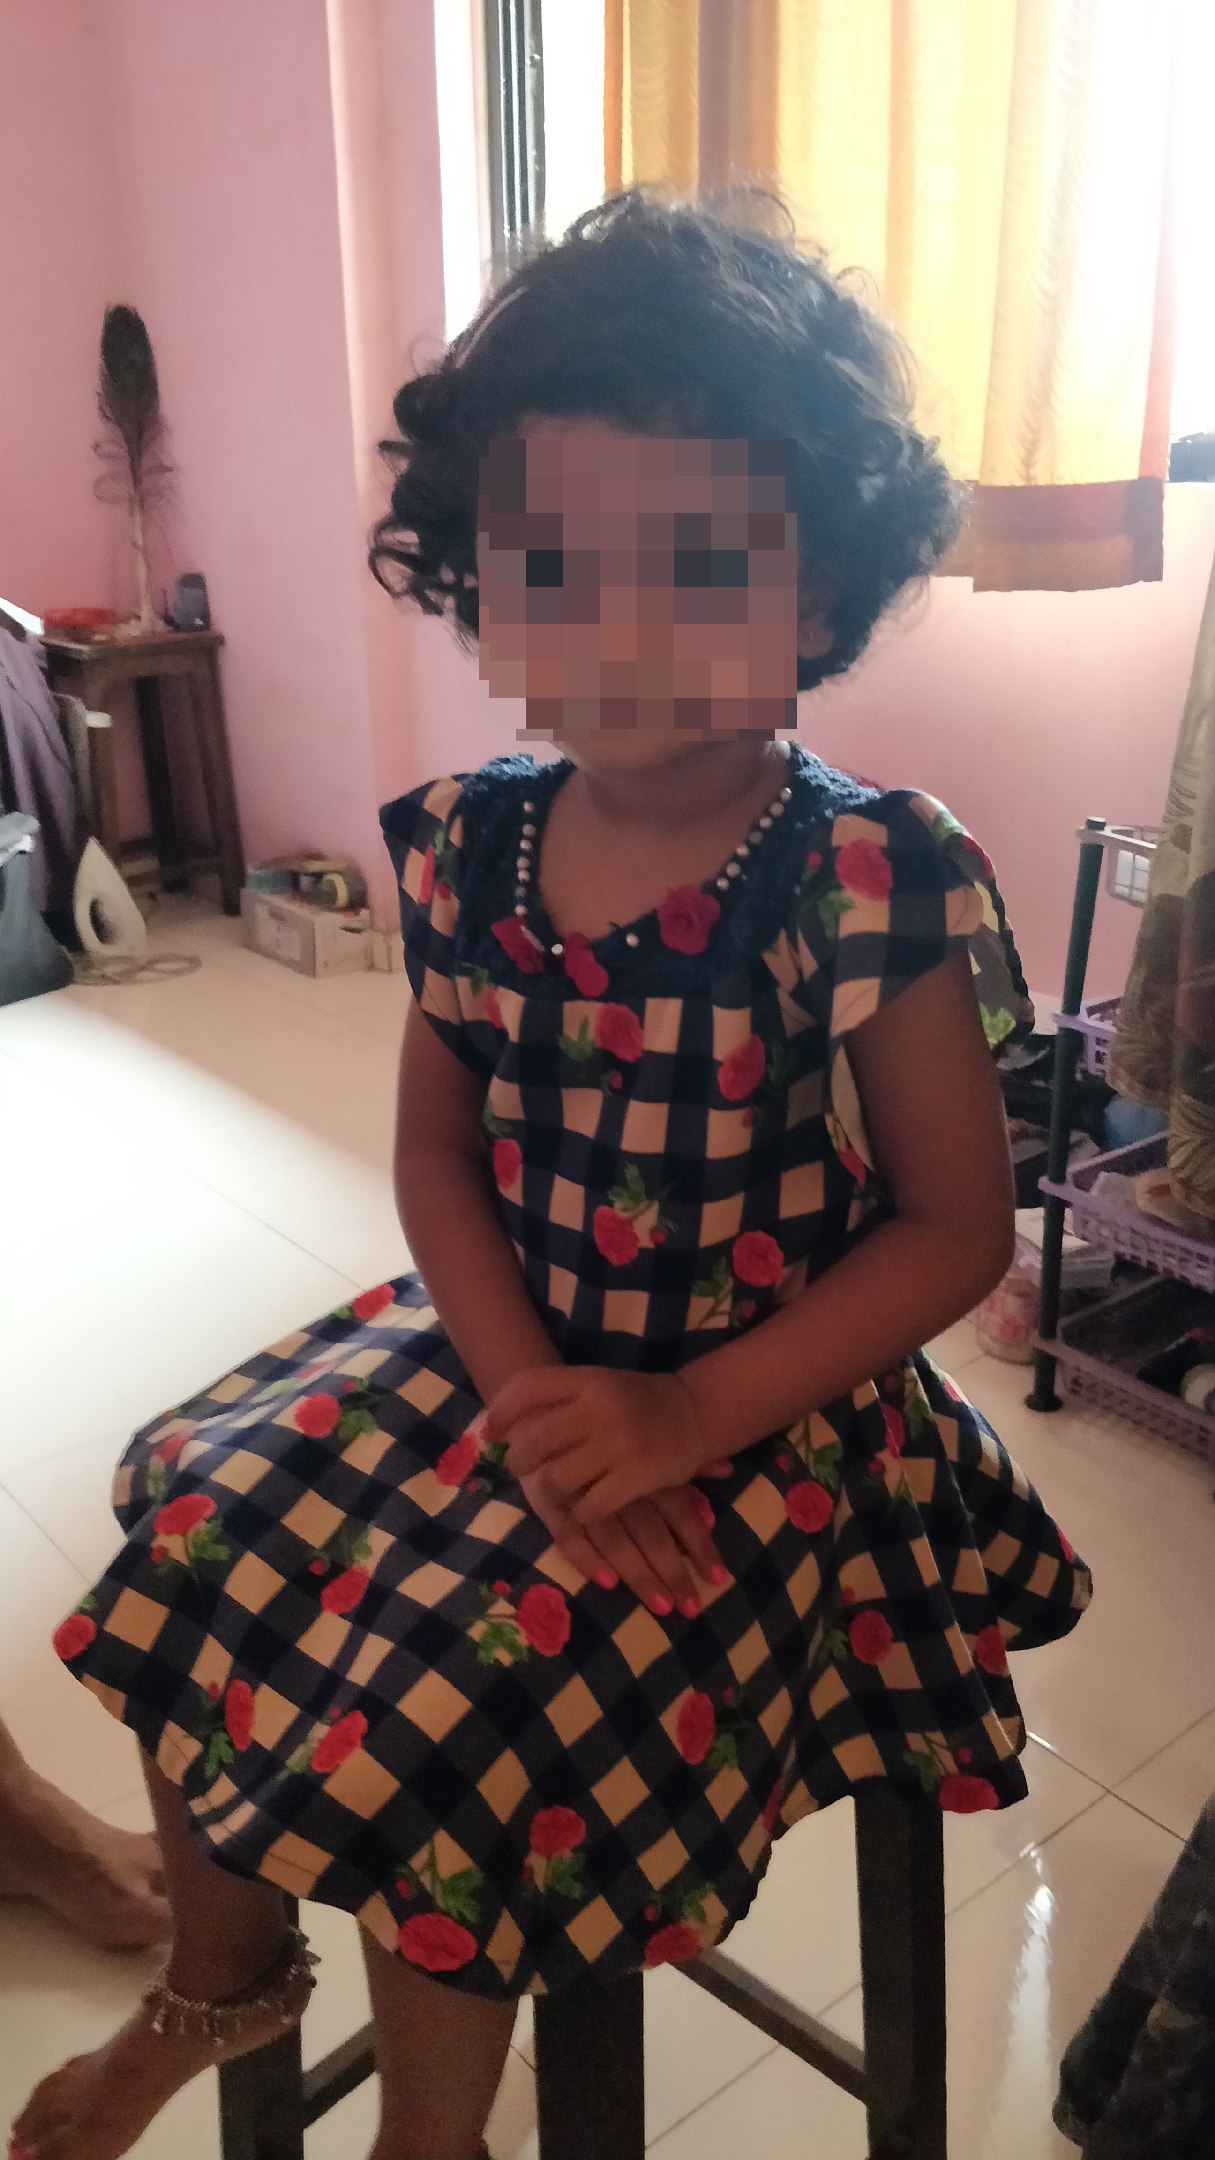
2 minutes ago, DM1 said:
Perhaps you could explain what method you used to make the initial selection as there are many ways to do this.
Also could you show thw the image prior to selection so we can see what the background foreground definition is like.🙂
I just used the Quick Selection ( I hope that is the term as I am getting confused between Photoshop Jargons and Affnity Photo Jargons) But yes I used a normal Quick Selection Tool.


Two Different Methods of Selection in the same Image and Subject ?
in Pre-V2 Archive of iPad Questions
Posted
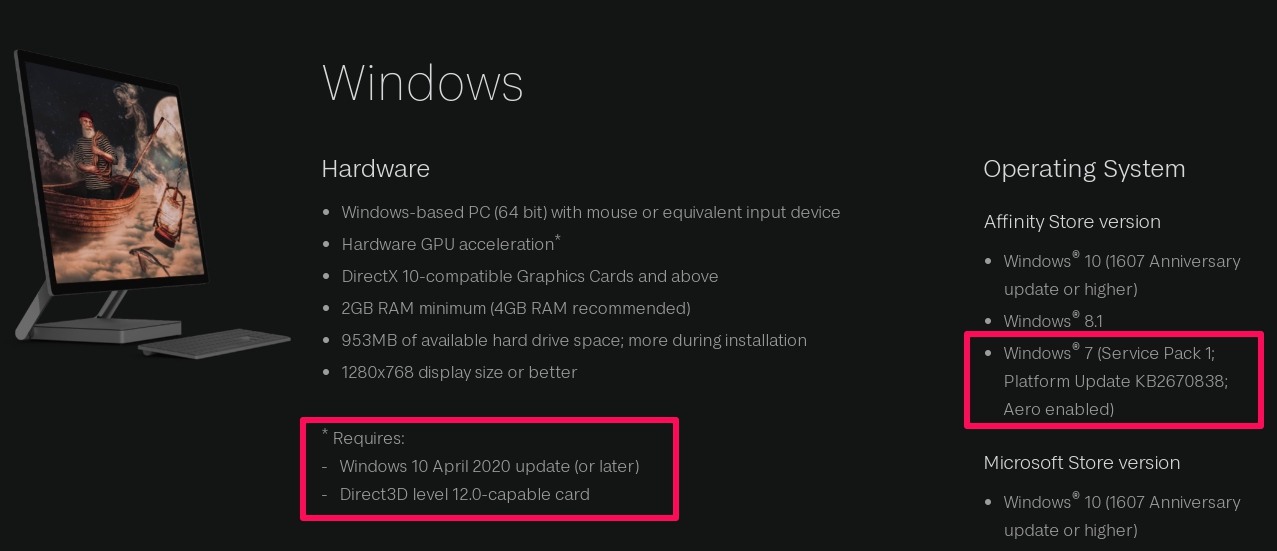
Ok there are certain challenges that I am facing when using two different methods of selection on the same subject.
1. Let's say you made a selection first using the Pen Tool. Later When making selection with the second method let's say Smart selection, how do you know where you have to start from the second selection ? like the starting point ? so that both the selections merge perfectly ? isn't that tricky ? How do I know where did I leave the first selection and where should i start the second selection from ? Sure I can see the first selected layer, but then when I start with it everything boils down to pure fluke !! If matches with the earlier selection fine or else, go nuts about how to Marge it perfectly ? How does one do this ?
2. When I start working on the second selection I am using the original photo uploaded and then trying to make a selection in the same original uploaded pixel layer, but after making the selection when I change that selection to new layer (Going into select persona) It does not do that !!