

AntiqueFlaneur
-
Posts
201 -
Joined
-
Last visited
Posts posted by AntiqueFlaneur
-
-
26 minutes ago, thomaso said:
Such kind of automatic re-positioning according to switching left / right margins only applies to objects which were created as master page objects.
So if I put text boxes into the master pages and put my content into them, they would reposition correctly?
-
The attached pic is what results when I add a new page before already-existing-and-laid-out pages in Affinity Publisher. The Subsequent pages do not adjust to take into account the different margin locations, so I have to go back and readjust every single page. Given that the margins are the same size, but only in different places on the page, is there a way to get Affinity to autocorrect for this different and save me a lot of work?

-
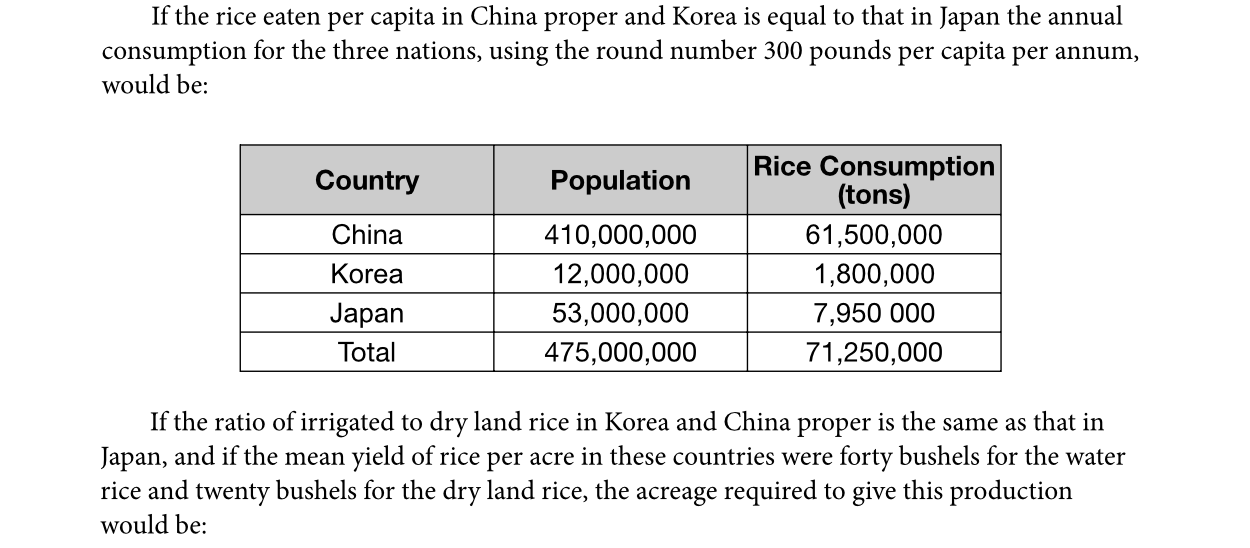
In the attached pic I have a bottom row called "total". Is there a way I can have the top line of the population and rice consumption totals of this row be thicker so it's more visually obvious that the numbers below are the sum of those above?
-
3 hours ago, Dan C said:
Perhaps try using Frequency Separation on your original image, then apply the Dust and Scratches filter to the High Frequency layer only. Now, group both the High and Low Frequency layers together, and then use an Unsharp Mask to reduce the effect of the blur. This resulted in the following for me, the more aggressive you are with the Dust and Scratches filter, the more blur will be introduced -
That improves the result. Thanks!
-
6 hours ago, Alfred said:
Try the Dust & Scratches filter.
I've spent a few hours fooling around with the dust and scratches filter. It does make the white specs go away, but at the cost of blur. Even when I adjust the tolerance up I can't really find a sweet spot with no specs and no blur. Suggestions?
-
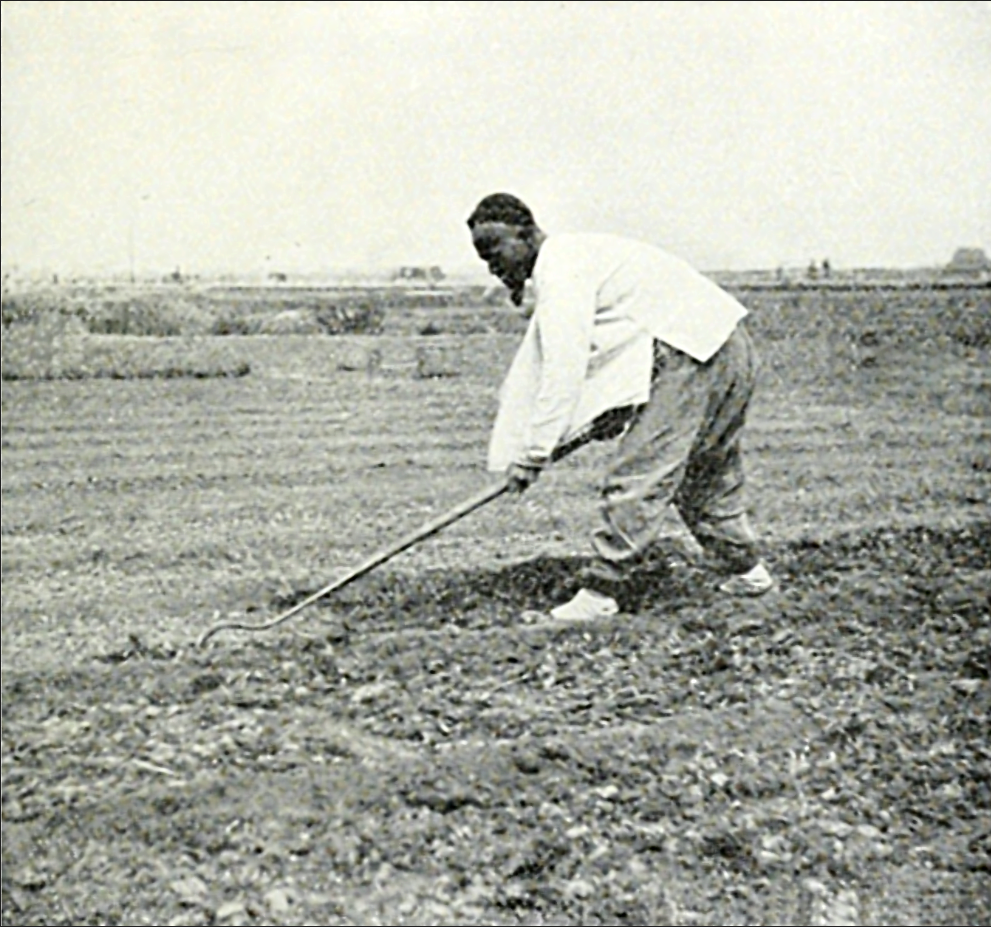
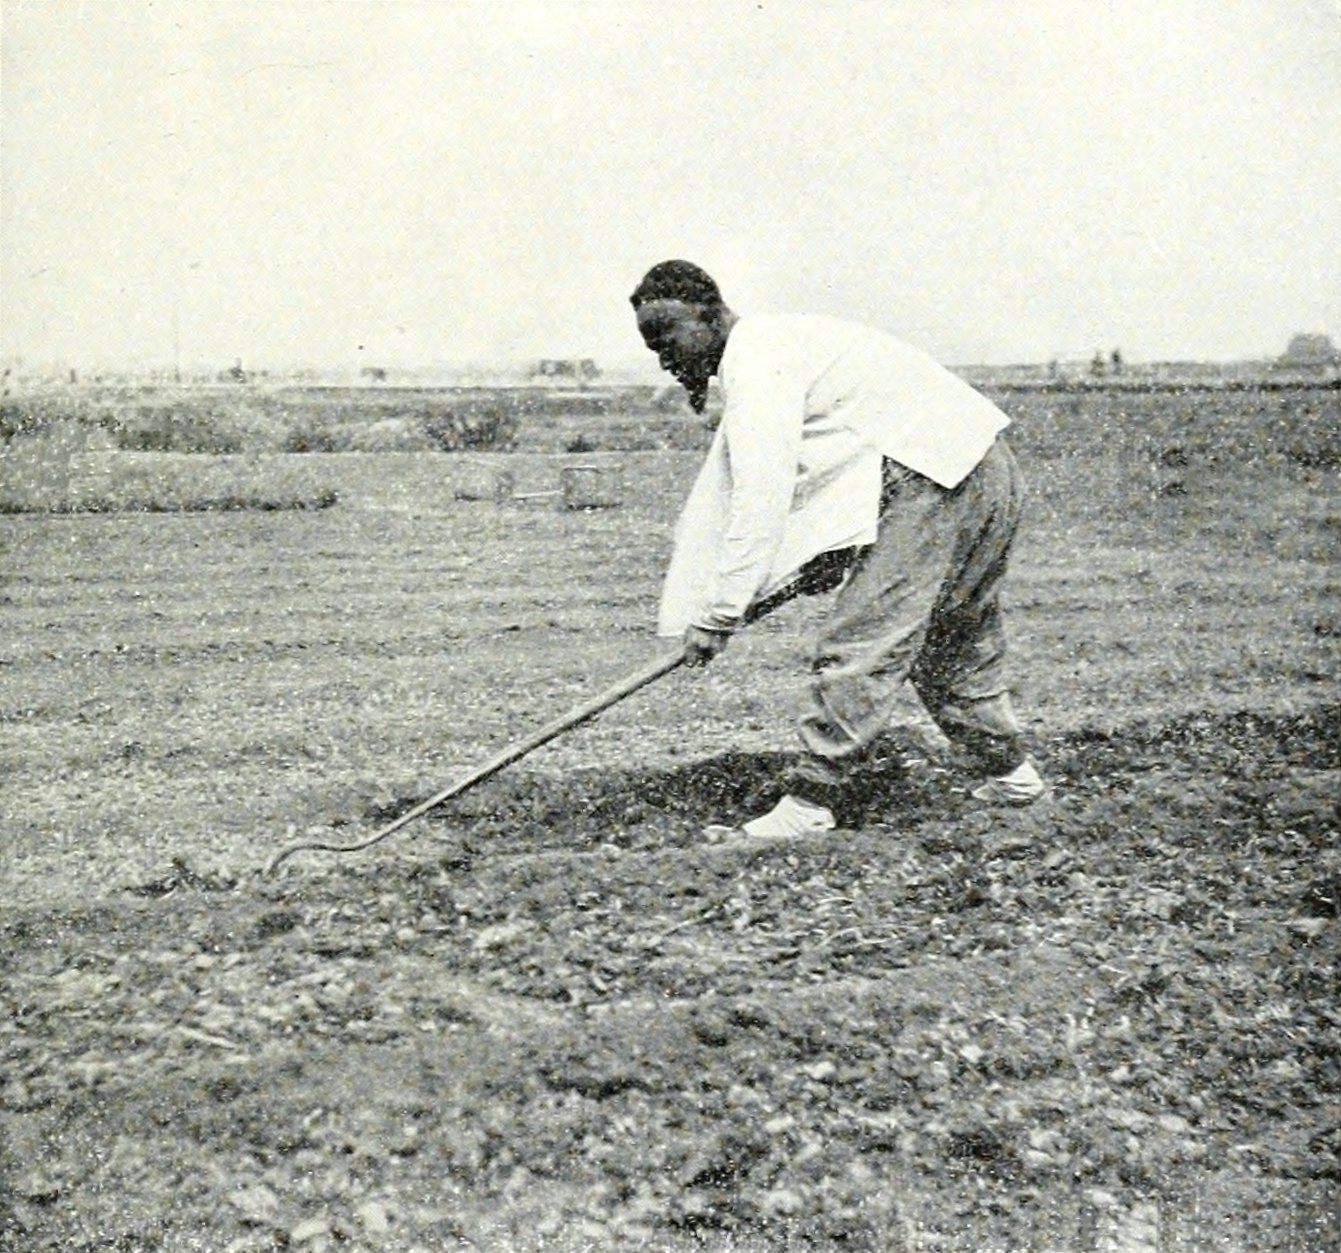
The attached photo has hundreds of white "specs," on it. I've found I can often fix these with the inpainting brush tool, but with so many specs it takes forever to get them all. Are there any quicker and more efficient ways to fix these?
Thanks!
-
2 hours ago, walt.farrell said:
First, do a File > Save As... and save the complete file under a different name, so you don't lose your original.
After that it should simply be a matter of selecting the spread(s) you want to delete in the Pages studio panel and clicking the Delete Selected Pages icon (trash can) at the top right of the panel.
Finally, do another File > Save As... and save the file under another new name, which should compact it and remove the space otherwise taken up by the deleted spreads.
Good to know. I just figured out my problem, but it could be very useful to know how to do this in the future. Thanks!
-
I figured it out, guys! Thanks for your help. It was actually the vertical alignment in the text studio being set to center align instead of top align.
-
21 minutes ago, walt.farrell said:
Could you save a copy of your .afpub file with only the master page(s) and spread 52/53, and upload it?
Could you link me to instructions on how to save a version of my afpub file with only certain pages/masters?
-
17 minutes ago, walt.farrell said:
So, are you saying that the text "Chapter Three" and the paragraph break following it are a separate text frame from the text beginning "maintenance and restoration"?
Could we see a screenshot with that text frame selected, rather than the image? And perhaps with the Text Frame studio panel showing?
Yes, they are separate. I'm attaching a pic with the textbox selected and the Text Frame Studio panel showing.
-
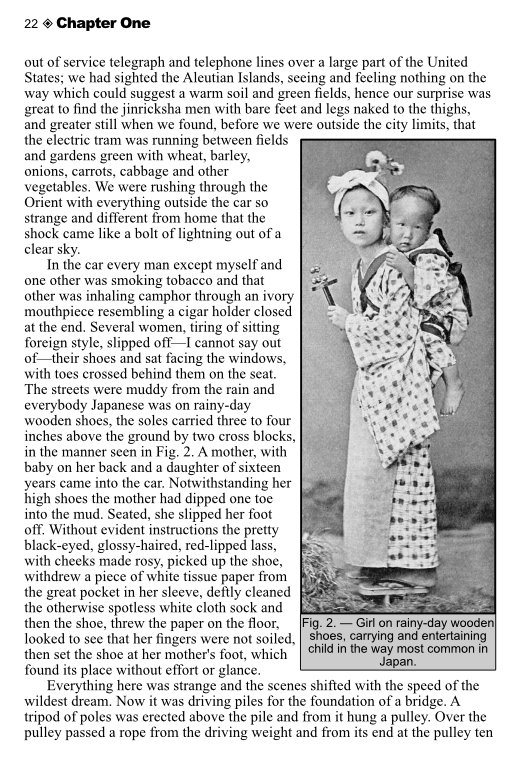
In the attached pic, I've got text wrapped around a photo. But the text seems to start slightly below the top of the picture it is wrapped around. Any way to raise it up so it's even? Note that the top of the text box is already even with the photo.
-
On 7/2/2020 at 4:37 PM, Old Bruce said:
I know that there can be a time lag to the view updating in the Pages panel but I have never had the master page change not carry over to all pages to which it is applied. What sort of changes are done to the Master Pages? If it is a change to a Text Frame's Paragraph style then this is not going to get applied to text with an applied Paragraph Style.
Thanks! That was my issue.
-
16 hours ago, Lagarto said:
But in Publisher, if text frames are on separate spreads (or pages, when not using facing pages), I cannot multiple select.
That's what I'm finding.
-
1 hour ago, Lagarto said:
Yes, this is possible in all three apps (and with both artistic and frame text) but you need to use the Move tool to select the text boxes (instead of the Text tool).
I've got the move tool selected. What buttons do you hold (I'm on a mac) to select additional boxes once you've got your first box selected?
-
On 6/19/2020 at 2:54 PM, AntiqueFlaneur said:
I've been consistently having strange image irregularities when I go to use my edited photos in an Affinity Publisher document and export the finished product. I'm wondering if I'm missing something basic in my Affinity Photo process that's causing problems.
My process is this:
- I load the image into Affinity photo
- I use the crop tool to straighten (ruler) and crop the image down to the right size.
- I use FFT denoise
- I add a curves adjustment layer and modify as needed.
- I save the photo.
- I import this into Publisher.
- I have also tried adding the optional step of doing a "rasterize and trim," with no apparent difference.
- These are all black and white photos. Should I be making an adjustment to grayscale? if so, where do I do that?
Is there something I'm missing? Do I need to merge layers or something? When I've tried this the image does not look great. Suggestions?
I'm adding an example of what one of my normal-looking edited photos looks like after being exported from Publisher.
FYI, I found my solutions. First, I had to convert all my photos to greyscale in Affinity Photo before adding them to publisher. Second, I had to set my export to greyscale as well. Third, I had to make sure that my picture frames were located below my linked picture files in the hierarchy of Layers. -
Thanks for your offer of help, but I was actually able to figure out the problems (actually two separate problems)
-
I've got about 60 text boxes that I need to adjust text properties in. I've set a paragraph style to cover all the changes I need, but is it possible to select all the boxes at once so I can apply the paragraph style to all of them? When I select one box and try control-, option-, or shift-clicking another box, it does not keep the original box selected. Any way to do this?
-
I've applied a different master page to each chapter of my book, but I'm finding that when I update the master page, the changes do not seem to be carried over to the pages that master has been applied to. Any suggestions for fixing this?
-
On 6/19/2020 at 4:17 PM, walt.farrell said:
Yes, but can you show us how it looks before you have the irregularities? And what are the irregularities you're seeing. We need to know what you're seeing, and ideally to see it ourselves.
Also, are you saying that it looks OK while you're looking at the document in Publisher, but looks wrong (in some way) in the exported PDF when you look at it with a PDF viewer?
@walt.farrell Yes, the photos looks good in publisher, but have strange tones once exported as a PDFs. Check out the two pics I'm attaching to this message. The first has a weird line down the middle of the left photo. Both Photos in the spread have a yellow hue to them (as they looked before greyscale is applied to them in Publisher).
The second one is from publisher. No line, and proper greyscale.
-
2 minutes ago, walt.farrell said:
What does it look like after you save and before you import into Publisher? What is the "irregularity" that you're seeing?
Do your image and your Publisher file have the same color format and ICC profile?
What format are you using to Export from Publisher, and what Export settings (including those on the More... dialog) have you used?
1) It looks great until the image is exported from Publisher.
2) The document is set up for Gray/16 and Greyscale D50. I'm not sure where I would adjust the color profile in Affinity Photo.
3) I'm exporting as PDF and using the "As document," and "use document profile" color setting, but as an experiment I tired using Gray/ GrayscaleD50 setting with no difference.
-
I've been consistently having strange image irregularities when I go to use my edited photos in an Affinity Publisher document and export the finished product. I'm wondering if I'm missing something basic in my Affinity Photo process that's causing problems.
My process is this:
- I load the image into Affinity photo
- I use the crop tool to straighten (ruler) and crop the image down to the right size.
- I use FFT denoise
- I add a curves adjustment layer and modify as needed.
- I save the photo.
- I import this into Publisher.
- I have also tried adding the optional step of doing a "rasterize and trim," with no apparent difference.
- These are all black and white photos. Should I be making an adjustment to grayscale? if so, where do I do that?
Is there something I'm missing? Do I need to merge layers or something? When I've tried this the image does not look great. Suggestions?
I'm adding an example of what one of my normal-looking edited photos looks like after being exported from Publisher.
-
Where do I find the export settings menu? The help search bar didn't have a listing for it.
-
-
I have my Color format set to Gray/16 and my Color profile set to D50 for a book project.
When I look at my B&W photos laid out in publisher, they display properly. But when I export them as PDFs, they gain a yellow tint. See examples attached to this post.
Any idea why this is happening and how I can fix it?


Does a "nested" filter layer in the layers panel have a different meaning compared to a filter next to the layer?
in Pre-V2 Archive of Affinity on Desktop Questions (macOS and Windows)
Posted
I'm following a Affinity Photo tutorial step by step and the instructor's video shows pic one, with the filter next to the layer.
When I do the same thing, the filter is nested underneath the layer. Shown in picture two. Is this at all significant in terms of how Photo treats what you're doing? Just an unimportant visual change that's occured due to updates to the software?