marteidu
-
Posts
14 -
Joined
-
Last visited
-
Perspective grid
marteidu replied to Olivier Bujold's topic in Feedback for Affinity Designer V1 on iPad
+1 -
 Komatös reacted to a post in a topic:
Pressure brushes making blobs and dots when drawing with a tablet
Komatös reacted to a post in a topic:
Pressure brushes making blobs and dots when drawing with a tablet
-
Komatos, thank you very much! Issue solved, everything works like a charm.
-
marteidu reacted to a post in a topic:
Pressure brushes making blobs and dots when drawing with a tablet
-
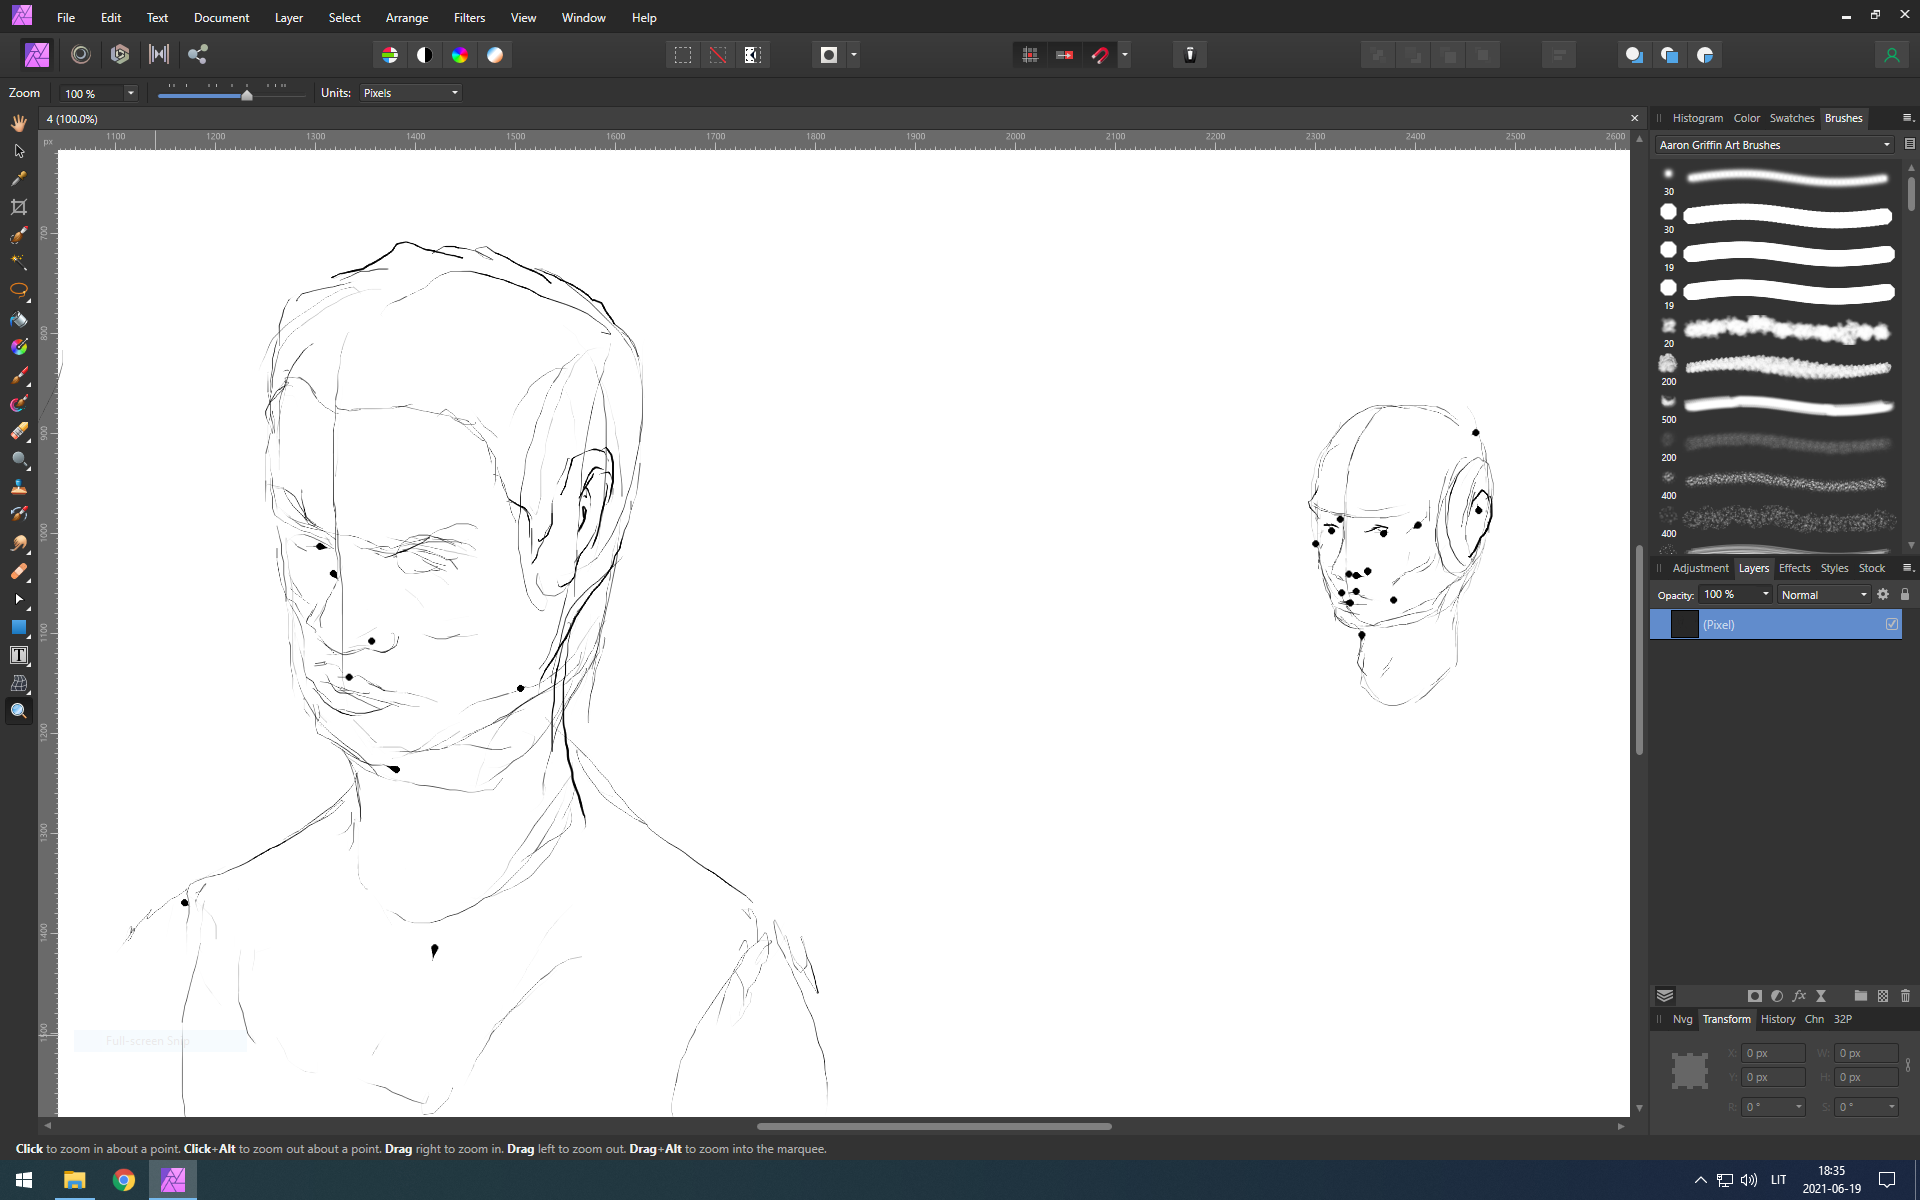
Hello everyone, Whenever I use a brush with pressure-controlled parameters, I get random full-sized dots although I draw very lightly. They seem to be random, however more frequent the less pressure I use. I have tried other apps and the issue is only present in Affinity Photo. I‘m using a Wacom Intuos Pro Medium tablet. I‘ve searched the forums and found that this issue has been present for at least 3 years now, however, I wasn‘t able to find a solution here on the forum. Has this ever been resolved?

-
I spent some time online learning about anti-aliasing. Experienced users probably know this, but I'll post what I found here for anyone else who runs into this same issue. Anti-aliasing is a feature that most design apps have, it reduces the jagged edges of objects by creating additional, semi-transparent lines around objects, making them look smoother. The jagged edges are there in the first place due to the fact that pixels are squares and we're creating round shapes or diagonal lines. Some apps do anti-aliasing better than others, but the visible lines between divided objects are generally expected in any app when working at a lower resolution (or zoomed out). When you zoom closer to the objects that are divided/split, you will see that the gaps between them do not get bigger. That's because you're seeing the object at higher resolution. Three ways to get rid of the gaps between shapes: 1. Export your design at higher resolution. 2. Create same-colour objects under your shapes, move them to cover the gaps. 3. Create a thin stroke/outline on the objects, thus removing the gaps. Reducing the blend gamma (cogwheel icon next to blending modes) also reduces the gaps. If you want to export a vector file for someone else to use, I would suggest to do it without these workarounds, so that the simplest, most basic form is presented to the other designer, who will in turn be able to use one of these methods when exporting.
-
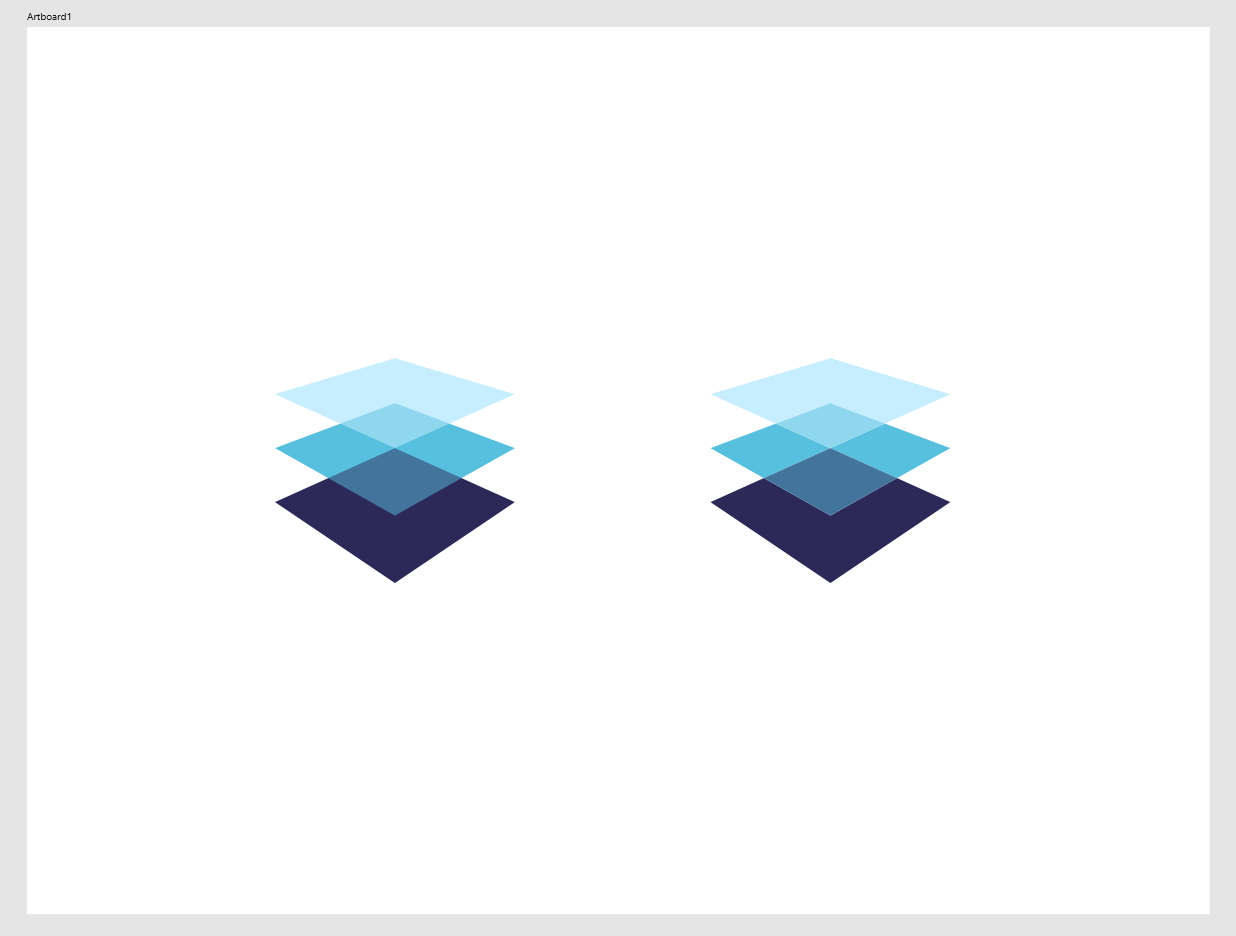
Thank you for your reply, Garry. It seems that this method still does not produce a result as smooth as the one on the left, however it does reduce the gaps.
-
marteidu reacted to a post in a topic:
Anti-aliasing in divided objects
-
Hello everyone, I have a question about anti-aliasing. I've already looked through the forums, but none of the suggestions helped me achieve the desired result. I came up with an illustration for a logo design by using three shapes with different blending modes. However, I would like to simplify and prepare the illustration for export, so I copied it, divided the shapes and gave them the colours that the blending mode gave me in the first version, and changed the blending mode to normal. The anti-aliasing is creating undesired gaps between the shapes. I've seen a couple of suggestions to create an underlying object or give objects an outline in order to avoid this, however for logo designs it's important to keep things as simple and neat as possible. Is there any other way to achieve the result I have on the left without adding extra shapes or outlines to the design? Am I approaching the problem incorrectly? I attached a Designer file and a picture. The illustration on the left is 3 shapes with the average blending mode, the one on the right is 6 separate shapes with a normal blending mode. 1.afdesign
-
marteidu reacted to a post in a topic:
What is the best way to create complex shapes without undesired lines inside?
-
marteidu reacted to a post in a topic:
What is the best way to create complex shapes without undesired lines inside?
-
marteidu reacted to a post in a topic:
What is the best way to create complex shapes without undesired lines inside?
-
marteidu reacted to a post in a topic:
What is the best way to create complex shapes without undesired lines inside?
-
Alfred reacted to a post in a topic:
What is the best way to create complex shapes without undesired lines inside?
-
Move Along People reacted to a post in a topic:
What is the best way to create complex shapes without undesired lines inside?
-
Thank you for your replies. I think the issue was with snapping, I've moved the objects out and back to their place and now the the "add" operation works properly.
-
marteidu reacted to a post in a topic:
What is the best way to create complex shapes without undesired lines inside?
-
marteidu reacted to a post in a topic:
What is the best way to create complex shapes without undesired lines inside?
-
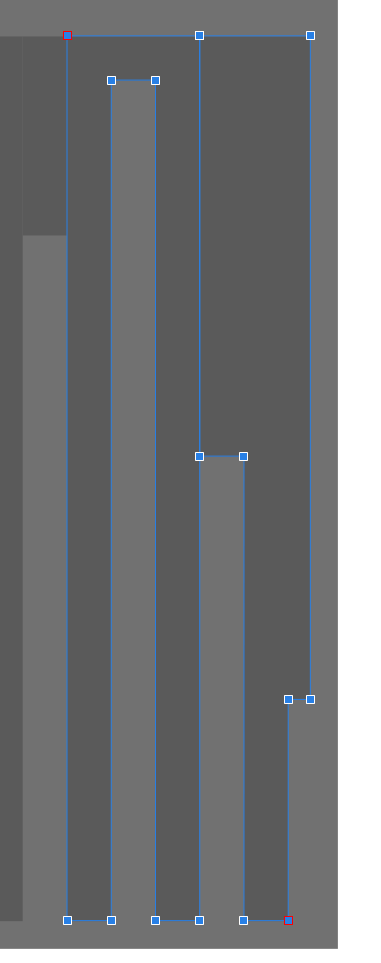
I'm trying to redo it now and am running into the same problem again. How can I join shapes like these? I've seen in forums that the "add" operation should be used, but I always end up with that line in the middle and can't find a way to remove it.
-
 Alfred reacted to a post in a topic:
What is the best way to create complex shapes without undesired lines inside?
Alfred reacted to a post in a topic:
What is the best way to create complex shapes without undesired lines inside?
-
Sure, I've attached the logo I'm working on. When I break the nodes and delete them, it creates weird shapes that are connected to other nodes. TM.afdesign
-
marteidu reacted to a post in a topic:
What is the best way to create complex shapes without undesired lines inside?
-
marteidu reacted to a post in a topic:
What is the best way to create complex shapes without undesired lines inside?
-
Thank you Alfred and v_kyr. Yes, this was what I was intending to do. I was wondering whether there was a way to fix those lines without redoing everything. I'll redo the project I'm currently working on as I've constructed it by creating multiple overlapping rectangles and adding them together.
-
Hello everyone, I have added a picture of my issue. This is a single shape and the rectangles are the empty parts inside it. I would like to remove the lines connecting the rectangles, but breaking the points of the nodes throws everything off. Am I doing something wrong with the boolean operations?
-
Thank you for your replies. Garry, thank you for the GIF demonstration, this workaround is exactly what I was looking for.
-
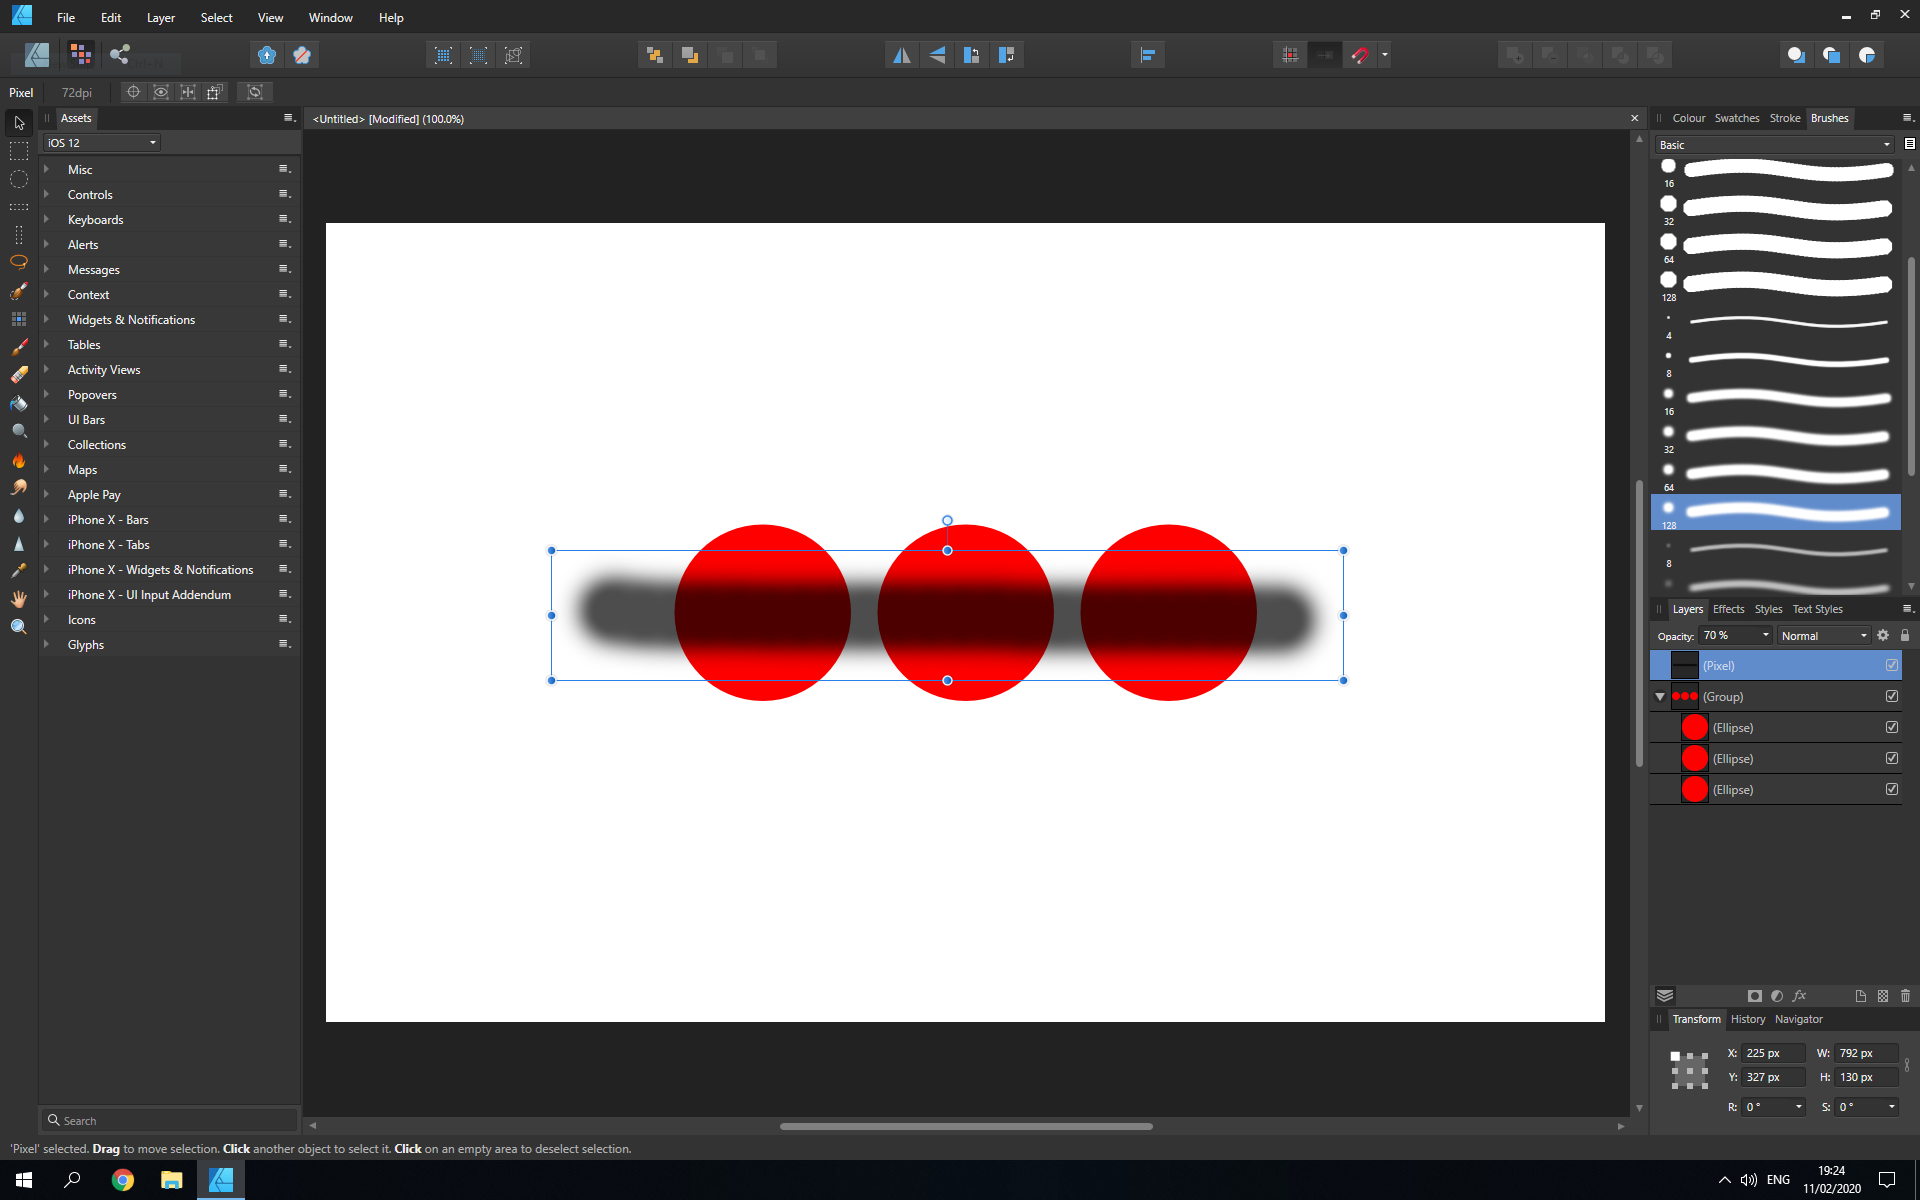
Hello, Garry, Here's an example. Picture 1 - The shadow is on a separate pixel layer, I want it to be inside the grouped elipses. Picture 2 - I added the shadow into the elipse group, nothing happens. Picture 3 - I added the shadow into a separate elipse, the shadow is now inside that elipse. I'm asking if there's any way to add the shadow into the group at once, so that I could adjust the shadow without needing to do it for every object separately. I'm using Affinity Designer on Windows.
-
Hello, everyone, I'm trying to add a pixel shadow layer (made with a brush) inside a group, so that the shadow would only be applied to that group and not the background. However, once I insert it inside the group, nothing happens. If I insert it into one of the grouped objects - it works the way I want it to - the shadow is only applied to that object. Is there any workaround to have this pixel shadow layer be applied to the whole group without having to separately add it to every single object? From what I've found so far searching the forum - this is not possible. I have seen suggestions to duplicate and rasterise the grouped layer and to insert the pixel layer into it. It works, but only on the rasterised layer, so I don't have complete control over the shadows and don't have the choice to tweak my grouped objects. TLDR; What is the best way to create a separate shadow layer that would only affect a specific group?