Ozymandias1972
-
Posts
31 -
Joined
-
Last visited
-
 Dan C reacted to a post in a topic:
anamorphic pictures
Dan C reacted to a post in a topic:
anamorphic pictures
-
NotMyFault reacted to a post in a topic:
anamorphic pictures
-
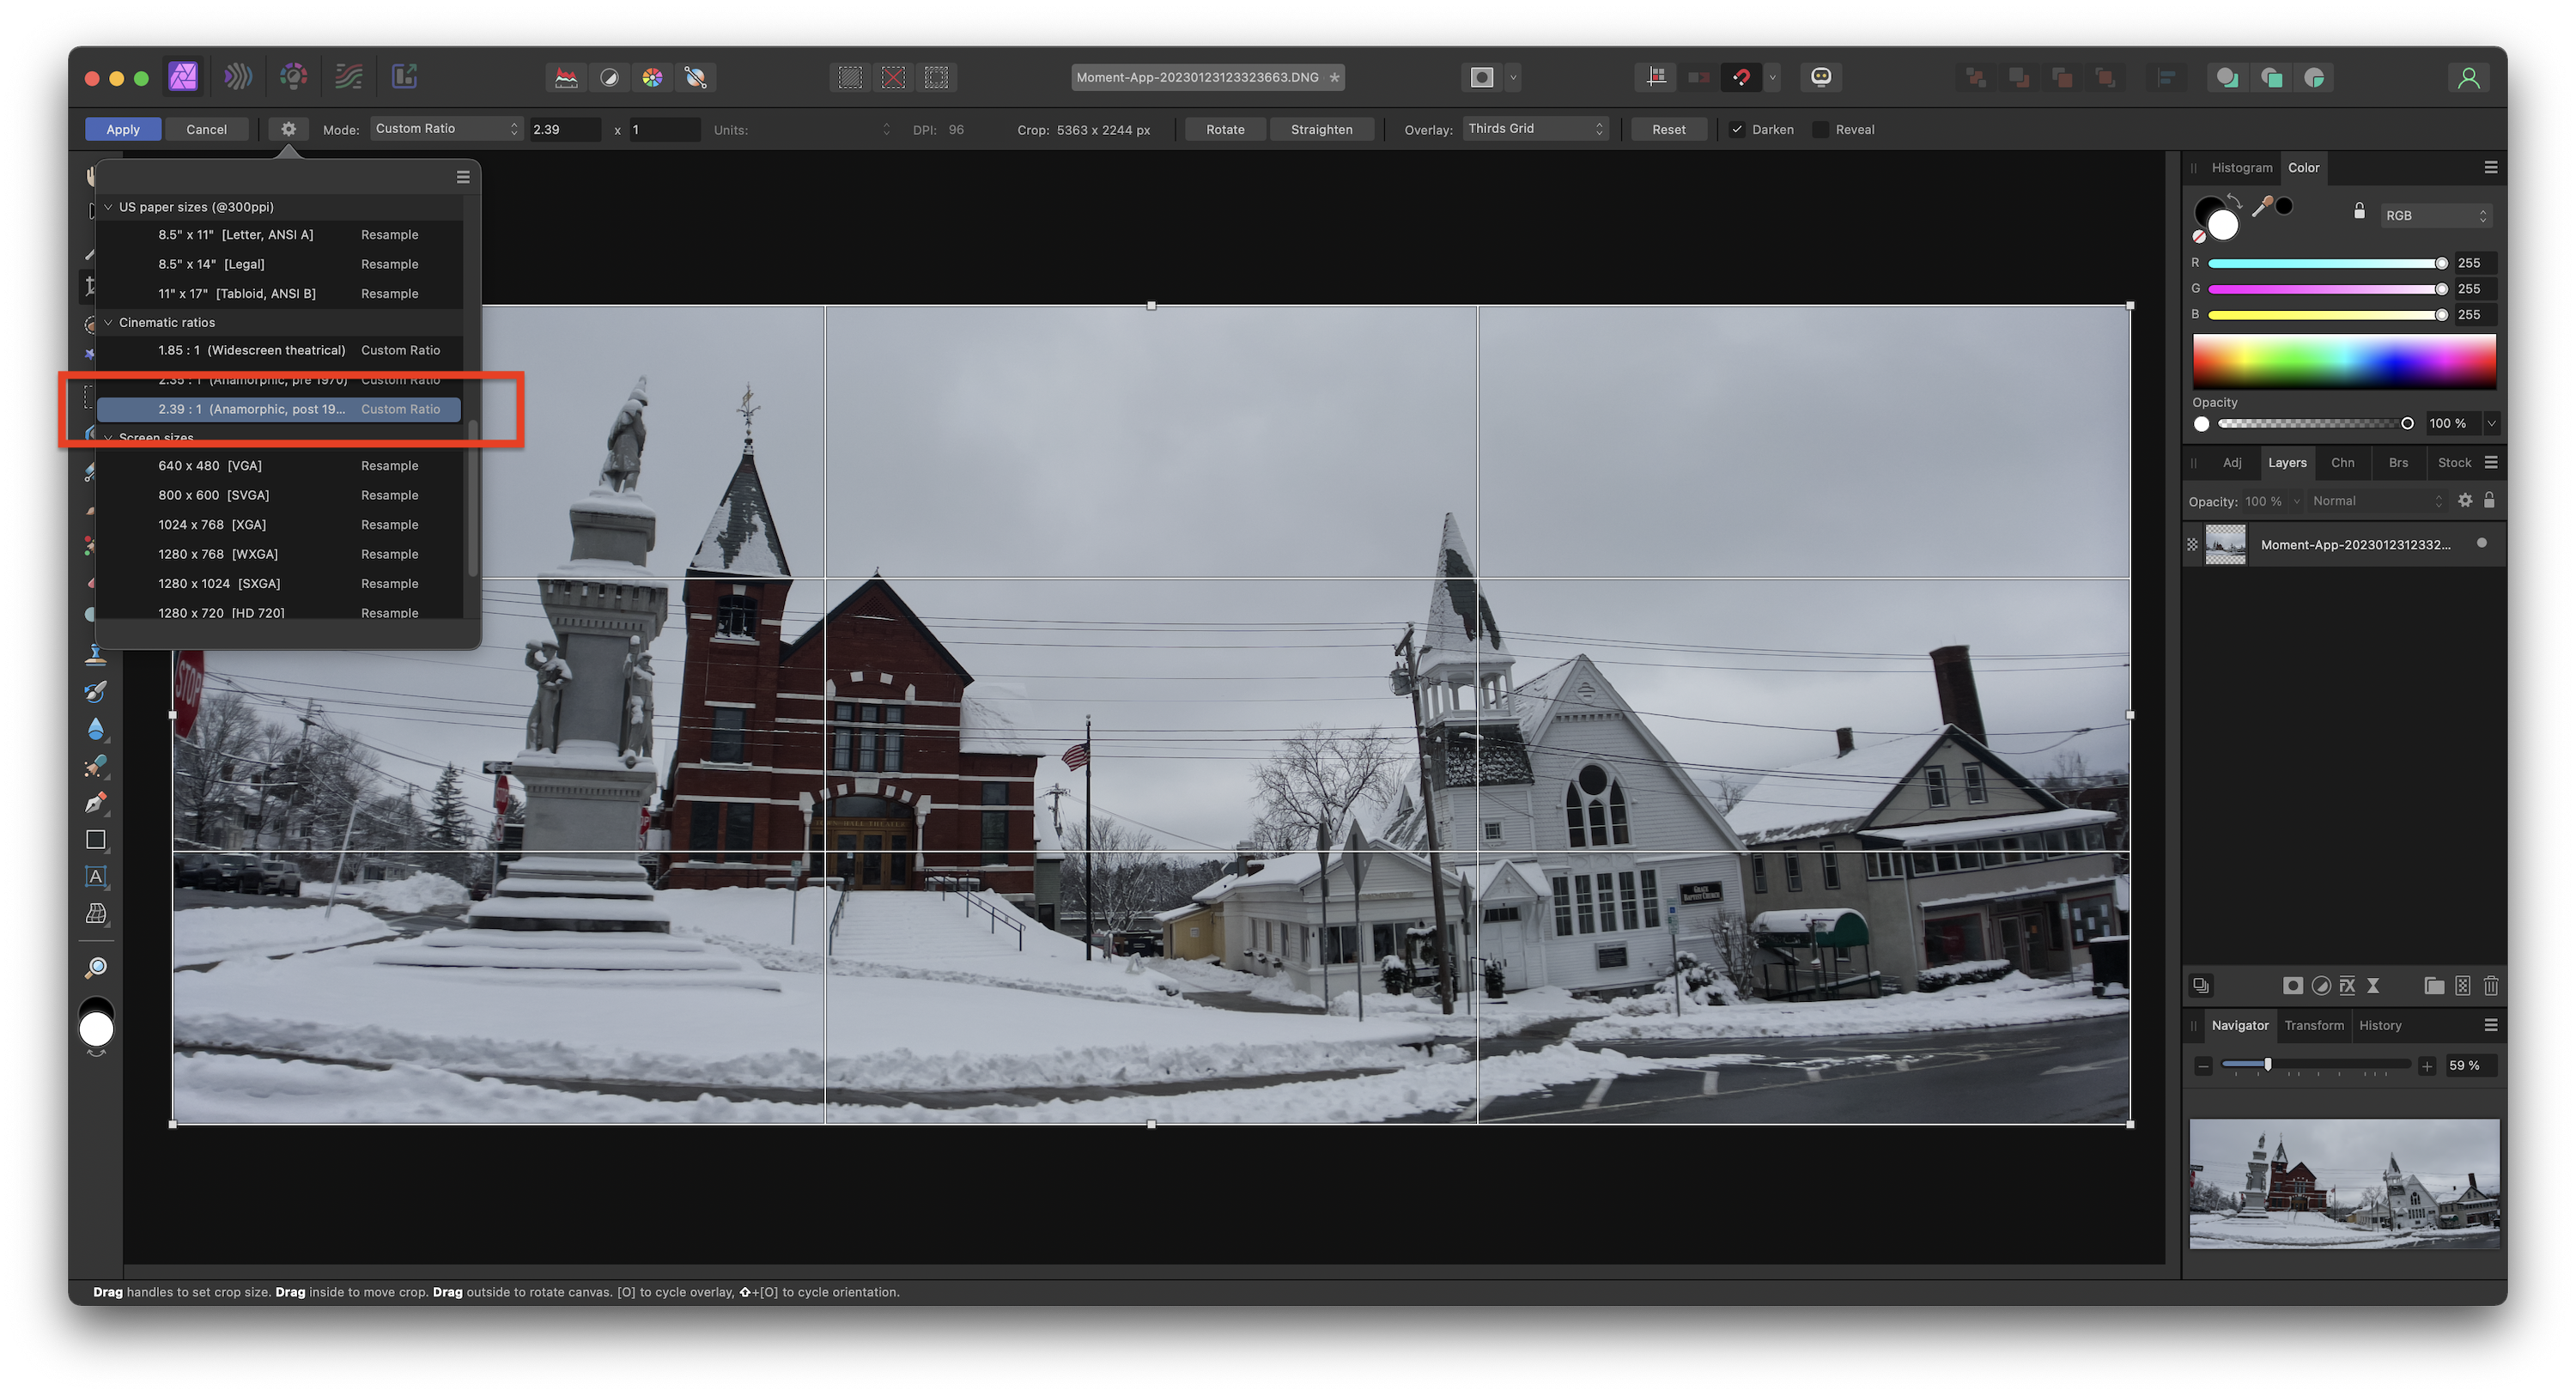
Finally another update. I managed to figure it out after overlooking the 'crop' custom menu. It turns out the 2.39:1 anamorphic ratio is exactly what I was looking for instead of 2:1. Because it models exactly after the 1.33 anamorphic lens I have from Moment when shooting RAW which has to be edited manually. In short, I have to manually crop the RAW version while the JPEG/TIFF images are automatically 'de-squeezed' on the Moment app instead of RAW. It's all good now! The image below is a screenshot showing the menu boxed in red as this was a test shot in Middlebury, Vermont.

-
Nevermind actually. I finally figured it out as I had to manually select the image, go to document resize and multiply 1.33 or 1.77 ( the latter for a bit more stretched out 2:1 appearance ) while unlocking aspect ratio. It works now. Thanks!
-
Just got around to this message. Are you stating that PAR isn't available on Affinity 2.0 but was on 1.0? Otherwise, I'll have to manually 'de-squeeze' the photograph. My question would be is do I click on the image layer or the canvas itself? It seems that if you are going to change the ratio, then the document size or canvas has to change to? Just wondering.
-
Okay. It looks like I do have the click/select on the layer of the image itself to use the transform panel or document re-size. But the RAW anamorphic image looks stretched out originally and not de-squeezed via the Moment camera app ( JPEG and TIFF de-squeezes automatically so no need to manually do it ). When I import the RAW image, it always goes to the editor for 'processing' before using the full Affinity Photo workspace. You can't access the transform or re-size document during the processing phase and available AFTER you process the DNG/RAW images. Also, if you transform or de-squeeze the image to proper anamorphic width and length, the canvas size is unaffected which means you have to change that as well or increase the canvas size for the de-squeezed image to fit in. And there's the little square icon with 9 or 10 pegs on it in the transform tool and I think you have to select where the transform should be at? At center? Upper left corner? There needs to be a better way for Affinity to make it easier to do anamorphic processing for still photos or at least detect it. I'm surprised the Moment lens is not 'detected' by this app let alone other camera lens such as Nikon, Fuji, Apple, etc. I'll see what I can do, though.
-
Ozymandias1972 reacted to a post in a topic:
anamorphic pictures
-
Wait. Do we have to add the multiply * symbol before the 1.33 value or after it in the X and Y fields or just one of them?
-
Okay, this thread does NOT make sense to me at all. There is a problem with the way the UI works on Affinity Photo v2 regarding anamorphic de-squeezing. First off, I own a Moment Anamorphic lens for the iPhone 13 Pro and wanted to shoot ProRAW which works, BUT it's not de-squeezed. So I have to import it into Affinity Photo to do it manually. But when I import the DNG file, it goes into Raw editing mode automatically. The instructions in the above posts in this thread do NOT clearly answer the problem because it is 1.33x format. Every time I tried to multiply it on the Transform box, it does NOT look right. When I shoot anamorphic in JPEG or TIFF format, it looks exactly how it's supposed to be de-squeezed, but it won't do it in RAW or ProRAW format. I do see Photo has a 16:9 : 1 crop option but that's NOT the solution which CROPS and does not 'transform'. Why does the transform tool NOT exist in the RAW editor but only in the main application?
-
I think they will update Designer in the future as it already had a patch along with other apps. As for vector trace, I've never had a problem using Adobe Capture as a go-around to export an SVG to Designer on the Mac. The rest of Designer is fine but for vector trace, if I have to, is done on Adobe Capture which is a free app for iOS ( iPhone and iPad ). It works for me every time. Unless you're on Windows, then use Inkscape or other vector apps as a go around.
-
Sure, a flatbed scanner will do the job when you're in the office or home studio. However, mobile wise, if you want to scan, there's SwiftScan for the iPhone which I use a lot. Now, if you had a camera stand and a crane rod with the adapter to hold the phone while laying the artwork on the floor or table, you can use a bluetooth remote to take photos/scans that way. I have the stand/crane and it works. However, if you have a high end camera like a DSLR/mirrorless, that would do the job better than a smartphone. However, working with this many layers on 600 dpi, then you definitely need to do that on the desktop or laptop. The iPad version of Affinity Designer works well but it depends on the available RAM and storage space to do the job. If you're doing 16 x 19, then the desktop with an external monitor will be much better of an experience so you can view everything at once, one with preview at the window fit size and the other full size in real time. That's how I do it.
-
Adobe Capture can export to SVG once you save it to the library. Adobe Capture can access the camera or the photo album and once you select the vector image that's traced, you can export it as SVG, PDF, the image itself natively. I can take a drawing I did from my sketchbook, snap a clean photo, import it to Capture and then export it via AirDrop to my iMac as SVG. Or to Files on the iPad for any vector app to import. The reason I have Capture is because I had an Adobe ID which is free but dropped Creative Suite due to the ridiculous monthly subscription plan that makes no sense. I always use a dark background so that it scans in only the white paper and the black ink using the camera when I have to. There's nothing unprofessional about its results because it can be cleaned up during production ( as in using Designer ). Also, when I do my artwork digitally on iPad such as Procreate, I can share it to Capture to be converted to SVG. In fact, Affinity Designer works on iPad so there's that, although I prefer the desktop version since it runs better and easier to deal with when using two monitors. And it's not limited to iPhone but works with iPad. Would it be nice if vector trace was in Affinity? Sure, but this is the best workaround I can find. This is the post I made regarding Adobe Capture in detail: And this one: I eventually solved the problem after doing the shirt so now I know what to do. Hope this clears it up.
-
Exactly! I've been using Adobe Capture for the last two years now as my 'go around' technique and this trick works every time. SVG will import to Designer or Publisher, although I recommend the former to be sure so as to save the template. I understand the frustration on the lack of vector trace for Designer and would've like it had they built it in, but for now Adobe Capture is free and does get the job done.
-
Ozymandias1972 reacted to a post in a topic:
AutoTrace (convert raster image to vector)
-
Ozymandias1972 reacted to a post in a topic:
AutoTrace (convert raster image to vector)
-
Ozymandias1972 reacted to a post in a topic:
AutoTrace (convert raster image to vector)
-
Actually, I found that using Adobe Capture has been the best solution in my workflow using AirDrop which works wonders. I recently updated to Big Sur with a new 2019 iMac I got a year ago using Affinity Designer and it's been very good. Especially given the fact that with AirDrop's ease of use, I used to go with Dropbox as a go around which was a pain in the neck. This was a thread I posted a year ago about this issue: I hope this may help although SuperVectorizer looks great as an alternative.
-
Ozymandias1972 reacted to a post in a topic:
AutoTrace (convert raster image to vector)
-
Ozymandias1972 reacted to a post in a topic:
AutoTrace (convert raster image to vector)
-
Ozymandias1972 reacted to a post in a topic:
AutoTrace (convert raster image to vector)
-
Excellent! That's actually a good approach and I'll give a try. Thanks!
-
Ozymandias1972 reacted to a post in a topic:
Anamorphic letterbox on Affinity Photo
-
You're right. My bad, it's larger than 16:9 as I was thinking of a different ratio. But yes, this is exactly what I was talking about with the black bars. It looks like you created a black background layer with a snap to grid option? I suppose I could create a template or preset document to use letterboxes for future use.
-
Ozymandias1972 reacted to a post in a topic:
Anamorphic letterbox on Affinity Photo
-
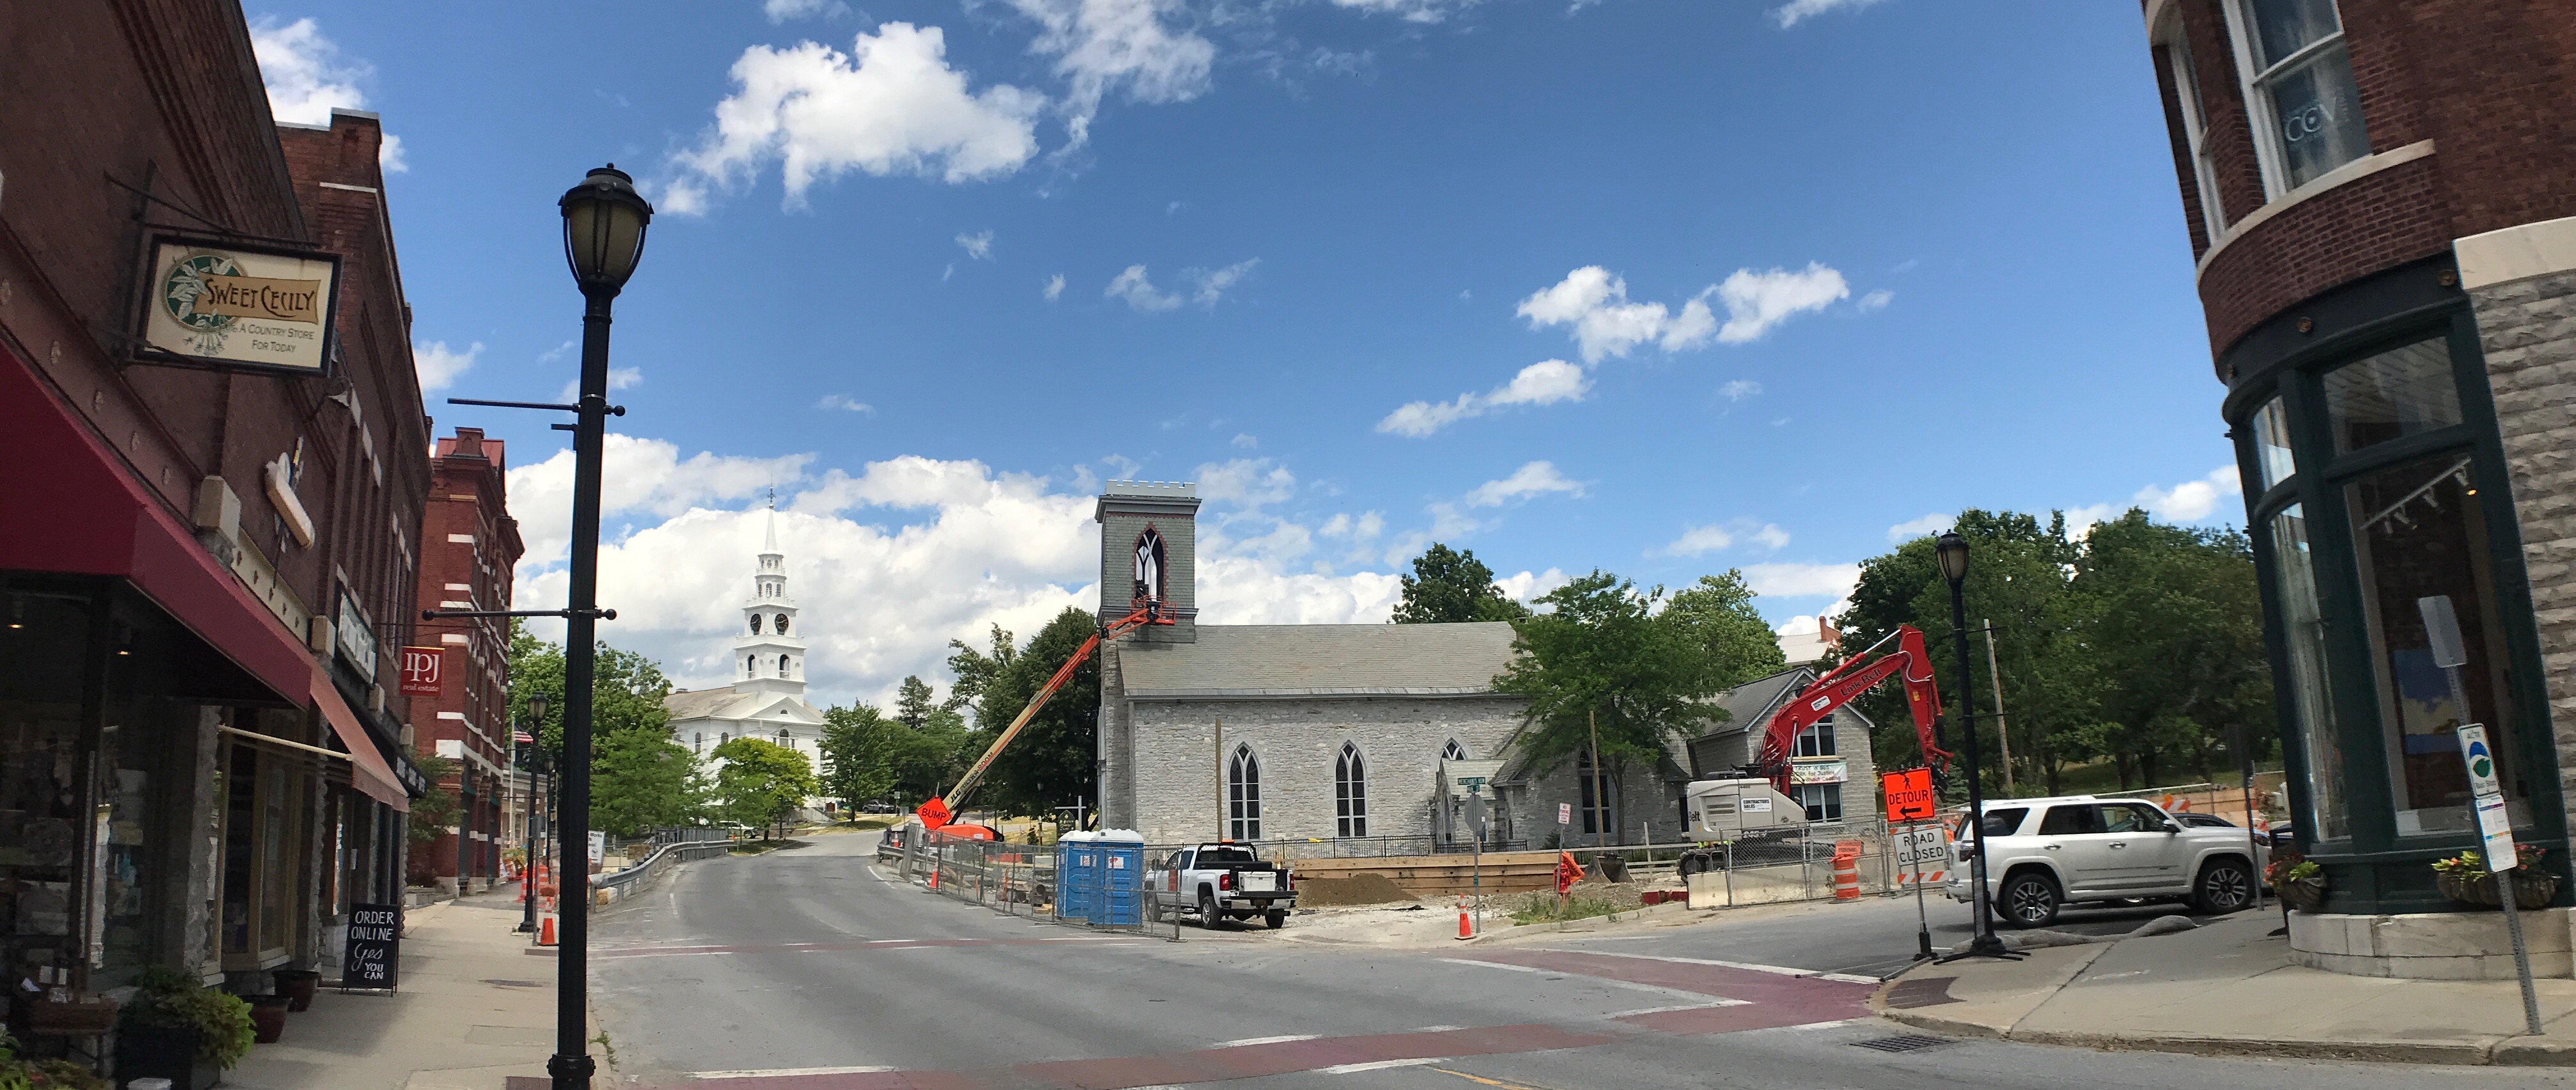
Sure. I'll give you two samples of recent shoots in my town in the New England region. The first shows my downtown area and the other is the trees with lens flare coming from the sun using the Moment anamorphic lens. Each appears to have a 16:9 ratio. What I'm trying to figure out is how to add letterboxes at the top and bottom for a 'cinematic' effect via Affinity Photo. Each image is 5363 x 2270 pixels at 72dpi. With video, it's easy for me to desqueeze using a specific app and then import to Da Vinci Resolve to be exported properly after editing. But an anamorphic photo is a different situation so I wasn't sure if one is supposed to add letterboxes or just simply create a black background layer and put the image on top of it which is probably the only way to do it. When previewing the photos or video on iPhone, letterboxes are already shown when anamorphic is shot but once it's Airdropped to the Mac, you don't see them unless they are processed through an image or video editing app. Thanks!
-
If I recall, it was the default vector brushes, not the Vector Pencil. Basically, I would tap on the Vector brush tool and some times the lag occurs even with the basic strokes. Even the other brushes with inking and other texture effects would cause lag or glitch. I don't see any issues on the desktop version but only on my original 12.9 iPad Pro. When I draw with vector brushes, it needs to feel smooth and consistent. Even if I used the stabilizer, some of the lag can be noticeable. Sometimes the Vector brush would work fine at first and then lag after several strokes later. It should be smooth, clean, lightweight and fast considering it's a vector path despite working on 300 DPI for print purposes. It's especially true when the ends of my stroke lines have a wispy look to it as if using a #2 brush for comics. Based on my experience, Clip Studio Paint utilizing a vector layer, Adobe Fresco ( vector brush mode ), and/or Procreate do a nice job with the stroke lines. Sometimes if the Affinity vector brush lags or fails me, I often find myself having to switch to Adobe Fresco to use the vector brush or Procreate on my iPad for consistency and then export it out as SVG via Adobe Capture to Affinity Designer to tweak. As an additional note, I do NOT have any custom brushes imported to Affinity Designer on iOS. At the moment, I'm using an older Wacom Intuos 4 which makes it more difficult to draw consistently since it doesn't have a multi-touch feature so I plan on getting a display tablet later on for the desktop.