Yonder
-
Posts
11 -
Joined
-
Last visited
-
 Yonder reacted to a post in a topic:
Affinity Designer 2 - Contour Tool Doesn't Work Well on Certain Typefaces
Yonder reacted to a post in a topic:
Affinity Designer 2 - Contour Tool Doesn't Work Well on Certain Typefaces
-
NathanC reacted to a post in a topic:
Affinity Designer 2 - Contour Tool Doesn't Work Well on Certain Typefaces
-
@NathanC The font in the example is called Shrikhand. I'm unable to test every font I have installed, but it also happens with more common fonts such as Comic Sans, Courier New, Georgia, and Times New Roman. I've tested these fonts in Designer 1 and did not have the same problem. I'm also on Windows 10, in case that may have anything to do with it.
-
I'm having a problem where the contour tool doesn't apply the radius to the closed/inside part of letters at certain contour radiuses with certain typefaces. This seems to only be a problem with Affinity Designer 2. Testing with Affinity Designer 1 with the same typeface and letter, the contour tool is working as it should be. The same result happens if I make the letter, convert it to curves, add a stroke, then expand the stroke. The stroke on the inside disappears. The attached videos show these two things happening. First video is contour tool, second is expand stroke, third is Affinity Designer 1. ContourTool.mp4 ExpandStroke.mp4 Designer1.mp4
-
 Yonder reacted to a post in a topic:
Exported image looks different than how the image looks in working file.
Yonder reacted to a post in a topic:
Exported image looks different than how the image looks in working file.
-
Yonder reacted to a post in a topic:
Exported image looks different than how the image looks in working file.
-
Yonder reacted to a post in a topic:
Exported image looks different than how the image looks in working file.
-
Yonder reacted to a post in a topic:
Exported image looks different than how the image looks in working file.
-
NotMyFault reacted to a post in a topic:
Exported image looks different than how the image looks in working file.
-
Yonder reacted to a post in a topic:
True accurate preview for Photo
-
Thank you very much for your help, I'll give your suggestions a try. The only problem, and this will most likely be an ongoing problem unless there's a fix, is that rasterizing the base image layer, that being 5.PNG, changes how the image looks. Certain small details are lost, and at the size I'm working at, those details can make a big difference. But I'm sure I'll be able to find a work around for that and as I said earlier, this doesn't happen with every file like this one. Thanks again for your help, and I'll definitely give your feature request a vote.
-
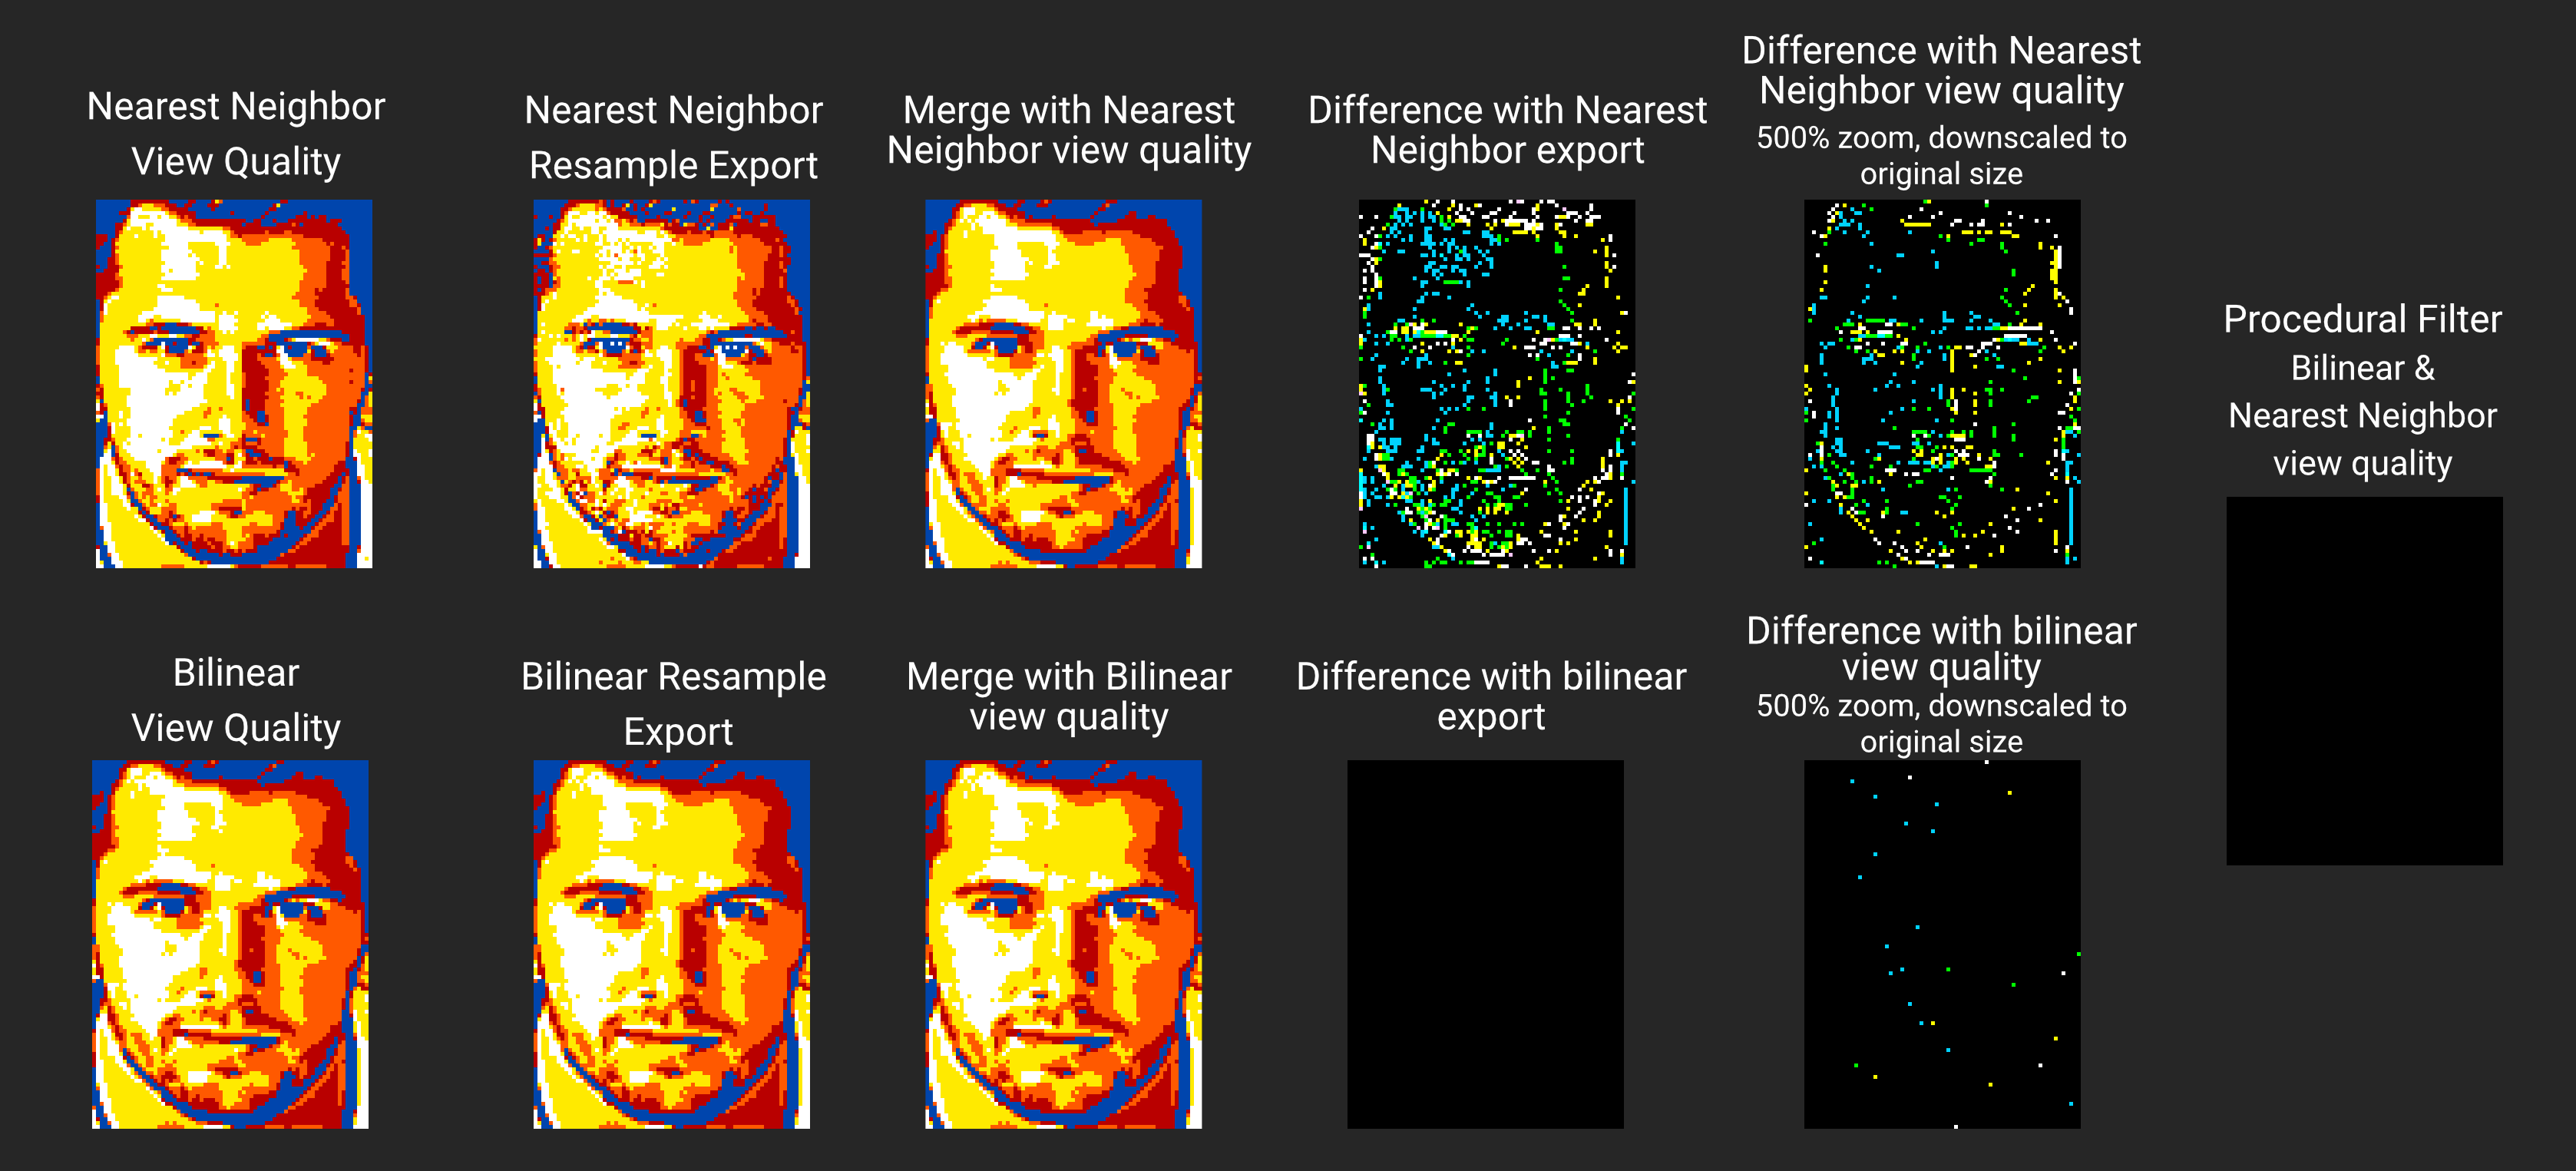
Thanks for the tips, here's what I have. I put together a comparison between nearest neighbor and bilinear view quality and resampling at export. Unless otherwise noted, all of these exports were at the original size, 72x96, all that's changed is whether the resampling was bilinear or nearest neighbor. I've also attached the working file. SampleFile.afphoto

-
The original size is 72x96 and that's the size it's being exported at. The problem isn't the resampling, the example I posted is what the image looks like after exporting with no resampling, it was enlarged after being exported. To me, it seems that the noise reduction layer isn't being exported properly.
-
Another thing is that this doesn't always happen, I work with a lot of files set up pretty much the same as this one and just export it as a PNG (no scaling) and have no issues with them looking different. This file for some reason isn't doing what I'm expecting it to do.
-
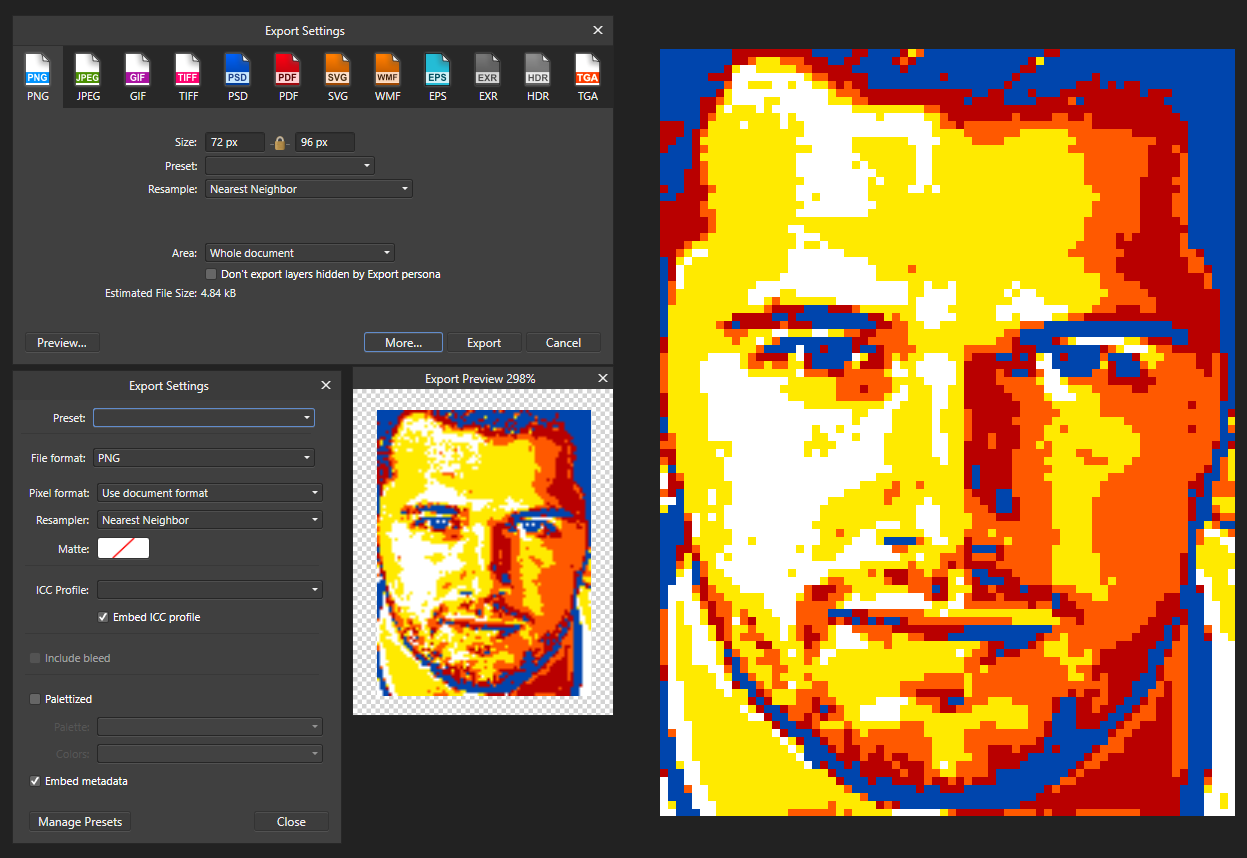
Here's the export settings with the preview(though the preview isn't scaled and resampled with nearest neighbor). The export preview shows a different image than how the working file looks.
-
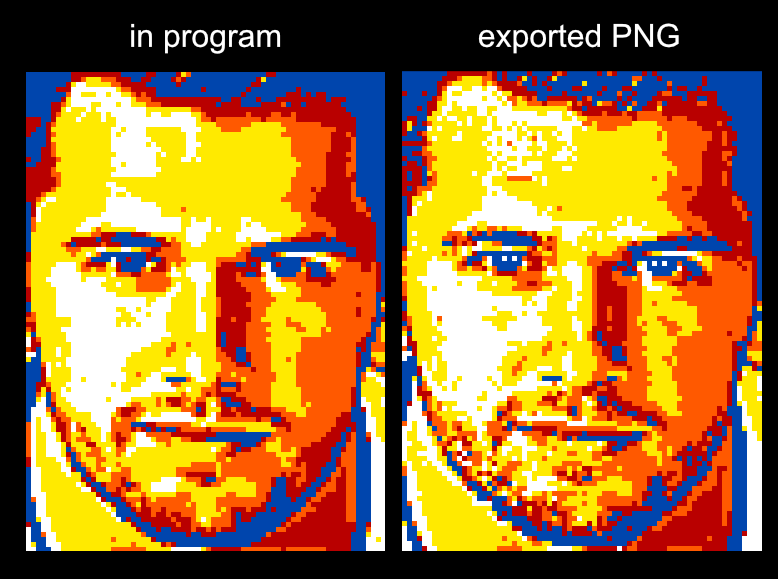
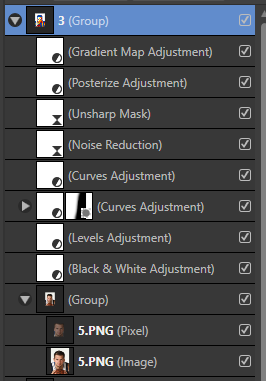
I'm having a problem where what the exported image looks like is not what the image looks like in the working file. I'm working at a 1:1 pixel scale and need what I'm exporting to be exactly what I'm seeing in the working file. Rasterizing the layer group also makes the image look different from what it looked like pre-rasterize. Attached is a comparison, one being a screenshot of what the image looks like in the working file preview and the other is what the image looks like after being exported as a PNG with Nearest Neighbor resampling. Also attached is a screenshot of my layers. My view quality in the preferences is also set to Nearest Neighbor.
-
I've noticed that with Nvidia G-Sync enabled (and this is G-Sync on a FreeSync monitor), the brightness of the UI fluctuates slightly when there's cursor movement within Affinity Photo. When G-Sync is disabled the problem stops. I've tried to record a video of the problem but it doesn't show in the recording.
-
Here's a video of the problem, take note of the file size. 2019-08-07 08-13-07.mp4
-
I'm having an issue when copy/pasting from one canvas to another. I have a 2400 DPI scan of a photo that's roughly 2.5 x 2.5 in. or 6000 x 6000px and I'm trying to copy it to a 5 x7 in. 300 DPI canvas. The problem I'm running into is when I paste it to that 5 x7 in. 300 DPI canvas it automatically resizes it to 2.5 x 2.5 in. on that canvas rather than staying the original size of the scan. I want to be able to resize it myself after pasting. I don't recall this happening in prior versions, is there a setting to stop this from happening? I can't find anything in the preferences. Also, I found that Paste Special > as a PNG doesn't resize it, but this isn't helpful if I'm trying to copy/paste multiple layers.