RomanNYC
-
Posts
19 -
Joined
-
Last visited
Everything posted by RomanNYC
-
Yes exactly. Let's keep it where I posted originally. When I see people reply elsewhere or ask questions -- I just reply wherever I see them post. (I already replied to the post in the other thread, FYI)
- 10 replies
-
- 1
-

-
- saturation
- vibrance
- (and 2 more)
-
Layer Behavior
RomanNYC replied to RomanNYC's topic in Pre-V2 Archive of Affinity on Desktop Questions (macOS and Windows)
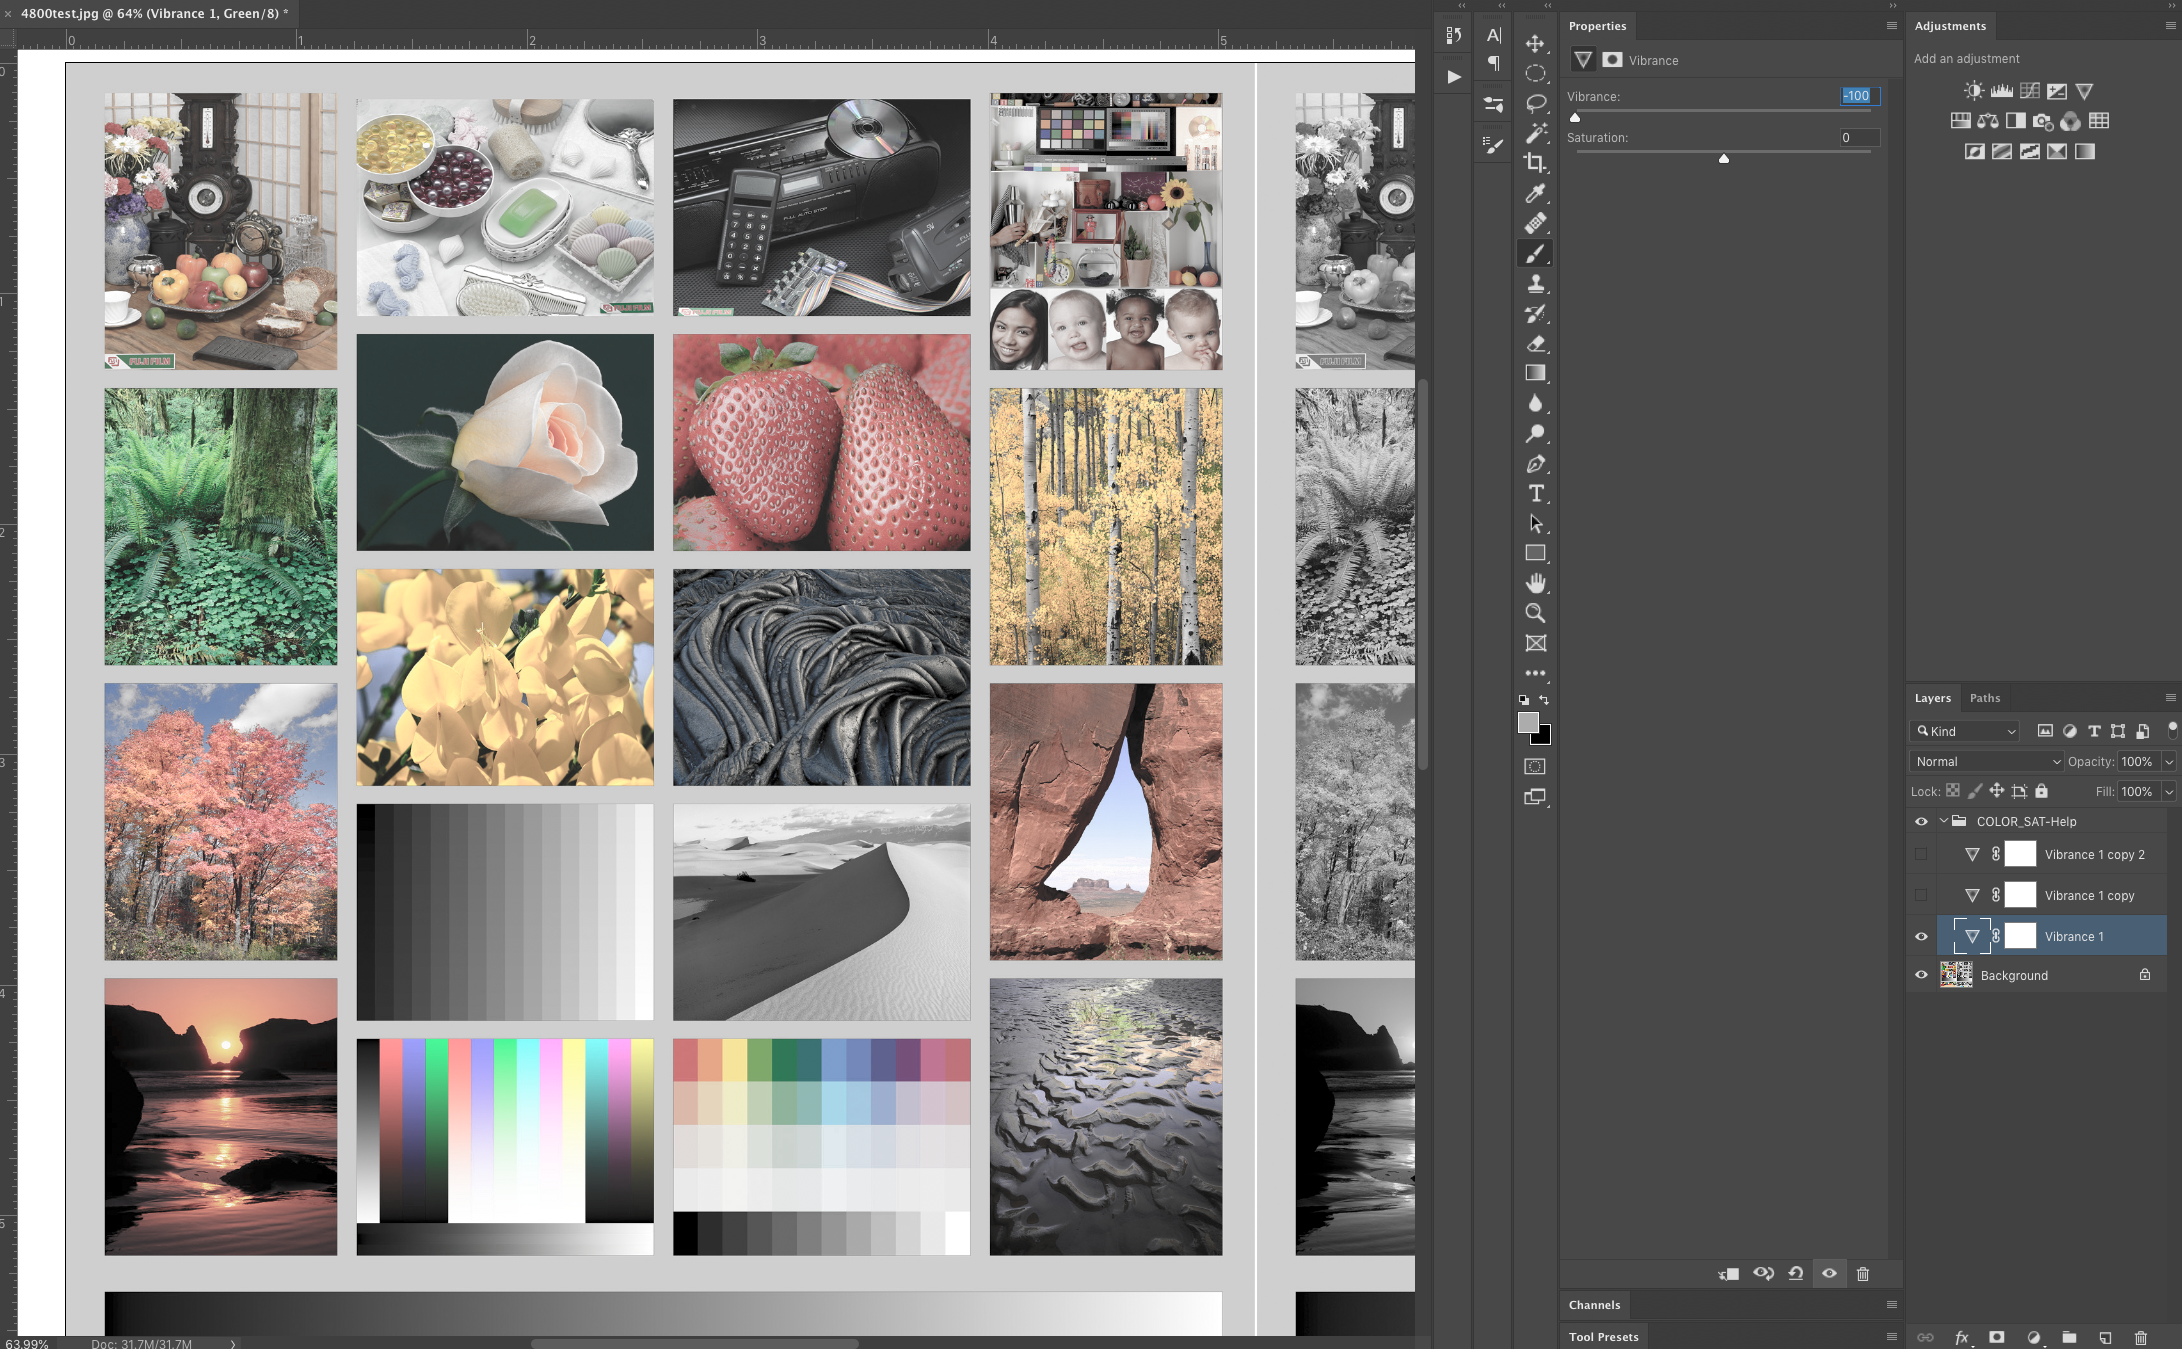
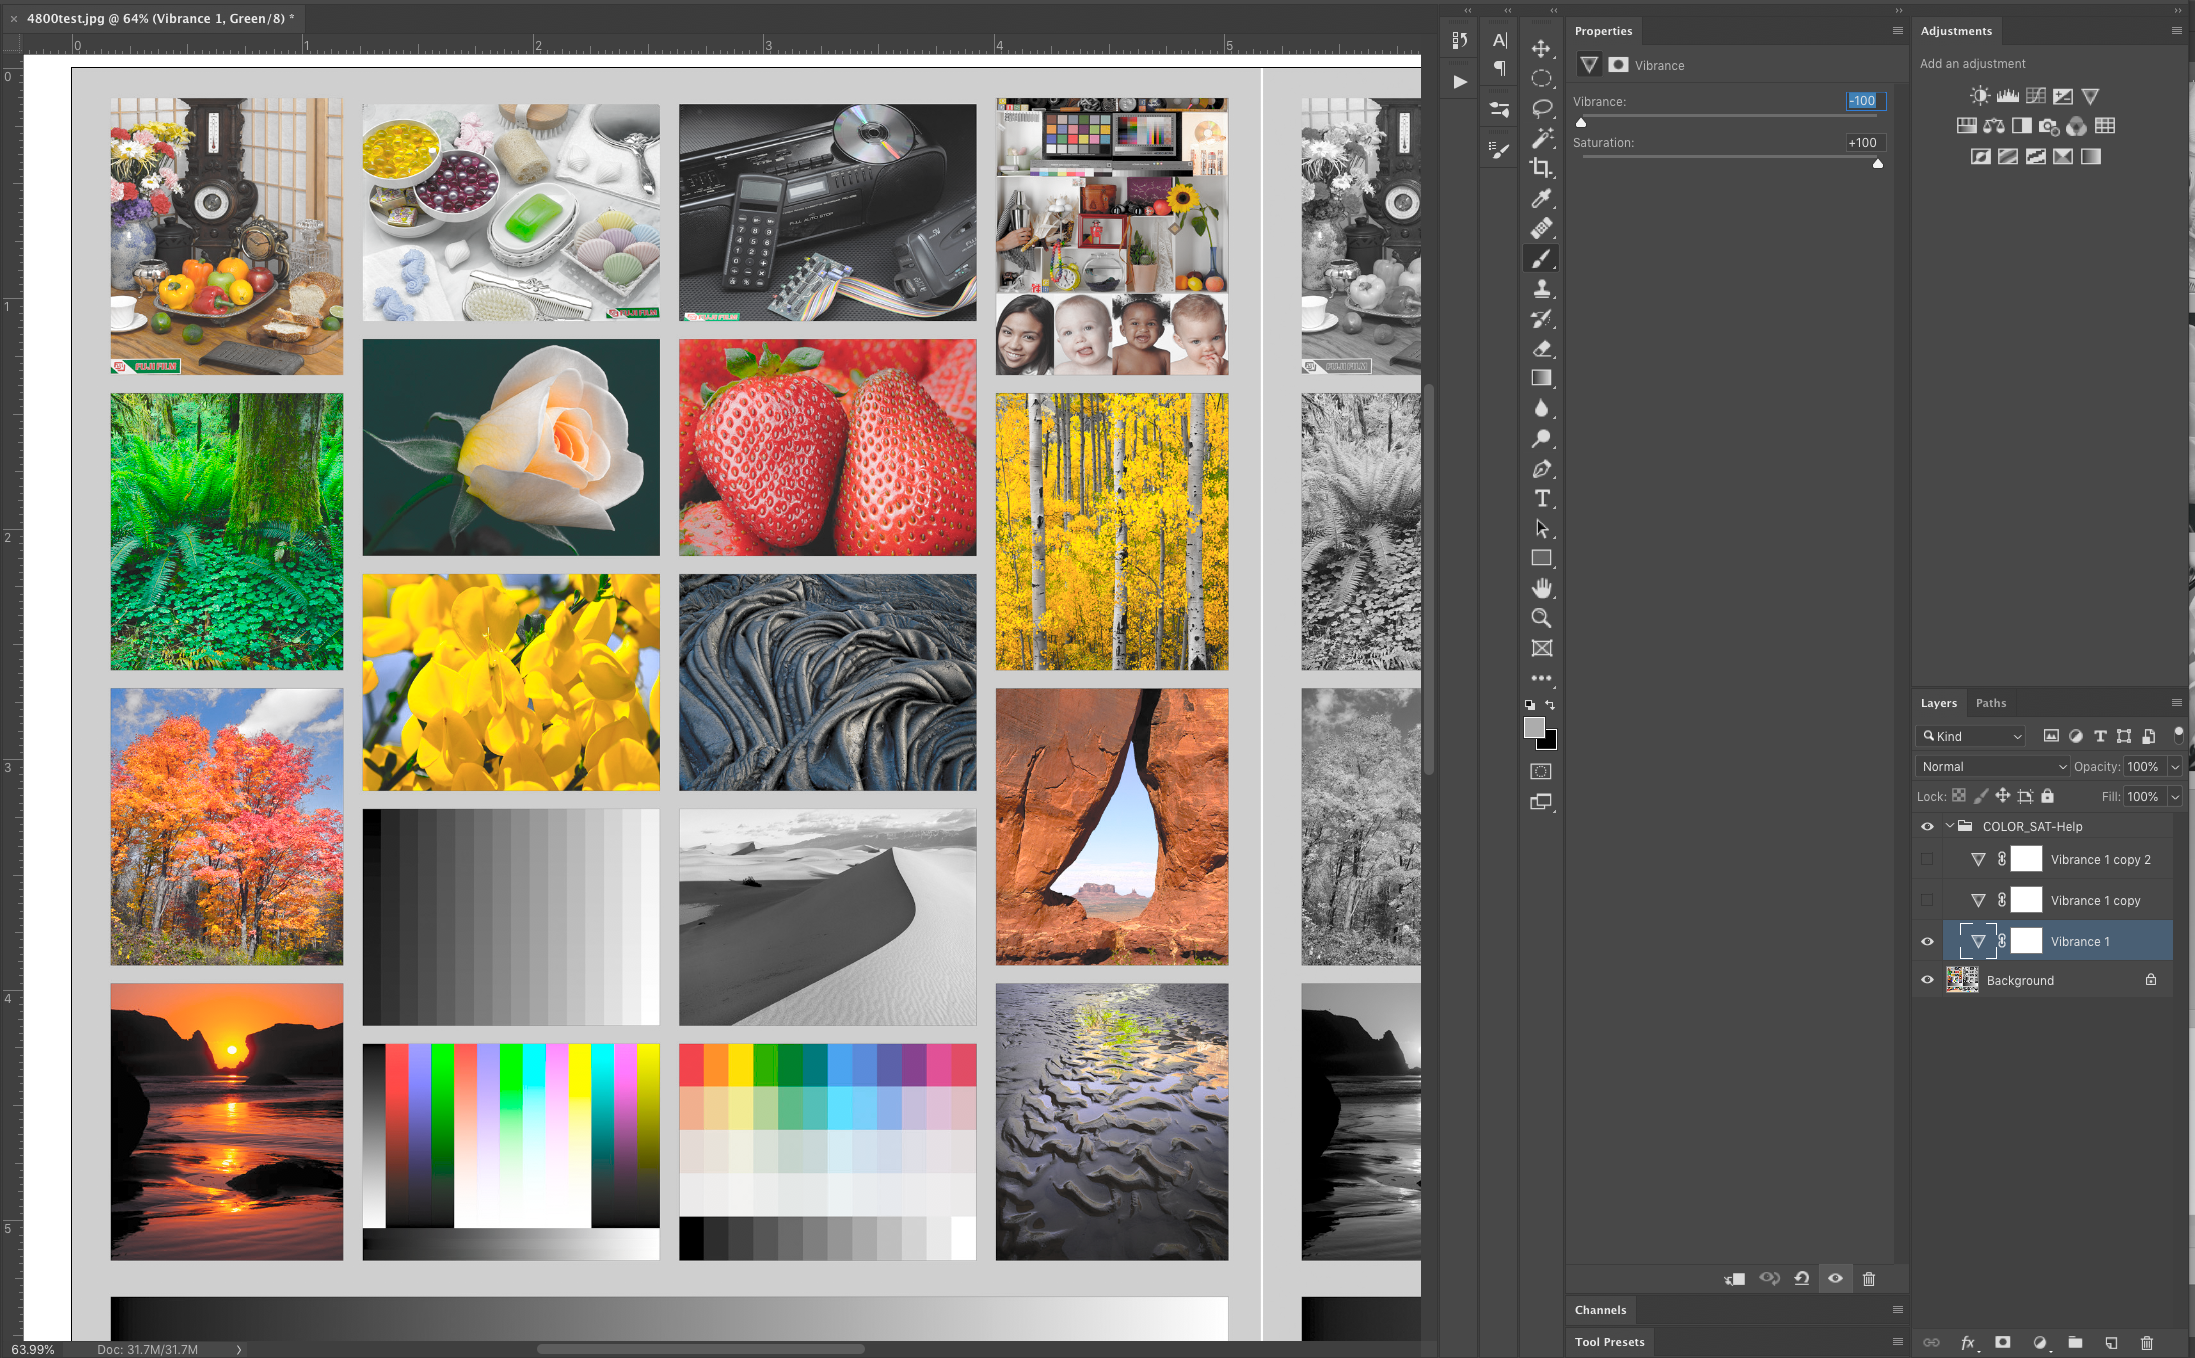
Attached: original file as JPEG, aRGB color space original file as JPEF, aRGB color space, with vib at -100 and sat at +100 (3 times in a row) -- just like in my original PSD upload. You can try to do the same settings in Affinity Photo, whereas I did the above in Photoshop and can't figure out how to reproduce the same result through these same adjustments.
-
Yes that’s correct. A TIFF file — it’s a printing test image — and saved as PSD since that what was asked I supply by a moderator. I realize the same results myself, when doing the same slider adjustments in Affinity. My concern was that matching these “simple” sliders in the vibrance adjustment in both photoshop and affinity yield different results. I am interested in why but ultimately only care about achieving the same result in Affinity as in Photoshop. So, it’s not possible you’re saying? - Roman
-
Layer Behavior
RomanNYC replied to RomanNYC's topic in Pre-V2 Archive of Affinity on Desktop Questions (macOS and Windows)
Right. But they don’t reproduce the same results. I can not achieve the same in AP. That’s what I am asking about. If you know a way please let me know. -
Thanks for trying it out. I included the PSDs that use TIFF files. I mainly would use a 16bit TIFF. But I’ve also used a JPG. The behavior is different. My PNG file format is just default for my Mac’s screenshots, meant to show the use of PS and AP only. Ultimately I want a way to see the most saturated colors. It worked all these years with PS and not sure why it wouldn’t with AP.
-
Have you had any luck figuring this out? I'd love this to work, even if it's a work-around.
-
Layer Behavior
RomanNYC replied to RomanNYC's topic in Pre-V2 Archive of Affinity on Desktop Questions (macOS and Windows)
Any update Callum with the vibrance, the skin-retouch and check layer PSD's I attached to this thread? Thank you. Roman -
Yea I did that before too and was surprised. According to the article on Adobe's vibrance adjustment I cited above: Vibrance: Adjusts the saturation so that clipping is minimized as colors approach full saturation. This setting changes the saturation of all lower-saturated colors with less effect on the higher-saturated colors. Vibrance also prevents skin tones from becoming oversaturated. Not sure what Affinity does... I was just hoping it would be similar or closer to the same results. I encountered the same issue with the other two things I did often with Photoshop (in my above post with PSD files).
-
I found this: https://www.photo-mark.com/notes/analyzing-photoshop-vibrance-and-saturation/ I think the way Adobe uses the vibrance adjustment is just different. But I wish there was a way to accomplish what I had been doing in photoshop with Affinity Photo. Is there a work-around or an alternate way to arrive at the same result?
-
Layer Behavior
RomanNYC replied to RomanNYC's topic in Pre-V2 Archive of Affinity on Desktop Questions (macOS and Windows)
I posted the two files... but I also have two other Photoshop Actions that are a bit more complicated -- but I can't replicate the effect. Can I include those two in a PSD file? skin-retouch.psd check-layer.psd -
Layer Behavior
RomanNYC replied to RomanNYC's topic in Pre-V2 Archive of Affinity on Desktop Questions (macOS and Windows)
sure thing vibrance.psd vibrance.afphoto -
thats weird. maybe the new build isn't fully cooked with vibrance? not sure.
- 10 replies
-
- 1
-
-
- saturation
- vibrance
- (and 2 more)
-
Layer Behavior
RomanNYC replied to RomanNYC's topic in Pre-V2 Archive of Affinity on Desktop Questions (macOS and Windows)
I use this effect to see the strongest color in the scene - i mean if there is a similar effect in Affinity, please let me know. I do have two other much more complicated questions and layers that has to do with a series of check layers and also a skin smoothing thing. But I am starting off with this relatively simple issue. -
Layer Behavior
RomanNYC replied to RomanNYC's topic in Pre-V2 Archive of Affinity on Desktop Questions (macOS and Windows)
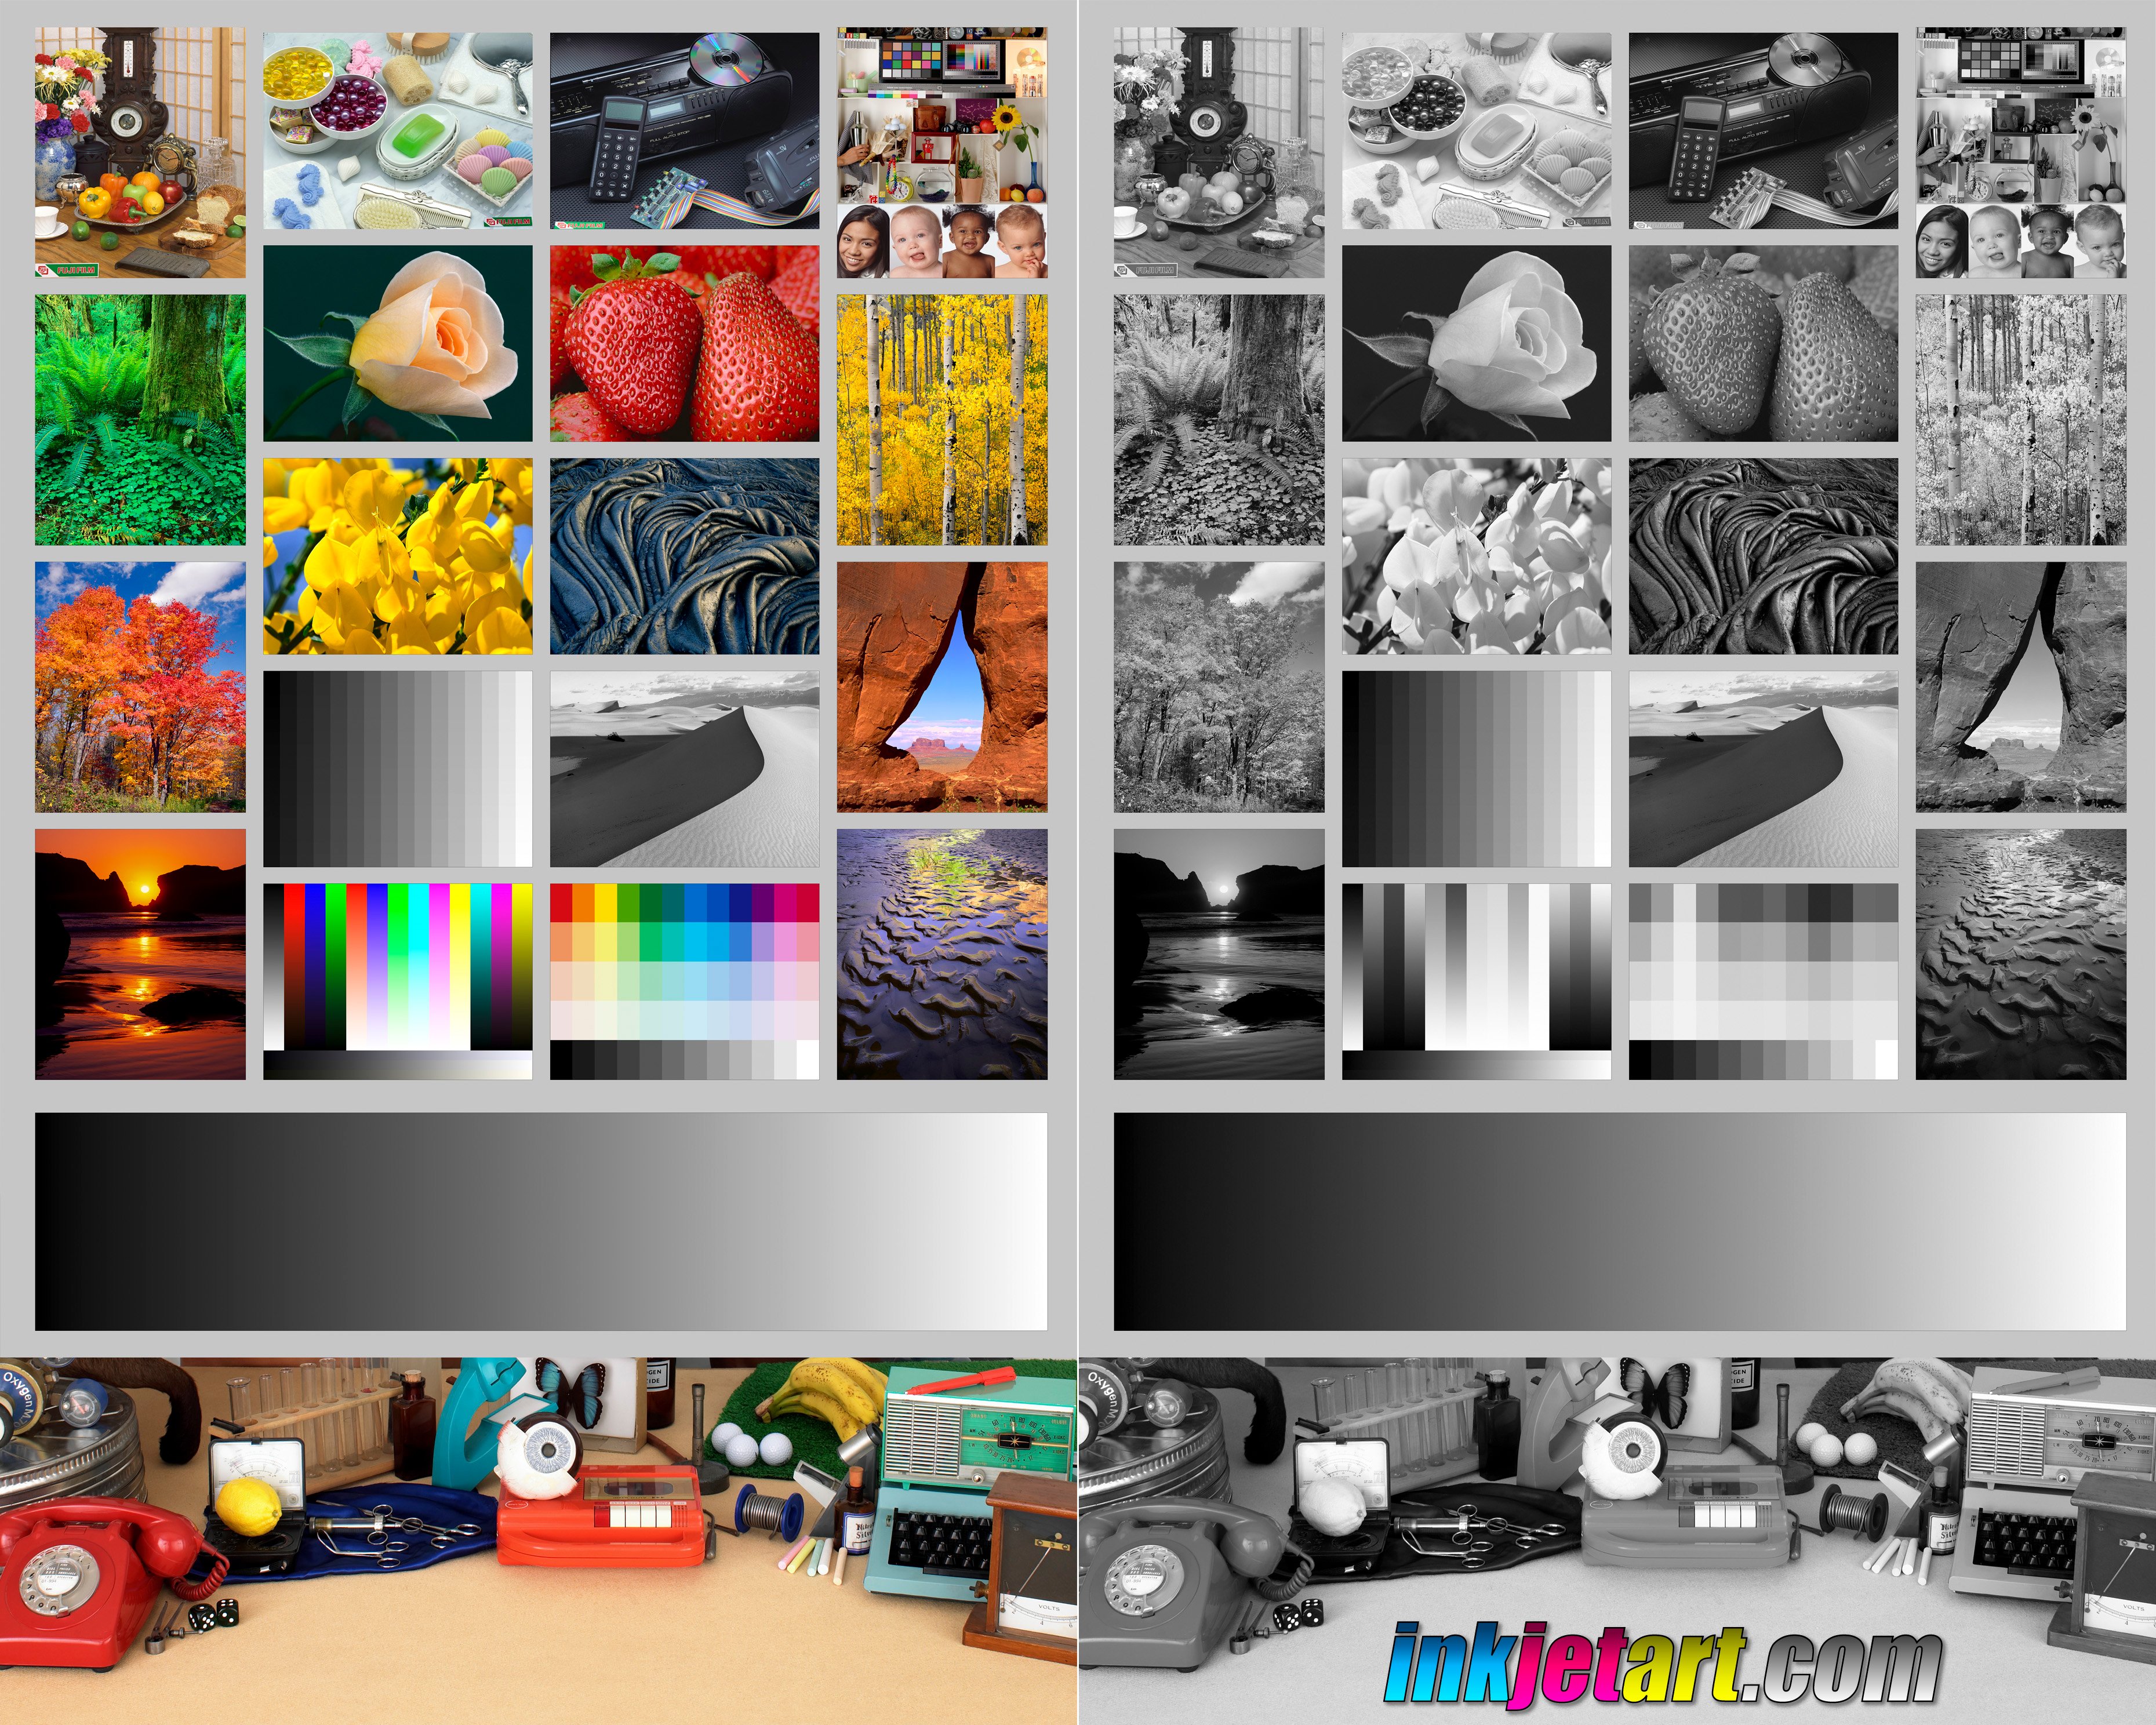
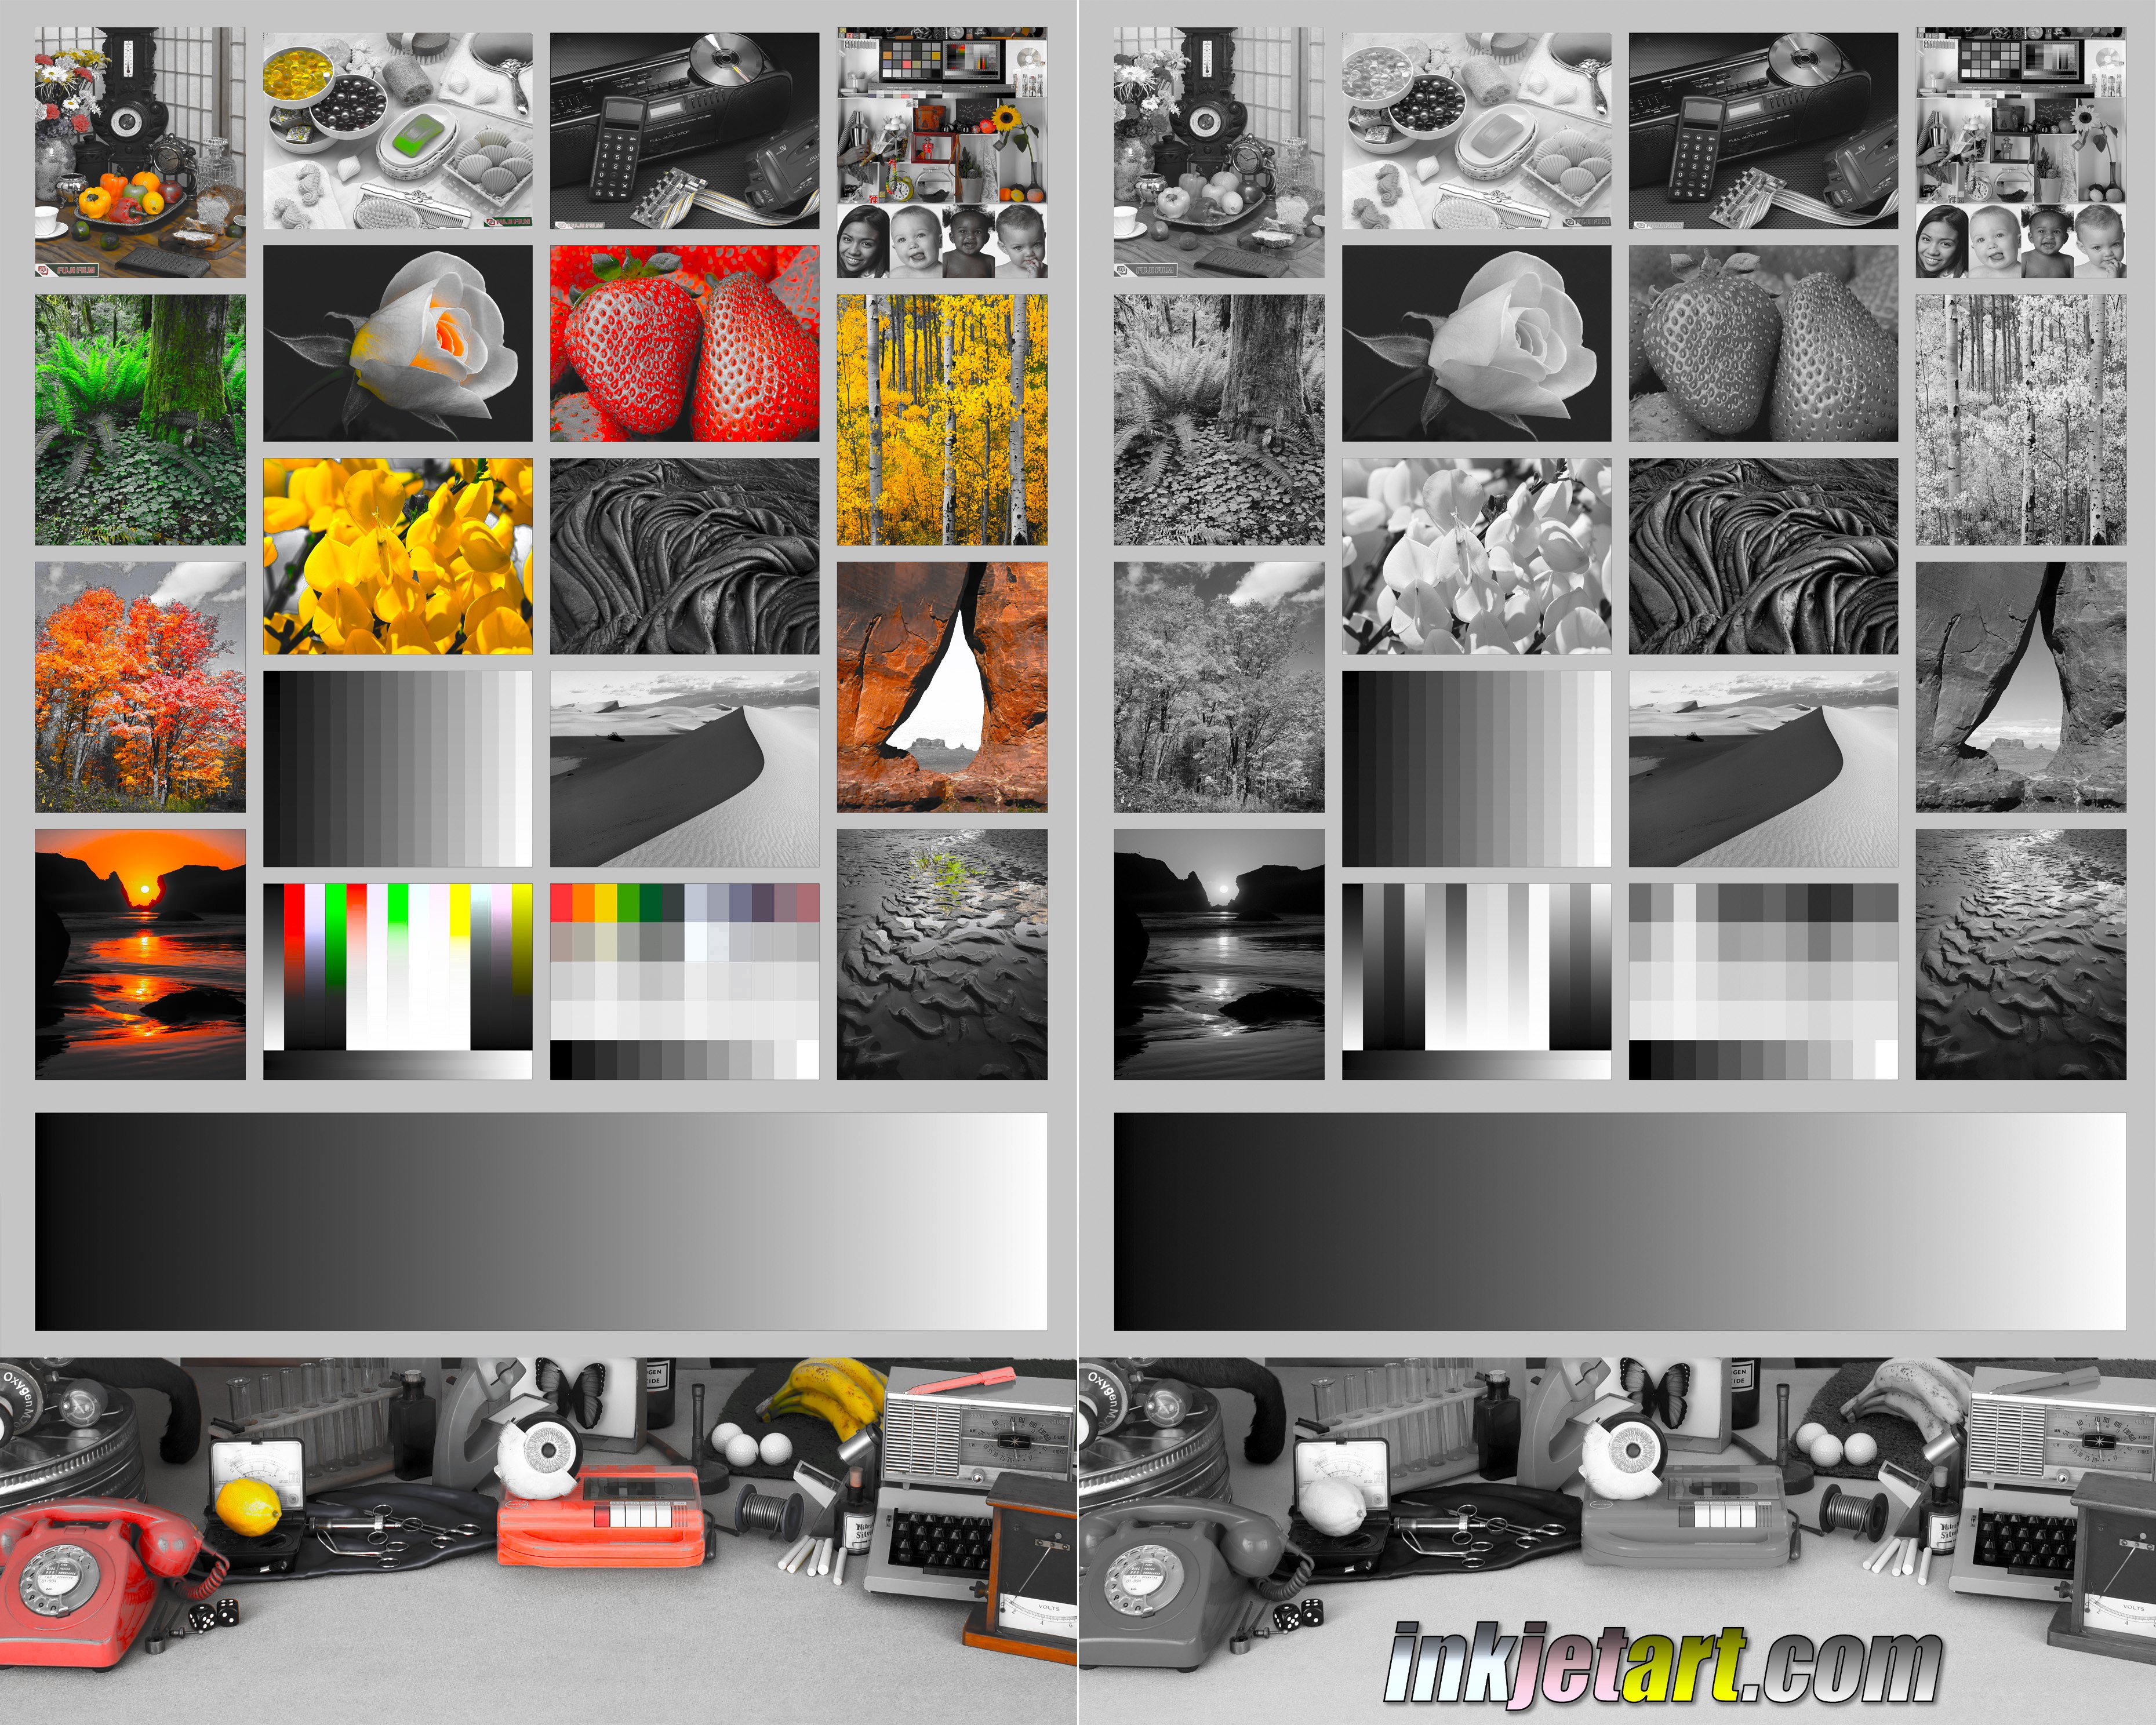
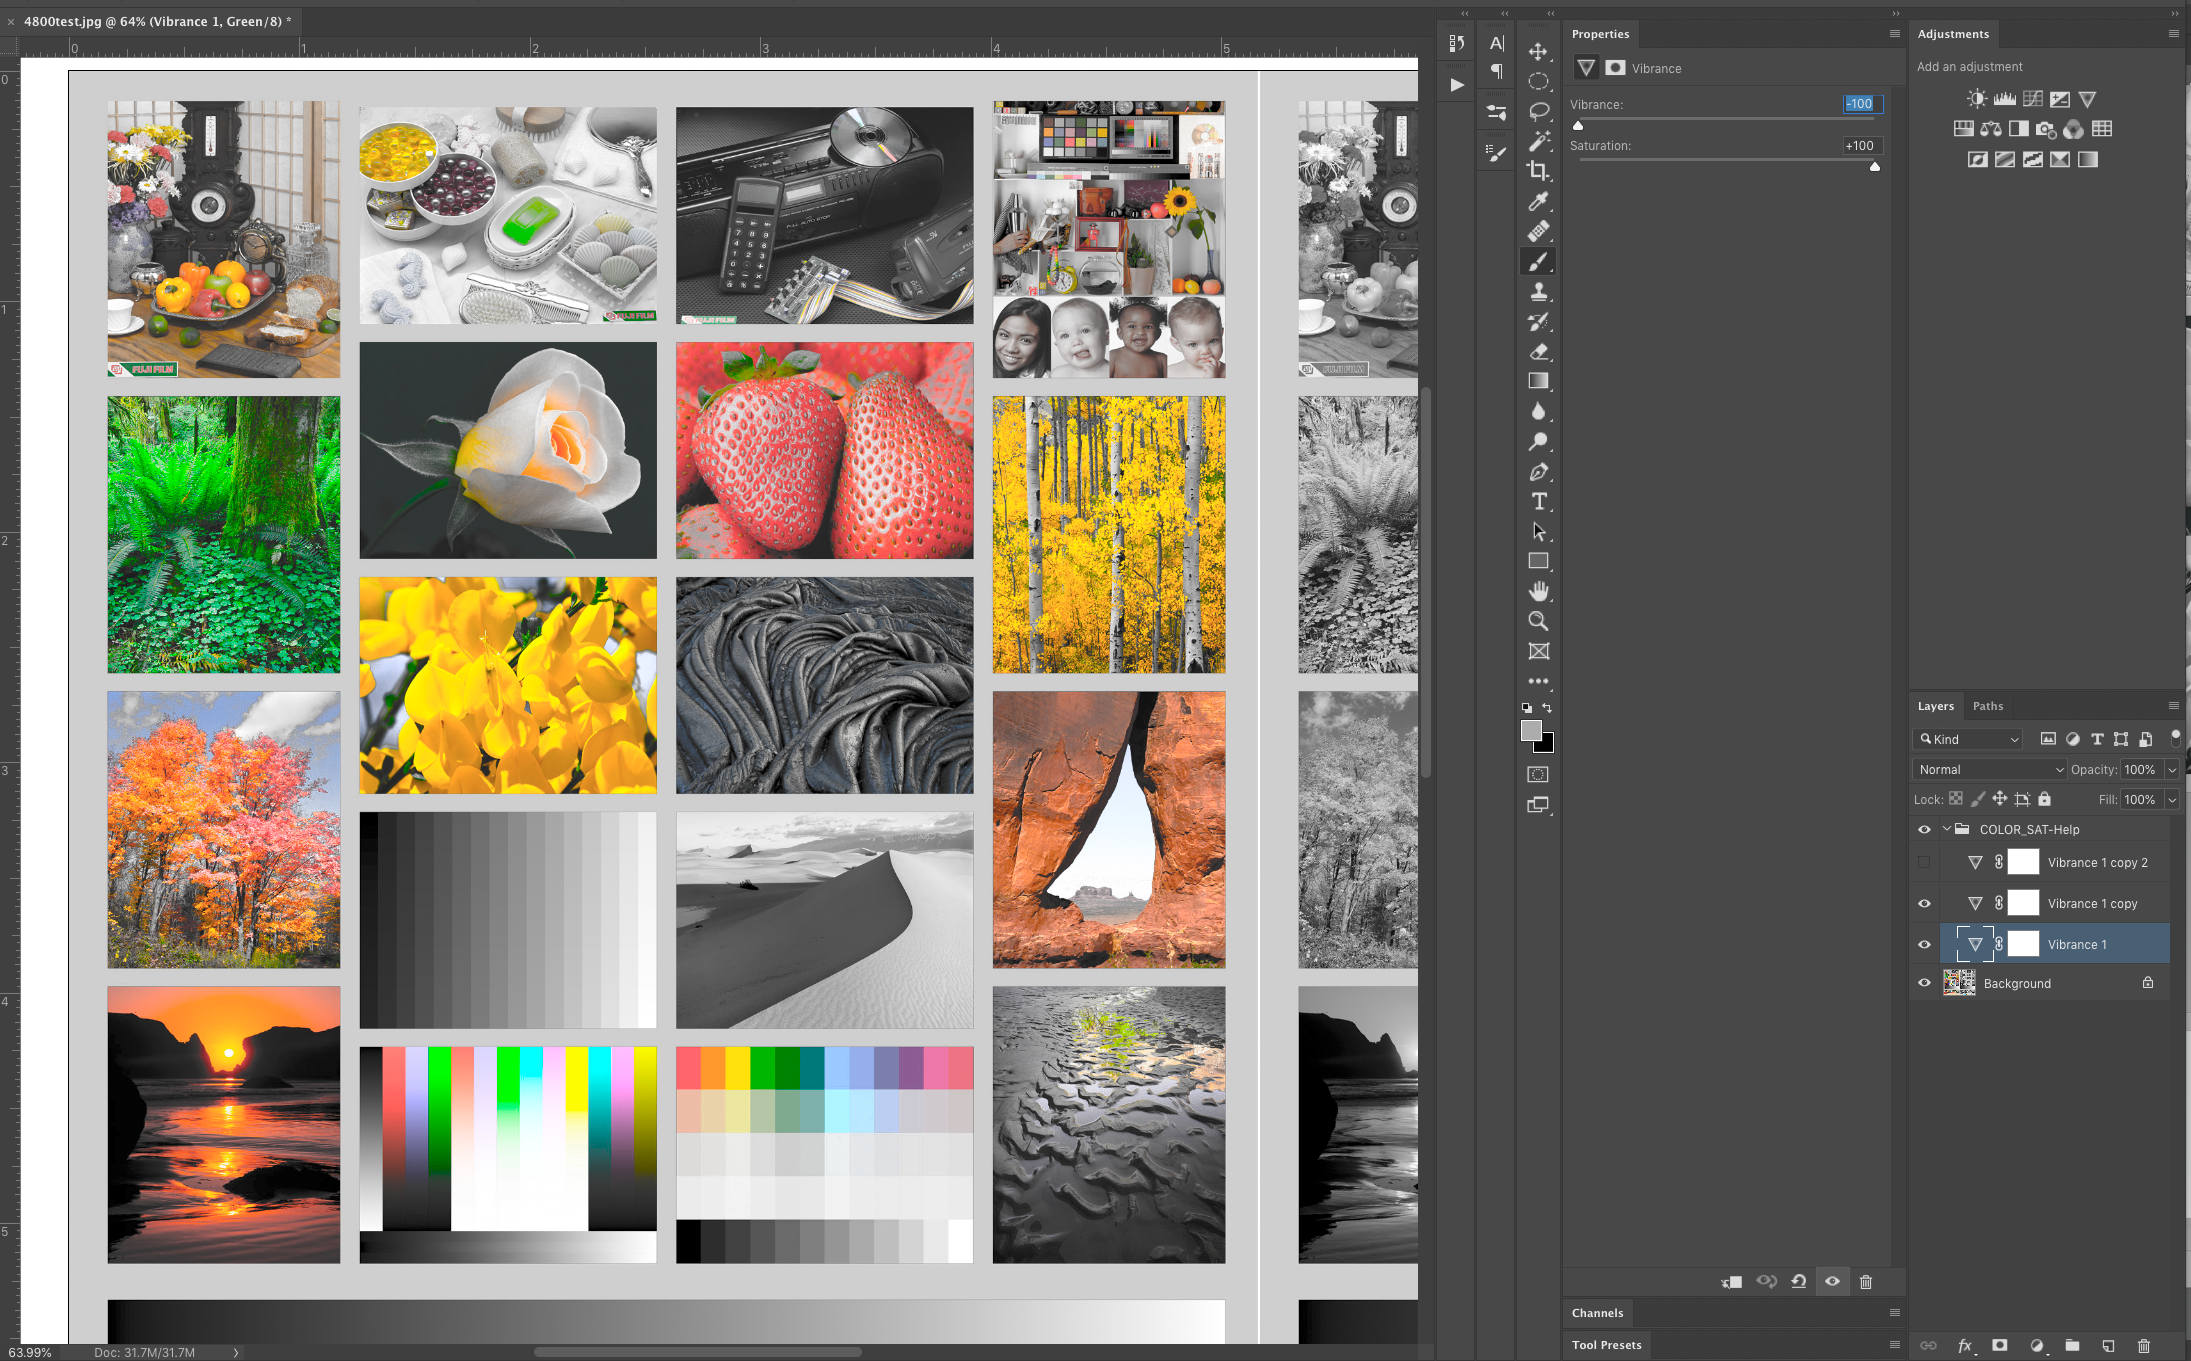
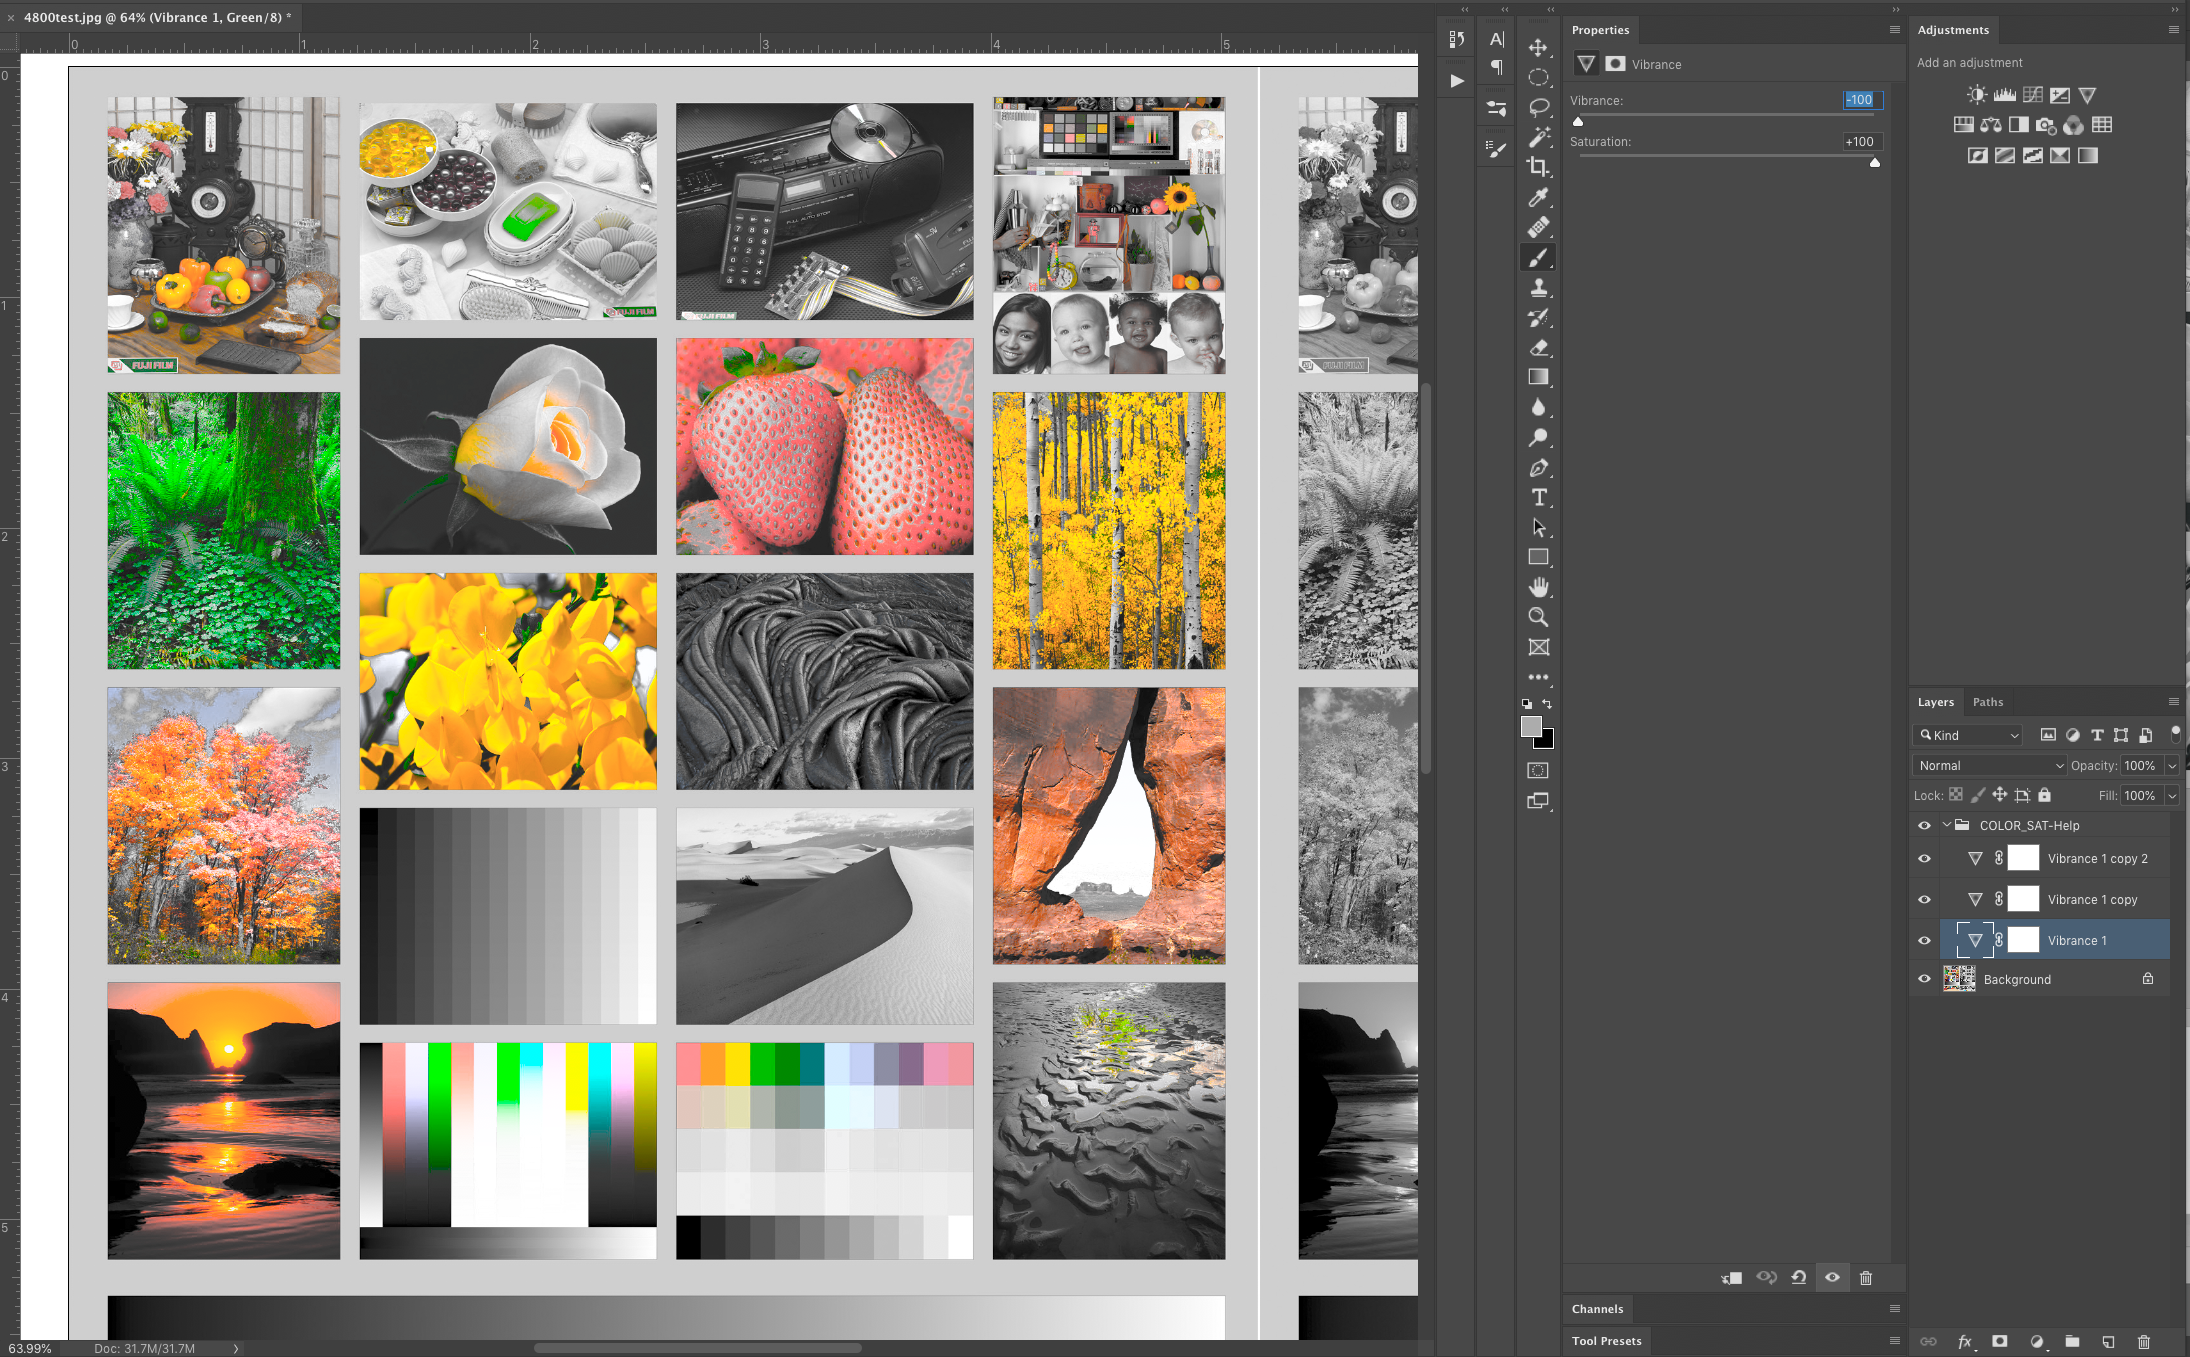
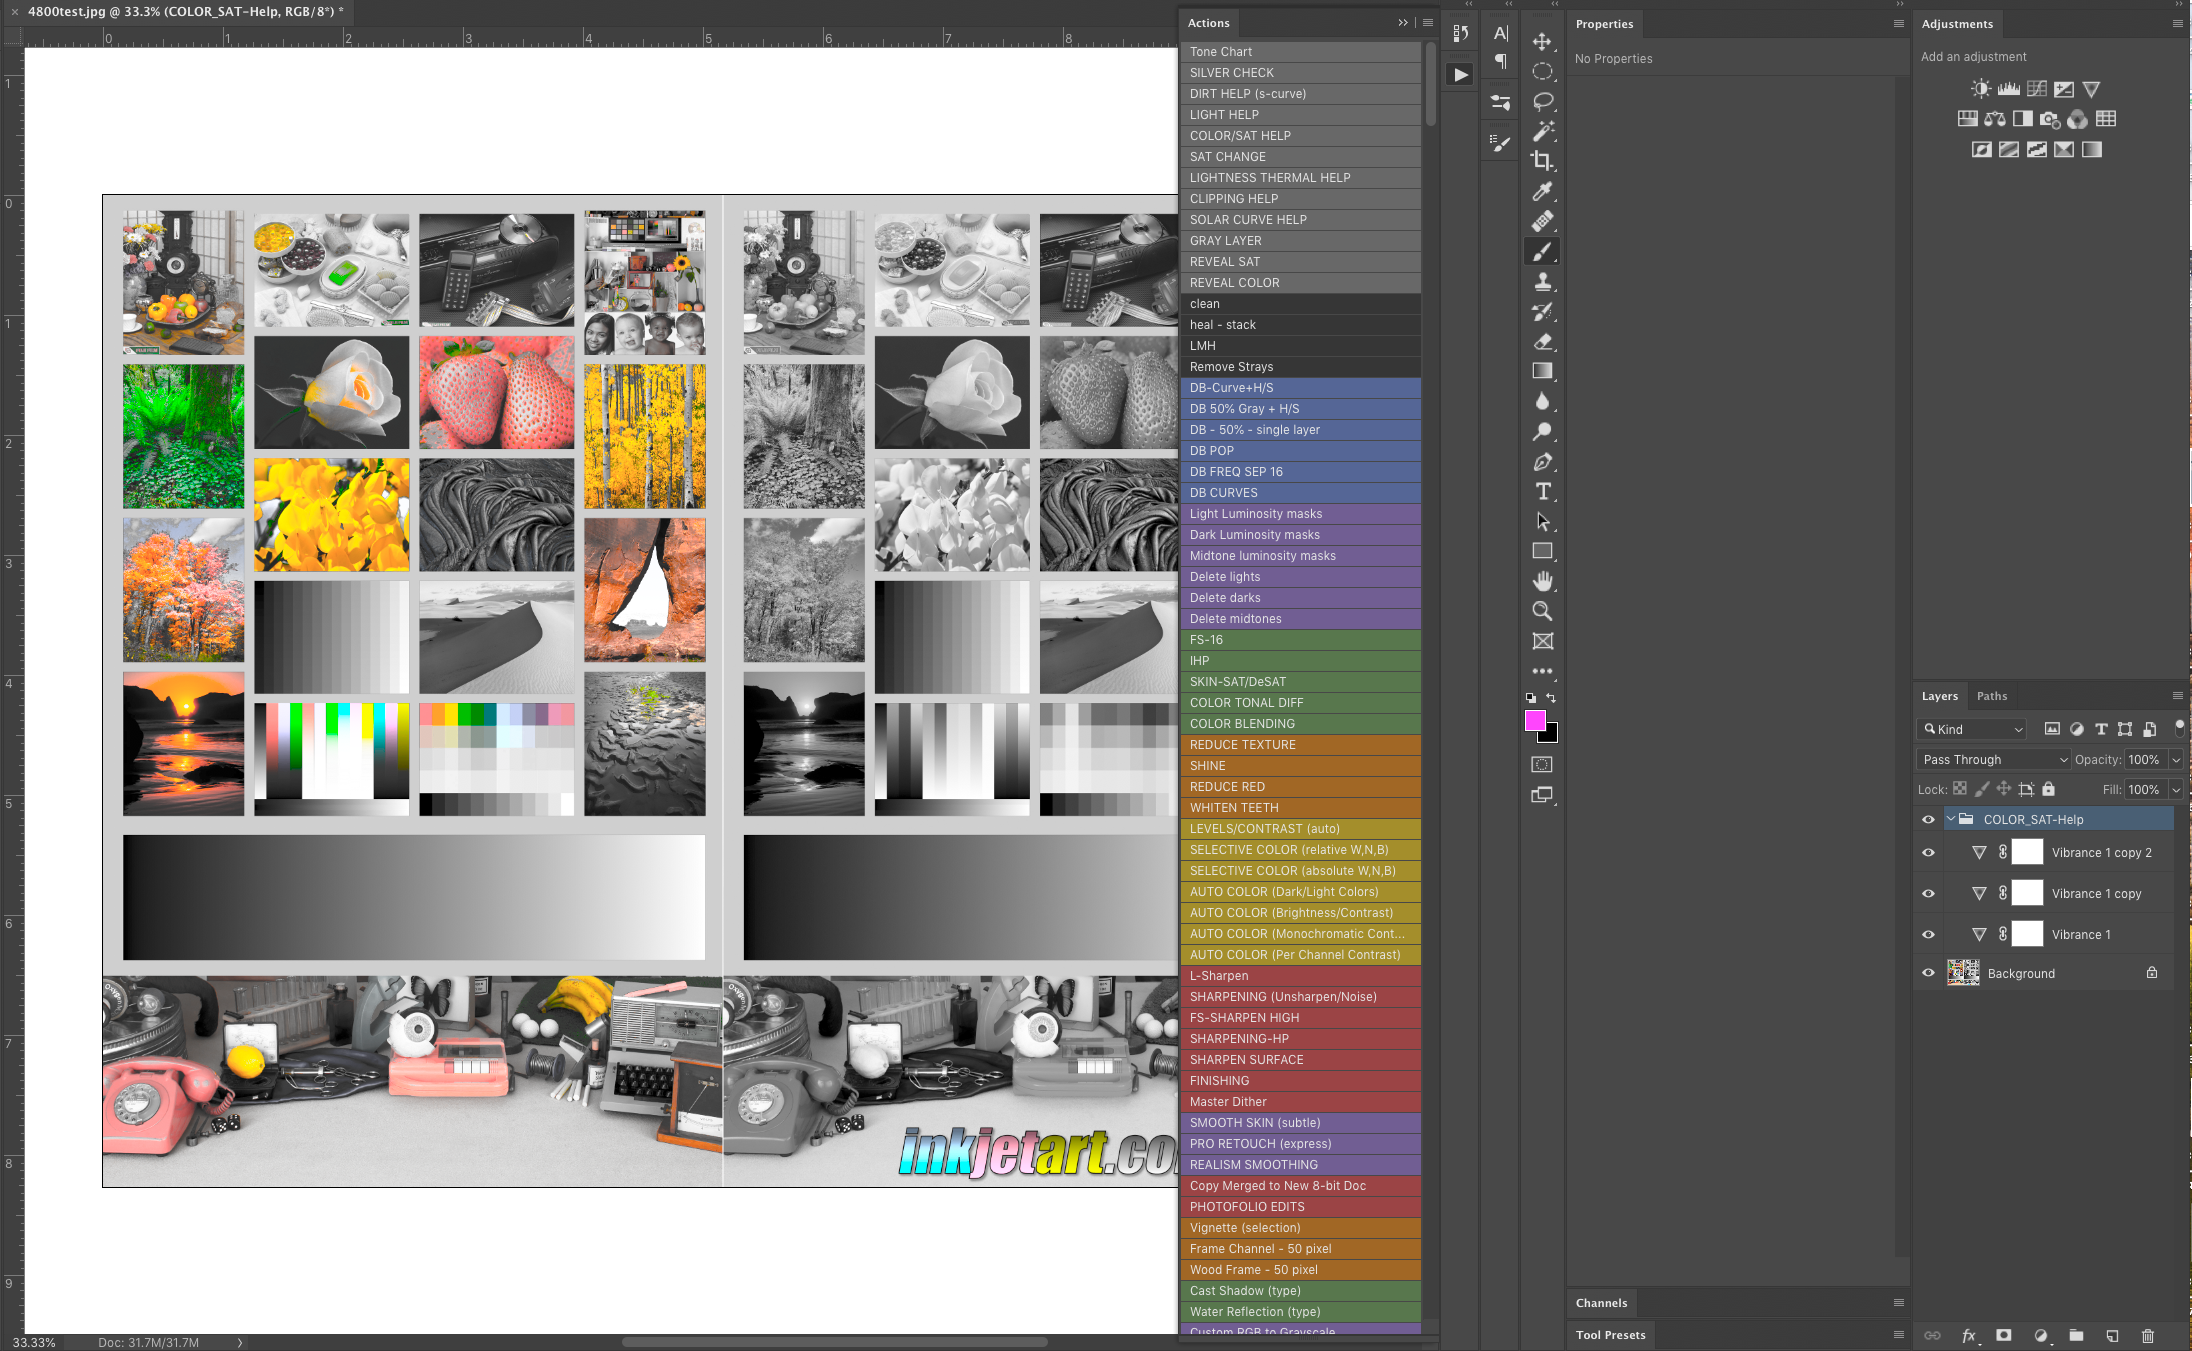
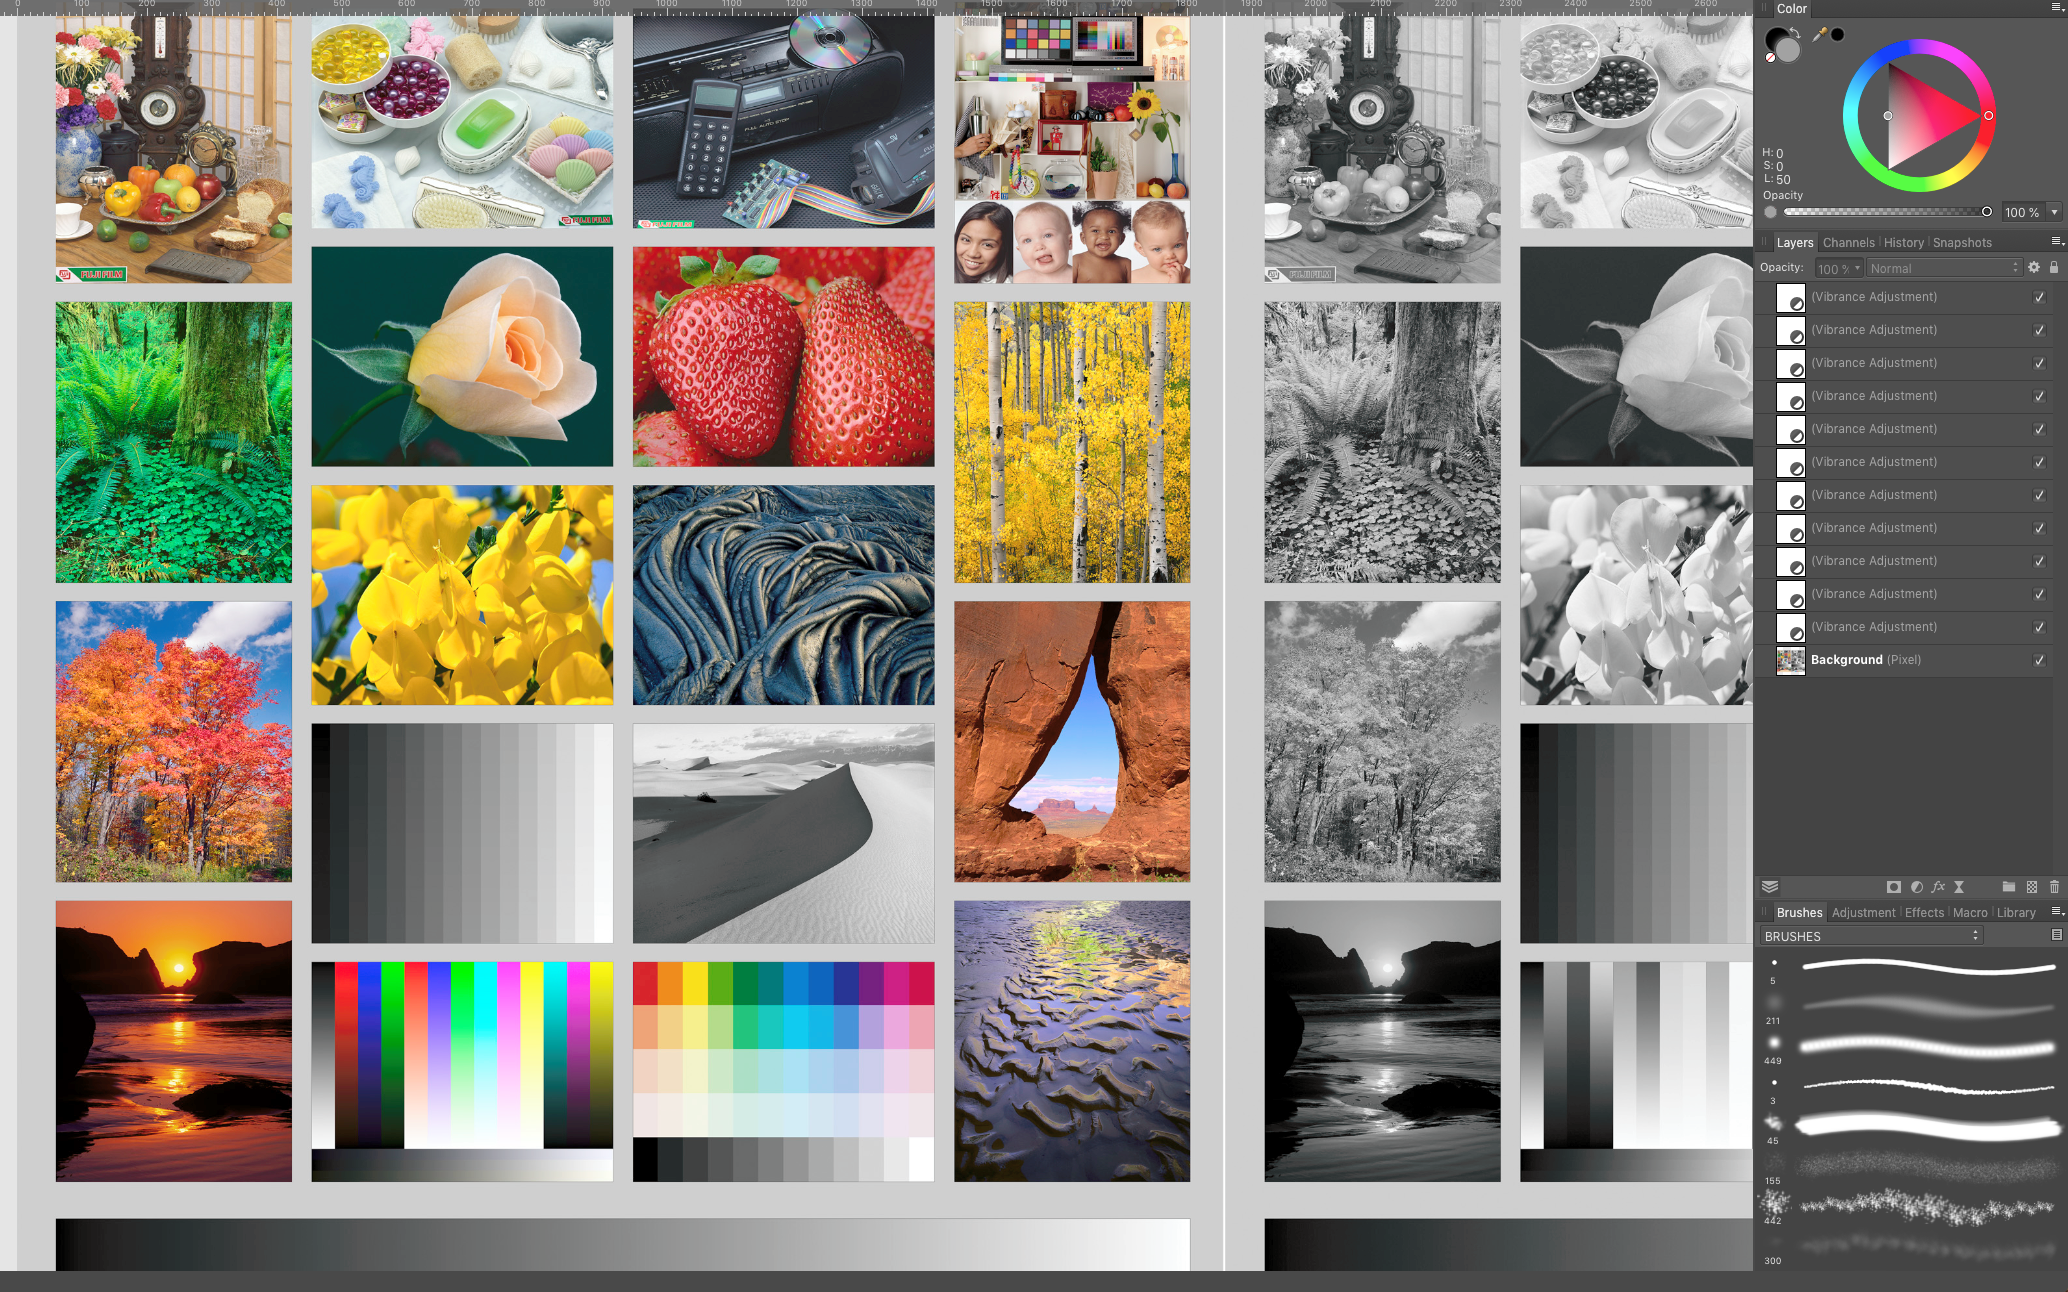
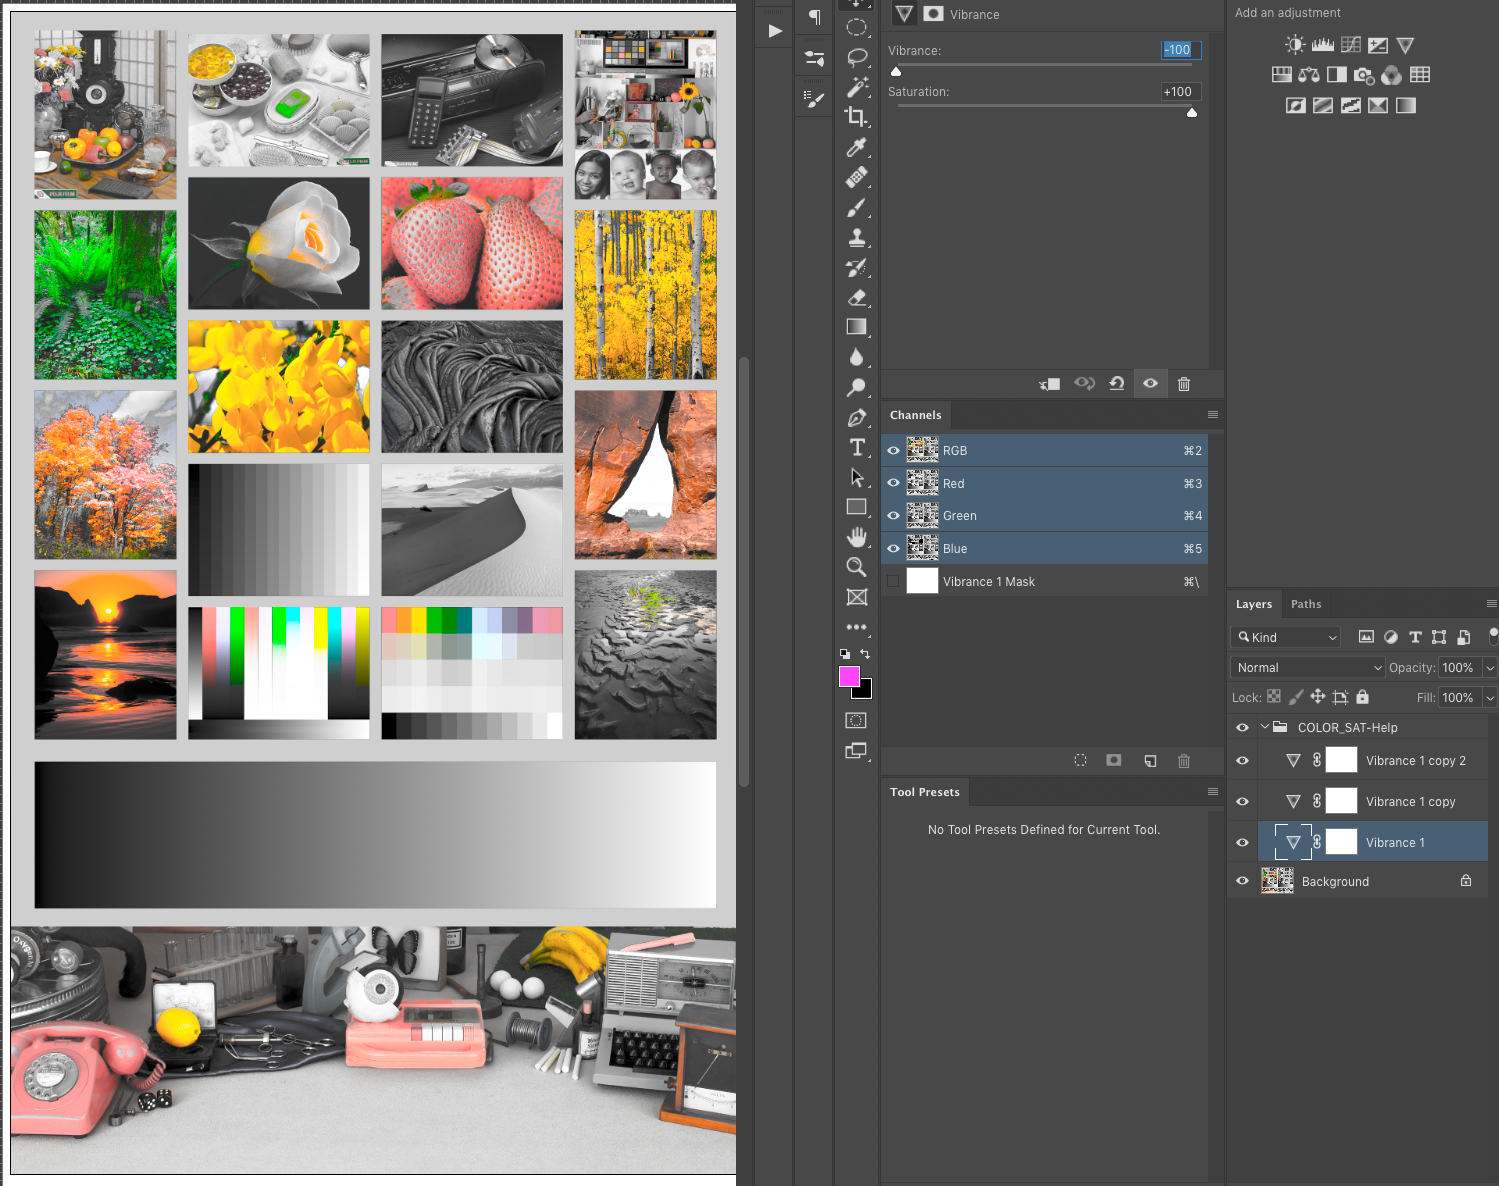
Hi John, I am including screenshots of the UN-EDITED state, then one Vibrance adj with -100 vibrance, then with +100 saturation and how that looks on the image... then the same Vibrance adj layer (with -100 vib / +100 sat) duplicated two more times. As then these are all put in a regular folder with a blending mode of "Pass Through". The adjustment layers don't have anything special -- just a "Normal" blending mode. That is my question, essentially -- how come something so basic, that seems to be mirrored in Affinity Photo in terms of setting parameters, doesn't actually look the same when done in Photoshop and Affinity Photo. There must be something I am missing or the way the two programs handle layers or this particular adjustment must be different. I have also included screenshots of the same setup in Affinity Photo... and you can see it doesn't matter if I have one, three, or eleven Vibrance adjustments with the same -100 vib / + 100 sat settings -- it just looks the same. Am I missing something? - Roman
-
I am basically trying to recreate some Photoshop Actions I use all the time. In Photoshop I can create a few Vibrance adjustments with vibrance at -100 and saturation at +100 and it shows the most intense areas. In Photoshop these are just in a folder but they work without the folder too. In Affinity Photo this doesn't really do anything like in Photoshop so I am not sure how the layers actually behave? I do have some other questions -- if someone out here is really proficient with Affinity -- would it be helpful if I sent over my Photoshop Actions -- I have 3 that I really want to match with Affinity. Thank you, Roman [I've attached the vibrance effect that photoshop can (seemingly) accomplish and Affinity not] -- before and after
-
thank you -- i'll give it a try. Do you run or have you found ways to create check layers -- ie. checking saturation change, color reveal, blemish reveal, etc -- through combinations of curve, b/w, etc? (In Photoshop i had a lot of those that were helpful).
-
Thank you very much! I'm watching now and will do that on the healing end. I have a few more questions regarding layer behavior -- could I message or email you?
-
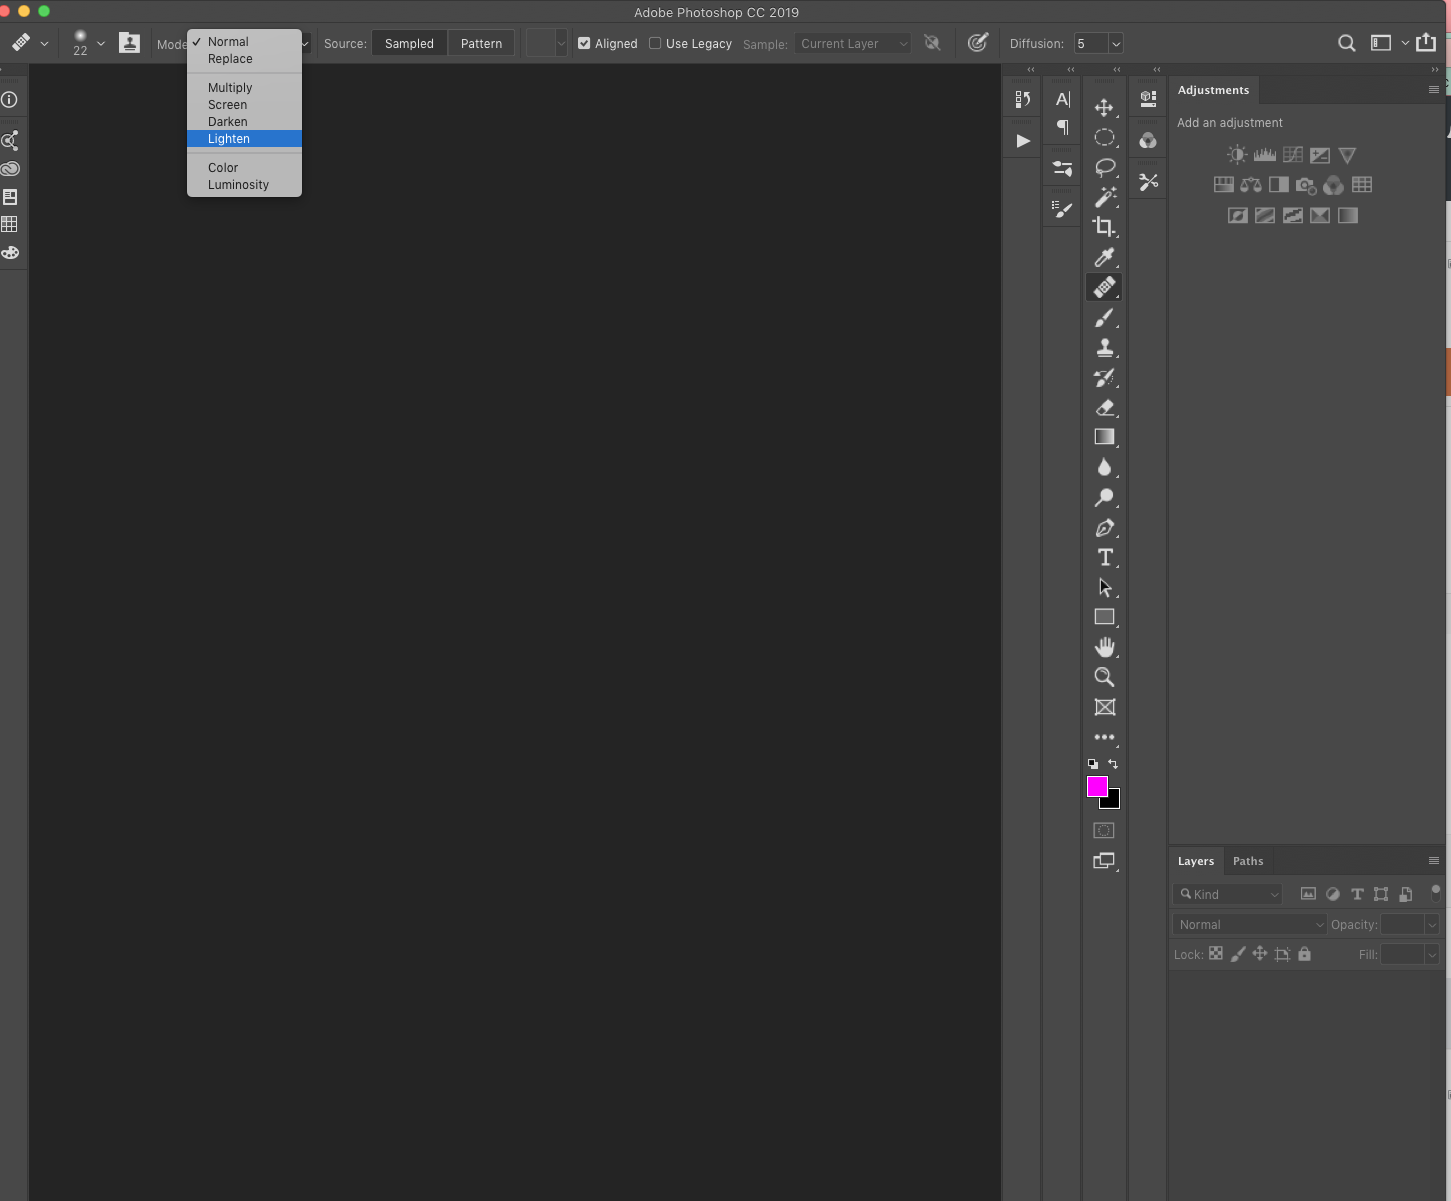
Guys is there a way to have the paint brush or healing brush tool go into lighten, darken, replace, etc mode?
-
I am relatively new to Affinity and, like many of us, am coming from years of Photoshop use. What I am having trouble with are two aspects of Affinity: 1) The healing brush painting mode. This was very useful in Photoshop where I was able to only effect the light/dark pixels or replace pixels. I can't find the equivalent in Affinity. 2) Gray layers -- I can create a new pixel layer, fill it with 50% gray and use it for dodging and burning. Is this technique better used as a mask for an effect on a duplicate layer in Affinity or do you all use gray layers? Here's a screenshot of what I had in Photoshop but in Affinity I need help! Thank you!