trevorc
-
Posts
46 -
Joined
-
Last visited
-
 John Rostron reacted to a post in a topic:
Image Stacking question
John Rostron reacted to a post in a topic:
Image Stacking question
-
Image Stacking question
trevorc replied to trevorc's topic in Pre-V2 Archive of Desktop Questions (macOS and Windows)
I've been around the houses using various combinations of the suggestions above and have finally come up with this as the most simple solution. I'm starting with 10 consecutive frames with a bird near the centre of each. 1, New stack with all pictures 2. Set Live Group Stack to minimum, this will show all all the individual pics in a single group. 3. Select each individual frame in turn. In order to know which frame you are looking at reduce the opacity and the subject will disappear. 4. Move the subject to where you want it in relation to the group 5. Having moved all the subjects where you want them crop the picture as required and save 6. I ended up with my subjects where I wanted them but the background segregated into different shades of grey. I resolved this by selecting the shade I wanted overall, drawing rectangles and flood filling Thanks for all the input. While doing this I have realised that there are lots of tutorials on stacking but they all seem to be on specific subjects such as using stacking for noise removal, object removal. I haven't found a single tutorial which deals with stacking to combine subjects from different pictures into a single view. -
Image Stacking question
trevorc replied to trevorc's topic in Pre-V2 Archive of Desktop Questions (macOS and Windows)
that worked well thank you but I reached the point where I have ten layers on top of each other and I can't work out how to merge them back together. I have tried merge visible and grouping and rasterising but nether works. -
Image Stacking question
trevorc replied to trevorc's topic in Pre-V2 Archive of Desktop Questions (macOS and Windows)
Thanks for that I shall try it tomorrow -
On the help pages/image stacking it says "Your images are blended and presented in a Live Stack Group in the Layers panel. You can manually align layers if auto-alignment isn't 100% accurate.". Can you explain how to manually align. I can't see a way to manipulate the individual images in the stack.
-
CPU usage ever increasing
trevorc replied to trevorc's topic in Pre-V2 Archive of Desktop Questions (macOS and Windows)
Thanks, it makes sense. I suppose I have just got used to not worrying too much about current tabs. -
When I'm using AP to edit consecutive pictures, I don't tend to dismiss one picture before moving onto the next. As a result it is not unusual for me to have 8 or 9 tabs showing at any one time. My noisy fan drew my attention to the fact that my CPU usage was ever increasing. Closing down each tab one at a time produced a relative drop in CPU usage until falling to low level with the final shut down and a fan back to normal. Is this a warning to me to close tabs before moving on? Does this mean that that AP is swallowing resources even on dormant edits?
-
help with merging bird pics
trevorc replied to trevorc's topic in Pre-V2 Archive of Desktop Questions (macOS and Windows)
Thanks for the explanation. I had worked out that it was the blue sky that was making the difference but I wasn't clear why. -
help with merging bird pics
trevorc replied to trevorc's topic in Pre-V2 Archive of Desktop Questions (macOS and Windows)
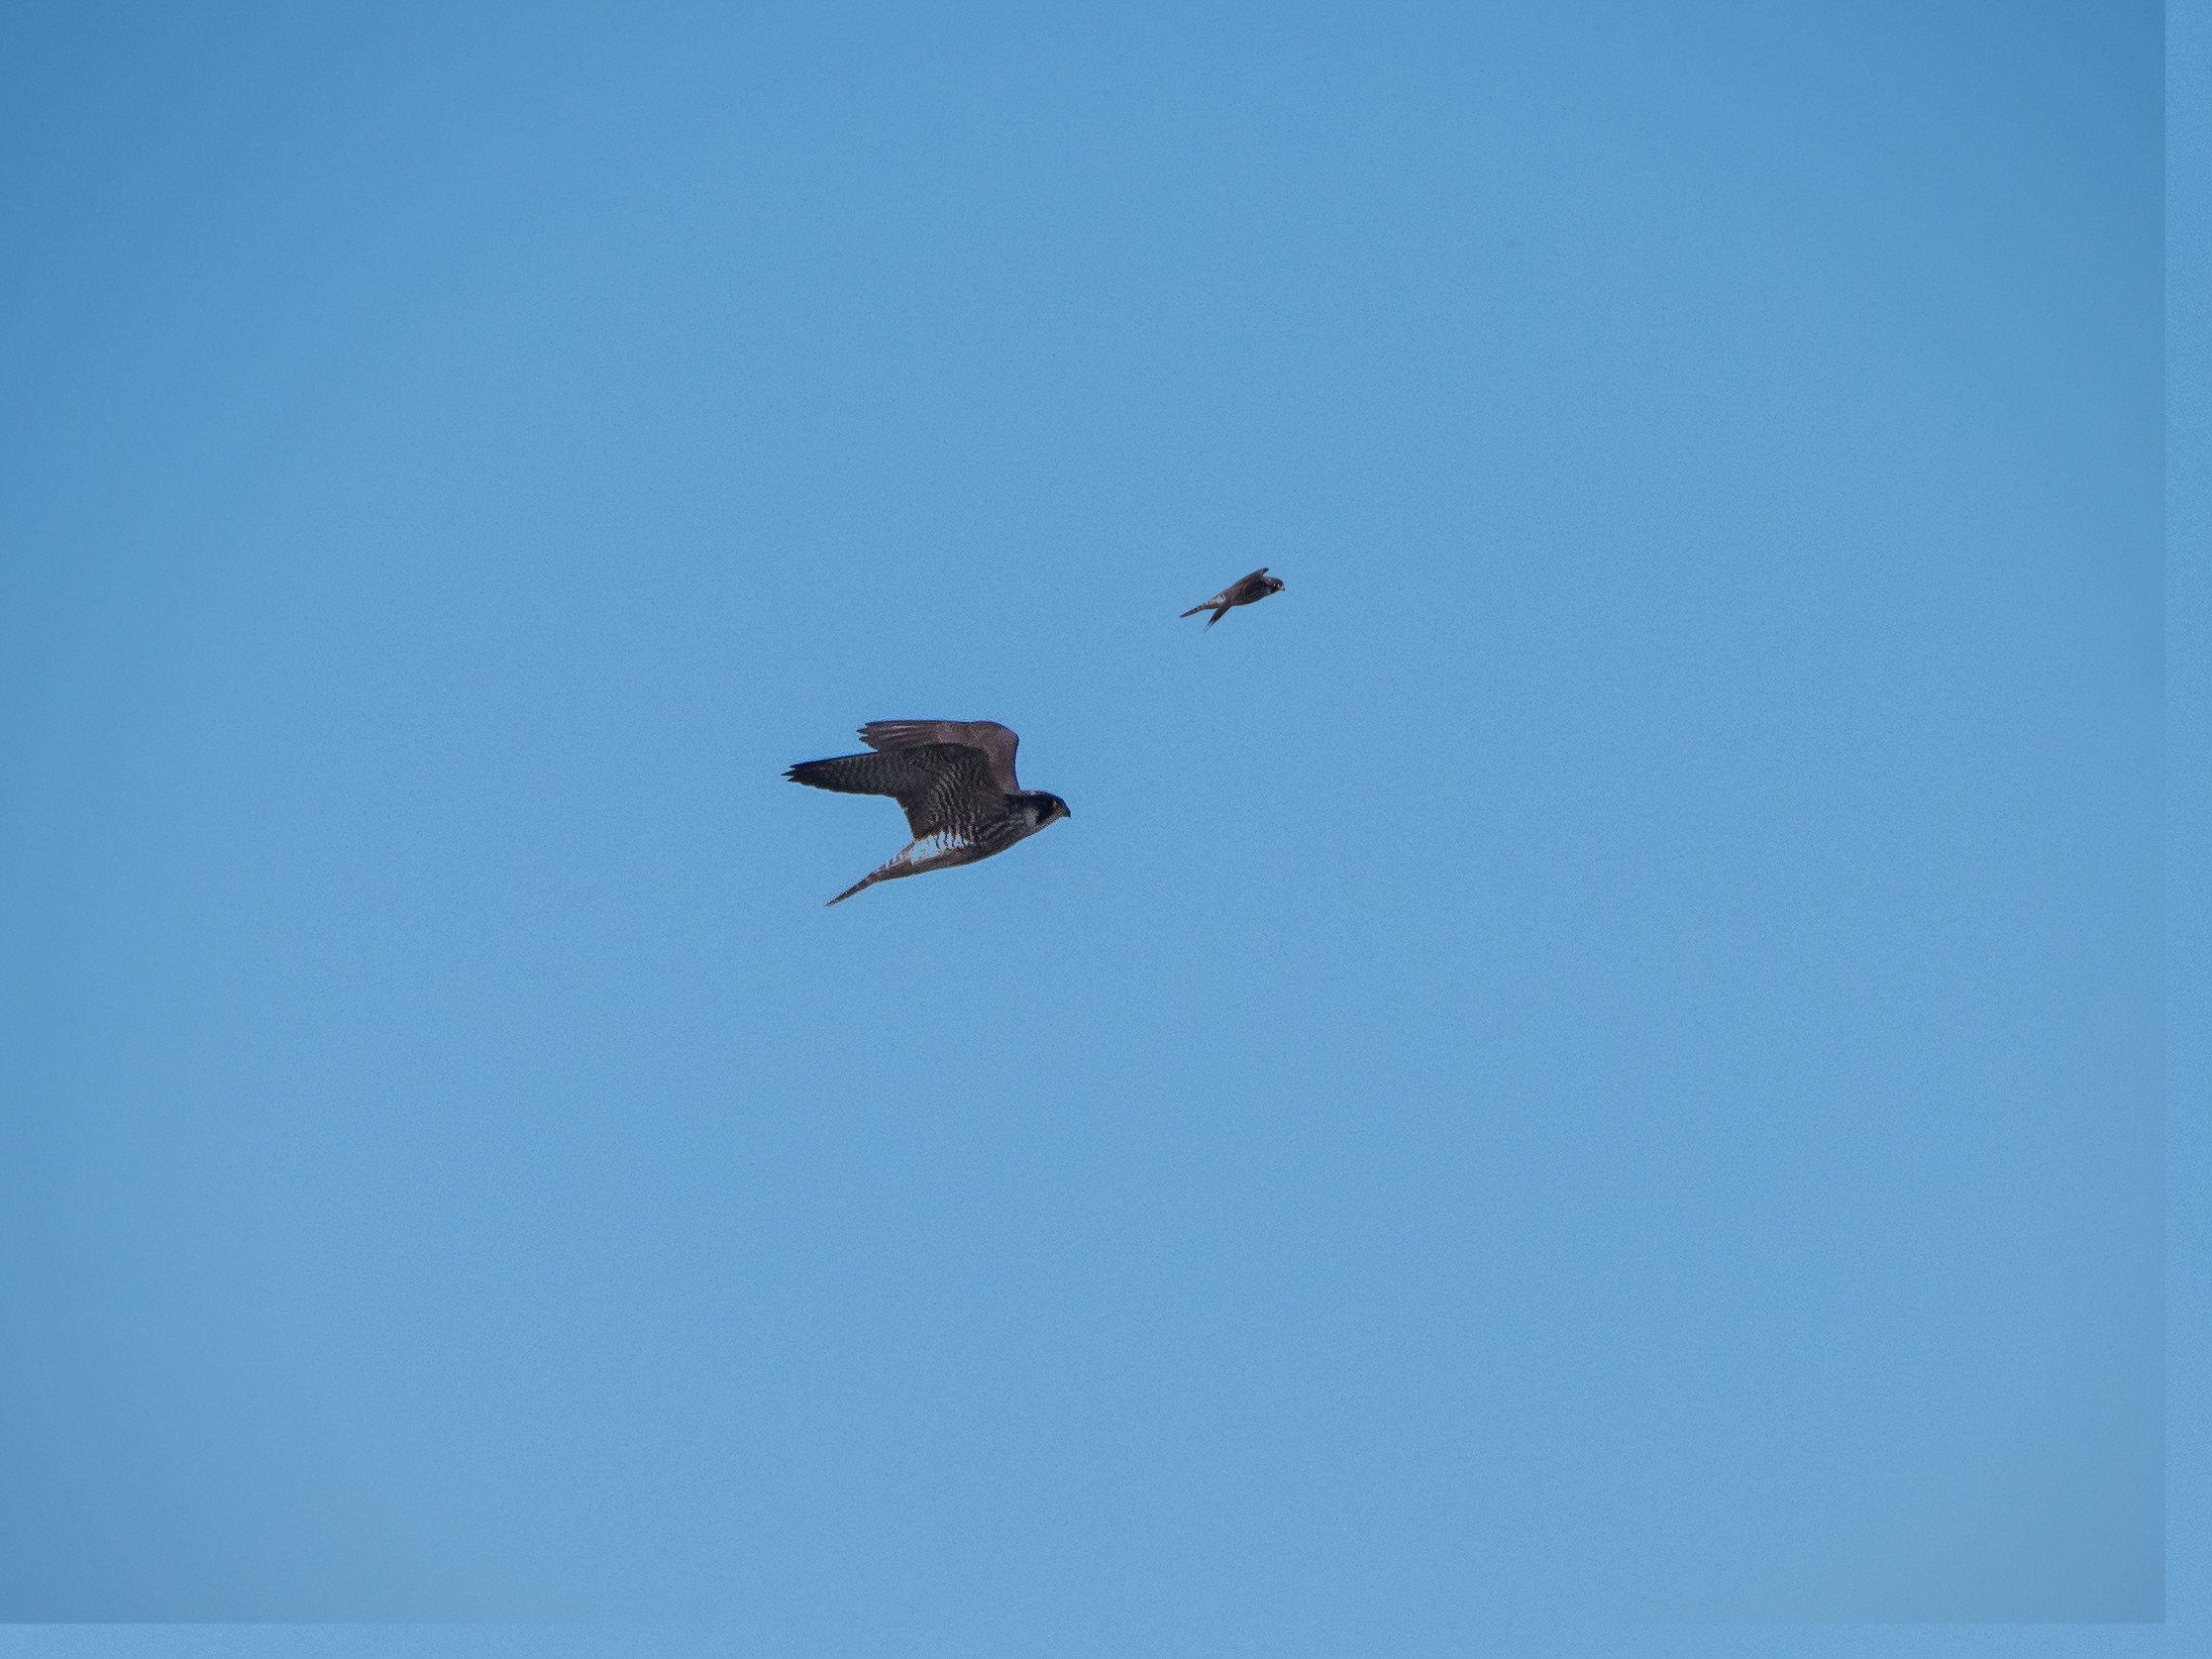
Sorry a few months on and I have another question. When I follow the above process with some other pictures I get the result below. The large bird has been blended to darken and looked OK but as soon as I placed the small bird on top both birds show the sky through where the body is pale. I'm must be doing something very silly. warsash g9 20210226 00261.RW2
-
SteveKen reacted to a post in a topic:
1.9 saving issue
-
1.9 saving issue
trevorc replied to trevorc's topic in Pre-V2 Archive of Desktop Questions (macOS and Windows)
I can confirm that hitting the save button even though it is an export and says it is saving as an Affinity file does actually save as a jpg. A bit messy but I can continue using 1.9 until it is sorted. -
1.9 saving issue
trevorc replied to trevorc's topic in Pre-V2 Archive of Desktop Questions (macOS and Windows)
I have added extension to filename during export, problem still exists I have ticked file name extensions in explorer, they show up but it makes no difference to my problem -
1.9 saving issue
trevorc replied to trevorc's topic in Pre-V2 Archive of Desktop Questions (macOS and Windows)
so if it doesn't work, can we revert to the previous version -
trevorc reacted to a post in a topic:
1.9 saving issue
-
trevorc reacted to a post in a topic:
1.9 saving issue
-
SteveKen reacted to a post in a topic:
1.9 saving issue
-
1.9 saving issue
trevorc replied to trevorc's topic in Pre-V2 Archive of Desktop Questions (macOS and Windows)
Ah, I am so pleased I am not alone Steveken. I haven't changed anything in the Windows settings -
1.9 saving issue
trevorc replied to trevorc's topic in Pre-V2 Archive of Desktop Questions (macOS and Windows)
excuse my stupidity where is show file extensions for known filetypes. -
1.9 saving issue
trevorc replied to trevorc's topic in Pre-V2 Archive of Desktop Questions (macOS and Windows)
that is exactly what I am doing -
1.9 saving issue
trevorc replied to trevorc's topic in Pre-V2 Archive of Desktop Questions (macOS and Windows)
No not seeing that, here's my screen. The drop down box contains only Affinity files although the jpeg tab was selected on the previous screen