henryb
Members-
Posts
108 -
Joined
-
Last visited
Everything posted by henryb
-
what do you mean? I thought you said it worked for you. Do you mean that the reason I'm not getting my Mac to call my number via this hyperlink I just made is BECAUSE I'm trying to "go to" it from WITHIN Publisher (via the 'Go to hyperlink' button), but if I save the pdf and open it with another reader in my Mac it will work?
-
hey thanks for the reply! But just tried it (on my Mac) and it doesn't seem to work... So, I double clicked on my phone number in the Affinity Publisher PDF I'm working on, right clicked, Interactive, Insert Hyperlink, Hyperlink type: URL, In the URL field I typed "tel: +306944121212" and hit OK. But when I then right click on the phone number in the publisher document I'm working on, Interactive, Go To Hyperlink Target, nothing happens at all! (Whereas if I do the same in for my website, when I hit Go To Hyperlink Target it simply opens Safari and goes to that url...). Am I doing something wrong?
-
is there a way to hyperlink a phone number in the PDF we're making in Affinity Publisher? (So that the phone number's hyperlink will maybe open up a FaceTime app or something on your Mac or PC (or just the phone app to make a regular call if you click on the link from a phone)? Obviously this hyperlink CANNOT be an https link...
-
Detailed area selection?
henryb replied to henryb's topic in Pre-V2 Archive of Desktop Questions (macOS and Windows)
Ok I'll just leave the acceleration thingy off ("power user" lol) Thanks for that! Will be using this then as it will prob be very handy! After saving the AP file, I had shut the app down. Now that I re-opened it in order to save this selection as you explained; to my surprise I see that, for some reason, the marquee selection I had made around the dog, and the brush refinements around it, are all gone!! Is this normal? So I shouldn't shut the app before I save my selections, otw I will lose them?? Also, the history of adjustments & actions is also gone! So I can't go "back in time" until I find the most recent time-point where this selection was active, either. So I guess when saving and exiting AP, the only thing that's saved in the file is the most recent "state" of the photo you were working on and everything else is deleted?? -
Detailed area selection?
henryb replied to henryb's topic in Pre-V2 Archive of Desktop Questions (macOS and Windows)
Mac - Big Sur. I just went to File -> Export in the page you see in my last-attached screenshot. (Dunno what "persona" - whatever that is lol - this is) -
Detailed area selection?
henryb replied to henryb's topic in Pre-V2 Archive of Desktop Questions (macOS and Windows)
And BTW, can someone please tell me how come when I export the final jpeg, the colors in it look different than they do in the original AP project page? -
Detailed area selection?
henryb replied to henryb's topic in Pre-V2 Archive of Desktop Questions (macOS and Windows)
YES!!! That did it!! I turned it off and now it works (meaning the Refine window doesn't automatically turn off after a few seconds)!!. What did I just do to fix this problem? (I mean Hardware Acceleration sounds like a "good" thing to have turned on... No??) Slightly off the topic, but does anyone how how to save this marquee selection below that I've made around my dog (now that I've refined it as much as I could with the brushes) so that I can get it out of the way for now, and maybe make new selections to edit other areas of the image (as it doesn't seem like I can have simultaneously selected area "groups" A, B and C, and be able to apply different effects to different groups). And later on me able to toggle my selected area/s at will? (So somewhere I can save this selection/s, deactivate it for now, and be able to bring it back later). -
Detailed area selection?
henryb replied to henryb's topic in Pre-V2 Archive of Desktop Questions (macOS and Windows)
I tried restarting, trashing caches, launch agents/deamons etc etc but it still just doesn't want to work. Step 1 make selection around dog Step 2 click Refine button to open Refine Selection tools/brushes Step 3 - no matter what I do (whether I start painting around edges with matte brush, or simply do nothing and just wait..) after a few seconds the red mask is gone and I can no longer affect the image with the brush so I have to close the Refine Selection window and start over...). Any work I had done using the matte brush is lost. This is an endless loop... -
Detailed area selection?
henryb replied to henryb's topic in Pre-V2 Archive of Desktop Questions (macOS and Windows)
I'm having trouble with this Refine Selection tool thing.. After I've made my marquee selection around the dog, I click on the Refine button, then the area outside the dog turns to red, I then start painting around the edges to refine the edges, and after a couple of places I've refined, the red-colored areas around the dog just disappear and I can no longer use/see the brush on the image. I then click on the Refine button again to bring the red back so I can continue from the point where I got interrupted, but we are back to square one again and I have to start over. It's happened over 10 times and I've given up - I can't keep doing this over and over. There must be something wrong with the tool. Anyone know what the problem is? -
Detailed area selection?
henryb replied to henryb's topic in Pre-V2 Archive of Desktop Questions (macOS and Windows)
THANK YOU! I found this Affinity Photo tutorial on the Matte Brush Refinement method (that you mentioned) and it was GREAT! Thanks again!! -
Hello again! I'm trying to hide the plastic bag on the table using the Clone brush tool to make an empty table. But the rotation preview is not helping.. When I change the rotation value of the clone tool preview to fix the table edge so that it maintains its “logical” curve, I get a crappy-looking preview near the rotation slider (which is half-hidden behind the controls) which is no help really. Is there a way to show the rotated result preview where the table is?? *Maybe a keyboard shortcut to affect the slider, while my pointer is at the table-edge position (so I can get the preview where I need it, and simultaneously try rotation degrees using keys, so my pointer doesn’t have to leave the table edge so I can see what I’m doing)?
-
thanks! But since I can't read German, reading walt.farrell's reply above, it looks like shift+cmd+i will invert the pixel selection (so I guess that's what your 1st photo shows). But your second photo looks like it shows that cmd+i ALSO "inverts". But what does that command invert, then, if not the pixel selection area? The colors?
-
Detailed area selection?
henryb replied to henryb's topic in Pre-V2 Archive of Desktop Questions (macOS and Windows)
Ok the result is FANTASTIC!! WOW!! ❤️❤️ But HOW did you accomplish such a fine selection in all the edges where the hair gets really thin, and the background's color (the brown leather seat's, in this case) shows "through" the ever-so-thin hair?? Ok my selection below was crappy and hasty, but I don't think I could've made it significantly better anyway... What did you do to make the selection so perfect?? And, I don't think I really understood the difference in your method to mine. Did you 1) Duplicate the layer (CMD+j), then 2) make the pixel selection and 3) apply the color change via desaturation or via color sliders on one layer while leaving the other layer (with the dog mask) untouched? Is that what you did? Is there any diff really to what I had done? -
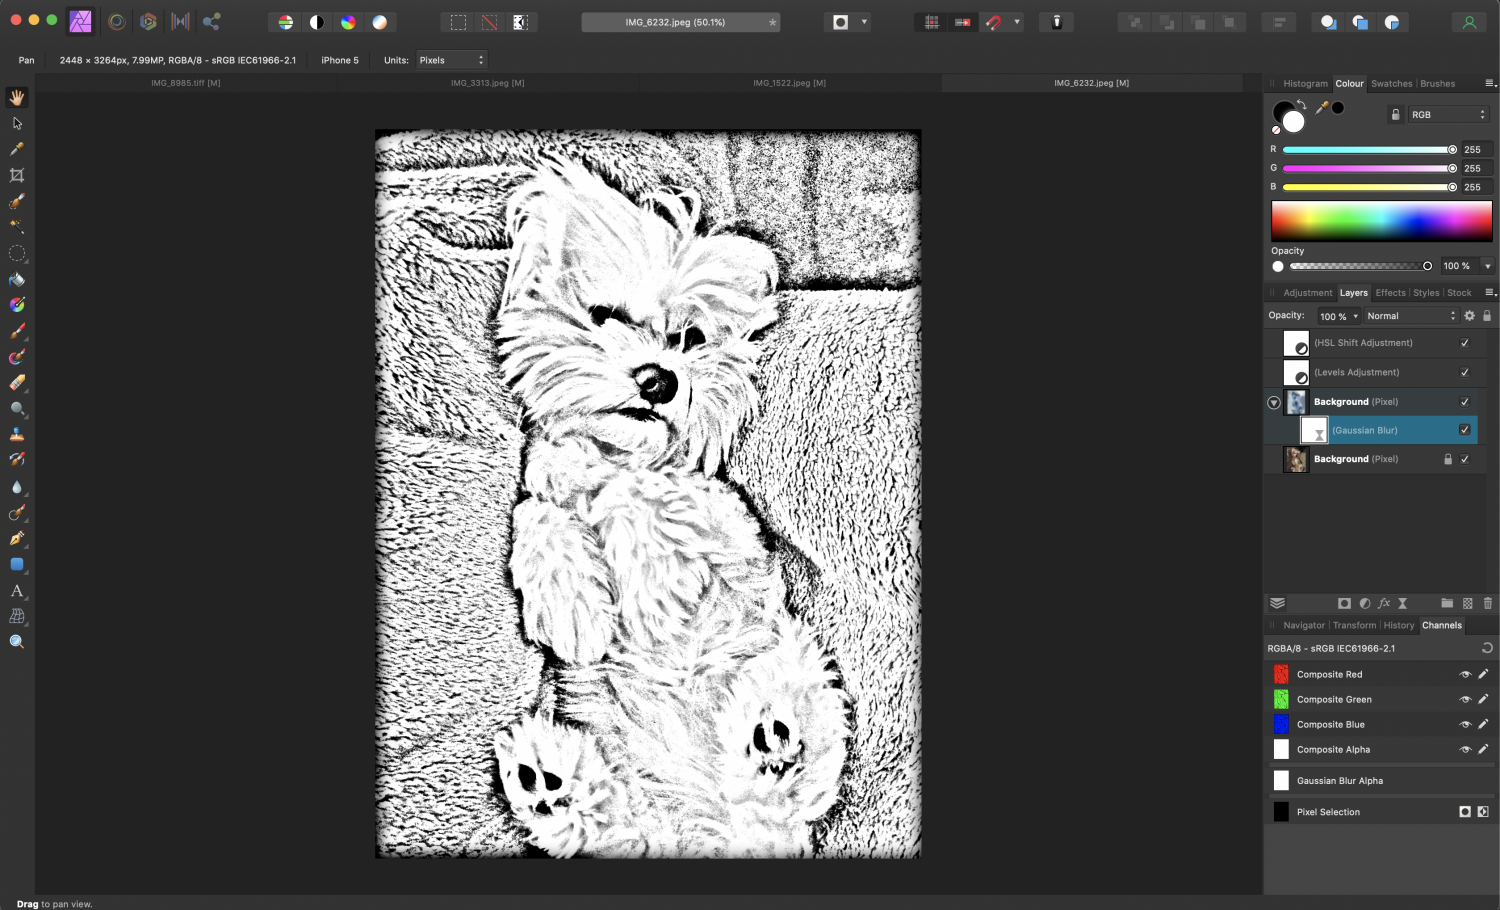
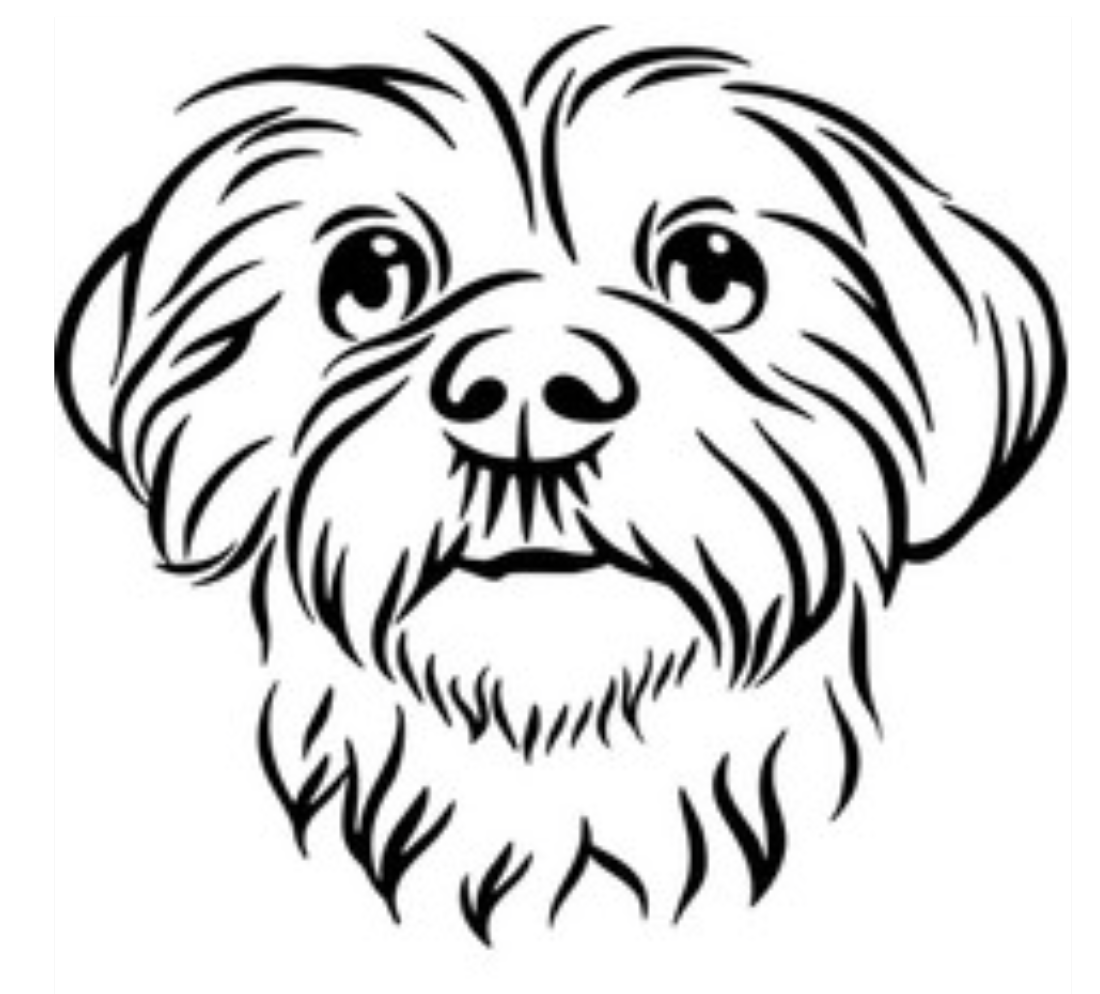
Thank you - great to know how to do But, in this specific case (getting the image printed on the custom doormat) it's not at all wh at I need - I followed the steps shown in the video you had linked (https://www.youtube.com/watch?v=AesJUS2yO2c) and got a result close to the one you showed (attached here). Though it may look like a pencil sketch (which is great), it could definitely not be printed on the doormat because apart from the dog's eyes, nose, mouth and paws which are clear black, everything else that makes the dog up (body contour, fur etc) is made of shades of grey. And the doormat printer can't do that. That's why in my first post I attached a black & white sketch of some dog which was made of thick black lines only. If you see the example of a custom doormat printing, that I had attached initially, you will understand that anything that's designed on it can either be made up of clear black print, or no print at all. So there can be no color gradients nor shades that make the dog's drawing up for this specific use. That's why I wanted to somehow convert a photo of my late dog into an (over)simplified sketch - like the sketch I found online and attached previously. Is that even possible to generate from a photo? (Maybe what I need to do simply can't be done?)
-
I used an old photo of my late dog in my car and tried to make the best - to my abilities - area selection around him (toggling all the time between On and Off in the Snap To Edges for the selection brush tool to get the most detailed selection I could at the dog's hair endings). Then I inverted the selected area to select everything around the dog, and lowered the color saturation slider completely down to take the color of the surroundings away (so the dog stands out in contrast). But because the selection of the dog's hair edges was far from perfect, the result looks horrible and "unrealistic" when the colorful dog is then in a black&white environment. It looks like someone just cut out the dog from another photo using a pair of scissors, and stuck this cutout atop a different photo! Is there some kind of technique, or tool, within AP that would do this MUCH better? *The last attached file is the original photo I used BTW
-
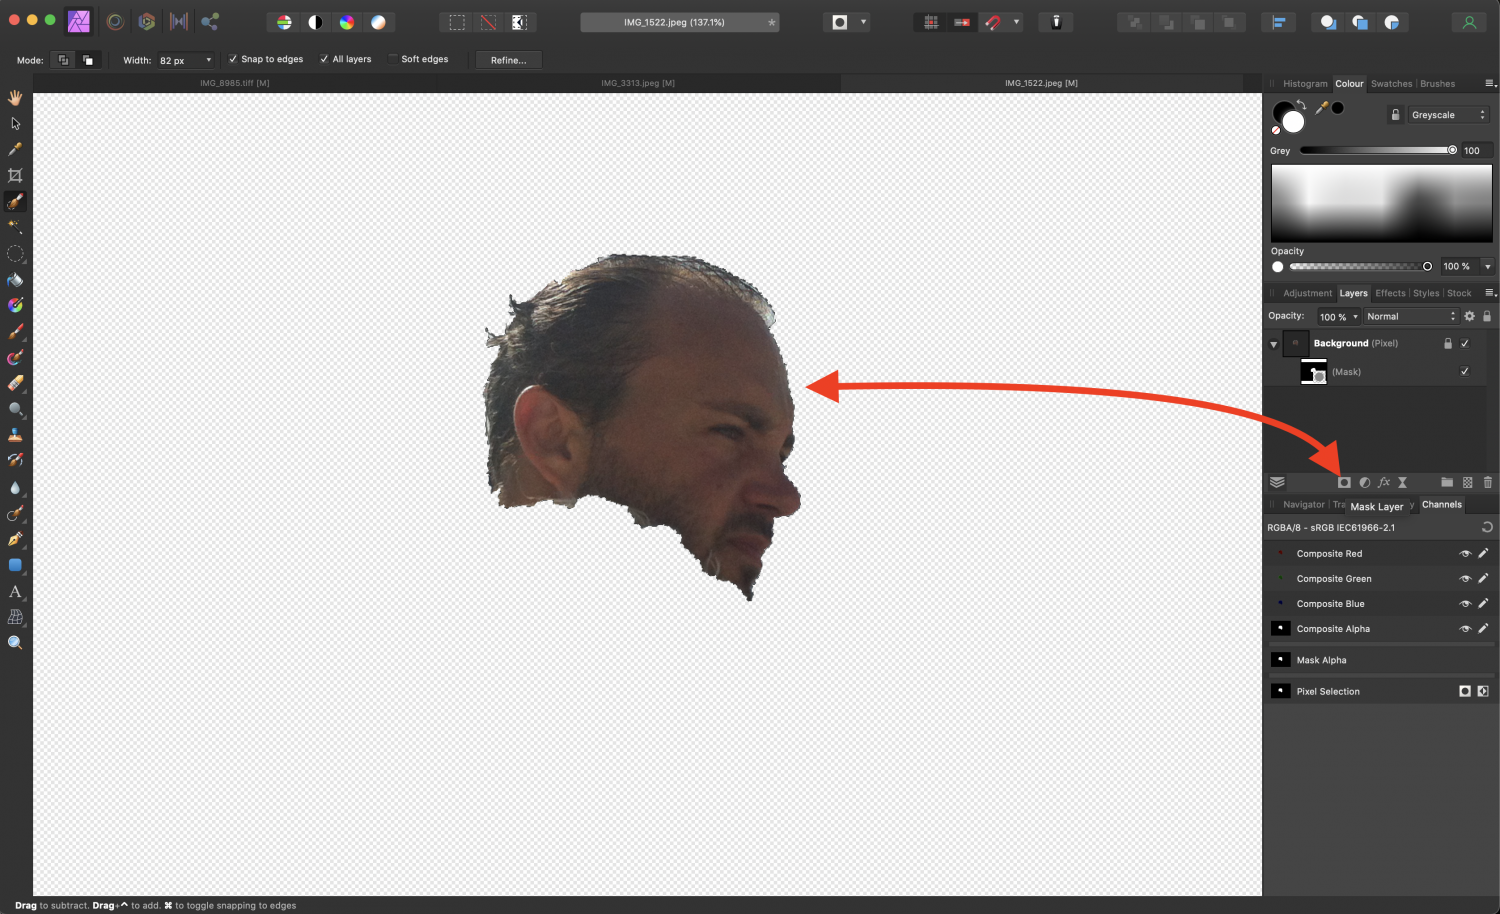
Hello! I have read that to invert a pixel selection (selected area) quickly, the shortcut is CMD+i. It is definitely not working for me. Is there maybe somewhere in AP (on Mac) where I can "set" what these shortcuts will do (if that is the reason I'm having this problem)? *In the attached screenshots, I show: 1) an arbitrarily selected area (my face), then 2) when I hit the mask button it (correctly) masks out my face and hides everything else around the selected area. 3) Then I show what happens when I press CMD+i (in my attempt to invert the mask - so to select everything outside the face's area) and the selection ISN'T inverted but something else happens instead...), and 4) I show a successful selection inversion (and masking out of the surroundings, while hiding my face) - which is what I was unsuccessfully trying to do with the CMD+i shortcut before - and achieved this only via the "long way" of pressing the Invert button in the Channels' tab. Also, is there some kind of view assist option which I can toggle on to make it more obvious which area/s is/are selected? Say, by dimming the unselected area/s?
-
Hello! Does anyone know if there's a way to take a photo (say of my dog) and transforming it into a very simple (over-simplified lol) vector or even a jpeg image of pen-strokes? I have all 3 of the Affinity apps, but would rather use AP as I'm more "acquainted" with it. What I want is to order a custom-made doormat, like in the attached photo, with my dog's image on it - but obviously they can't print anything detailed, nor use shade gradients etc. So my only option is to give them a file that looks as simple as the attached sketch example so that they can use that. So I would like to be able to take an existing photo of my dog (example of an unknown dog's photo attached) and somehow convert it to simple sketch. Any ideas?
-
bringing back full quality
henryb replied to henryb's topic in Pre-V2 Archive of Desktop Questions (macOS and Windows)
no it's an .afphoto file! I found the .afphoto file (of 300MB) on my disk and opened that. So surely (?) all the original quality files are in there. I can't remember but i think i imported all the 13 photos in their original quality (copy-pasted from a second AP tab in which I had "thrown" in the entire collection of the photos I liked - that .afphoto file is over 6GB!! - and to make my final selections on the .afphoto file that I screenshot for you, I must have made the canvas thingy smaller). So how do i resize it now to make the quality come back in all the 13 photos? Does just resizing the (saved) canvas/project change the quality of the photos back to what they were before the resizing and subsequent saving? -
I had made this collage of 13 photos in AP, and the photos were in perfect quality (you could zoom in A LOT virtually without losing quality. I wanted to use this for my facebook cover photo, and had read that a specific resolution and scale would be required to export it from AP and then upload it to my cover photo on facebook. So I had done that (can't remember the process) and it worked great for facebook, but the quality was REALLY lower.. If you zoom in just a bit it pixelates really badly. Problem is that I closed saved the aphoto file after having had exported the cover photo. Now if I open the afphoto project file, i still see everything in this "un-zoomable" low quality. Is there a way do undo this in AP (using the same afphoto file) so that my photos return to their full-quality level? I mean, keep the collage I've made as is, just bring back the quality Note that the afphoto is 300MB but only contains 13 photos in it.. That seems huge for only 13 photos at such low quality. Right? So, maybe the full-quality photo files are still "in there" somewhere? BTW is there anyway to make AP project files take up MUCH less hard disk space? Something like in Final Cut where you can "delete generated media files" (of course without losing anything from the afphoto file? (Maybe AP, like FCPX, generates files that are not necessary and you can delete them?). THANKS!!
-
Well, I haven't check out everything yet. I just went to the app store, downloaded the 1.8 update, then opened Photos, right-clicked on a haphazard photo, clicked on edit with affinity photo, made a couple of eedits, cmd+s saved, and the edited photo had replaced the original photo in Photos. That was what it was supposed to be able to do, and was able to before the bug of June 2019 came into our lives, and now can do again!! I can't say that an 8-month wait for such a BASIC flaw in AP is something to say "kudos" to Serif for (actually it's INSANELY late), but at least it now works!! You are saying that something else (related to this topic) STILL doesn't work?


