IzelPhotography
-
Posts
17 -
Joined
-
Last visited
Posts posted by IzelPhotography
-
-
On 04/07/2017 at 9:02 AM, hexaae said:
+1 for Smart Objects PSD import, and extending AP/AD Embedded documents.
ATM you can't do something like this:
(www.youtube.com/watch?v=XLdLwxt0nB8)
or to be exact you can't alter the mesh to wrap the object around something and save it as a template to easily add a different image/page every time you need. When you apply Mesh Deformation to an Embedded document in AP it will be converted to plain pixel image.
I used to use this a lot in PS for concept and mockup work. Sadly, it looks like I'll have to go back to PS as it's really important to me to be able to transform content in a non destructive way and be able to re-edit wording etc after it's been wrapped around objects. Now I have to create content, warp it, create finished image then delete layer and start layer again instead of editing it PITA.
Gutted as this looked like a good PS replacement.
-
10 hours ago, salzi said:
How did it work?
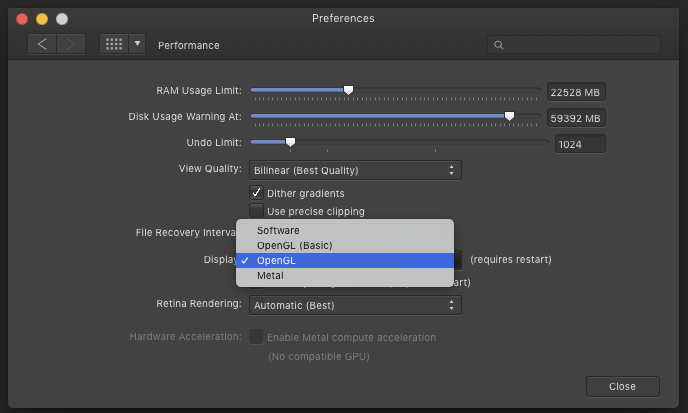
So far so good. No glitches at all. Switched to metal on my dual graphics card 2015 MacBook Pro and seems good as well. I'll be working it again today on the Mac Pro that's still on Sierra (the MacBook pro is on High Sierra as a test machine).
To be honest, it seems far more responsive than PS and I prefer the way inpainting works. It seems to get it right 1st time whereas PS sometimes took several goes. Actually, there are a lot of little things that just seem to work better and, more useful. Glad I made the switch.... so far

-
16 minutes ago, Patrick Connor said:
This combo defaults to what we think will work best for most users on your OS. So you can try the Metal if you wish but the performance may be improved for some and reduced for other .afphoto files. If you get glitching on "OpenGL" then try "OpenGL (Basic)"
Thanks, trying out Metal to see how it handles.
-
-
-
1 hour ago, Chris B said:
Hey IzelPhotography, welcome to the Affinity Forums

I think perhaps you would be better off using the Blemish Removal Tool for blemishes. The Inpainting Tool is great but I believe it also does more complex calculations so it can take a bit longer to complete lots of quick actions.
The beta should also be a bit quicker than release when using the Inpainting Tool.Thanks.... yeah, it's a mixture of blemishes and cloning out.
Just found the Beta release so I'll install that to see how it goes. So far, 1st impressions are really good. Probably haver a few ore questions once I get finished with this job. Thanks
Edit.
Inpainting is a lot better in the Beta! Thanks
-
Desktop Version on a Mac Pro 2013, 32gb Ram, 2x500 video cards 6 core version.
Using the Inpainting brush on a tiff file and every half 6-12 dabs removing blemishes a time bar pops up and it stops for about 5-10 secs or more before I can carry on. Any advice ref settings etc to avoid this?
Any pointers would be great... might have to use PS just to get this job out the way for now.
Thanks


New NIK Collection Released by DXO
in Resources
Posted
Cheers.... just tried before reading this and the Mac Version was dead for me. Just re-installed the free version (well, I paid for it originally) and all is well again on latest Affinity Photo and High Sierra. So glad they brought it up to date