Vince42
-
Posts
103 -
Joined
-
Last visited
Everything posted by Vince42
-
 Thank you for the wonderful illustrations. My task is to reuse the shape in many different perspectives without bending anything. The "bended" in "bended Sheet" just describes the shape of the desired object, not the use cases. I had the high hope, that I could create one object, give it a fill, put it to the back (or front) perspective and to change the perspective for every use case. But as it is impossible, I will work with my little workaround.
 -
Sorry for being too unspecific, for sounding disappointed and for calling the isometric grid an isometric view - my failure, apologies. My original vision was to have one object, bending its curves, putting it to the isometric grid and by all that having a fully fledged 3D model of the bended sheet, that I could easily adjust and change the 3D view on it. The fact that this is not possible, does not disappoint me, it just makes my plans a bit more complicated. I think I found a solution now that I can work with, thank you all again for all the good advice!
-
But wouldn't that just allow me to resize the sheet? I thought that the curve handles would not be selectable - and besides the curve handles would not know anything about the curve, as they reside in separate segments of the sheet, right? Thinking about this: I probably would not even need an isometric view then, because the segments would not be aware of the three dimensions ... Well, i will play around a bit and see where it gets me to ...
-
Just one final stupid question: Am I seeing it right, that there is no way to have the curve handles for the whole sheet, but only separately for the three (back, middle, front) parts?
-
This is also intriguing, thank you very much! I will play around with all the good suggestions now - thank you all very much, you were very helpful!
-
I put the edges together, but I am not sure, whether I created a closed curve by doing so - probably not. I will test this approach, thanks!
-
I thought I connected all lines and would have something like a 3D object, which I could adjust later on. But it seems that I will have to go for the back-middle-front approach. The shadows will be a different story after getting the base model right. Thank you for your input!
-
Hi, I just started playing around with isometric views. I would like to create a "bended sheet" (that is the best description I came up with, sorry). So far I did the following: Drew a line representing the bending with the pen tool Fitted the line to the side Duplicated the line Drew lines between the to bended lines with the pen tool So far the result is not spectacular but it shows at least the bended sheet: How can I apply a filling to this? Is there a way to have shadows and such in order to make it look three-dimensional? Is it possible to apply a pattern to the filling? Any help is highly apreciated (as always)!

-
@v_kyr thank you so much! That looks exactly like what I want to achieve! 🤗
-
I need to check out the substraction, never tried anything like that, but sounds as if it could work, thank you!
-
Sounds good! How would I do this with a transparent background?
-
I need to draw multiple concentric circle segments, which are of different lengths and with several openings. The result looks a little bit like a concentric maze, if you should need a picture in your head. As there is no cutting tool, I tried the donut, which allows only one opening and does not allow a width in pixels, I tried drawing the segments with the pen tool, but adjusting the curves without any "circle snapping" is cumbersome. How would you approach this?
-
Thank you for your tips!
-
Okay, sorry, were not aware of the implications. Is there any way to show the source in a legal compliant way? Otherwise it would become difficult to describe what I think and mean ... 🤔
-
Oh! That is really a good tip, thank you! I will contact them. (+1)
-
I want to redraw a comic picture and would like to have some tips from you, how you would approach this task. I would start with the basic (more or less) mono-coloured layers, try to redraw the simpler shapes and finally go over to redraw the complex elements. I am a bit unsure about how to best handle all the little details in a complex shape: shall they be drawn one by one or should I try to make use of some patterns? Maybe I should first draw the outline of the figure and add the details afterwards? As always: All your input is highly appreciated!
-
I found the problem: the system drive ran out of disk space. This hint was only shown, after I explicitly ran the update as administrator. Thank you all for the tips!
-
I just downloaded the three updates for Designer, Photo and Publisher, but they all fail to install. Am I the only one with this problem or is this a known issue?
-
I hope the title is not too confusing. I have a group of elements that assemble a vertical heading and some text boxes like this: I think I got the constraints right now: I can resize the group vertically and horizontally, the heading adjusts vertically, not horizontally and the boxes resize horizontally, both are anchored top left. I now duplicated the last box and moved it downwards in order to add another element to this group, but as soon as it leaves the area of the original element it vanishes. I am clueless as I thought the duplicated element would be visible inside the borders of the group. Any idea what goes wrong here or where my misunderstanding originates? excel-20190228.afdesign
-
:facepalm:
-
Thank you all very much for your examples! I tried them all (did not succeed with @Ballyshannon as my Pixels cannot be converted to curves) - and got really what I wanted! Kudos for all of you! It became obvious to me that I still do not understand the principle of masking - guess I should watch some videos and consult the Affinity book again. The lack of understanding hinders me too often to thing into the right direction - and I do not want to bother you guys with too many simple / stupid questions. Thanks a lot again! #LoveAffinity
-
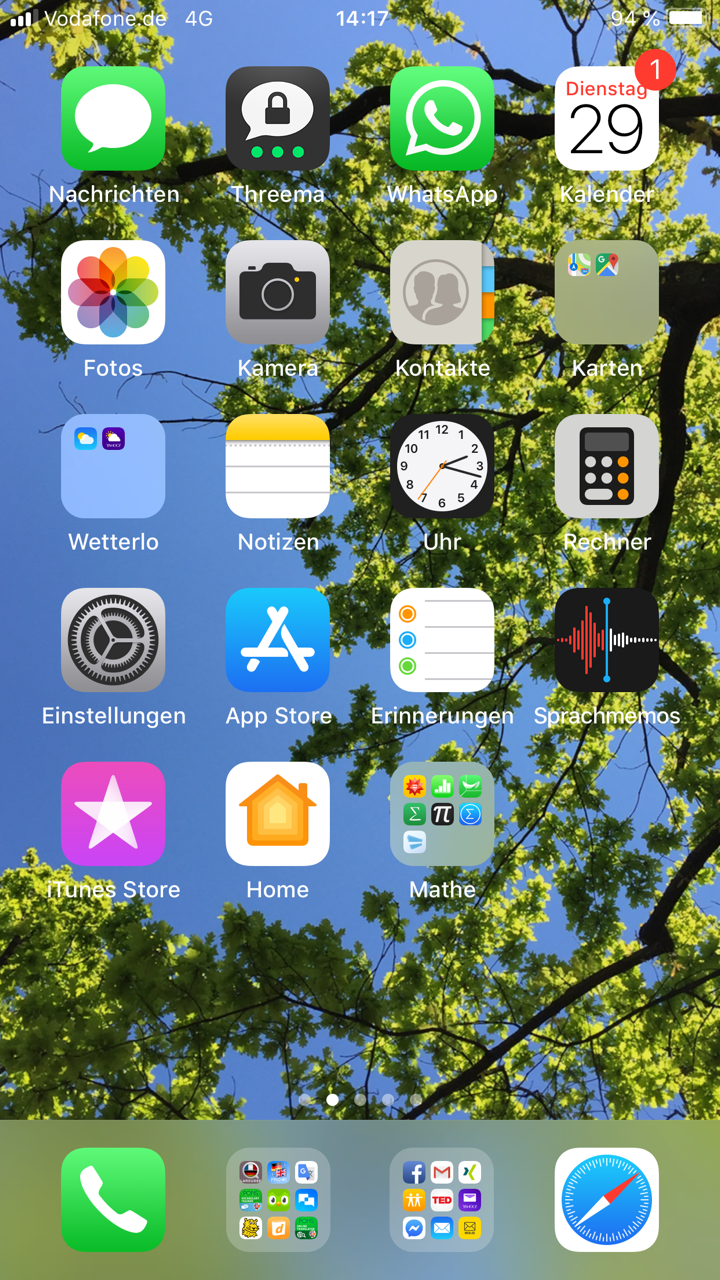
I have a screenshot of an iPhone and I would like to blur all icons except for one. My first thought was using a Mask Layer, but no matter, where I put it, I were not able to get a blurry effect. Then I painted a rectangle with rounded corners and hoped to get it inverted somehow in order to create a form to put on top of the screenshot and to give it Gaussian Blur and a low opacity, but also did not succeed. Then I watched some videos on masks, which also did not point me into the right direction. My approach - and there is probably a better solution for my demand - was to put a rectangle of the size of the screenshot on top of it. I gave it 50 % opacity (still no blur) and at least the picture looks "shaded" now. Then I painted a small rounded rectangle, but now I cannot find a way to "break a hole into my glass", if you know what I mean. I tried subtracting the two shapes, but it did not leave me with a big rectangle with a hole. Any help is highly appreciated as always. :hug: screenshot.afdesign
-
OT: Choosing a font
Vince42 replied to Vince42's topic in Pre-V2 Archive of Affinity on Desktop Questions (macOS and Windows)
Thank you very much everybody! I will try some tools online and on my computer. I guess the combination of tools always depends on the specific demands of a project, so that there is no "good for all" tool or combination of tools. The information were very interesting though. -
Inspiration needed
Vince42 replied to Vince42's topic in Pre-V2 Archive of Affinity on Desktop Questions (macOS and Windows)
In case somebody should be interested ... I took the original picture, applied transparency with the Transparency tool, put a rectangle in the background, added quotation signs and applied a White Balance Adjustment to all elements in order to give everything a gold colour in order to make it look warmer and older. I also changed the dimensions to a rectangle instead of the square layout, so that the font in its original spacing would fit; I also raised the line height to 125 % for a better spacing. That's it basically, I think. Einstein.afdesign
-
Inspiration needed
Vince42 replied to Vince42's topic in Pre-V2 Archive of Affinity on Desktop Questions (macOS and Windows)
Thank you for the good ideas, I will play around with some variants - including trying to make the picture partly transparent. The Einstein font is indeed a bit special - maybe I could squeeze it less and make the overall image less dramatic but rather "gold coloured" ... we will see ... again: THANK YOU ALL - I truly appreciate all the valuable input that I get from you guys!