kirkmc
-
Posts
30 -
Joined
-
Last visited
Everything posted by kirkmc
-
Got it, thanks.
-
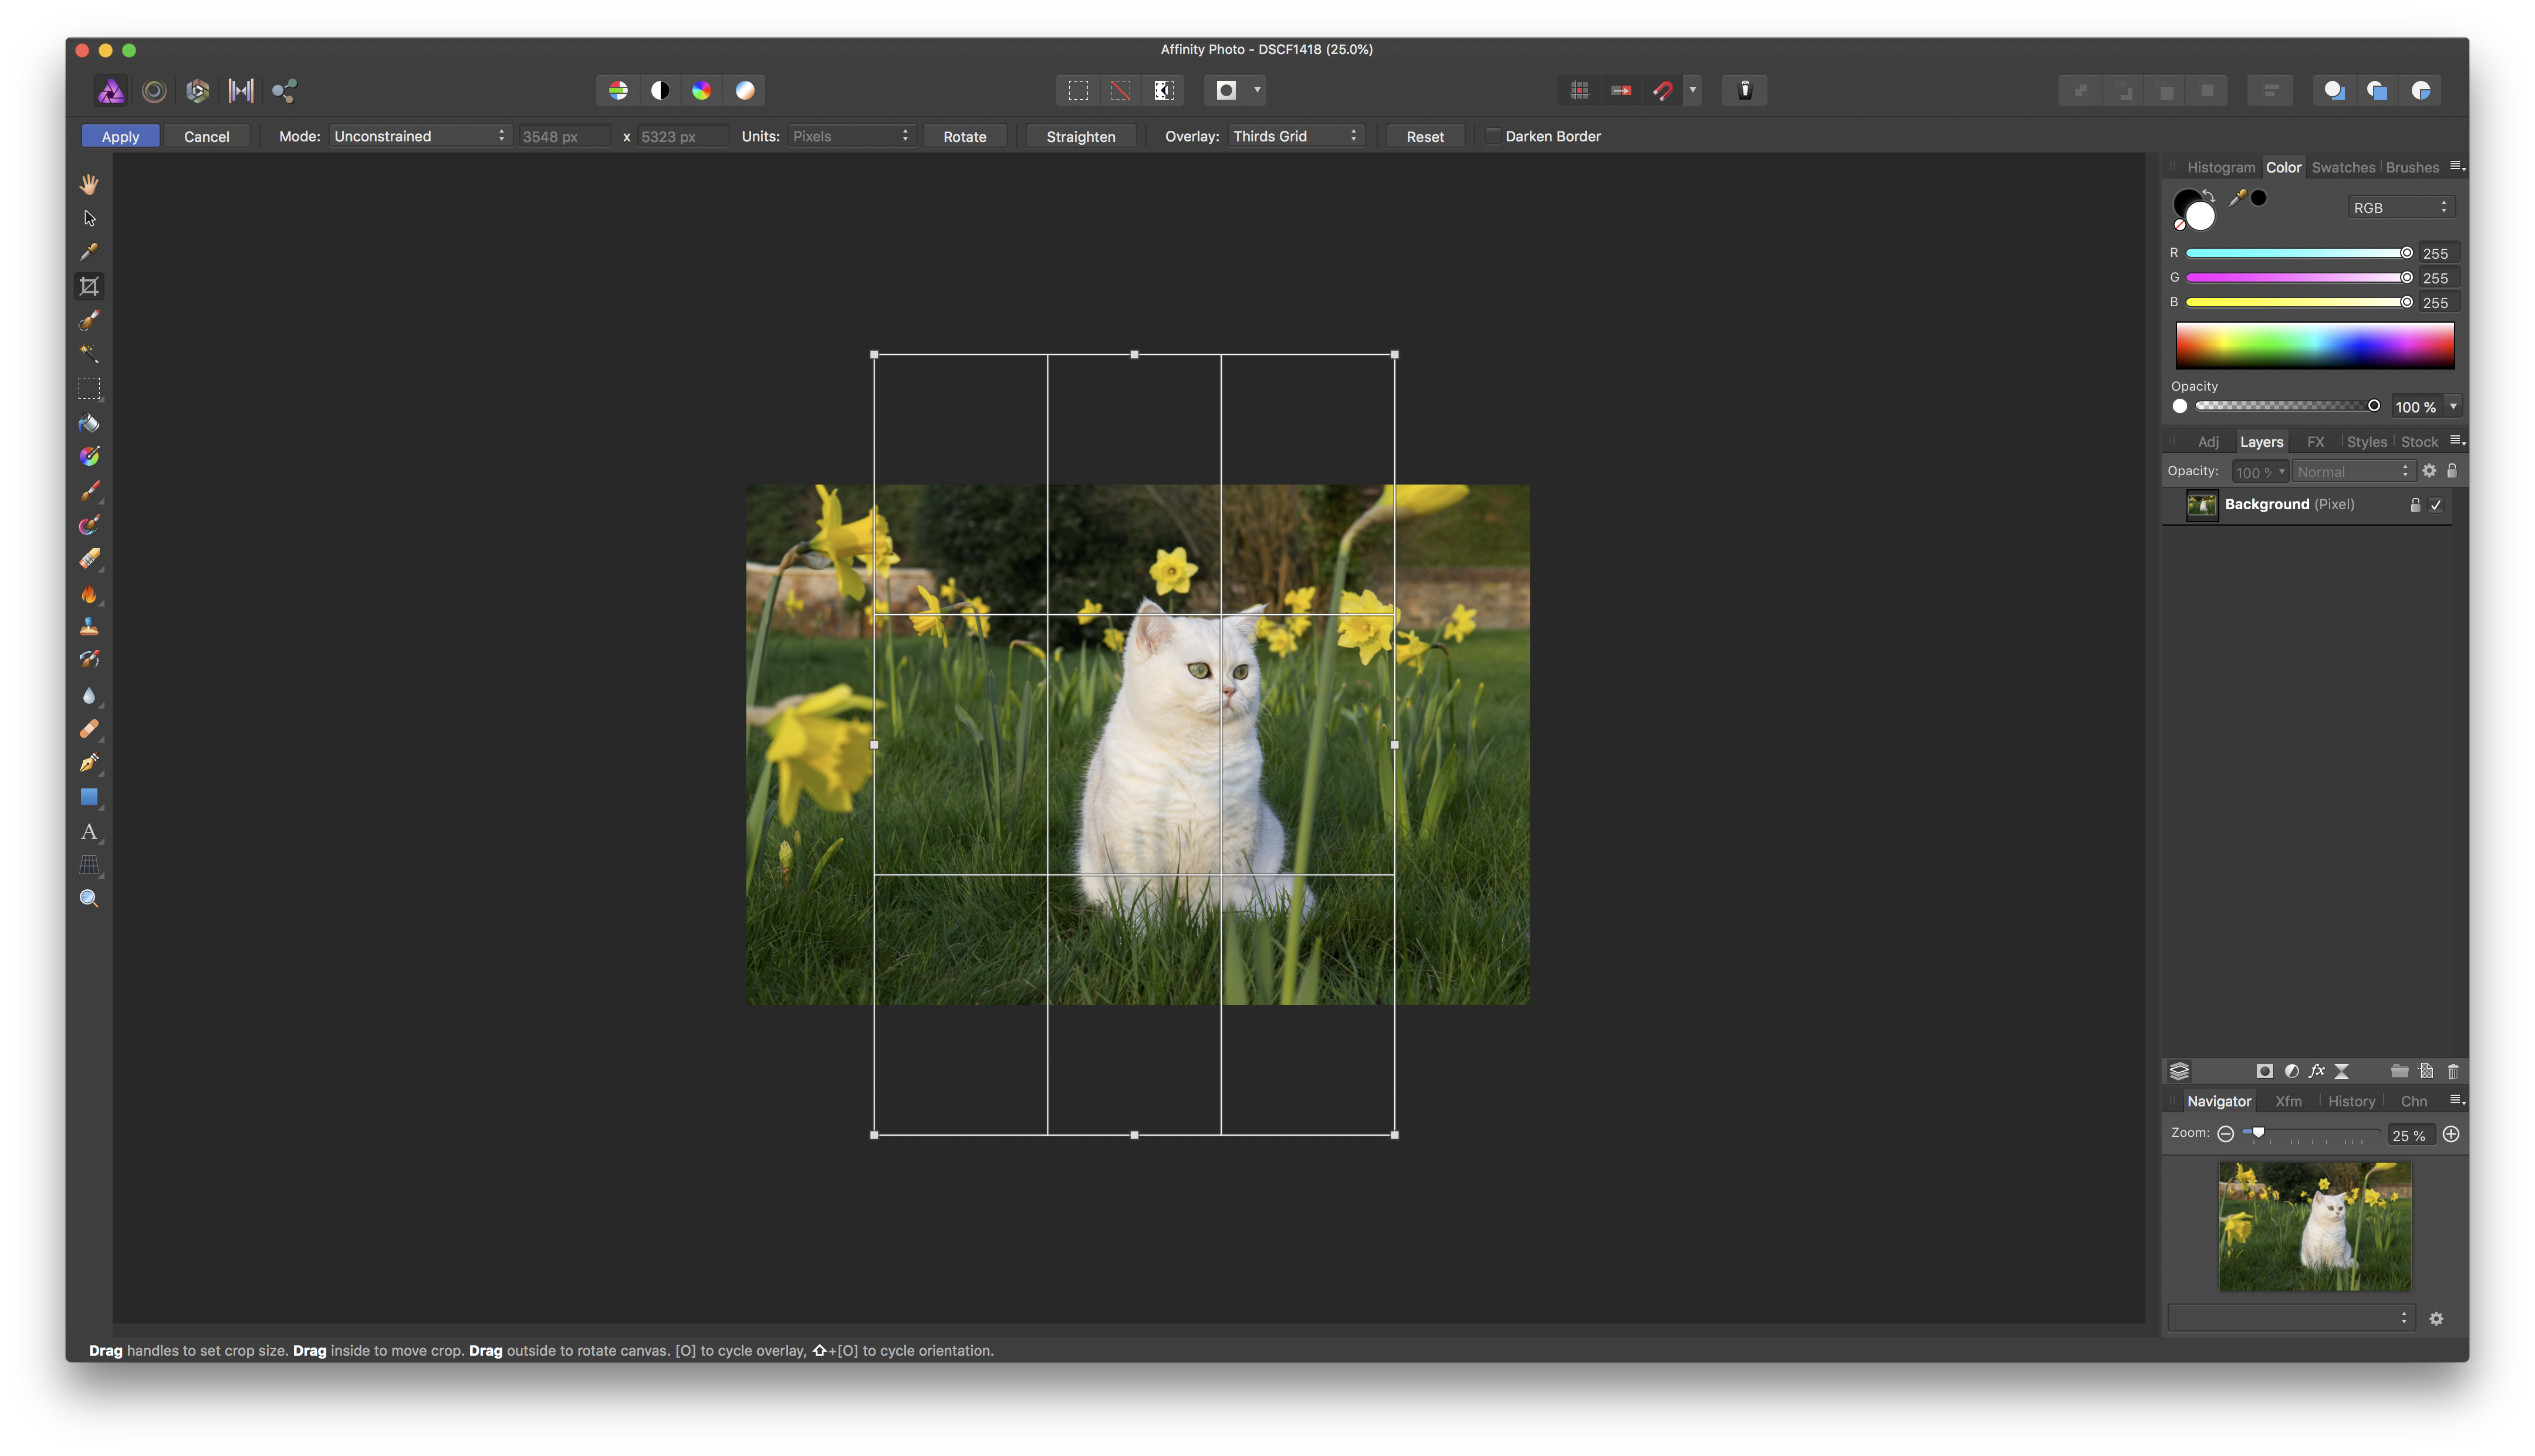
In my case, as you can see in the screenshot above, it's the default set of panels that display on launch.
-
Screenshot.

-
Several panels in the same group? As far as I understand, you can't save a workspace, so you will always have the same number of panels by default.
-
@toltec Thanks for that. All those are things that are not obvious. Such as why clicking Rotate on a 3:2 ratio converts it to 2:3; what's the logic there? I just reopened a file I was trying to rotate earlier, and even in Unconstrained, clicking Rotate shifts the aspect ratio from landscape to portrait; that seems like a bug to me. And I don't see any way to get that top handle that you show in your screenshots. This is just one of the many examples of severe user-unfriendliness I'm finding in AF. I've been using it for quite some time, but only use it for very specific things, because I don't know how to use most of it. I bought the book that was released a few months ago, and, while the second part with the tutorials is interesting, the first part isn't very useful. It assumes that the user already knows what all these features do, which really isn't the case for many people. I've watched some of the video tutorials for some of the features, and in many cases, this app requires extremely complex procedures for things that should be simpler.
-
AF does some amazing things, but this is the kind of thing that makes it incredibly frustrating to use. When I select the crop tool, there's a Rotate button, which works in an odd way. With a photo in 3:2 aspect ratio, it crops the photo as though it were in 2:3. (And the Crop tool is really painful, trying to use custom aspect rations; when I set it to 3:2, it keeps switching to 2:3. Other photo editing apps let you click a button, drag a bit, and free rotate. The explanation above is hermetic to me: Okay, I have my layer selected, and the Move tool selected, but where is the Transform panel? Oh, it's the Xfm panel? They why didn't you say so. Enter a value; well, I tried that, and I can't enter anything in that field. This is just an example of the frustration I have with this app. So many settings are hidden, or require long explanations to use. Why can't you simply allow a free rotation like most apps, even Apple Photos, offer?
-
Maybe I'm missing something, but I can't see how to crop a photo to a specific aspect ratio (4:3, 3:2). There are a few options in the Mode menu when the crop tool is selected, but not enough. I think every photo editor in the world gives you a number of aspect ratio options, and also lets you choose whether the aspect ratio is appealing to portrait or landscape mode. I find it surprising that I have to pull out a calculator to get the aspect ratio I want. What am I missing?
-
Thanks, that's certainly a lot more complicated than when I need for now. I'm going to try a few different things to see how the photos turn out.
-
Yes, you may be right. Thanks.
-
I just printed again using the default profile it offered; it looks much better. But why does the tutorial suggest not allowing the printer to do the color matching? I don't understand; I'd expect that would be more accurate.
-
I don't know. I had assumed the profiles were for the paper, not for a combination of paper and printer. I'm new to this. So I can't use non-Canon paper - at least to get accurate printing - on this printer? I bought Epson because it was a bit cheaper, and there was a 2-for-1 deal at Amazon on their glossy paper.
-
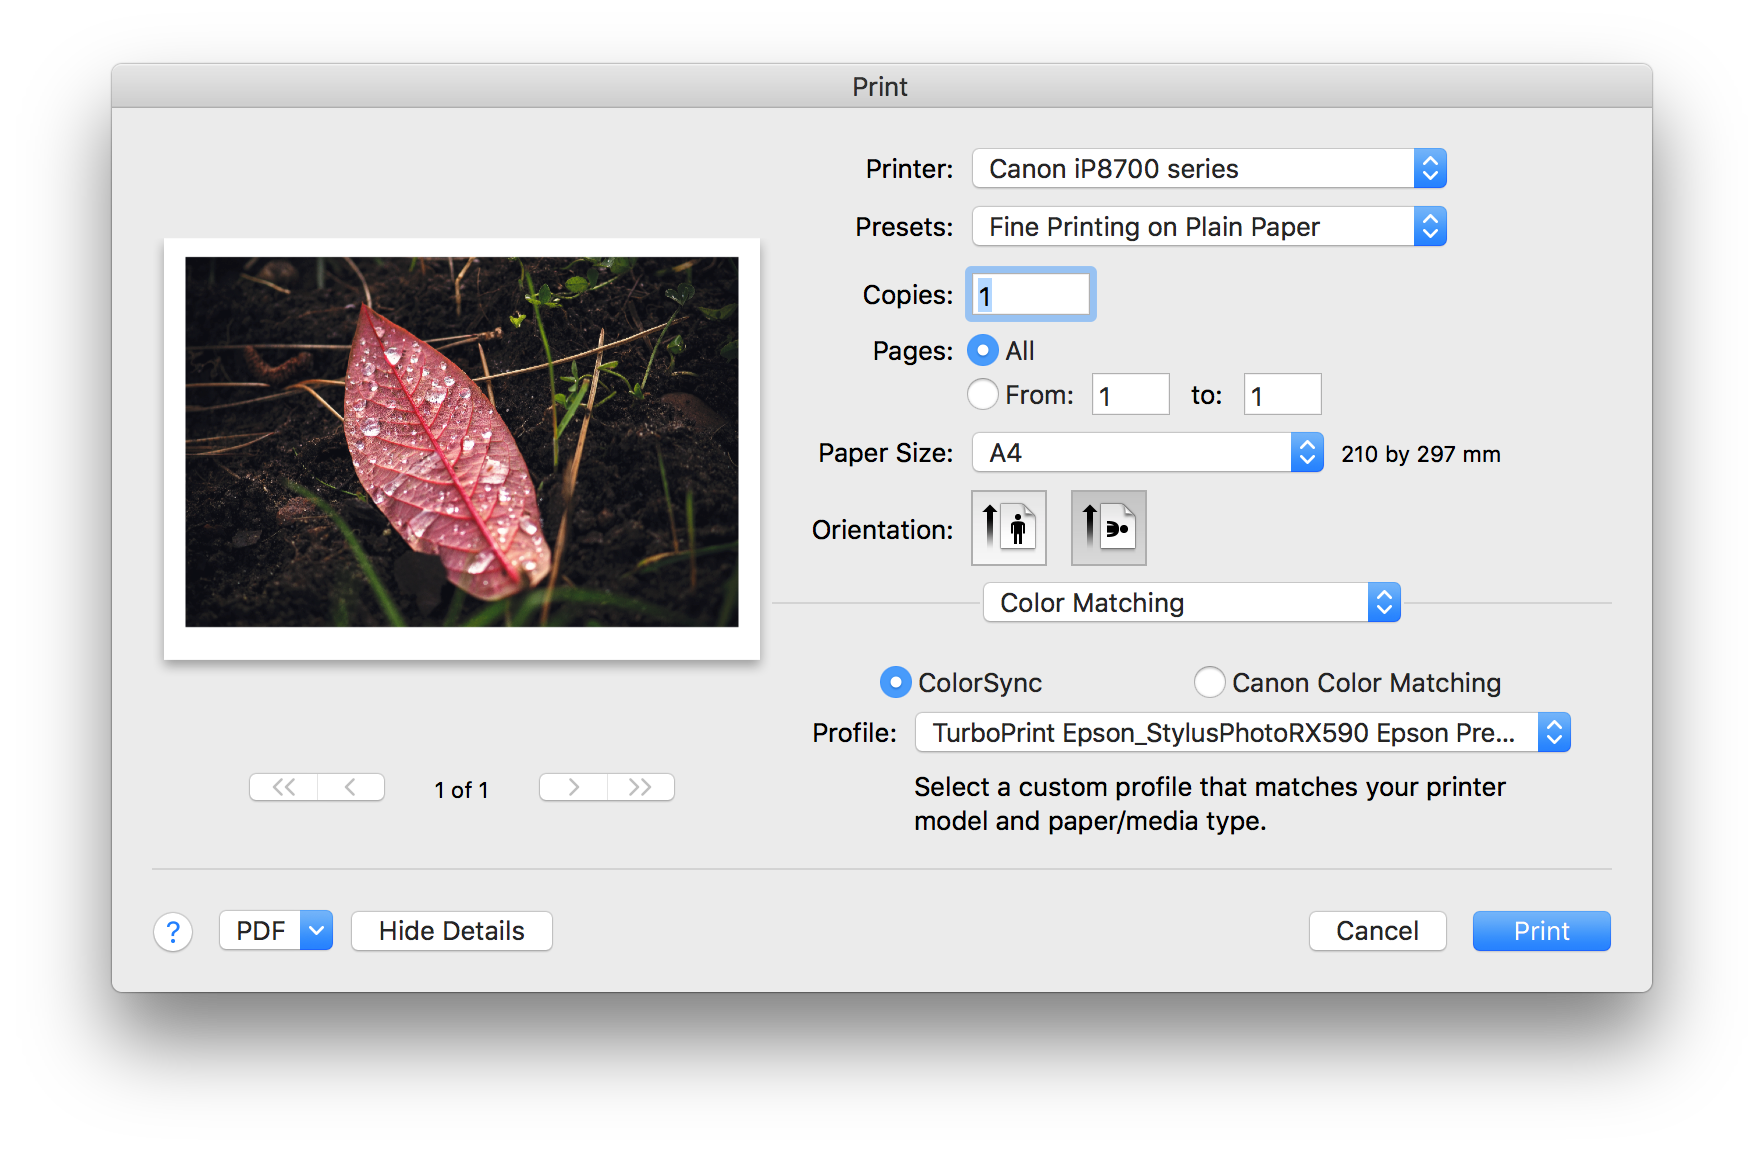
No, that's a profile for the paper, not a printer. You can't see the entire name, but it's Espon Premium Glossy. Or is the profile only for an Epson printer? I downloaded it from a page that had Epson paper profiles. And if that's the wrong profile, how do I know which one to choose? All the Canon profiles have names that aren't very helpful, like Series PT1, Series MT2, etc.
-
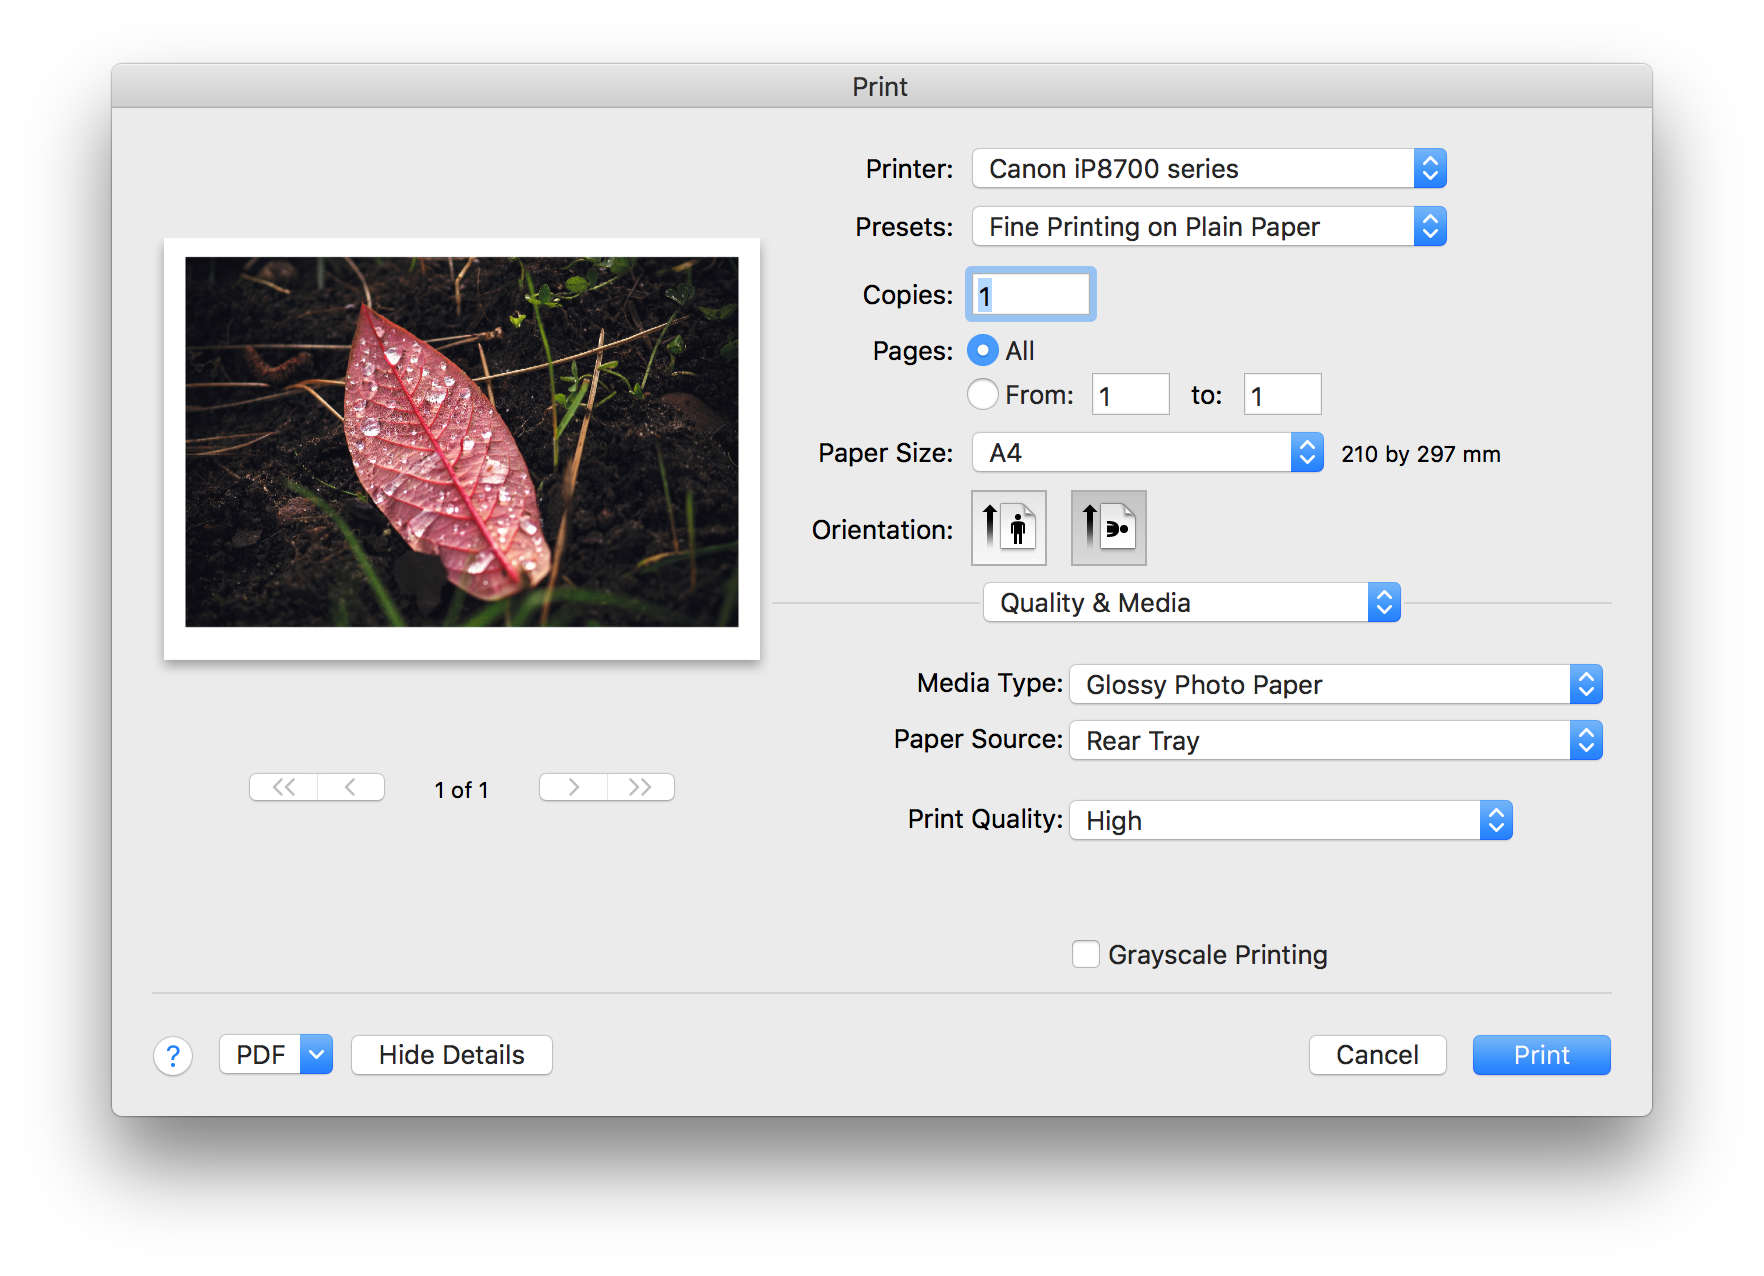
Well, I did what the tutorial said, which was to merge the layers, and copy them onto a new document. as you can see in the screenshots of the printer driver, the photo is much brighter and more colorful than the printout. Why should I choose a profile for the printer rather than the paper? I downloaded profiles for the two papers that I bought, and assumed they would be appropriate.
-
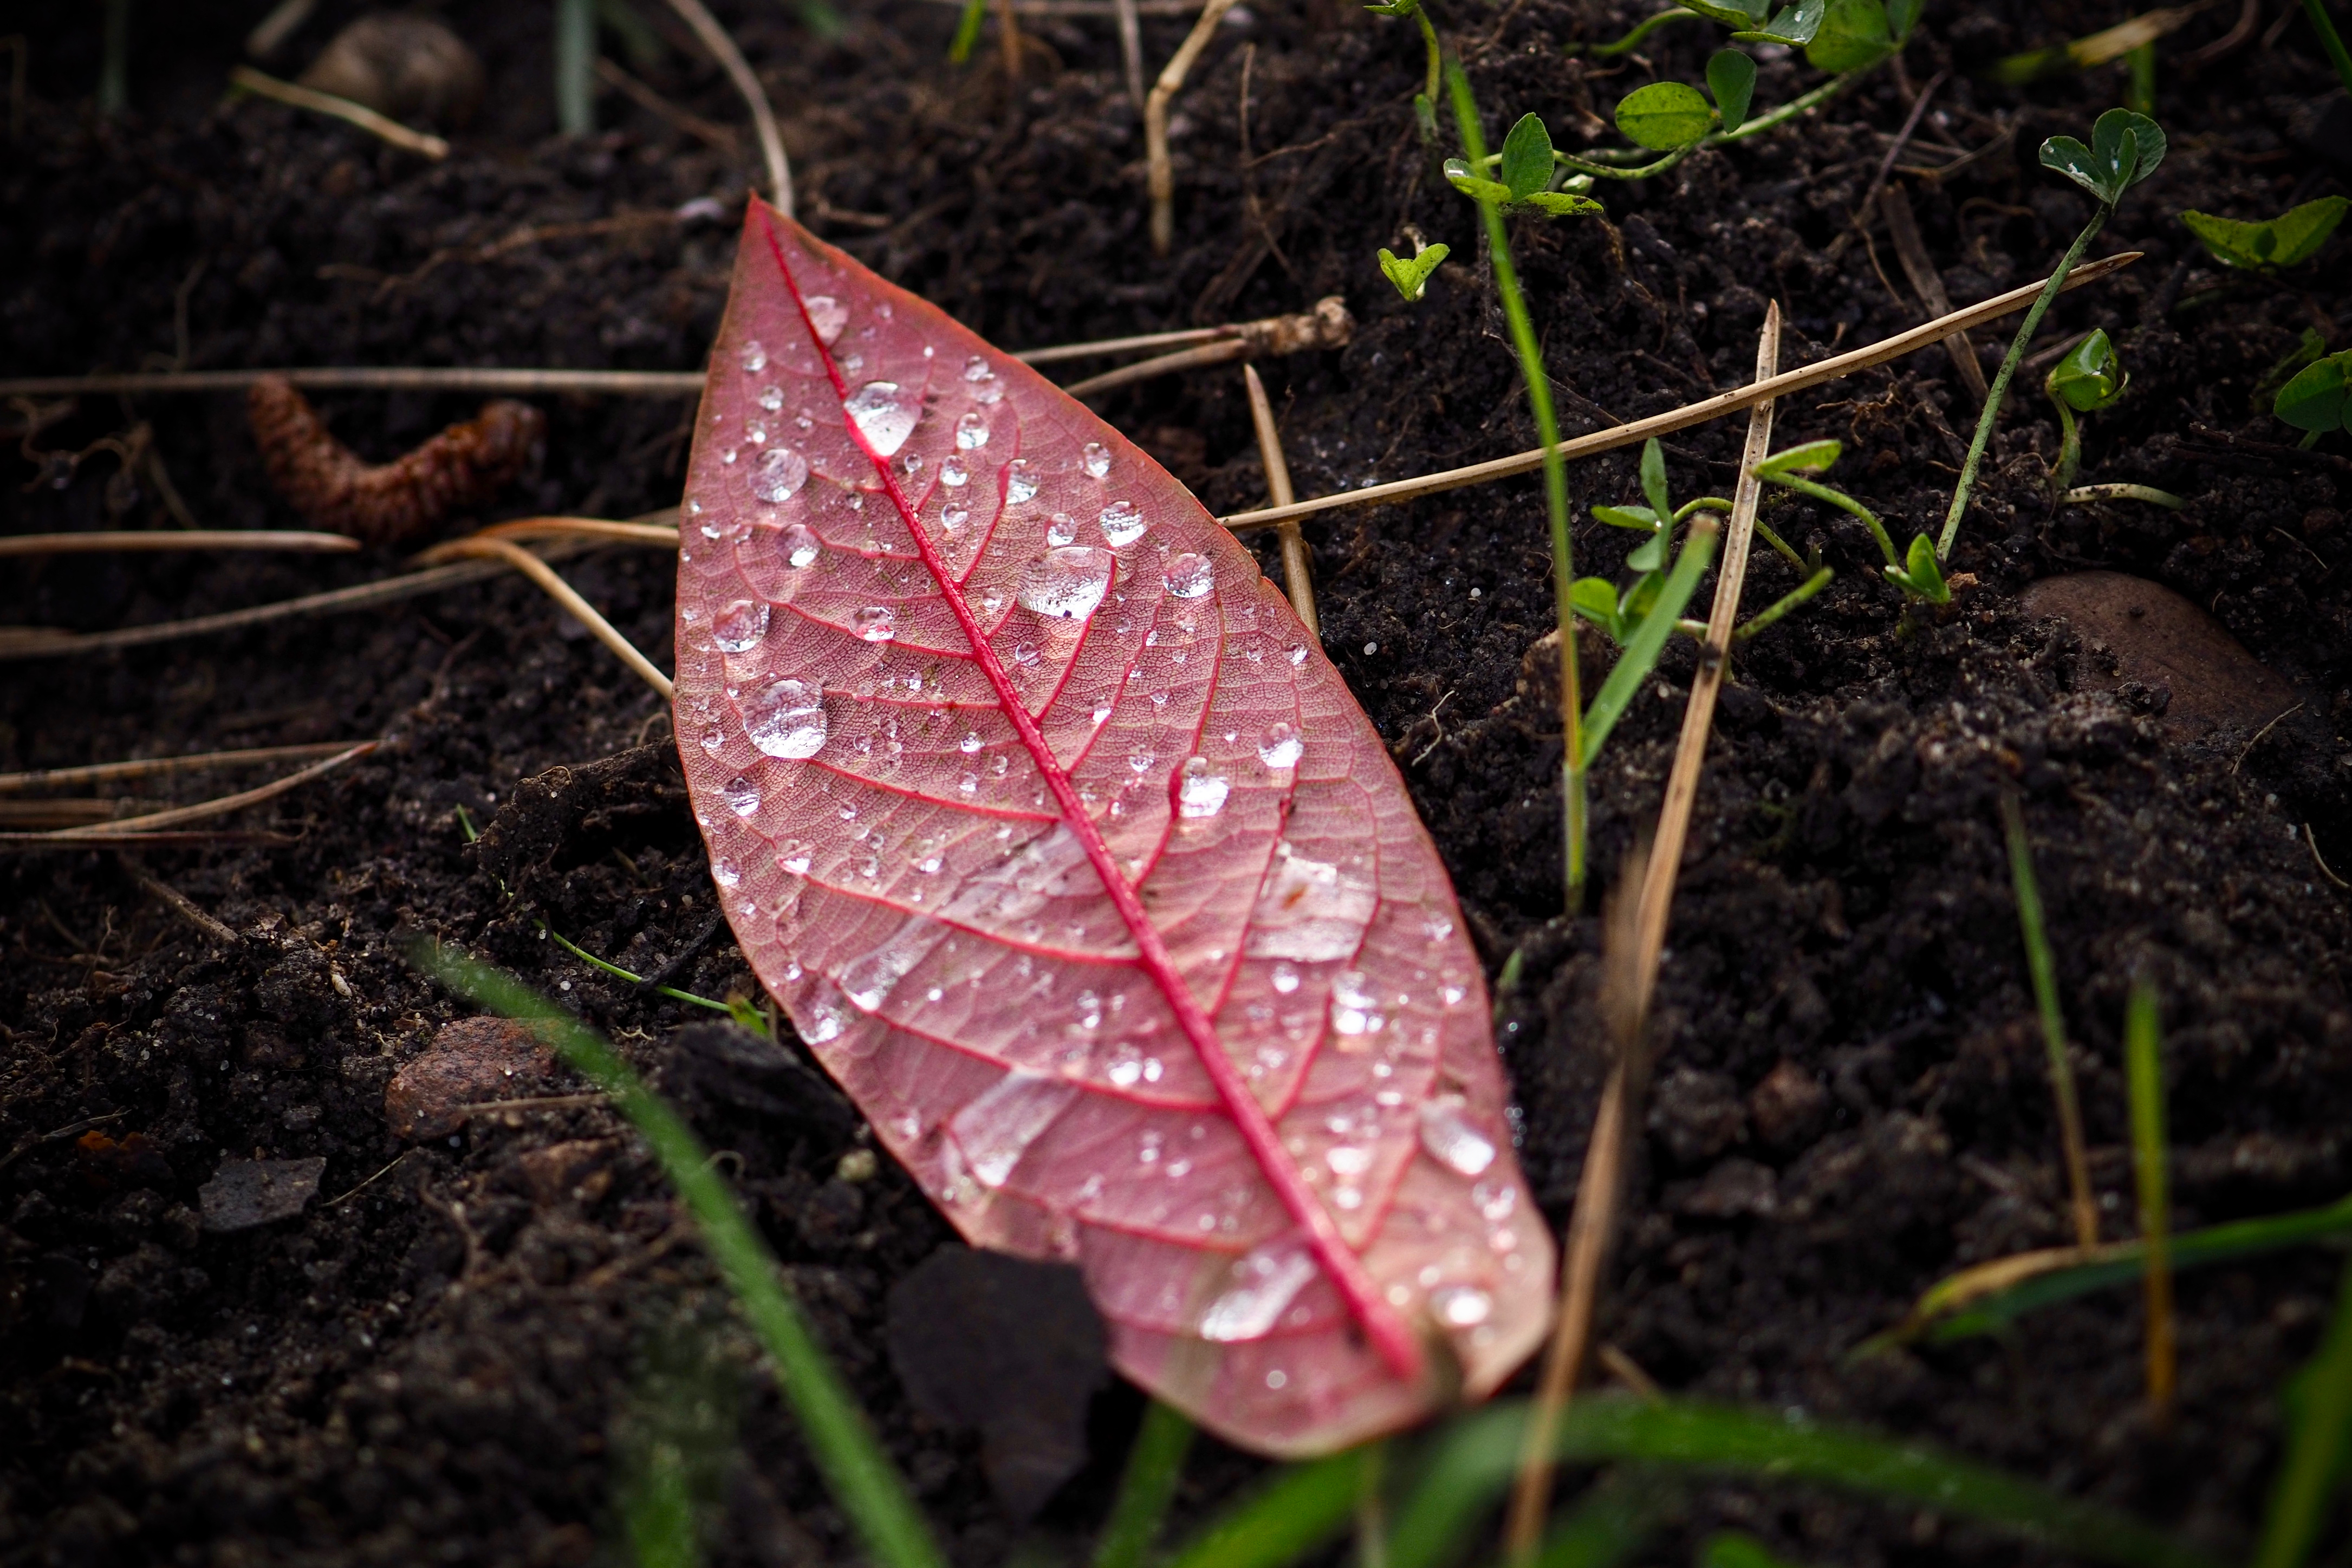
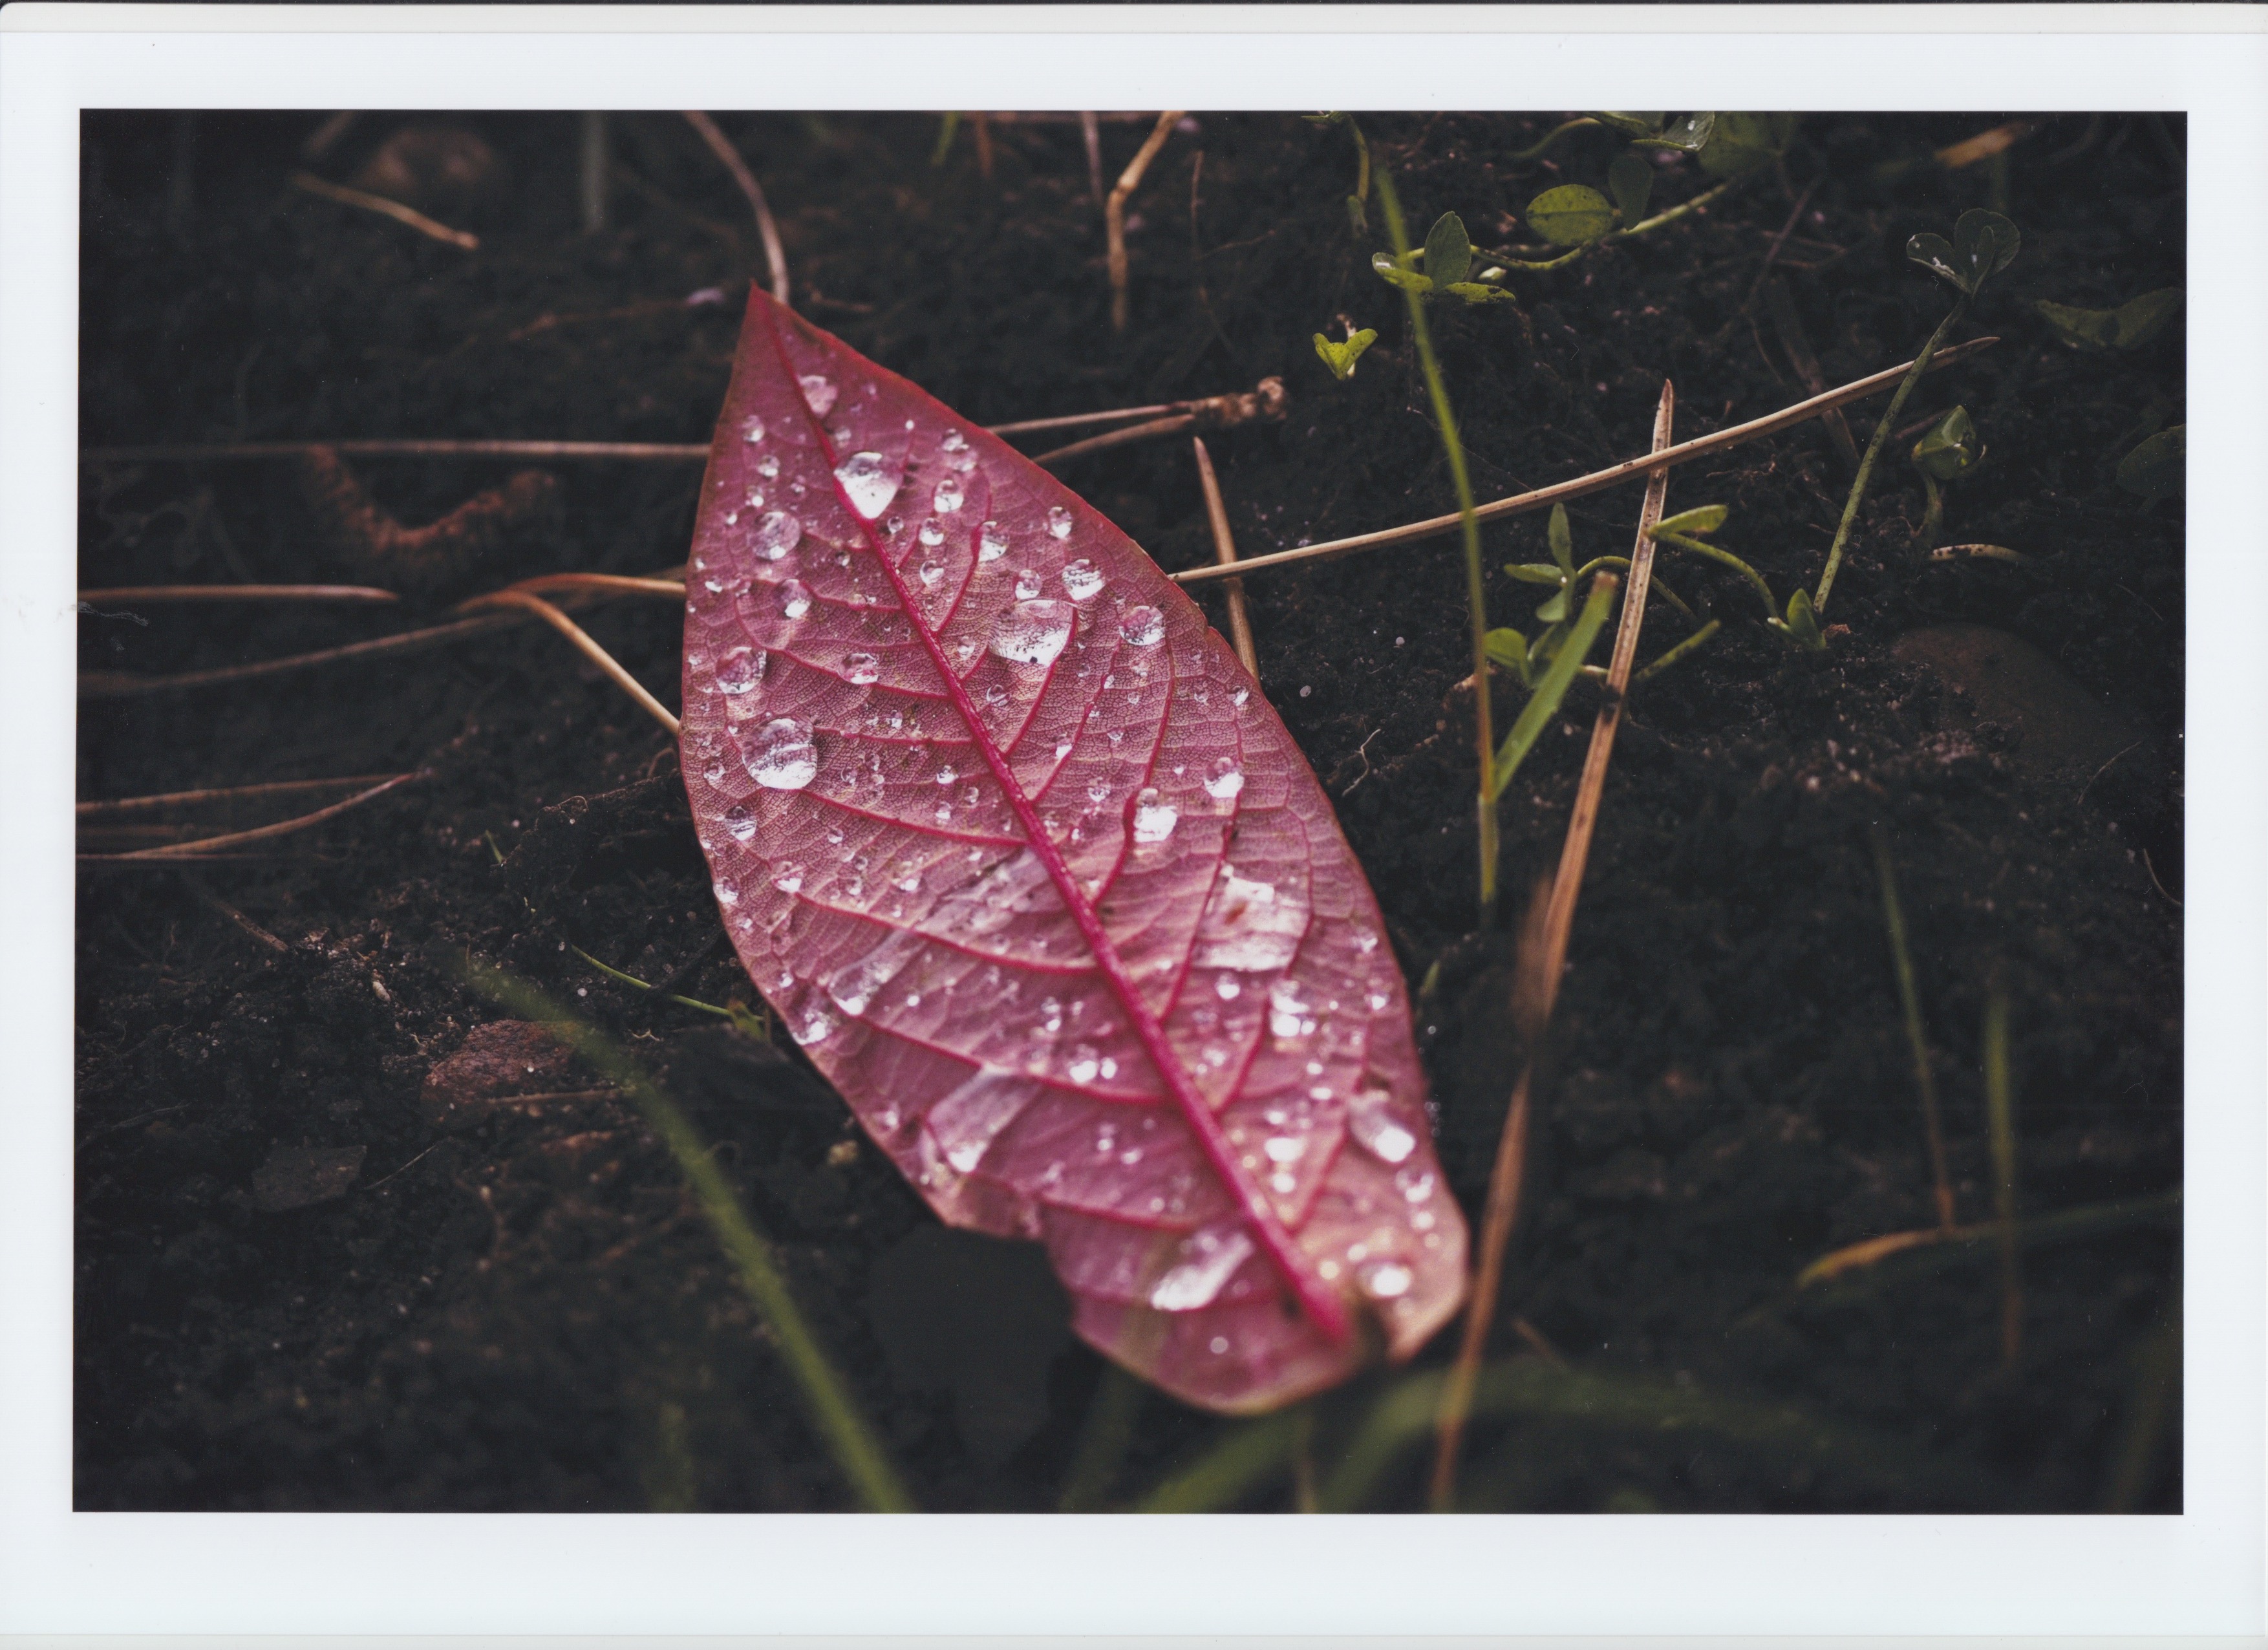
I'm new to printing photos. I've never owned an inkjet printer, and I bought a Canon Pixma iP8750, a 6-ink A3 printer. I'm interested in learning more about my photos by printing them. The first thing I did was print a couple of photos from Apple Photos, which is where I store my photo library, just to make sure the printer worked. One was in color, one in black and white. They both looked okay; the color one was of a cat on grass, and the lawn looked a bit yellowish, but not too much. The black and white one was of some thatched huts near Stonehenge, and it had a bit of a magenta cast, but still looked decent. So my next step was to learn how to print more carefully. I followed this tutorial: https://vimeo.com/203271868 I used the second method - placing the photo on a white background, to have borders - and I carefully followed the instructions selecting a profile for the paper I was using, telling it to use ColorSync to manage colors, etc. My iMac is calibrated with a Spyder Pro, so I'm confident that the colors are good. The print I made was ugly. The colors don't match what I see in screen, and it's dark and murky. I'm trying to find out where I went wrong. I'm attaching a scan of the photo I made with a flat scanner; it's not exactly the same colors as the photo, but it's close enough. I'm also attaching the photo itself that I exported from Affinity Photo, after soft proofing and adjusting the brightness and contrast. And two screenshots showing my print settings. I'd appreciate if anyone could help me figure out why this photo looks so bad. Thanks in advance.
-
I've just watched this tutorial about lens corrections: https://vimeo.com/194330558 I'm trying to see how Affinity Photo applies lens corrections to my RAW files, and it turns out that I use the same lens that is used in the video. But when I take the same file, make a copy, and apply the lens corrections to one copy, but not the other, there is no different at all between the two. I downloaded a trial of DxO Optics, and its lens corrections show a very noticeable difference. So there must be something I'm doing wrong in Affinity Photo. Any ideas?
-
Ah, thanks for that. I hadn't thought of using a macro. That does the trick.
-
Is there any way to tell Affinity Photo that I want all photos I open to have certain layers, such as Brightness/Contrast, Black and White, Shadows/Highlights, etc.? It would save time having to add them, and for the ones I don't want to use, I would just uncheck them.
-
No, I wasn't using a hood on that shot. But the flare isn't coming from where the sun is.
-
The sun isn't coming from that direction; it's coming from the right (around 2 o'clock).
-
Thanks for all the replies. I'm still surprised that it appears that Affinity Photo isn't smoothing things out better. I understand that it's best to start with RAW files, which I do shoot, but as this was my first experience with AF, I just tried with a JPEG. It's odd that other apps will do better on a JPEG than AP, and I'm not sure I get why that's the case.
-
Thanks for this. There are light streaks across the field around the tree; what is causing them?
-
Okay, the attach file thing isn't working. I've tried several times. Here's a Dropbox link: https://www.dropbox.com/s/ntngmek3mbz5mot/P6060052.jpg?dl=0
-
Arrggh, the file wasn't attached. Here it is.
-
This only shows up on the BW conversion; the original is very clean. It clearly has something to do with the various sliders; I'm not using the exact same settings as in the tutorial, but adjusted according to the photo I selected. In Photos, you have far less latitude with these settings, you don't have access to the six different colors. But what I don't understand is how Affinity is rendering something without at least smoothly dithering the similar colors. I've loaded the RAW file in Affinity and it's a lot cleaner. Which makes me think that this software is fine for RAW files, but not very good for JPEGs. Again, I'm a newbie, but I've never, ever, seen photo editing software that would render something as badly as this photo in black and white. I'll attach the JPEG here and if anyone wants to have a look, I'd appreciate it. I'd like to understand if it's me doing something wrong or the software.
-
I just followed the tutorial which suggested moving the various sliders in a live layer. If I reset them all to 0, it's a lot cleaner, but it's much more washed out than the conversion I did in Photos. I started with a JPEG to follow the tutorial; I have a RAW shot as well, and I'll see what happens with that. But does this mean that Affinity doesn't give good results with JPEGs? I've been using Photos for quite some time, and never seen this type of artifact. Buying Affinity is the first time that I'm trying more powerful photo editing software, so, as my subject line suggests, I am a newbie.