abject39
-
Posts
102 -
Joined
-
Last visited
Everything posted by abject39
-
Cog and Circle not the same size
abject39 replied to abject39's topic in Desktop Questions (macOS and Windows)
This is exactly how I noticed the issue. I create GUIs for my own audio software, which is rasterized and often layered. I work in pixels, where precision is important and could see frindging pixels that were a different color. -
Cog and Circle not the same size
abject39 replied to abject39's topic in Desktop Questions (macOS and Windows)
I'm glad others have been able to verify my findings. What I find odd about this behavior is that even if the cog is converted into Curves, it maintains the same 1000x1000px ratio (up to 6 decimal places), even when we can see the reading is visually incorrect. -
In affinity Designer, if I create a 1000x1000px black COG and 1000x1000px white circle and center them on each other, they will not be the same size. Even if I set the Inner radius and Tooth size to 100% and the Notch size to 0%, I can easily see that the Cog is bigger once I zoom in. Is this a bug, or am I misunderstanding how the Cog and Ellipse tool works?
-
Currently, there are no options to show decimal places for shape parameters. For example, if I create an object with the Cog tool, I can define the Hole radius as 60.43% to make it as accurate as possible (which the shape will accept). Still, once I press Enter to input that value, the display will show 60%. This makes tracking minute accurate values extremely difficult. Can you add an option to the preferences to display the true values?
-
It is definitely not intended behavior for either. Fortunately, the most recent update has fixed the issues.
-
The radius option resets to rounded corners when adjusting a shape with different corner types. To recreate this bug, create a rectangle shape. Uncheck single radius for the corners, then adjust any corner except the top left to straight. Then adjust the percentage. The corner will become round. Furthermore, if opposing corners are adjusted too far the entire shape shifts instead of the corners meeting. For example, if 3 corners are adjusted passed 50% the other corners shift. In Affinity Designer V1 the corner tool would not shift other corners. It would stop once the two corners intersect. This is one the Windows Store version of Affinity Designer V2.
-
Surprised to not hear anything back on this. Maybe my description was entirely too complicated to understand. I can create a video of the issue if needed.
-
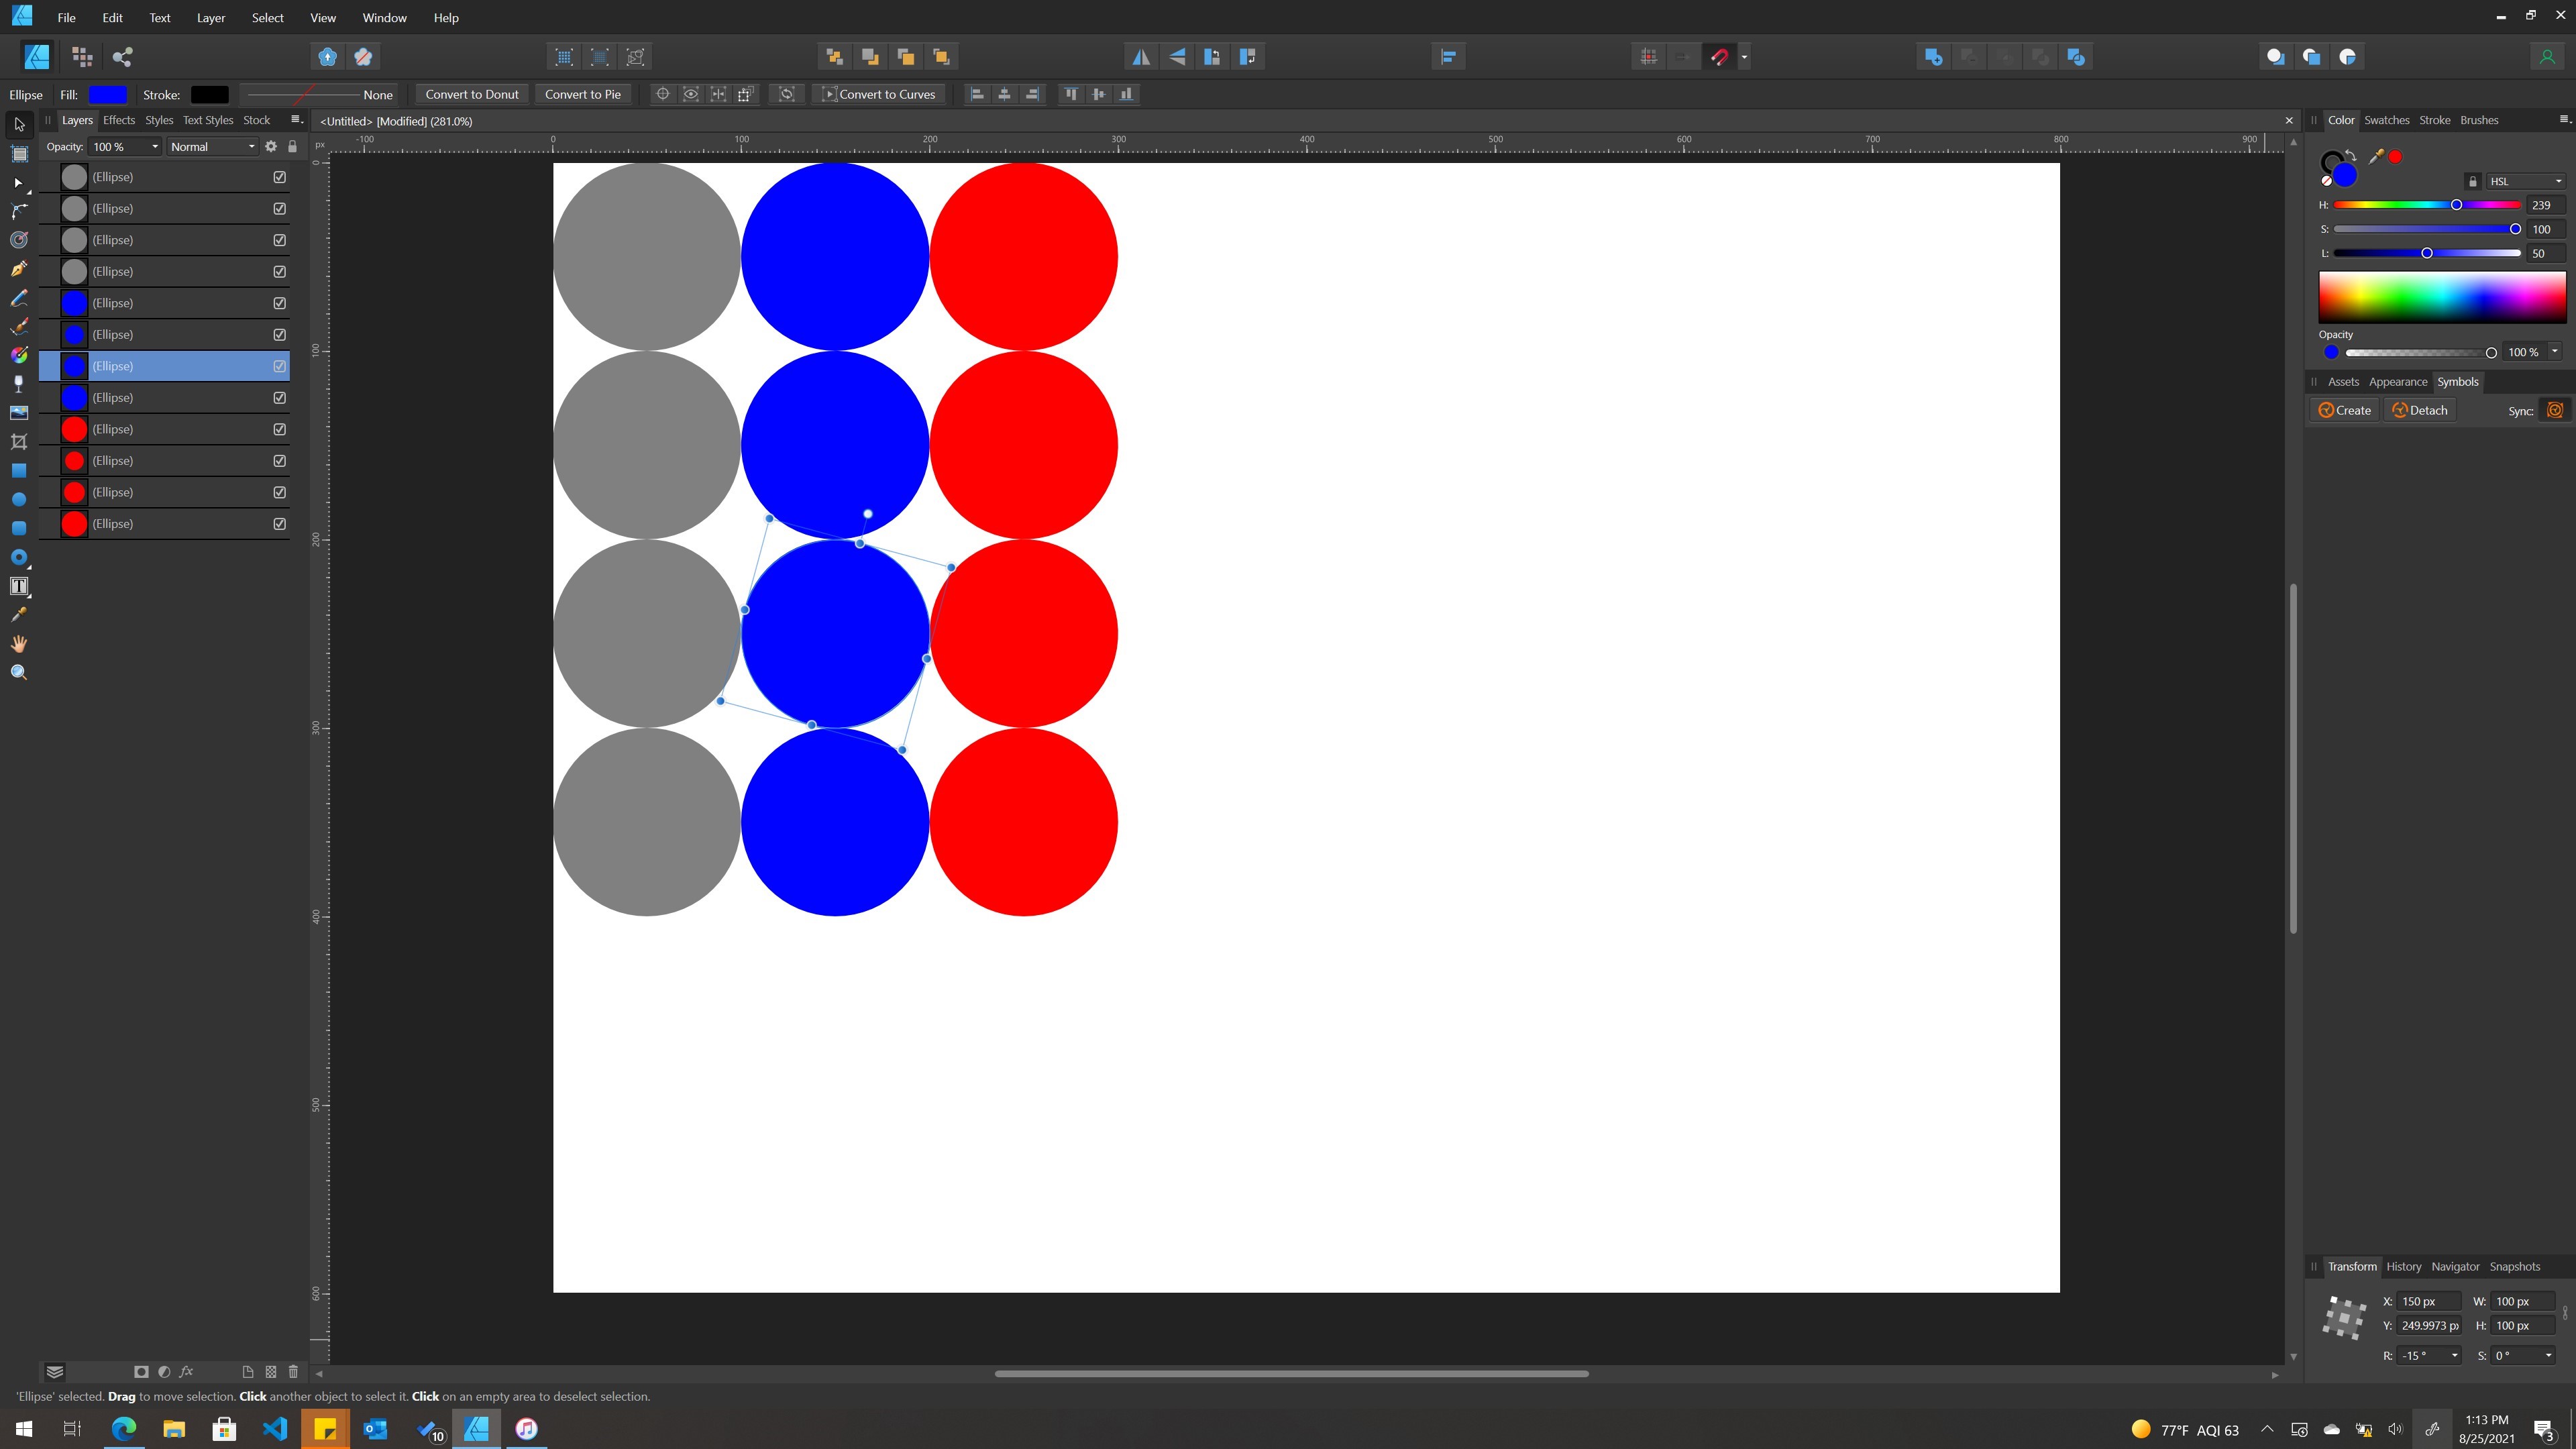
This bug exist in the 1.10 version. I have not tried the 1.10.1 version yet. This bug is with the alignment tool, but particularly the icon in the toolbar. Aligning via the drop down menu gives a different result. Basically the toolbar alignment precision is thrown off when a shape is rotated. Just to preface, this problem is easiest to view if you work with 4 digits after the decimal (This is the way I typically work because precision is needed for what I do). This is especially noticeable when the shape is equal on all sides. I created a document with 12 circles. The middle circles in the red and blue columns of circles are rotated; one 15 degrees and the other 30 degrees. Other than that, each circle is exactly the same at 100x100 pixels. Using the vertical alignment tool, if I set the column of circles to distribute by an even space of 0 it should result in a column of circles that is 100x400 pixels. This is exactly what I get in the gray column because none of the circles are rotated in it. But, for the blue and the red, I end up with columns that are 100.0192x400.0207 each. Now, let's take this a step further and manually move the circles so that the spacing is uneven (vertically). Then move the bottom circles so that the center of the bottom circles is at the 350 pixel position. Now if you select all the gray circles and then vertically align via the tool bar it will result in a 100x400 pixels column of circles with each circle exactly 100 pixels apart from each other. If you do the same with the red column it will result in each circle in the red column not being evenly distributed. But, if you align the blue column via the menu distribute option, it will be completely evenly aligned with each circle being exactly 100 pixels a part from each other. Doing it with the toolbar is always imprecise. I assume this is a bug. With 4 objects it isn't a big deal because it off by such a minute amount, but if there are several then it begins to compound the issue until it is clearly off. I have attached the circle project mentioned above untitled.afdesign. Below is an example of what it looks like after the distribution bug compounds over many elements. There is a visible gap between the cog outline and the purple ring due to a misalignment done by the bad spacing.

-
Locking gradiant
abject39 replied to abject39's topic in Feedback for Affinity Designer V1 on Desktop
Thanks. Hopefully some sort of implementation makes it into a future version. -
Locking gradiant
abject39 replied to abject39's topic in Feedback for Affinity Designer V1 on Desktop
Thanks. But... This is entirely too complicated for me to make use of this. This does exactly what I am looking for but I would want to create gradients that are more than just linear and I do not even know where to begin in the process of writing formulas for this. -
One thing I love about Affinity Designer is that the 3D effect and the Bevel/Emboss effect do not rotate when the shape itself is rotated. Regardless of the orientation of the object, they follow the orientation they are set to. The gradient effects, on the other hand, do not exhibit the same behavior. Is there a way to lock them so that they do not rotate? Or, is there a way to lock the regular object fill gradient so that it doesn't rotate with a shape? I know a work around is to place an object with a gradient inside of the object and lock the children but this is not effective with my use case where I need to make multiple copies of the same object and rotate it while keeping the gradient consistent. If I don't use a gradient, I can convert an object into a Symbol and duplicate it and place it in multiple areas in my project with different rotations. Without being able to lock the gradient or having to adjust each one individually it becomes very tedious.
-
Safe to say this has been totally forgotten.
-
Have you had a chance to verify this?
-
Even with the "Transform Objects Separately" option enabled, if you flip multiple objects it does not do them all separately. It does them all together as a single group. Is this a bug and is there a way to flip multiple objects separately?
-
UPDATE: I've expanded the document and added more knobs and suddenly the issue has gone away. It makes me believe the issue may be related to the document size specifically. The original file was 72x6060. My new document is 196x7474 and the issue has disappeared. I've changed none of the original knobs at all.
-
Have you been able to confirm this?
-
Ok, so I have confirmed this is most definitely a bug in Affinity Designer for Windows. Using export persona I was able to render the file in 2 slices. One slice with the upper set of the knobs and the other with the bottom set of the knobs. I then put them back together in a single file and exported them again and the shadows are correct now. The issue only comes into play when the knobs are rendered with all 101 of them at the same time. No idea what causes it though. Also the issue only occurs at 2x the original size. It does not matter if you increase the size during the export or if you increase the size of document itself. And it only seems to happen with the PNG file format.
-
I need them all in one file. Wouldn't rendering them in parts and then putting them back together in one file degrade the quality of the final knobs?
-
I think the bug could be related to the amount of knobs present or file dimensions but I'm not completely sure. I typically try to keep all of my projects lower than 1024x8000 px, which is not too big for the PNG file type. I use affinity designer to create GUI's for audio software. I've created frames of knobs in the past but not one exactly like this one before. This one is a little more detailed. I will try to increase the DPI to see if it fixes the final PNG export.
-
This does not seem to be this issue. Even with 4 values the center anchor point of X and Y is an integer every time. Each knob is exactly 40x40 rotated 2.7 degrees from each other. Also the first and last knobs are essentially horizontally flipped from each other yet only one is affected. This seems to be a bug. Lastly, the shape is unaffected by the issue. It only affects the shadow. Here attached is the knobs stitched together so that you can see what I see in my final product. The issue seems to be with shadow opacity and intensity. Any idea how to get around this issue? Untitled Project.mp4
-
It is not misaligned. It aligned exactly the way I want it to be alighted, which is to the top of the object it is in.
-
While I get what you're saying the issue isn't that the shadows are bigger or smaller. It's that they are completely different. They're lighter and seem to have less intensity.
-
Thank god someone else was able to confirm this. I thought I was losing my mind. Is there any workaround for this? I really need these knobs and I particularly need it as a PNG because I need to import it into another program with a transparent background.
-
I have a project in which I am creating knob frames. The shadow on every knob is identical, yet every time I render the project to a PNG that is 2x the original size the shadow of the 1st, 2nd, 67, 68, and 69th knob are all slightly lighter than the rest of the knobs. I have tried duplicating the knobs that appear fine and placing them in the same spot and rotating them to the proper rotation but it still comes out the same. I have tried different resampling algorithms but it still renders incorrectly. It's a bit hard to see after export. I've found that the best way to see the issue is to re-import the rendered file into a new project onto a white background to clearly see that the knob shadows are not rendering the actual way they are in the project for just those specific knobs. I have no idea why this is happening. This is within Affinity Designer on Windows (the most current version). I've attached the files. Knobs.afdesign
-
Ugh, it seems that is my only choice smh.