
Greyfox
-
Posts
312 -
Joined
-
Last visited
Posts posted by Greyfox
-
-
On 5/22/2021 at 1:12 AM, v1ktor said:
@Greyfox Is your hardware-accelarated GPU scheduling enabled or disabled?
Hardware-accelerated GPU scheduling is "ON", also Affinity Photo, Designer and Publisher all set to High Graphics Performance
-
15 hours ago, karlb1 said:
Hi, I'm having problems printing on affinity where things are not printing square to the paper.
as you can see from the photo attached the square isn't printing to the center of the paper.
All document/paper size is correct + margins all equalWhat happens if you select the "square object" before File->Print, and then select "Selection" for range in the print dialog. That should print the selection in the centre of the printer paper size.
-
2 hours ago, Alex_M said:
Thanks for the feedback, Ron. It might be my particular hardware, software and driver configuration.
For what it is worth, not doing it here either. Two 21" 1920 x 1080 monitors, GTX1660 Graphics, 466.27 Driver.
Are you using >100% Windows scaling, or > 100% text size? -
23 hours ago, Marvin Contreras said:
Hi, I think there is a bug on the last update, when I print a photo on any size got a white borde on one side, I already calibrate the printer, use a another one and the white border still there, I select fit to printable, but the white border still there.
What are the pixel dimensions of your image, and what size is the photo paper?
-
Working fine here too, and with Hardware acceleration turned on. Sliders fully responsive in Develop persona and also subsequently in Photo persona.
-
9 hours ago, c_moon said:
Not sure if this is a bug, the software has changed a setting, or I have...
For the last few beta updates and at least the last full version update, the "update available" prompt on the startup splash screen has not appeared when updates available. I'm on beta 1.9.41048 and full 1.9.2.1035 currently - I've only found out about updates because I searched the forums.
Thanks.
AFAIK the current release version is still 1.9.2.1035, and update messages only appear if there is a newer release version.
-
17 hours ago, John Billington said:
In fact there isn't a profile in there for the EF 100-400mm f/4.5-5.6L IS II USM on a full frame Canon, there is only one for a crop sensor Canon.
In the slr-canon.xml file from the Lensfun 0.3.95 database there is an entry for a EOS 5D MK IV camera with a crop factor of 1 (which AFAIK is full frame)
<camera>
<maker>Canon</maker>
<model>Canon EOS 5D Mark IV</model>
<model lang="en">EOS 5D Mark IV</model>
<mount>Canon EF</mount>
<cropfactor>1</cropfactor>
</camera>and further down in the file there are lens correction details for an EF 100-400mm f/4.5-5.6L IS USM for a crop factor of 1
The header for it is
<lens>
<maker>Canon</maker>
<model>Canon EF 100-400mm f/4.5-5.6L IS USM</model>
<mount>Canon EF</mount>
<cropfactor>1</cropfactor>
<calibration>
<!-- Taken with Canon 5D Mark III -->and that is followed by extensive calibration details.
With that file added to Affinity Photo, I can manually select that Lens in the Develop persona, however it appears to make no difference to the geometry of the image???.
-
18 hours ago, Komatös said:
Hello @John Billington and @Greyfox look at the link below, there's a howto to make your own lensprofile addition.
https://affinity.serif.com/en-us/tutorials/photo/desktop/video/330446061/
Hope that helps
Well aware of that, but the Lensfun database that Affinity currently uses has had my Sony Camera and the Sony lens I referred to for several versions now, and it is also quoted correctly in the bar at the top of the screen. It already has all the correction calibration details it needs.
The problem is that the Develop module hasn't got its act together, and fails to auto detect it. And it's not just that camera/lens combination.
-
2 hours ago, t3mmar said:
... what is the required memory for the Affinity & Design to work? I recall that less than 8Gb was the minimum requirement (4Gb if I recall correctly).
The minimum specified for each is 2GB, with the recommended being 4GB, however what really matters is available memory and that will depend also on what else is running in the system at any point in time.
-
51 minutes ago, zwilson said:
Here is the affinity file.
Yes, FTT certainly doesn't seem to be able to handle that pattern.
As comparison I ran that image through Topaz DeNoise AI as a plugin, with the result on the upper layer.
It's not perfect but it has done fairly well. -
25 minutes ago, BofG said:
There was a passenger aircraft once that during testing happily lifted the landing gear if the button was pressed whilst sitting on the ground. Should that have been left as it was and gone into commercial service?
Maybe the help file just needs updating to state the program will crash if the wrong objects are selected...
")
No, as I said in my post, the program shouldn't crash, or stall. If the selected items are not valid for the tool to work properly, the tool ideally shouldn't be available (grayed out), or at least if used and unable to produce a result, then there should be an error message and a dignified exit.
My question as to what the expectation, was in relation to what part of the line would be expected to merge with the circle and what part of the "overlap" would be expected to become transparent. 😀
-
8 hours ago, smartin684 said:
I just posted that this crashed my new M1 mac, and I replicated the crash on such a simple drawing. Step 1: create a circle. Step 2: create a line from the top of the circle to the bottom of the circle, setting both the lines endpoints on the circles "nodes"?. Step 3: Hit the XOR button. Crashes all the time.
What exactly did you expect to happen?
Obviously the program should not crash, or hang, but is this really a proper use of the function?The help file gives "Xor—merges selected objects into a composite object with transparent area where filled regions overlap", and overlap a filled square and a circle and it works as advertised.
A line (which could be very thin) intersecting two of the node points of an equally thin (unfilled?) circle doesn't seem to me to provide the basis for proper use of that function. Maybe my interpretation of the test you did isn't correct?.
Edit: If you try the attached file, which is a rectangle over the two node points of a circle, the XOR function works as I would expect.
-
7 hours ago, SCB-Affinity said:
I am seeing an issue with version 1.9 in Affinity Photo where the layer does not show a layer thumbnail preview.
Am I missing a step or setting that allows me to see the thumbnail?
So what steps were taken to produce the two added image layers?
-
3 hours ago, zwilson said:
I'm having trouble removing the moire pattern from this scanned image. I watched this tutorial on the FTT Denoise filter but as you can see from my attached screen shot the moire pattern in my image doesn't really match those of the two examples shown in the video and no matter what I try I'm getting less than satisfactory results.
Can you post the actual image itself?
-
On 4/30/2021 at 5:20 AM, John Billington said:
Thank you for looking into.
After reading a bit more on how to examine exif data, it's confusing as 'Lens ID', 'Lens Type' and 'Lens Model' all show different data. I have checked what lens correction data is in the camera and the Canon 100-400 plus the 1.4 extender are in there.
Would you have an idea as to how this can be corrected?
ACDSee Ultimate 2021 has no problem identifying the lens and extender. See attached screen shot.
ExifTool also gives the LensModel as EF100-400mm f/4.5-5.6L IS II USM +1.4x III, and LensSerialNumber as 4810001014 under Exif metadata (The mention of "..or Tamron" occurs in Makers notes, so I'm not sure I would jump in and start changing the Exif metadata.For what it is worth, Affinity photo's auto lens identification in the Develop Persona has not worked properly with my Sony SLT-A57 camera and Sony DT-18-135mm F3.5-5.6 SAM Lens for some time now, but again it identifies OK in ACDSee. See

-
49 minutes ago, andrecampeau said:
When I copy a text box in one document and paste it in another Publisher document, each line of the text box is broken into individual boxes. And when I drag the corner of a box, it stretches the text when it's suppose to expand the box. And it's the same with a picture box. It's broken in several elements, like stroke, picture, shadow. Is this a bug or am I missing something?
That not happening here, but perhaps sequence is important.
See video -
4 hours ago, snowdrop said:
I can't get the export to actually show the colors I use inside of Publisher. Intention is to view the end result/output on screen only, so I guss sRGB would be the way to go, but no such luck. The right more orange image is the output with the the wrong colors. The left is how it looks inside Publisher.
What format is the export, and what is it being viewed in?.
Also, does your exported file have an embedded ICC profile, and if so, what was it? -
Here is my go at it. Used split toning, selective color and FX inner glow.
Also a bit of a fudge to clean up the edges. Probably an overkill.You can tone it down to taste by reducing the layer opacity of the top layer.
-
9 minutes ago, Adrian Wood said:
I enjoy using Affinity but I find that I am using only just enough to start the engine when what I want to do is taxi, take off and fly as well. There is help a plenty in the videos but there is a but.
Here is an example. I have an image to which I want to add a small area of diffused colour. Sounds simple but when I go to the videos, I am lost in a sea of technical titles which I am sure are fantastic but I don't see where I might begin. Clearly there cannot be a video for exactly what I want but although enthusiastic, I am not of The Language. I am thinking that it would be great too see a list of ideas that people like me want to explore and for someone in the know to suggest titles to watch; or combinations thereof.
So where would I best go to learn how to add a small area of colour to an image. The colour has to be a highlight with a diffused edge; a hint of colour rather than a blob.
I feel that in order to do this, I must first acquire Phd in photographic manipulation.
You could spend many hours watching video tutorials in the hope one will have what you want to do in it, or you could post an image showing what you want to achieve, and that would help getting targeted directions, or links to appropriate tutorials.
-
1 hour ago, Lillias said:
..The result of all this is that the plugin works in Affinity Photo but it doesn’t appear to be working in Photoshop Elements and causes me to have to close PSE via the Task Manager and that is where the state of the parties are at present. It seems to me that the fault lies with Topaz!!!
For what it is worth, the same plugin (tltopazstudio2ps_x64.8bf) is used for Affinity Photo, and ACDSee Ultimate 2021, and it works OK with both of those host editors.
-
@Lillias
The earlier Topaz Labs plugins (typically Adjust 5, Adjust AI, Denoise 6, Remask 5, Simplify 4, and Studio 1) were in C:\Program Files\Topaz Labs\progname\PS_Plugins_x64
however but the later ones (DenoiseAI, MaskAI, SharpenAI and Studio 2) are in C:\Program Files\Topaz Labs LLC\progname\PS_Plugins_x64In Affinity photo you don't need to specify the full path. Just point to C:\Program Files\Topaz Labs and C:\Program Files\Topaz Labs LLC
and make sure the "Allow Unknown plugins to be used box is ticked.see the attached screen shot
-
10 hours ago, pcdlibrary said:
Rather than have grids cover a full page, can I have them only in frames?
If you are referring to Publisher, then individual text frames can have, or not have their own base line grid, and the individual grids can have their own spacing line spacing.

-
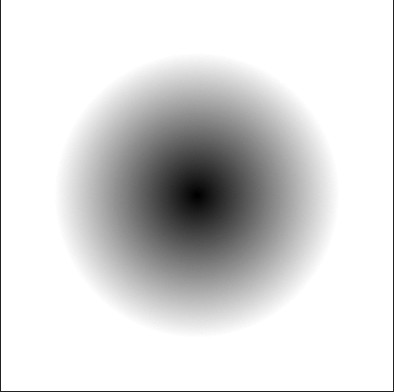
5 minutes ago, Joachim_L said:
Nice one, but there seems to be a thin border left.
True. It is very faint and I hadn't noticed it.
Interestingly when I turn off the half tone layer, and zoom the image back to around 30-40%, I see a very distinct white border around the outer circumference of the gradient.Not sure the screen grab will show it as much as it shows on my screen.
-
19 minutes ago, Affitoom said:
Hi
Why I have a border around my halftone?
Was that edge supposed to be there?
I have tested the filter in other shapes and images, and it always produces a border on the edges.
Can somebody help me?
Please
As perhaps a simpler solution, set the blend mode of the halftone to Vivid light.


Constraining Vector Brush in Affinity Designer
in Pre-V2 Archive of Affinity on Desktop Questions (macOS and Windows)
Posted
Is there any way of constraining the Vector Brush tool so the brush stroke is a straight line (similar to holding down the shift key when using the pen tool)?.
I can obviously delete intermediate nodes after using the brush, but that seems a bit clunky.