pedro6
-
Posts
8 -
Joined
-
Last visited
-
 Dan C reacted to a post in a topic:
Adjustment layer adjustments not exporting
Dan C reacted to a post in a topic:
Adjustment layer adjustments not exporting
-
Hi Dan Thanks for this. Thought I was doing something something wrong, so finding out this might be a bug is quite good news! No doubt you or a colleague will let us all know when further conclusions are reached, as I would still dearly love to export my file in a different form, as originally intended.
-
Carl, yes I have looked at the exported file - it does not include the adjustment. Did you get your adjusted file from the afphoto or the original jpeg? NPM, thanks. I tried that (see attached) but I don't know what you mean by "Put a red rectangle on top of the stack". How do I do that please? So far the result of making the adjustment a child and choosing lighten blendmode has been the same as before - the adjustment is not exported.

-
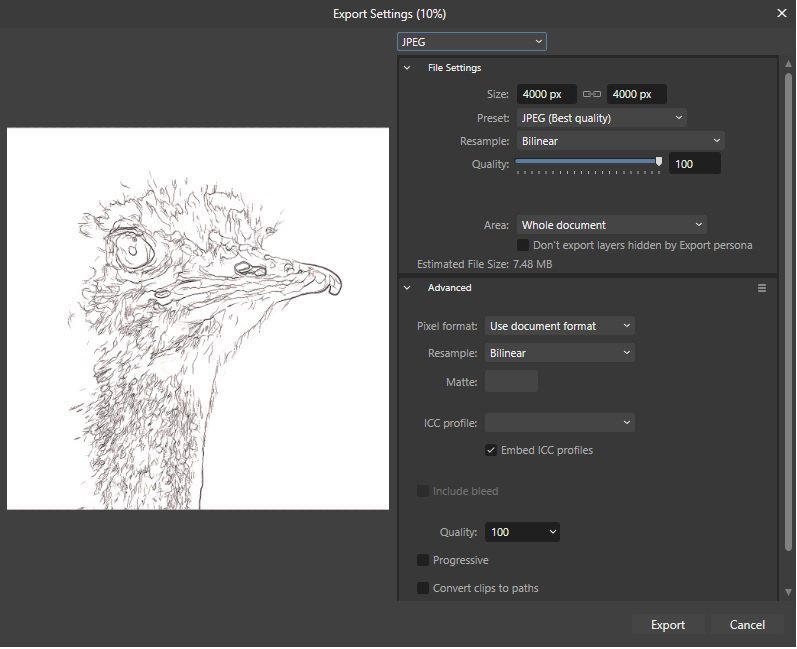
Here you go. Perfectly red. But I still can't export to a (red) jpg. I guess I could export from the afphoto, though that is a long way round. In the past (in AF1) I have been able to export multiple different versions of the same file with adjustments (from the original file, not needing to create an afphoto file). I must be missing something here, but I don't know what. PSG_20140731_DSC_1595_DxO_cartoon+sketch_AFF-brighter-colour-cropped.afphoto
-
Assuming that's what you mean, here's a cropped version of the jpeg.
-
Hi Carl - not sure what you mean by "the Affinity document"? Do you mean the original jpeg file I'm trying to edit?
-
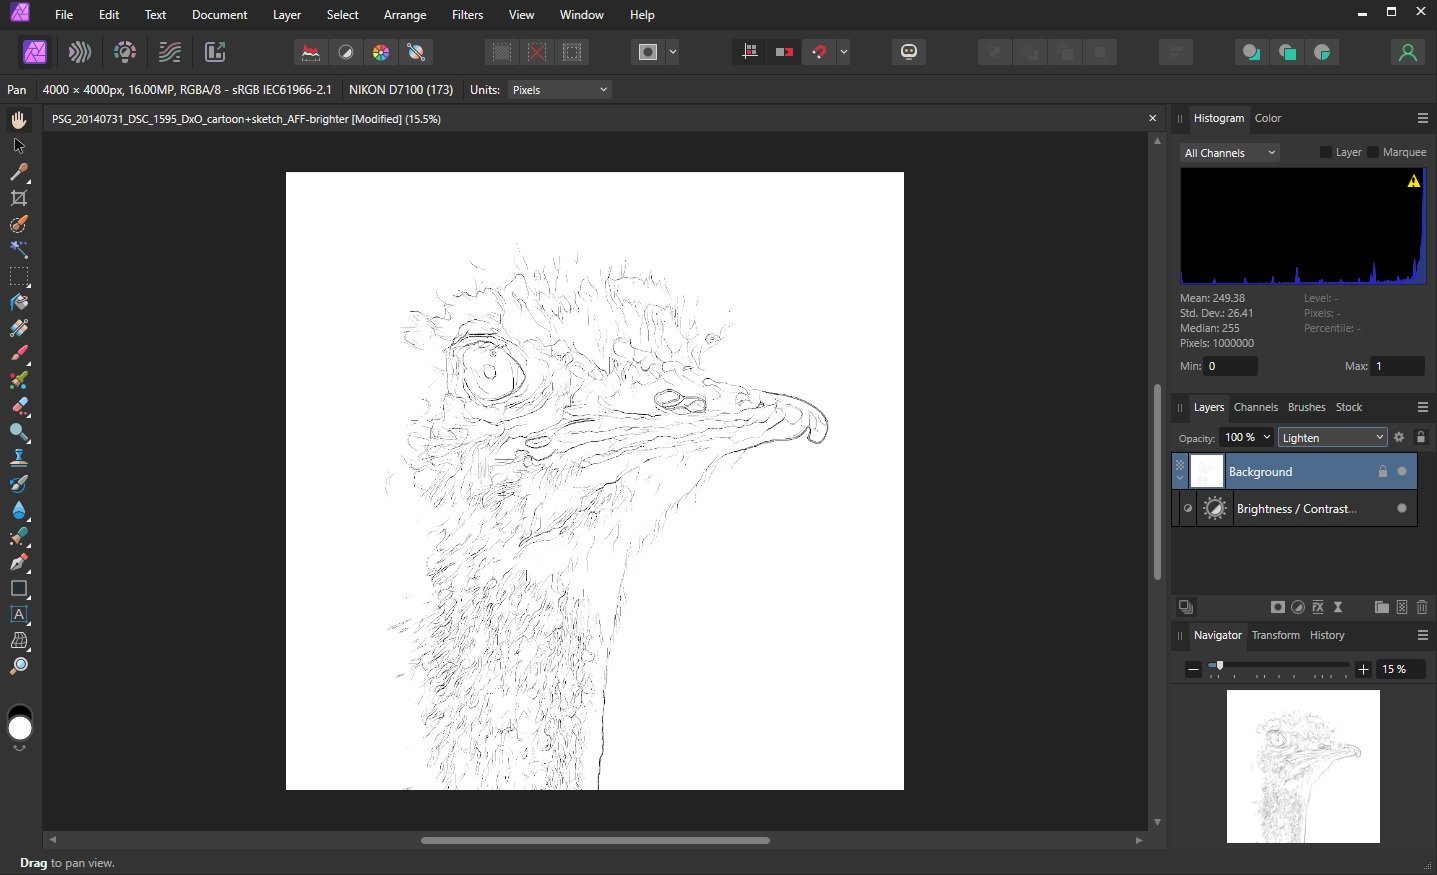
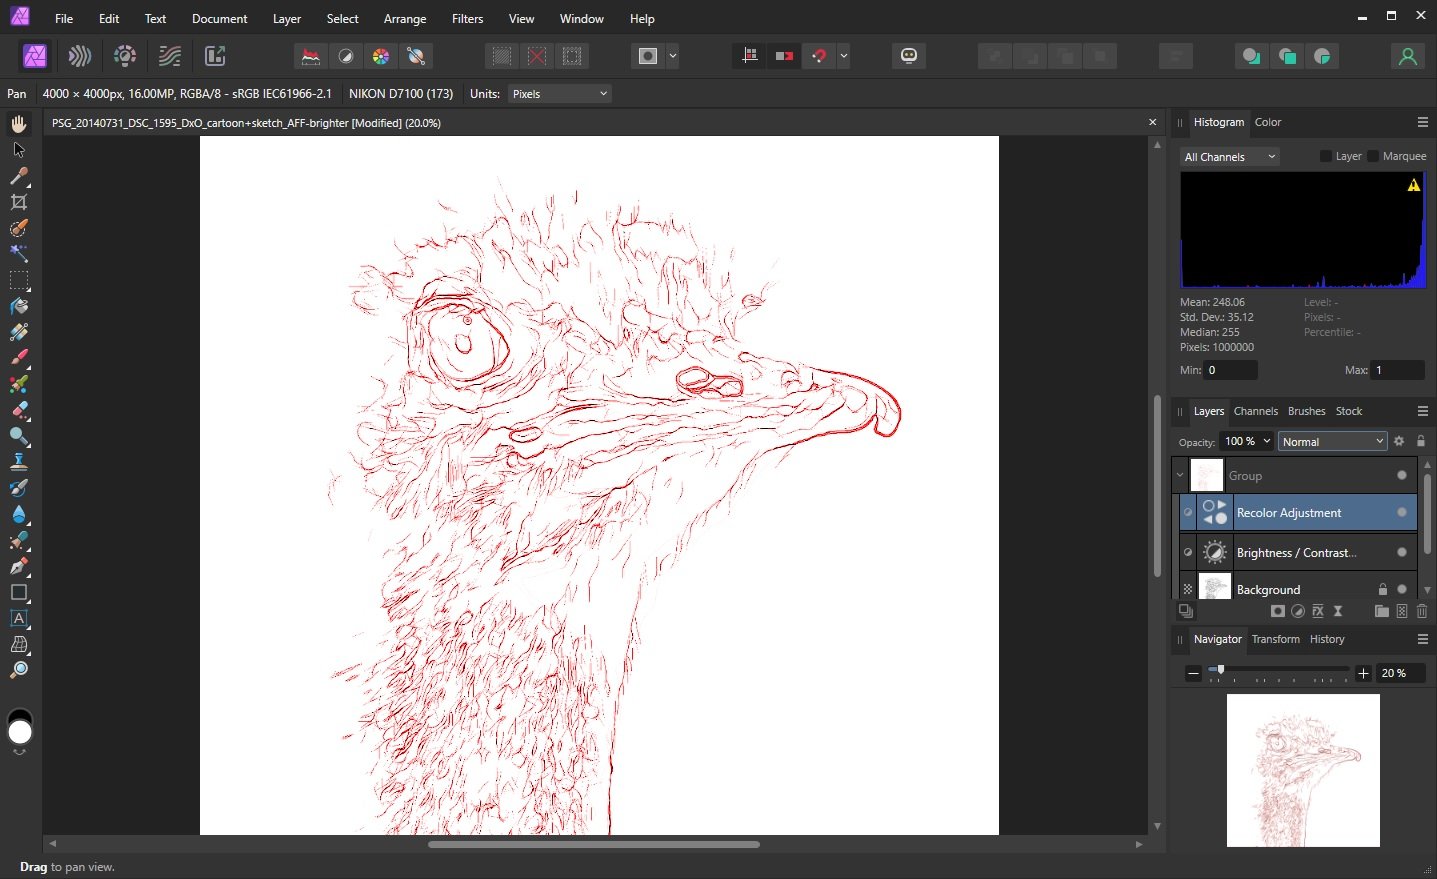
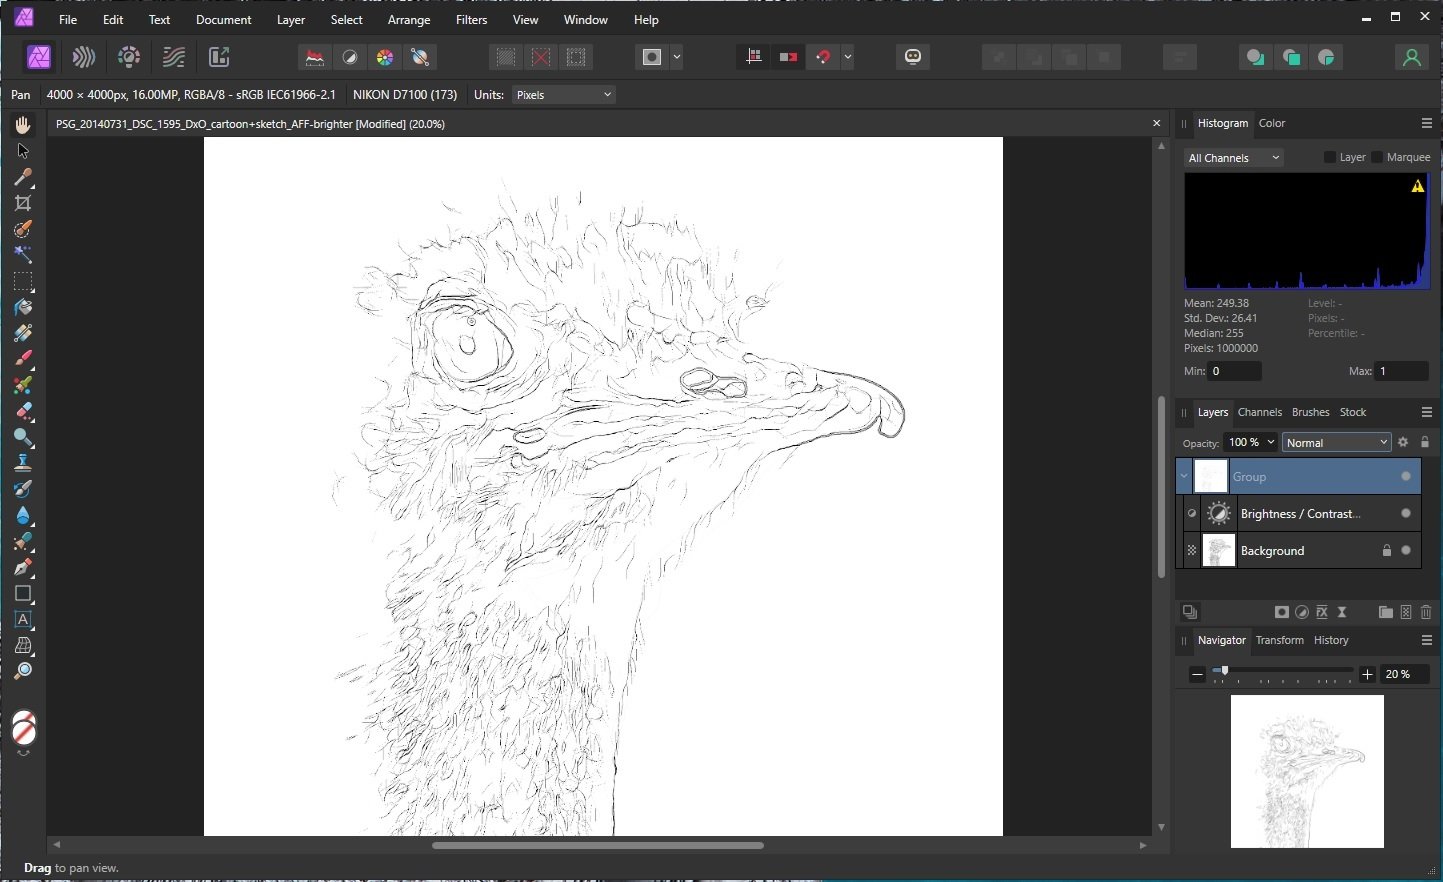
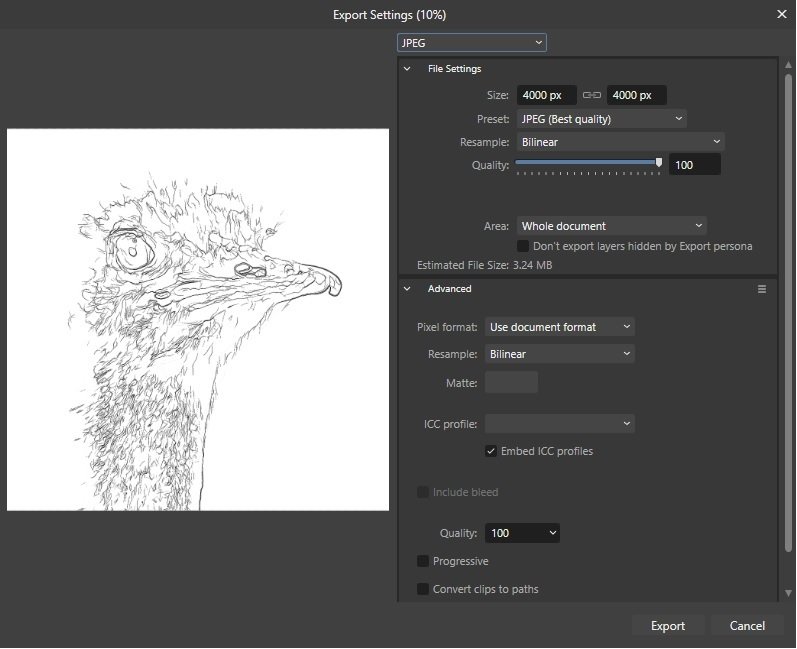
Hi NotMyFault, and thanks. If I move the adjustment below the background, the preview then shows much darker, thicker lines, so in other words the adjustment is definitely affecting the look of the preview (zoomed or not). My issue is that on export the look of the original (unadjusted) file is exported, not the adjusted look. To illustrate this further, I have now added colour to the image with an adjustment, and I attach a screenshot of Affinity showing the new adjustment and the colour in the preview, and also of the export panel (which shows no colour). So I assume that I have the wrong settings somewhere, but I can't work out where. Clearly the point of making adjustments is to enable them to be saved to a new file. That does not seem to be happening in my case.
-
Thanks, here you go. Notice that in the export dialog the lines are much thicker. That is the appearance of the original file before the adjustment.
-
I have a simple (I hope) nube problem. I open a jpeg in Affinity Photo 2. I add an adjustment layer. I am just reducing the brightness of a black and white sketch. So I have a background later and now there is an adjustment overlaid on top of it (in the same layer). But I can move that into a separate layer, which I do (though same problem either way, whether I move the adjustment into its own line or not). So I now have a background (original) layer and also an adjustment layer (reducing brightness). I can group them or not (same problem either way). I can move one layer above the other, which as expected applies the effect in the main screen or not (depending on the order, as expected). When in the right order I can see the adjustment in the main window. It also appears at the bottom of the sidebar (below the layers). So it looks like I have successfully added my adjustment. It looks great, just how I want it. So I go to export my adjusted image. I choose File/Export and choose my format (same problem whatever the format). In the export panel the preview is not adjusted. It is the original image, not the adjusted image. Sure enough, when I export I just get a file with the original, unadjusted image. No difference if (prior to export) I select one layer or both layers, or group the layers. I have also tried using the Export persona with a slice. Same experience/outcome - the adjustment is not included in the exported file. Though (prior to export) I can see the adjusted image in the main window, no matter what I do I can't get the adjusted image to export. I can't work out where I am going wrong. Any assistance would be appreciated.