FoxyCornelieus
-
Posts
10 -
Joined
-
Last visited
Everything posted by FoxyCornelieus
-
I had a complicated file created in Affinity Photo that I'd like to recover, if possible. When I opened the file it prompted me to recover an unsaved version of this file. I stupidly said "no thanks" before realizing that I should have said Yes. Silly me. So, I know there is a recovery file (unless it was deleted when I answered no). Another post suggested looking in User > AppData>Roaming>Affinity>Photo but there are only files there for version 1. Any suggestions?
-
I believe the tool would have to work the way that it does (adjusting hue only) in order for it to be useful for recoloring a photo. But I also feel the help files are not very clear about this point and that @R C-R's solution about fully replacing the color using a regular brush and the Flood Selection Tool to replace the full color with an exactly matching color should be mentioned in the Help. It also should be mentioned that it is not required to first select the color to replace (i.e. it is based on your first click). In short, good tool, could be better explained.
-
Thanks Nathan, I'll try that. Seems like it would work.
-
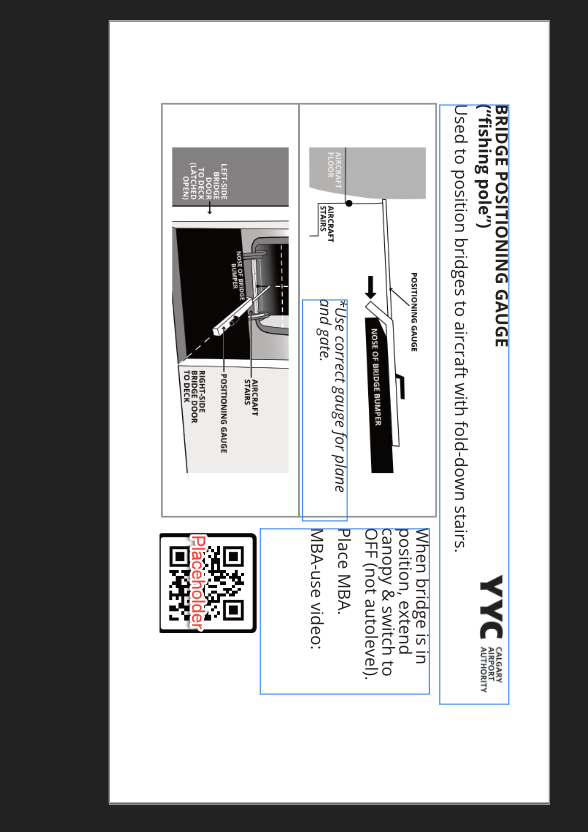
I needed to create a printable sheet with multiple versions of the same content (for "pocket cards" of a certain dimension). For this, I used the data merge layout tool and it worked a treat, copying one layout of text and images six times onto a printable A4 that can be cropped into six cards without me having to change the content six times whenever I wanted to make a change or correction. With me so far? Now what I want to do is take that same content, and (again, ideally without actually duplicating it), create a different page that has that same content in different proportions (for cell phone this time, instead of for the pocket cards). I would prefer to continue updating the original source content only once but have it result in two layouts: one with the existing 6-up format for print, and another with a 1-up for digital. I suspect there is a way to do this. It doesn't appear to be data merge because that only seems to work to repeat something across one page. I don't know what it would be called or how to setup the document. Can anyone help?

-
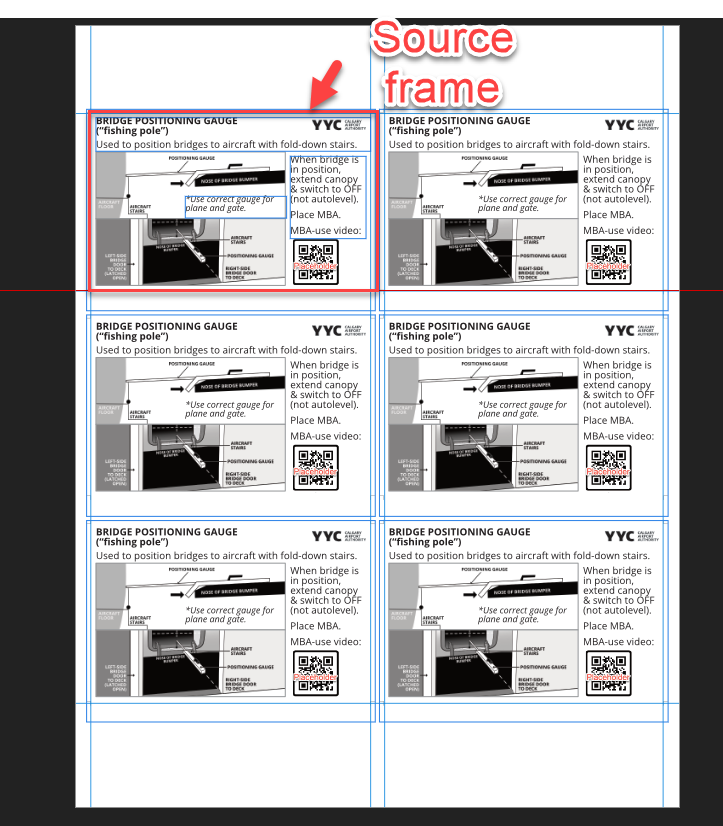
Am I doing something wrong? All the ink brushes seem to be starting and ending partway through my stroke. This seems to change if I adjust the line width and sometimes ends up really crazy. How do I fix this so the stroke is recognized for the entire curve?
-
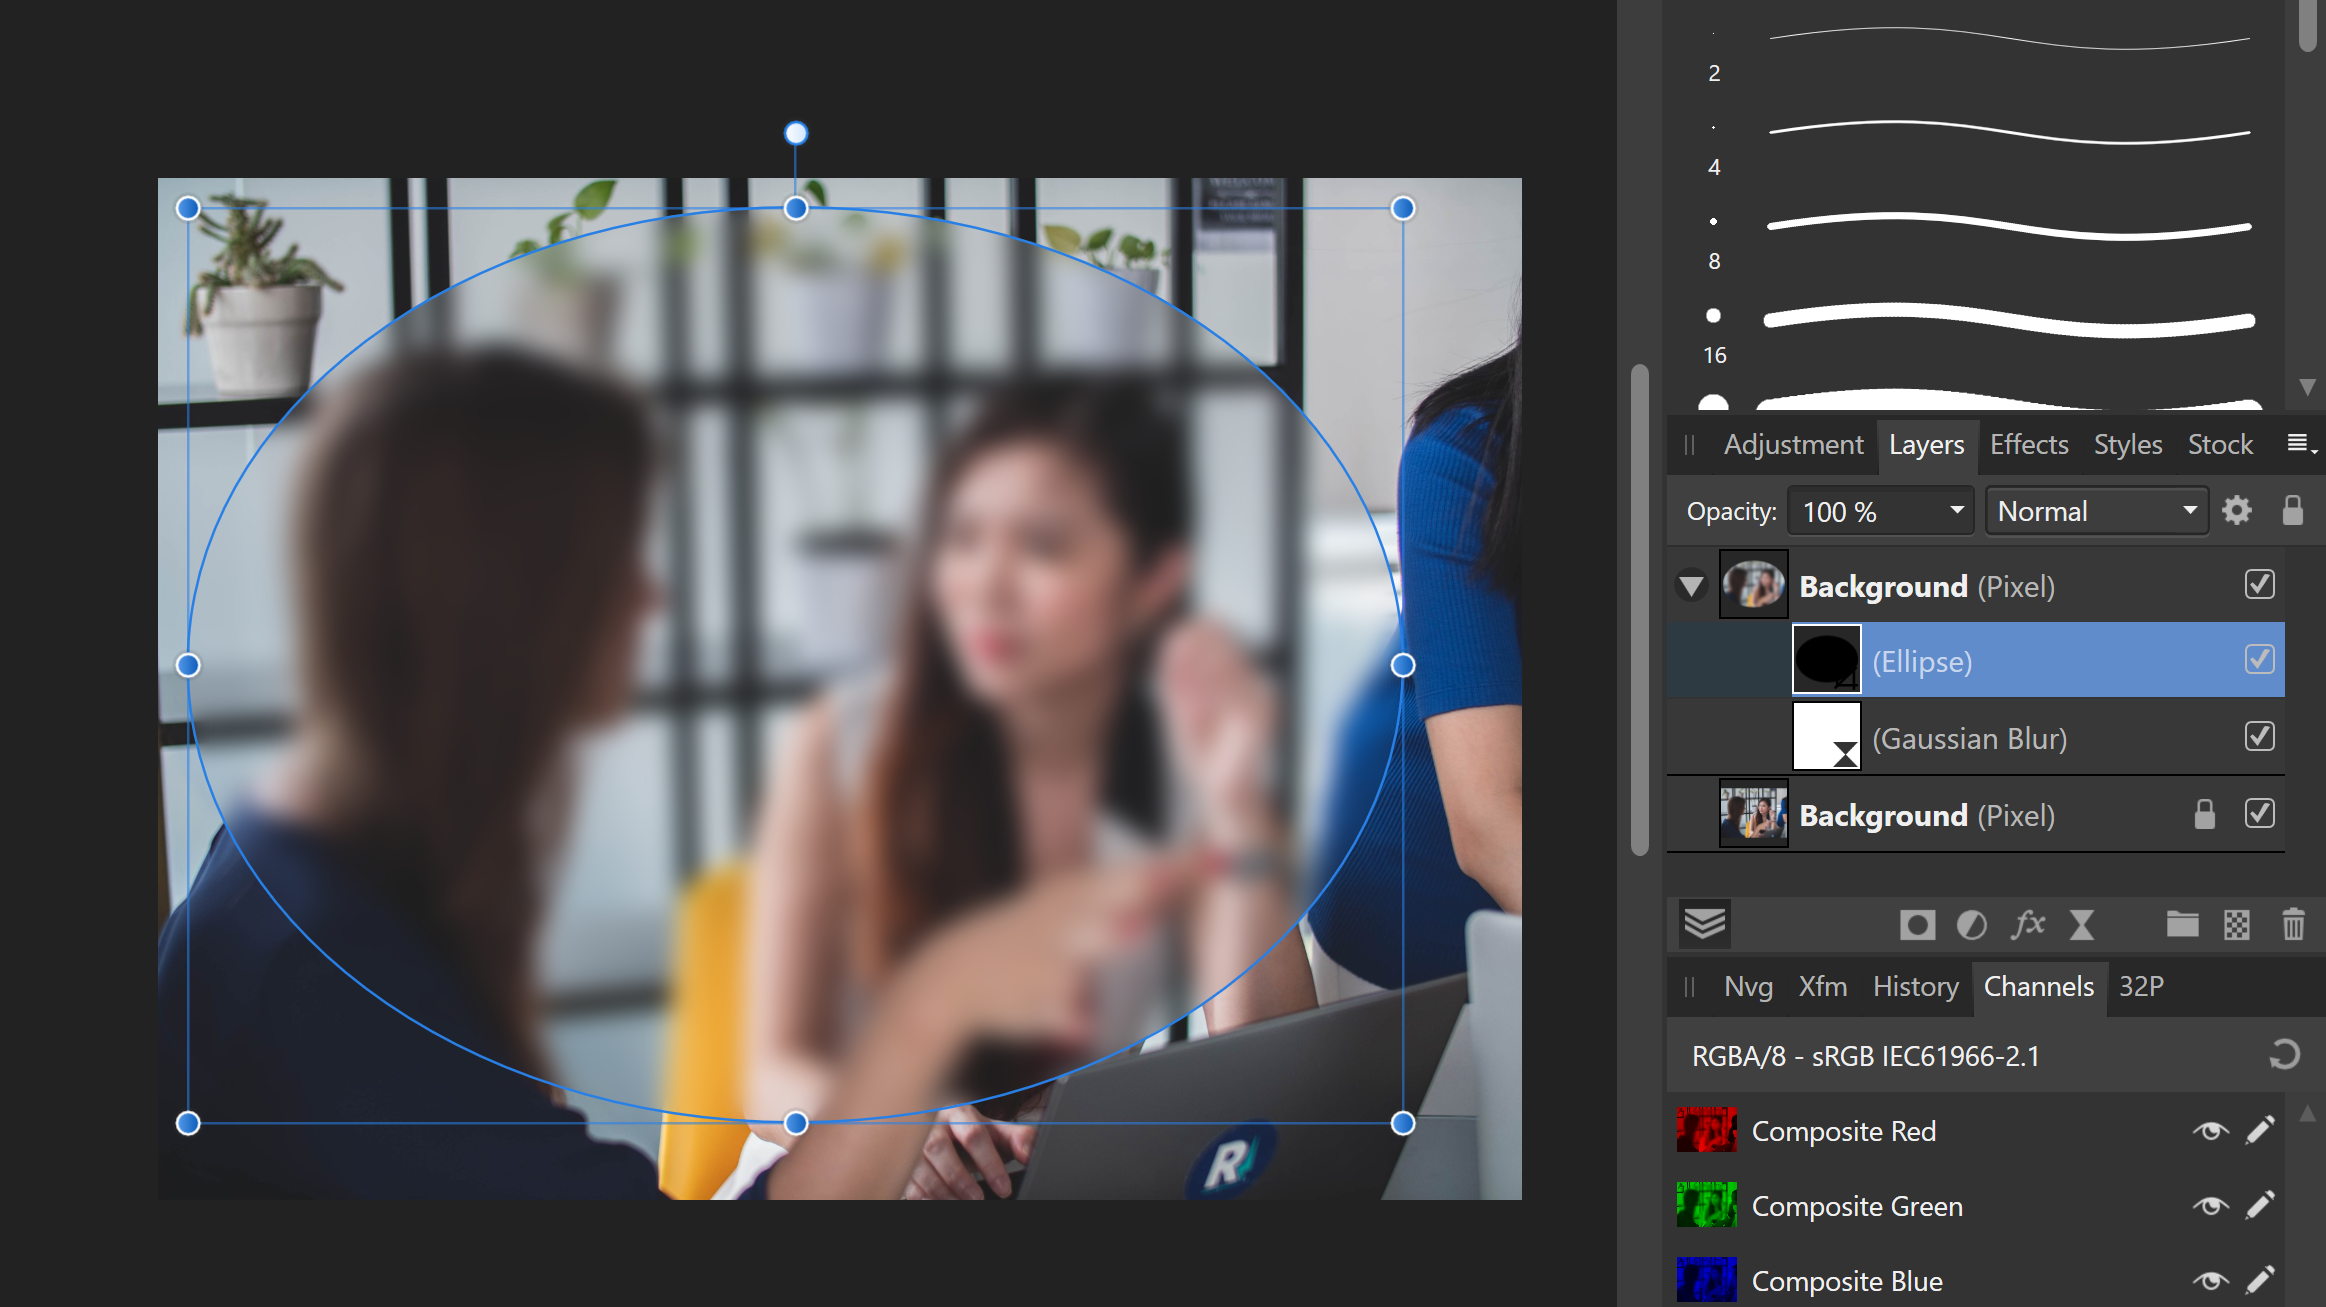
Wondering if anyone in the community can guide me in the right direction for the technique used to create a photo like this one by Sergei Nivens. There are at least 3 images here. Seems like the handshake is being used as a mask but I'm not really sure how - probably to clip the people talking but also to accentuate the background cityscape. You guys are such a smart bunch I thought you might give me a place to start! I have Affinity Photo and also Designer, if that's helpful.
-
Thanks guys, it would help if I understood why you're recommending to do it the way you are. @Alfred, putting a separate image on top does mostly what I was trying to do, though still not quite the way I expected. Is it not possible to use a shape to mask (cover) the area bounded by the shape? It seemed to me that putting a black shape onto a white mask should allow the effect through only in the white areas not covered by the black ellipse.
-
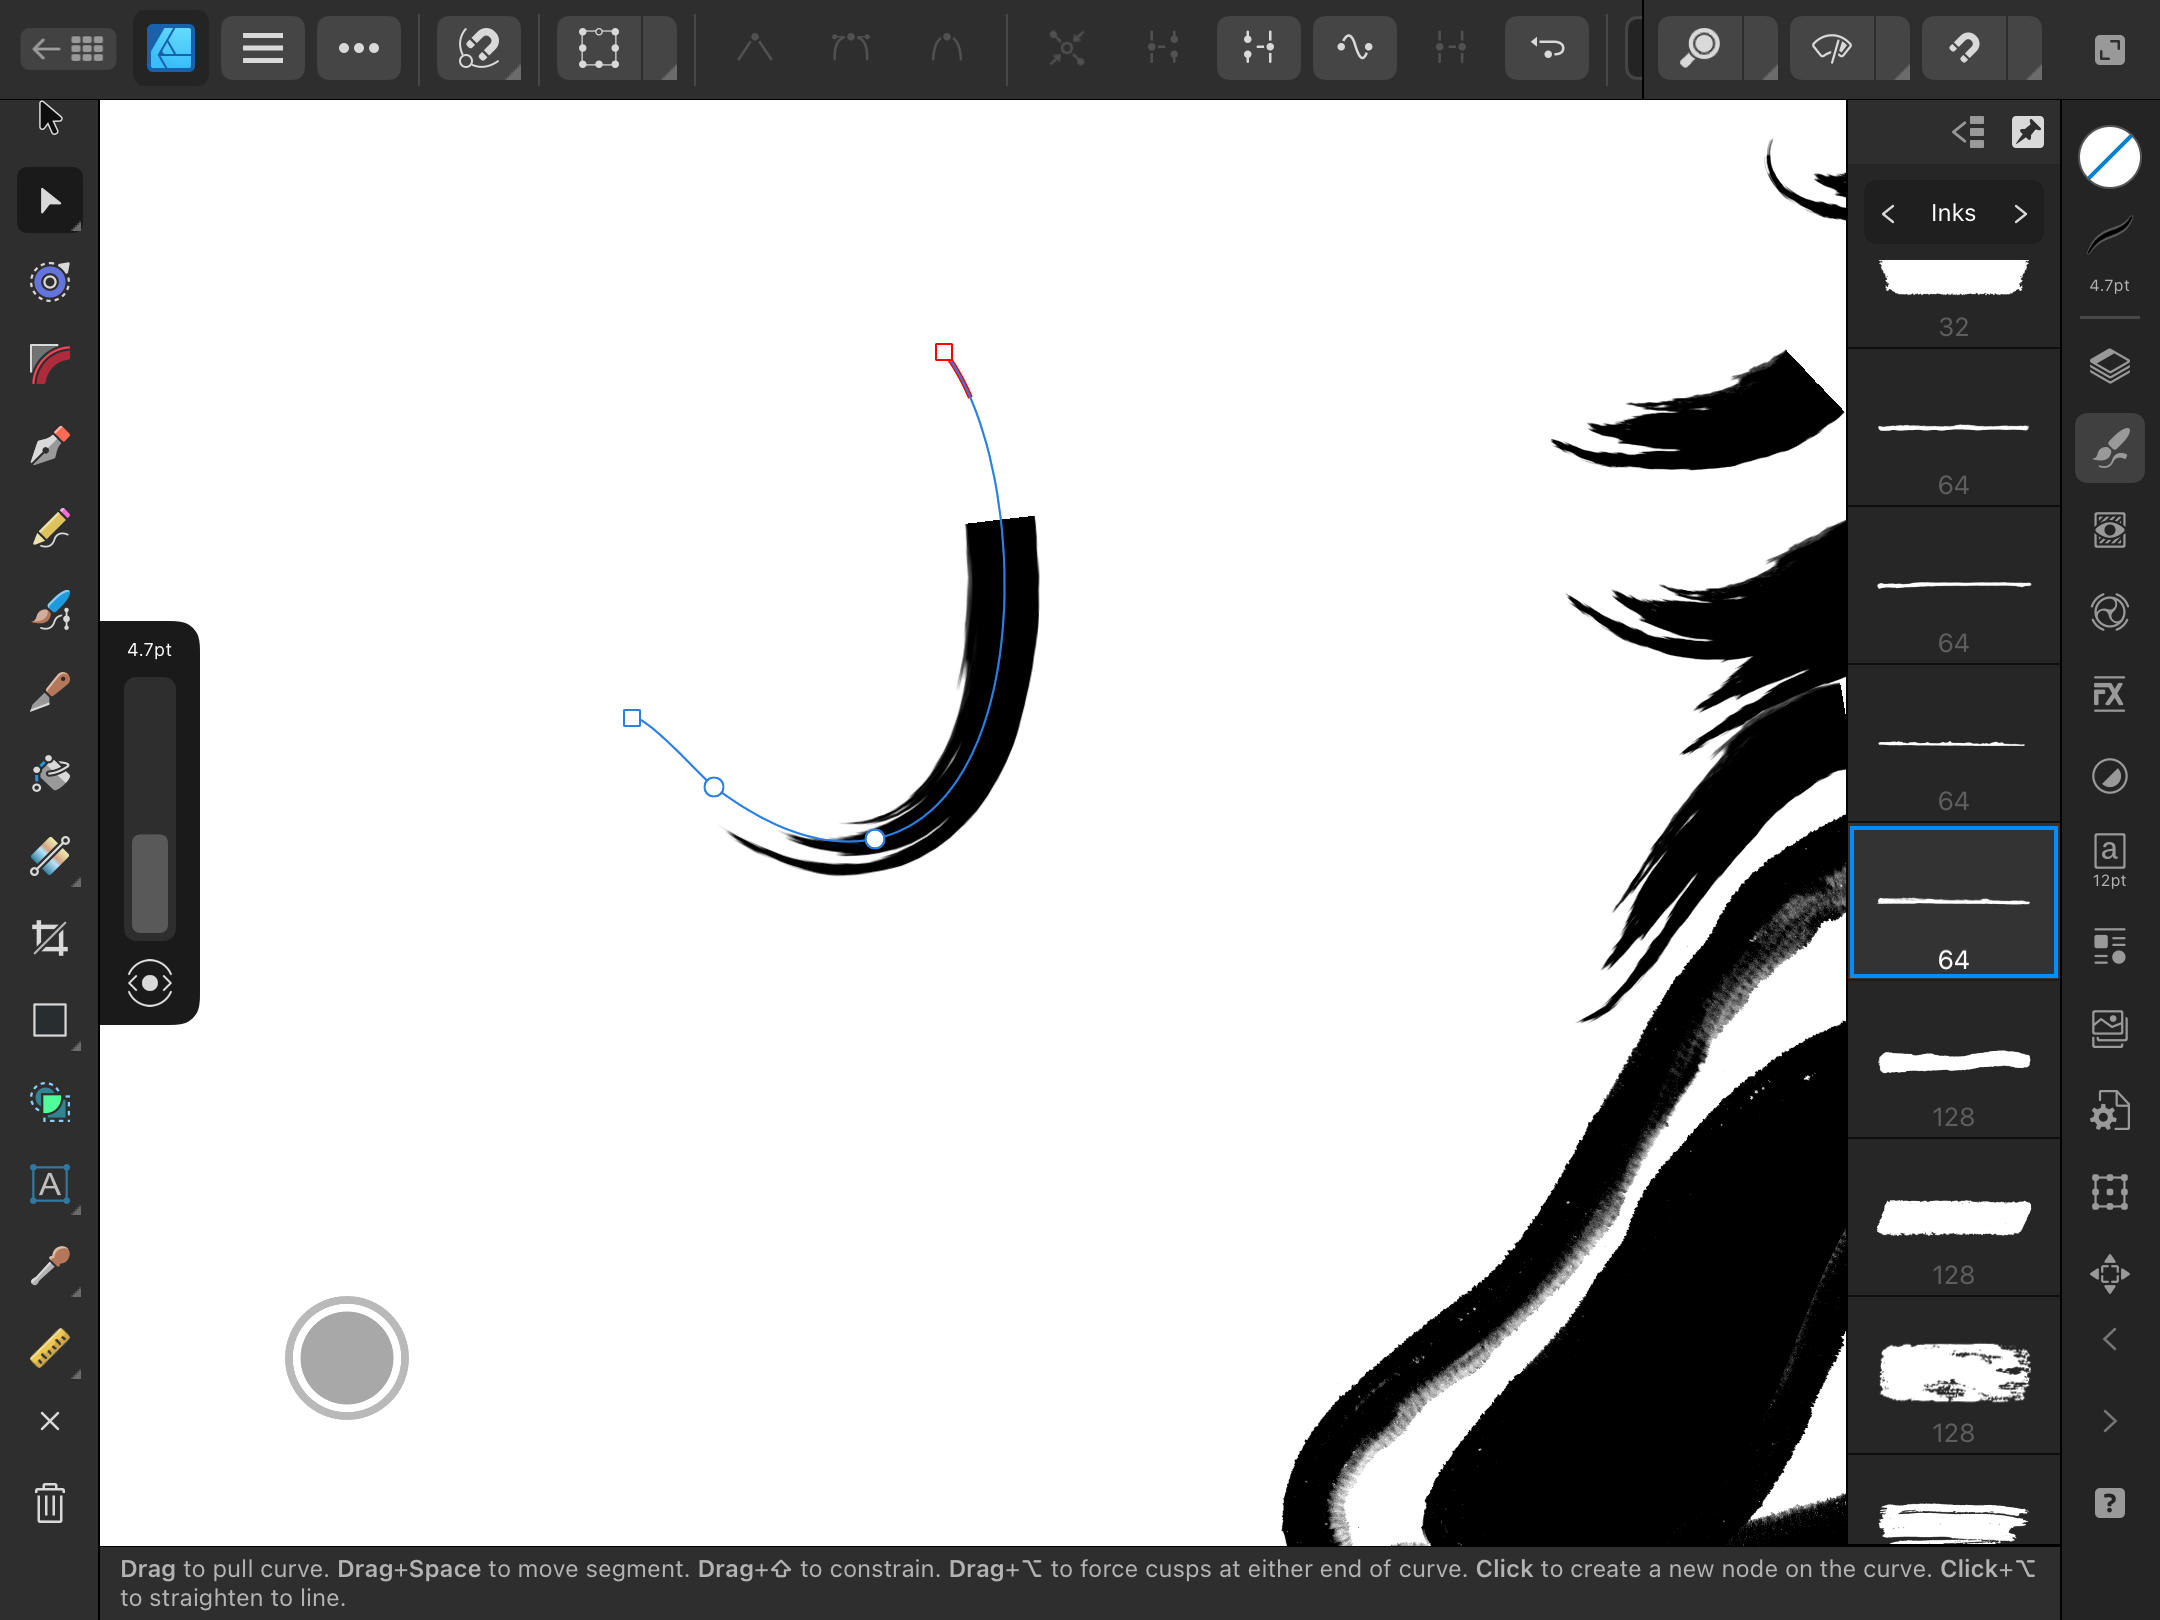
I've never been great at masks but I've watched a bunch of tutorials and still can't figure this out. I'd like to blur everywhere EXCEPT inside an ellipse. The closest I've been able to come is to blur inside the ellipse only (see the screenshot), which is the opposite of what I want. I've tried white ellipses and black ellipses, and different ways of stacking, and it always seems to turn out the same.
-
Ooh, nice. Yes, that's what I was looking for. Good to know - you saved me a lot of time fussing around. Any suggestions from anyone as to how to get a similar effect, perhaps with Smudge or some other tool/style?
-
I've been experimenting with Affinity Designer's watercolour brushes and the Neptune ink brushes I purchased. My understanding (from the tutorials I've watched) is that watercolours are supposed to bleed/blend together as in wet-on-wet when they are applied over each other on the same digital layer, whereas they will superimpose each other with a crisp edge (as in wet-on-dry) if the digital paint is separated into different digital layers and each layer is set to a Multiply blend mode. However, while wet-on-dry (different layers) seems to work as expected, I've not been able to get that nice watercolour wet-on-wet bleed/blend (single layer) with any reliability, either between one brush stroke and its "paper" or with two colours bleeding into each other when applied together on a single layer. Am I doing something wrong or am I misunderstanding how the digital version of these paints are supposed to work? I have the "wet-edge" checkbox selected. Is there anything else I'm supposed to do to get the colours to bleed? Does anyone have a good tutorial to recommend?