AndreaThomas
-
Posts
10 -
Joined
-
Last visited
-
How to create a zigzag path
AndreaThomas replied to AndreaThomas's topic in Desktop Questions (macOS and Windows)
@v_kyr Thank you, the 2nd one isn't what I'm looking for (it's seems more of a boundary edge effect) but the 1st example is very close and I'm reading through the link within it now. Hopefully it's what I need! Thank you. -
How to create a zigzag path
AndreaThomas replied to AndreaThomas's topic in Desktop Questions (macOS and Windows)
@GarryP Thank you for this but not quite what I'll need. I had actually come across your video while searching but my lines will be to curvy for this method. I've attached an extra image to my original post to help explain. I appreciate the very quick help though! Thank you -
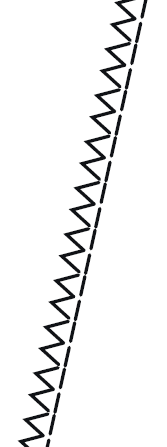
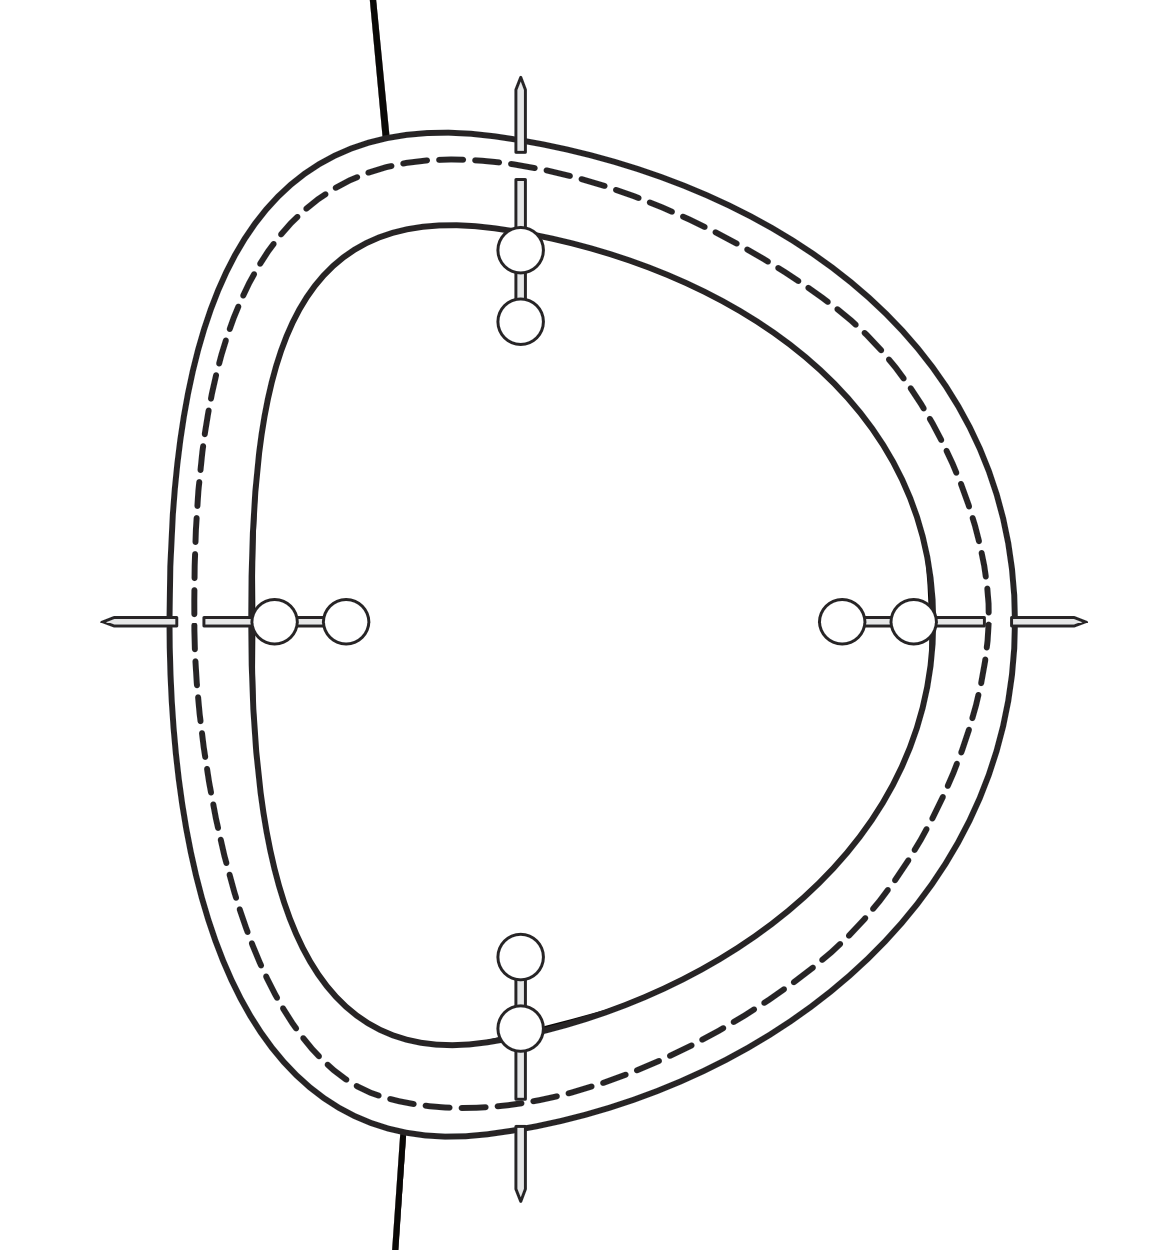
Hello, I need to create quite a few zigzag paths for the type of work I do. They need to be positioned fairly precisely so using a path I can manipulate would work a lot better for me than having to draw as accurately with a brush tool. Can someone advise how I could create a path like the one shown in the example (the line to the left, not the dashed line on the right). Any help would be much appreciated! I'm currently copy/pasting in a zigzag symbol I made but having to rotate each one when it goes around a curved area, which is incredibly time consuming! [Edited to add a second picture to show potential curves it would have to be drawn around - See the dashed line in the 2nd photo, that will be a zigzag in the finished version]

-
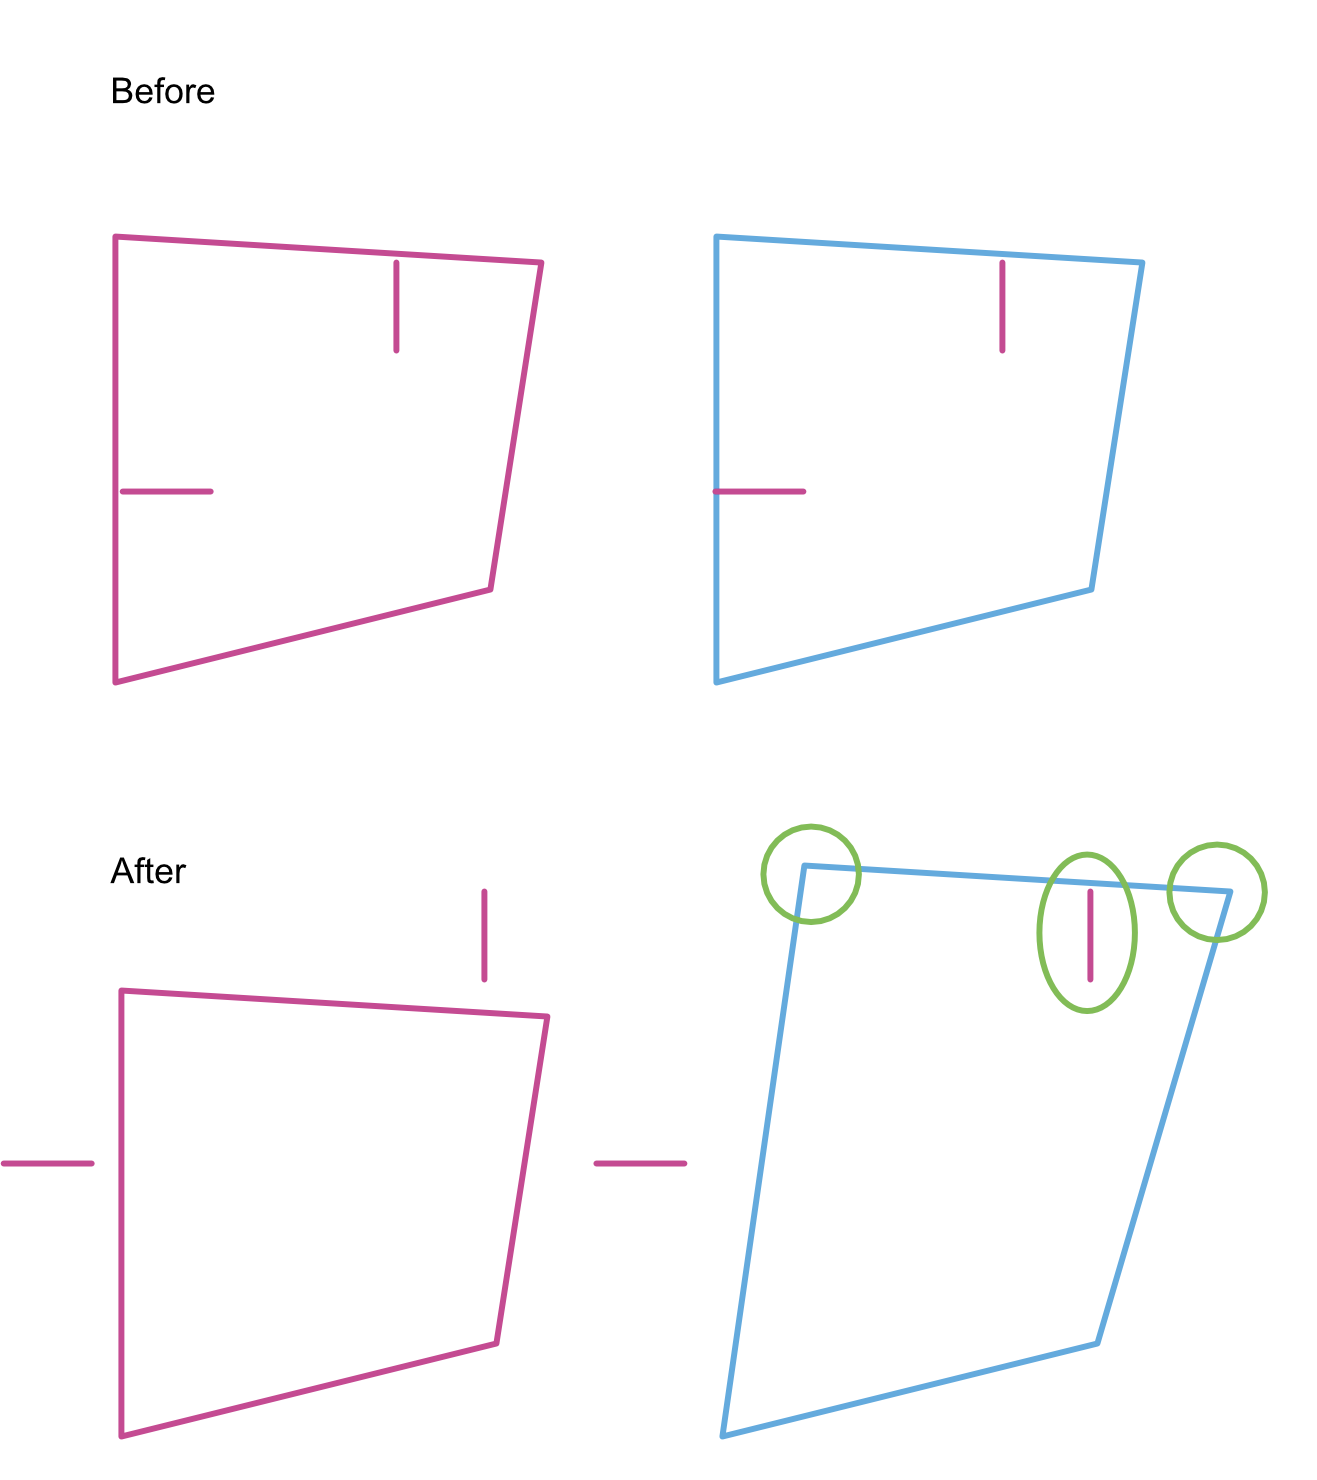
Thank you for your quick reply. I'll attach a screenshot and an example file. The problem is unless I select the nodes of the symbol, I don't seem to be able to move a symbol when it needs to stay relevant to a section of a path. (i.e. a few nodes of a path are selected so I can move them, and my symbol needs to also move at the same time) Apologies for comparing it to illustrator, but hopefully as extra insight I'll explain that I previously used symbols along my paths and could click them using the move tool along with my selected path nodes and move the whole selection as necessary. The only way to alter the symbol itself was to double click to go into symbol editing mode. In Affinity Designer, if I try to select path nodes and then use the move tool to select the symbol for moving at the same time, my nodes (when I change back to that tool) deselect the chosen symbol. If I have to detach the nodes they'll become completely useless as symbols to me. I have them as symbols so that if later on I need to adjust them (colour, length or stroke thickness) I don't have to change some 150 separate objects. In the example, I've shown with green circles, the node points I selected for movement and how it moves all other pink symbols in the 'After' section. If I'm mistaken and it isn't a bug, could you help me understand if there is a way to move the pink symbol in the "After' blue box at the same time as those top two (green circled) node points are raised up, but the remaining symbols to stay where I put them? (and the symbols not be detatched) nodes-with-symbols.afdesign
-
Issue: When the node tool is used to select the points of a symbol, moving the symbol then moves every instance of the symbol as well, even ones within locked layers. Use case: I have a path with symbols intersecting certain points of it. I use the node tool to select the points of the path to be moved, and include the symbols I need too. Once all desired points (of paths and required symbols) are selected I try to move the section but all symbols move, instead of only the only I clicked the node points of. The symbols act as expected if I use the move tool, but this is not the case with the node tool, which is necessary when trying to move symbols at the same time as path points.
-
+1 for wanting to use Affinity for sewing patterns and in dire need of the path measurement info. I'm still stuck using (and paying for) Illustrator until this feature is implemented unfortunately. Do we know if the Affinity team are still aware (or interested) in even potentially adding this to a (near) future release? I haven't bothered to use Affinity since realising it can't give me the path info I need. It doesn't seem worth it to design in one app only to try to port (and keep to scale and path/grouped items) into another just to get values. But I REALLY want to switch over to Affinity and drop Illustrator asap! I should also note, none of the previously user-suggested ideas work for me because of the type of path measurements I need so those haven't been an option.
-
Hmm, that doesn't seem to be the problem. I can see the images outline (when the layer is selected) is in the right spot on the page. If I click and drag the image down to a different spread it becomes visible. There isn't anything on it's current page that it could be underneath so I don't understand why it's visible when dragged to a separate spread but not visible on the current spread.
-
Background: Opening an IDML file in Publisher. Problem: Half of my linked images are not visible on the page. I can see the images in the layers panel and if I click the layer I can see the image's rectangular outline in the correct place on the page but the actual image is not visible on the page. I could delete and re-add all of the images but I have several books worth to do this to and would prefer an easier solution if I'm just missing something. I've checked the opacity. And if it helps (but might make it weirder), the images that are missing are always the images on the 2nd page of each spread.
-
 Markio reacted to a post in a topic:
Request: Additional dash/gap boxes for line strokes
Markio reacted to a post in a topic:
Request: Additional dash/gap boxes for line strokes
-
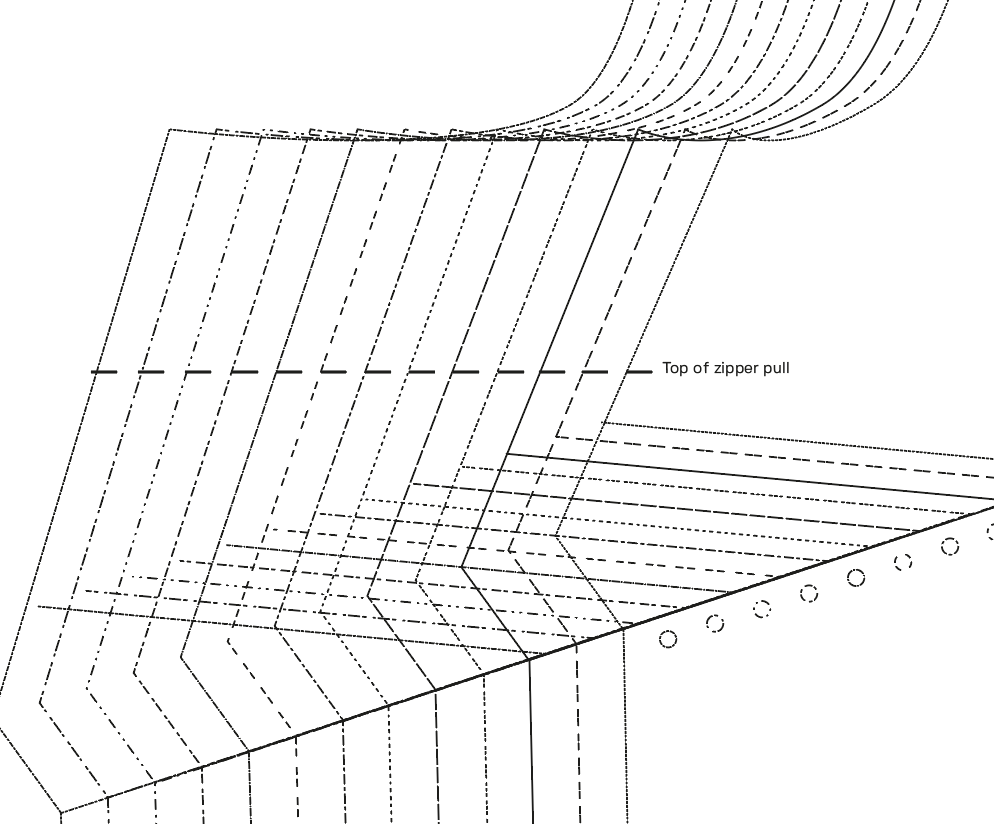
Thanks for the quick reply. I have been using those but although there are lots of combinations with widths of gaps and dashes, it still doesn't provide enough variety for the lines I need. With the extra dash-gap from Illustrator, for example, I currently have "dot dot dash" and "dash dot dash" options, which I can't make through Designer, from what I can tell. I'll attach an example I made in illustrator, and this is even with easy to follow lines, whereas some of the pattern pieces I need to provide have many more areas where lines cross over each other and the person following the lines needs to be clear on which line is the one they are using. These are printed with the line about the same thickness as a regular pen. If they accidentally follow the wrong line after a corner or crossover, then they'll have the wrong size and the garment won't fit.
-
There are currently four boxes to create a dashed line (dash-gap-dash-gap). I am moving over from Illustrator which has a 6 dash-gap ability and with the type of artwork I do the extra dash and gap are very important. I need to display at least 13 lines which each have very clear differences between them. If the purpose helps, I design sewing patterns and each of the lines to indicate the sizes needs to be extremely obvious as to which line they should be cutting out. The prints need to be clear when printed black/white so colour is not an option. Those extra couple of boxes would make a huge impact on my ability to show different line styles.