TrevorP
-
Posts
12 -
Joined
-
Last visited
Everything posted by TrevorP
-
I hope @PaulEC@Alfred @smadell and william overington can all see this, i'm a bit hazy how this works.... 1. EWP approach. Stating with the original, [copy] - New from Clipboard - Erase White Paper [produces the chequering] - save - export as .png; produces Test 1-1, a small change in the background grey (@alfred, this is why I decided it wasn't a success) and identical to exporting as .jpg and .tiff, and also to copy/paste the .afphoto file. @PaulEC, what you say makes perfect sense, which is why my original ask was about a way to turn the drawing first to black on pure white then black on transparent. 2. Blend approach. Thanks for this @smadell. [copy] – New from Clipboard – Blend Options similar to what you suggest – insert white fill layer beneath – Export .png produces Test.2-1, which I think is more a good approximation rather than a solution in that it produces a dark grey on very pale grey image rather than white. I didn't try to apply the EWP filter to create a transparency. 3. Levels adjustment approach. Thanks for this @PaulEC. [copy] – New from Clipboard – Levels Black 14% White 63% - save - export .png produces Test 3-1 (copy/paste .afphoto file does not work). [copy] – New from Clipboard – Levels Black 14% White 63% - save -- export .png – [copy] – New from Clipboard – Erase White Paper – Save – Export .png (Could not find a way of applying EWP without exporting and re-importing the file] produces Test 3-2. I'm not sure this is any different from 3-1. This is the best approximation producing black on I believe very pale grey, perhaps at the expense of a little definition. Maybe this exercise isn't so straightforward after all but I can't be the only person who has ever wanted to turn a drawing/scan on grey paper into a transparency?

-
Embarrassingly I have to recant my unstuck post of yesterday and now feel even stupider. I confused seeing the chequered background pattern associated with transparency with success, which it wasn't. I'll spend another couple of hours at this on Monday morning and post again if I still can't make it work, and post again if I can't in the hope you can help.
-
Thanks to you and William I have found the solution in a roundabout way. How come could get EWP to work never having opened AP before when it causes me so many problems, I wondered. Because it works straight away: open file, apply filter, export result. Where I had been going wrong was messing about with layers and all sorts. The point is EWP doesn't need setting up - it's the only thing I've found in AP that just works without fiddling about. I feel like an an idiot - but a happy idiot. Many thanks.
-
No William, I am unstuck, thanks to you and Alfred in a roundabout way. How come you could get EWP to work never having opened AP before when it causes me so many problems, I wondered. Because it works straight away: open file, apply filter, export result. Where I had been going wrong was messing about with layers and all sorts. The point is EWP doesn't need setting up - it's the only thing I've found in AP that just works without fiddling about. I feel like an an idiot - but a happy idiot. Many thanks.
-
Sometimes I have got the EWP filter to work, sometimes it seems to do nothing. I don't know why: clearly I have never understood how to set it up properly. I spent three hours messing about with it, again, before I sent the post yesterday in desperation. The Help page no doubt looks useful if you already know what to do. If you don't, it isn't, or not to me. Hence the request for step by step instructions for a seven year old. Thanks for taking the time to reply, anyway.
-
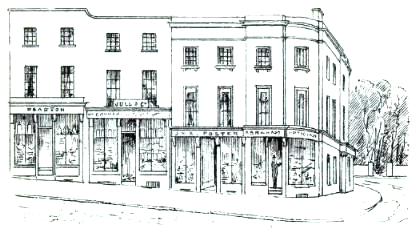
Here is a simple line drawing. Can anyone give me very simple step-by-step instructions how to make this image black on (real) white and then black on transparent? Would the process be different if the drawing were not black but (say) blue? I have both Aff. Photo and Designer, but zero competence with either: I have been trying to do this without success for about three years on and off. Help would be much appreciated. Imagine you are instructing a seven year old...
-
Thanks, Dazzler
-
Thanks Garry. That's very useful. I looked for ages for a demo clip like this. If you don't have much familiarity with Affinity or other graphic design programs (like me) you need demos of the simplest, most obvious things. The Affinity tutorials make me feel like an eight year old in a university seminar. Thanks again.
-
Thanks Lagarto; but no, that isn't my issue (the drawings in the thread aren't mine, it was just that @firstdefence posted in reply to the original poster something that was relevant to my problem). I repair books. Sometimes I need to replace a torn piece of text from a photo/photocopy/scan of a replacement page, then print it on a piece of paper similar to that of the original. So I need an image of the text with the "white paper" erased. Making small adjustments to the images of the text when the new page isn't identical to the old - slightly different print size, say - is the next problem I need to solve. But all this is probably more information than you need or want.
-
Found those, and made them work. Thanks for your help.
-
Thanks MEB. I have Photo as well, same level of competence, just looking to see if I can find the commands now...
-
first defence, I bought Designer and Affinity Photo mostly to do this exact thing, and I've spent on and off three years of frustration failing to do something you make seem simplicity itself. I can do the first part, applying the B&W filter, but after looking in the online help , the forum and the manual I can't find any info or tutorial on how to "merge visible" or "Erase White Paper". If you or someone else could spare a couple of minutes to explain in words of one syllable, I'd be grateful. My level of incompetence with Designer is pretty much total - eg although I can follow the online guide to set up the parameters for the dodge/burn brushes, I've never managed to make a marks with them