Peachy
-
Posts
16 -
Joined
-
Last visited
Everything posted by Peachy
-
 Hi Chris, unfortunately I only saw the message now. Does the problem still exist? Actually, it should have been solved with the update to 2.04. On my system (Win10), the setting can now be changed permanently. Greetings Peachy
-
Hi Walt, Thank you for your quick reply - I was already doubting my mental abilities.😉
-
Hello all, I haven't worked with Designer since the 2.0. or 2.0.3 update, so I only noticed this effect (bug?) today. In the panel "Settings", menu "Interface" the option "Specify lines in points" is deactivated. (I think in millimetres and not in pt.) Ergo, the unit of measurement mm also appears in the contour panels as contour thickness. However, the definition of the contour thickness in millimetres cannot be infinitely adjusted in this form compared to before. This is neither possible with the slider (which jumps to a different position after releasing the mouse), nor in direct measurement input in smallest intervals. Different values are displayed each time. Example: I enter 1.5mm but it jumps to 0.53mm - or I enter 2.5mm but the display jumps to 0.88mm. If the check mark is not set for the option "Specify lines in points", the problem does not exist. I can select any desired contour thickness - but in pt - continuously with the slider or by entering smallest intervals. After a lot of trial and error, I noticed that the input in the panel is obviously ALWAYS understood as an entry in pt. I.e. Designer reads the value I enter in pt and then converts it to mm. Is there another default setting to generally set the contour thickness in mm or is this a bug? Just for your information: In the document settings I have also set mm as the document units. It would be great if someone could help me out of this dilemma.
-
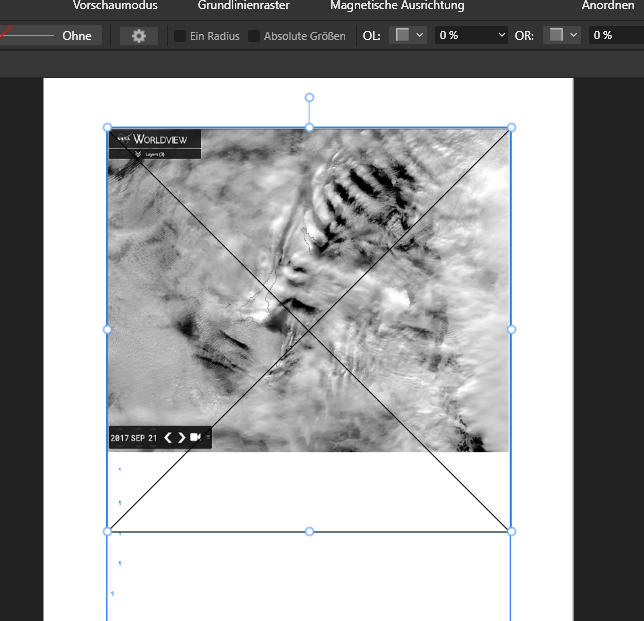
Hello together, I'm once again at a loss for a basic function because I don't have enough experience with the Publisher. FAQs and other sources have not helped me. I have a picture frame in which a picture is placed that is much smaller than the picture frame. I would like to resize the picture frame WITHOUT resizing the picture placed in the frame. How do I do this again? Thank you very much for your help. Translated with DeepL For the german members: Hallo zusammen, ich verzweifele mal wieder an einer Basic-Funktion, weil ich zu wenig Routine im Publisher habe. FAQs und andere Quellen haben mir nicht weitergeholfen. Ich habe einen Bilderrahmen in dem ein Bild platziert ist, das wesentlich kleiner als der Bilderrahmen ist. Ich möchte nun den Bilderrahmen in der Größe ändern OHNE das im Rahmen plazierte Bild in seiner Größe zu ändern. Wie geht das nochmal? Danke vielmals für Eurer Hilfe.
-
Wow, that's an exotic hint. But in fact it works. I tried it out in Libre Office Writer straight away. A tried and tested tool. Many thanks for the quick help.
-
Hello all, what do I have to do to create a soft line break in a justified text in Affinity Publisher in such a way that the words before the line break are not stretched across the entire block width, but remain on the left margin? The style sheet "Justification - Last line left" does not produce the desired result. Thanks in advance Für die deutschsprachigen: Hallo zusammen, Was muss ich tun um im Publisher in einem Blocksatz eine weiche Zeilenschaltung so auszubilden, dass die Wörter vor der Zeilenschaltung nicht über die ganze Blockbreite gestreckt werden, sondern links am Rand leiben? Die Formatvorlage "Blocksatz - Letzte Zeile links" bringt nicht das erhoffte Ergebnis. Danke im Vorraus
-
Thanks Old Bruce, as you see i found the solution a few minutes after submitting the post. Life and software sometimes is a miracle. Thanks for your quick response.
-
Hello all. I have created a book (one page) in Publisher with 20 chapters and a total of 190 pages. All text frames, except for the cover page and the table of contents (still under construction), are linked together so that the text runs from the third to the last page. I used the paragraph styles to define the different chapter headings. Now I would like it better if each new main chapter starts on a new page. How do I do this? I didn't get anywhere with sections and I didn't find a manual page break. It can't be that this should be complicated in a layout program. Thanks for the support Hallo zusammen. Ich habe im Publisher ein Buch (einseitg) mit 20 Kapiteln und insgesamt 190 Seiten erstellt. Alle Textrahmen, bis auf das Deckblatt und das Inhaltsverzeichnis (noch im Aufbau), sind miteinander verknüpft, sodass der Text von der dritten bis zur letzten Seite durchläuft. Über die Absatzvorlagen habe ich die unterschiedlichen Kapitelüberschriften definiert. Nnun würde mir es besser gefallen, wenn jedes neue Hauptkapitel auf einer neuen Seite beginnnt. Wie stelle ich das an? Mit Sektionen bin ich nicht weitergekommen und einen manuellen Seitenumbruch habe ich nicht gefunden. Kann doch nicht sein, dass dies in einem Layoutprogramm kompliziert sein soll. Vielen Dank für die Unterstützung !!!! Oh man. It's done. First you search forever and then you find the solution after the post. In the format volume there is the entry "Flow". There you can set how the further behavior should look like. Oh man. Hat sich erledigt. Erst sucht man ewig und dann findet man die Lösung nach dem Post. In der Formatvolage gibt es den Eintrag Fluss. DDort kann man einstellen wie das weitere Verhalten aussehen soll.
-
Bingo, thanks a lot. That was the reason. I was searching for threee days, knowing that this must be an easy basic setting.
-
Ich habe ein Mehrseitendokument mit mehreren Kapiteln. Die Hauptkapitel sollen immer auf der nächsten Seite beginnen. Allgemeine Absatzeinstellung: "Blocksatz links". Ich wollte das über Textstile definieren und habe in dem entsprechenden Stile unter dem Eintrag Flussopionen "Start" den Eintrag "Auf der nächsten Seite" angewählt. Funktioniert auch, nur auf der Seite davor beginnt der Fließtext nicht an der oberen Kante des Satzspiegels sondern er ordnet sich mittig in der Vertikalen. Das heißt über und unter dem Textblock entsteht ein Freiraum. Das gleiche Dilemma entsteht bei allen Auswahlmöglichkeiten außer "Keine Änderung" und "Beliebige Position". Weiß jemand Rat? I have a multi-page document with several chapters. The main chapters should always start on the next page. General paragraph setting: "Justification left". I wanted to define this via text styles and have selected the entry "On the next page" in the corresponding styles under the entry flow headings "Start". It works, but on the page before, the continuous text does not start at the upper edge of the sentence frame, but is placed in the middle of the vertical line. This means that there is a free space above and below the text block. The same dilemma arises with all selection options except "No change" and "Any position". Does anyone have any advice?
-
Perfect! Thanks a lot for this quick help. As Konfuzius said: People do not stumble over mountains, but over molehills. One less molehill.
-
Hello everyone, how can the permanent highlighting of recently edited objects be switched off? I forgot how to do that. The attached excample is in Publisher. Thanks to all
-
Got Problems with the field panel: I'm just delving deeper into the world of Publisher (V 1.7.1.404) - absolut exiting! I have just watched the video tutorial "Page layout". Unfortunately, I am not able to insert even a single field into a text frame via the field panel by double-clicking, as explained in the video as well as in the online help. The cursor is placed in the text frame (master document) the style palette "Fields" is open, but e.g. the fields "Name" or "Page number" are not clickable with the mouse. When I use the Text/Insert/PageCount commands it works but no hashtag is displayed in the master document, but " Nr.". Curly braces are not shown either. I work with a German version on Win 7. In the screenshot you can clearly see that also the instruction appears grey in the palette. What can I have overlooked? Thanks for help
-
@Alfred: Lol. It will probably take a little while until I understand the jargon here in the blog. Thanks for the first entries in my Affinity Glossary. @Walt: Too bad, sometimes it is helpful if you can make the control characters visible. I will deal more with APub ;-). Thanks for the hints. This saves me unnecessary searching. Peachy
-
Thanks a lot, I was afraid of that. By the way, what does "APub" mean?
-
Is there a possibility to make hidden characters visible in Affinty Design text processing, such as paragraph marks, tab stops, spaces, etc.?