Andersmb
-
Posts
7 -
Joined
-
Last visited
-
Cool, thanks for helping me out! I got it working the way I wanted.
-
 Andersmb reacted to a post in a topic:
File management:What are you using?
Andersmb reacted to a post in a topic:
File management:What are you using?
-
afdesign file attached
-
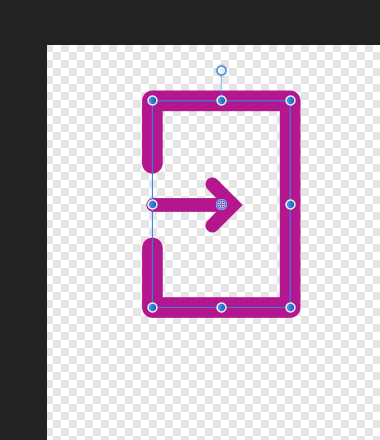
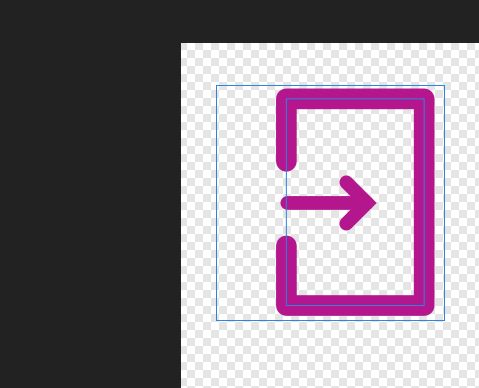
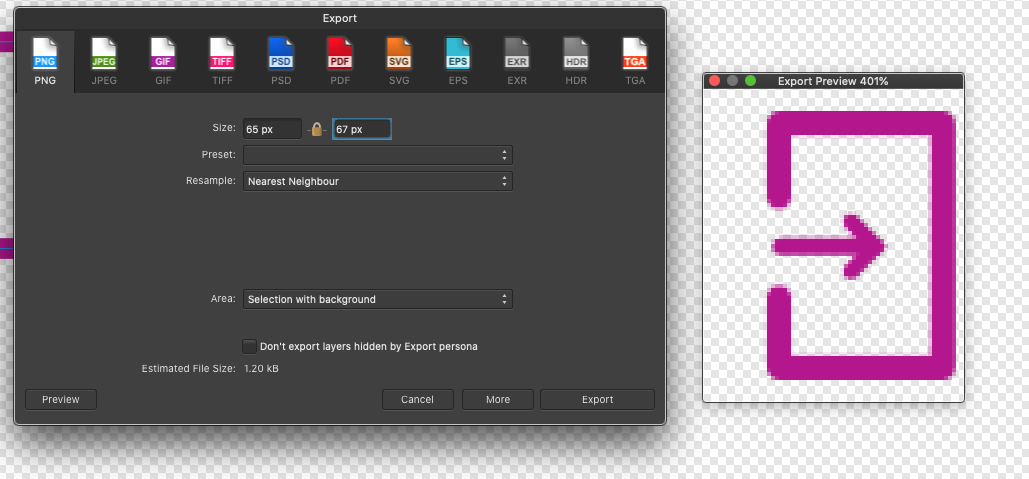
I have made a small icon in Designer, and I would like to export it to a png file. I select the object and click on Export. However, there is empty space on one of the sides. See the images below. What have I dont to inflict this situation upon myself? Designer Persona: Export Persona: PNG Preview icons.afdesign

-
I may have had some assistance.... (no, I'm secretly the Flash, but don't tell anyone)
-
For some reason, when I now opened AP, it worked. I promise, it did not work yesterday! I probably should have restarted the program... But I now pressed "x" (not "alt"), and that switched from a black to a white brush. It turned out that it was "that simple" after all. Thanks for taking your time trying to resolve the issue! I used a tripod, but I should have used a delayed shutter as I noticed some small movements in the shots. But in principle you are right (if I just did my job well, and the lighting did not change significantly).
-
@GabrielM Thanks for your reply. I did try to follow this video, but the manual blending that the video demonstrates does not work for me. I don't want to do an exposure blend. I just did a fun little project in my living room where I took a background image of the living room, and then I moved around and posed in different locations. I want to mask in all poses of myself onto my background image, so I have to manually mask in my person from each image. The monochrome brush masking with a mask layer did not work for me: yes, I could mask in the background image, but I could not "undo" and bring the top image back in. I tried with white brush, and I tried with black brush. The effect was the same: I just removed the top layer bringing in the background. It would be much easier for me to have a completely opaque (black) top layer, and then mask in my person down onto the background. Hopefully I have explained that well
-
I have done multiple exposures of a scene, and I want to mask in certain areas of each frame over a background frame. I have loaded the background frame into Affinity Photo, and I have one of the other exposures as another layer above the background. I have simply tried to right click on the top layer, and select "Mask to below", hoping that I can selectively mask certain portions onto the background layer. However, this simply does not work for me. The layer mask is created just fine, but when i select the Brush and begin masking in the regular way (white/black), there is simply no change to the image. I have checked all the opacities and settings of the layers and brushes, and it does not work. I have made sure that each layer is a pixel layer. If I simply select the top layer and select "Mask layer", the sure I can mask down to the background, but I am not able to bring the top layer back! It is therefore destructive, and it is impossible to do a decent mask job unless I can both mask down and bring back, in an alternating manner. So, what am I doing wrong? I am using AP 1.6.7