chrishoward
-
Posts
10 -
Joined
-
Last visited
Everything posted by chrishoward
-
Thanks, Carl. I suspected as much but was hopeful. Any suggestions of software that does support that?
-
Each week I have to crop 200 photos to 1:1 size. These are a mix of portrait and landscape. The focal point is not in the same position in each image. So, I need to be able to change the crop area for each photo. To open, crop, save for each photo is slow and tedious. I'd much rather use batch that has a macro that automatically opens each photo, opens the cropping dialog, waits for me to set the crop area, then saves the photo. Is this possible with Affinity Photo? (Is it possible in Photoshop?_ Thanks
-
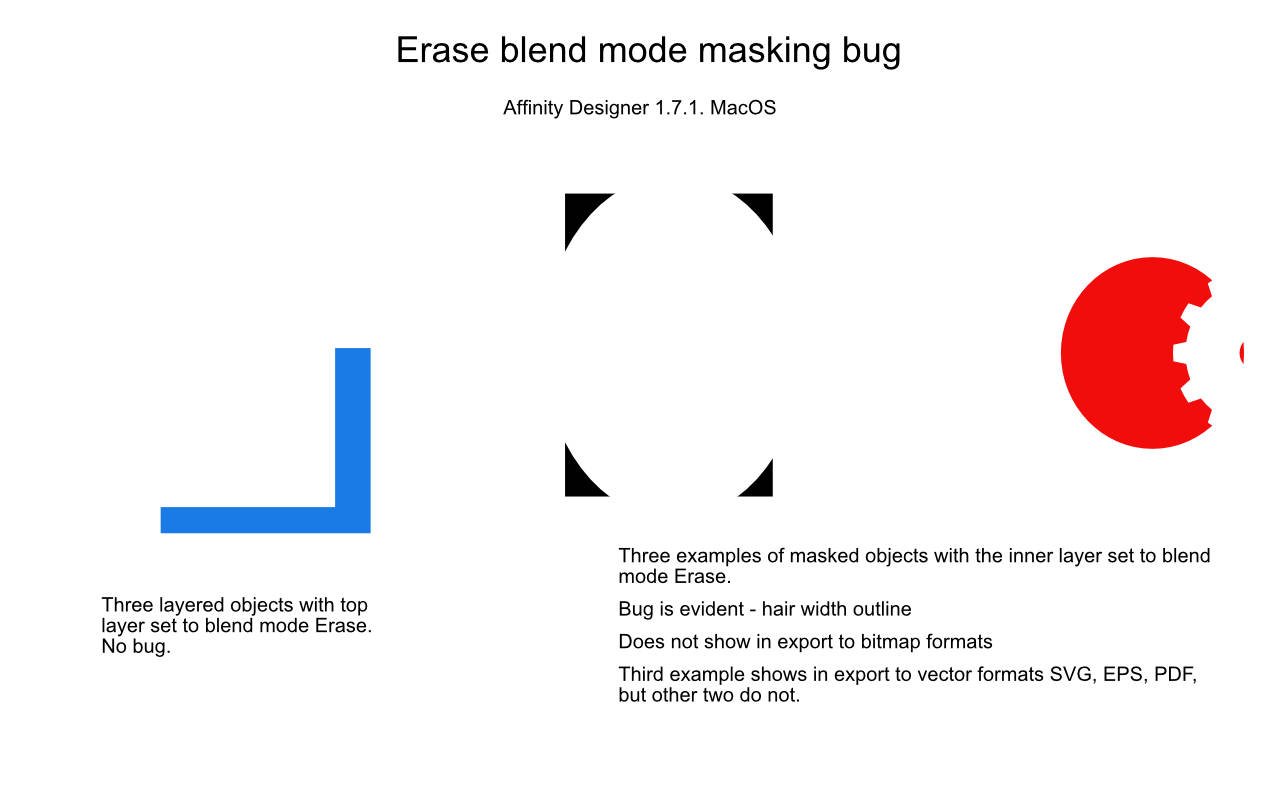
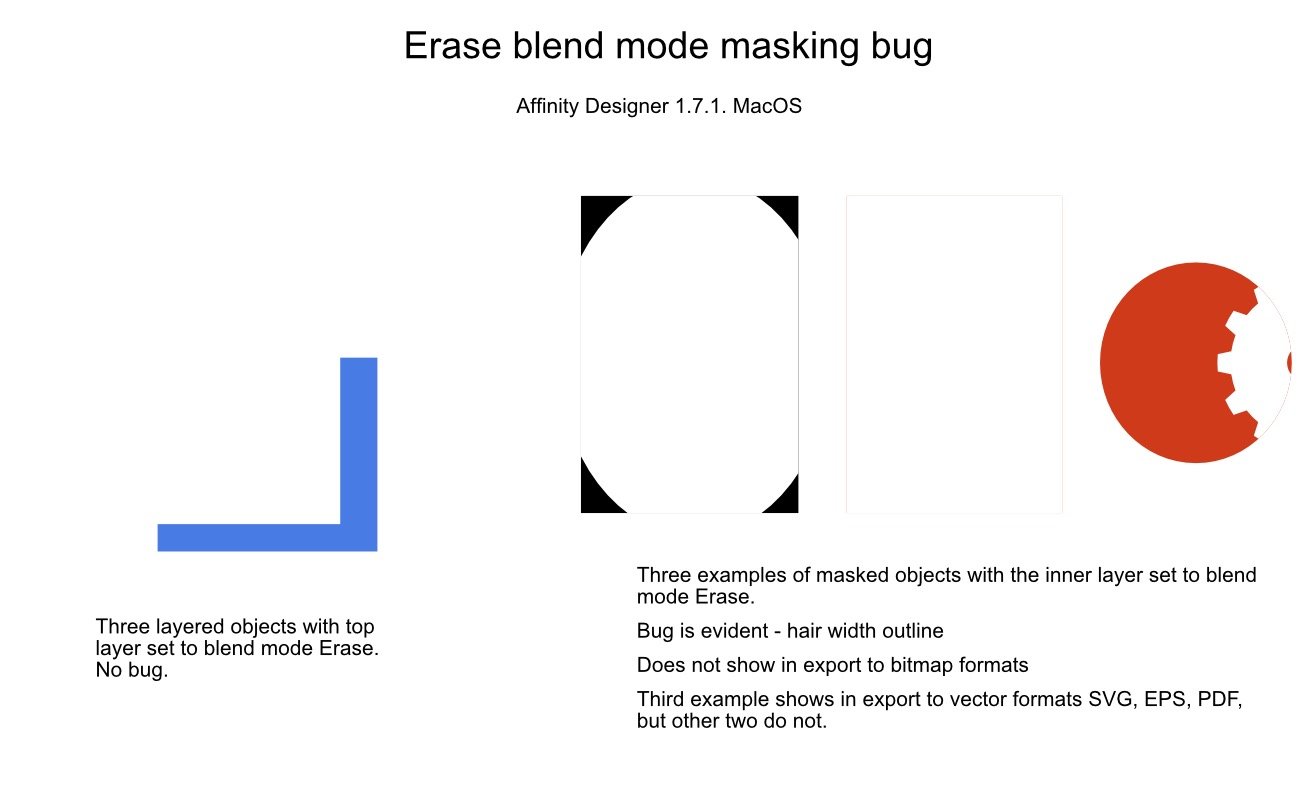
Erase Blend mode bug when masking
chrishoward replied to chrishoward's topic in V1 Bugs found on macOS
Thanks, MEB. Not sure about that. As my original post says, the problem is evident in exported vectors types - PDF, SVG, EPS. And I attached an SVG as proof. And I just exported to a PDF with the "Use precise clipping" enabled and it still has the issue in the PDF - just like the SVG above. See attached. However, in both cases, it's only evident on a circular object. As my original image says "Third example shows in export to vector formats SVG, EPS, PDF, but other two do not." And i tried doing 300dpi PDF too. It's quite reasonable for "Use precise clipping" to be in Performance settings but it's equally reasonable for it to also be in View Mode menu since it affects the view. Kinda of like InDesign and it's three different view quality modes. My own opinion is if something looks like a bug but has a fix that's not easily determined by ye average user - such that one logs a forum request reporting it as a bug - then there's probably user experience issue. My user experience was I spent well over 30 mins testing and proving this "problem" that could have been averted by better UX design. As well, I spent time googling and searching for an answer. My user experience may have been much, much better with a simple option in the View Mode. (Can't absolutely say i would have quickly found it there, but definitely more chance of it being both visible and meaningful if i saw it there) Erase bug.pdf -
Erase Blend mode bug when masking
chrishoward replied to chrishoward's topic in V1 Bugs found on macOS
Thanks heaps, MEB. I would suggest tho that that then presents a UX problem. It should be easier to know the fix for this problem (maybe the option should also be in the View Mode menu), and the Export panels should include a toggle to turn on precise clipping. -
Erase Blend mode bug when masking
chrishoward replied to chrishoward's topic in V1 Bugs found on macOS
Thanks, Hangman. The Subtract is probably the way I should have done it! It's the way I have been doing things. I think I'd seen the Erase blend mode and was just looking for reason to use it, so overlooked that. Nice tip, Alfred. Thanks. P.S. Affinity dudes, despite the alternative ways Hangman has shown of achieving this, my original way still appears to demonstrate a bug. -
Erase Blend mode bug when masking
chrishoward replied to chrishoward's topic in V1 Bugs found on macOS
Thanks, Hangman. That is very good alternative, and probably how most people do it. Which is probably why this bug hasn't shown up before. -
When I set an object inside another as a mask and then set the inner object to Erase blend mode, the primary object shows a hairline outline. See attached example files and screenshot. I am on a Mac using Affinity Designer 1.7.1. This happens in any document. It does not show when exporting to bitmap formats and not in all cases exporting to vector formats (SVG, PDF, EPS) This is my first time using the Erase blend mode, so do not know if the bug previously existed. Thanks Erase bug.afdesign Erase bug.svg