ahelton
-
Posts
12 -
Joined
-
Last visited
Everything posted by ahelton
-
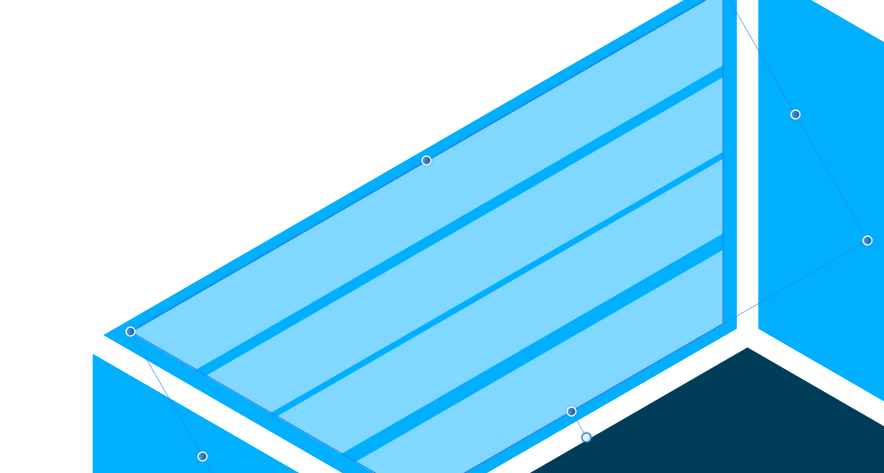
Okay. I figured out the clipping part finally, but am unsure how I get the transparent trapezoids to distribute evenly. I tried the distribute vertically button, but that doesn't work. This is what I have currently:

-
I've been trying to figure this out for an hour, but am stuck. I'd like these partially transparent trapezoids to fit inside the light blue trapezoid while keeping the same angle as the parent light blue trapezoid on the sides and with the same about of padding around the edge (as in outside edge of the transparent trapezoids having some padding around them so as to not go all the way to the edge of the light blue trapezoid). I figure there's a far easier way to accomplish this then what I've attempted thus far, so am hoping someone on here can advise me on how to accomplish this. What I tried to do is copy the light blue trapezoid and create a slightly smaller version of the light blue (I changed the color to green so I could see it) trapezoid and stick it inside the larger one and then clip the transparent trapezoids to the smaller of the two light blue trapezoids. However, for some reason when I do this it will only clip it to the larger one and not the smaller one (using Arrange -> Movie Inside. Additionally, I've tried recreating this in a separate document to play around with the Arrange -> Move Inside feature and that feature is totally grayed out when I try to use it. Why is this?
-
Thank you! Exactly what I was trying to accomplish.
-
Hi All, I'm making a simple logo and need a little help. I've got a Texas shaped graphic that I created and am going to run text through the middle of it, so I created a rectangle with no fill and no stroke and used the subtract tool to make my cutout. On one of the versions of the logo, I'd like to have just the outside portions of Texas stroked with a solid white color. However, when using the subtract tool it strokes the internal portions as well. I've uploaded a image of what I'm talking about to make it easier to understand. I don't want a white stroke running horizontally across the top of the cutout or the bottom of the cutout. I just want the very outside of the state to have the white stroke.
-
Just wanted to say thanks to everyone for the input. I got it looking the way I envisioned.
-
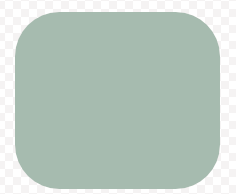
Just curious if anyone can shed some light on why the same color look so different in Affinity vs other places such as our organization's website or in Microsoft Word. The color in Affinity has the exact same RGB value, but looks significantly different. Is there a way to make it look the same? Or at least close to similar? What's the best way to reconcile this? I created a logo earlier using the rgb color values from our website, but it looks so drastically different I am not able to use it yet. I've attached photos of the green color we are using. The first is from Affinity, the second is from our website and the third is from Microsoft Word. *****EDIT******* I think I figured it out. My color profile was set to "Created by Microsoft WCS..." I switched to sRGB and everything matches up correctly now. I still don't know what the created by Microsoft WCS options mean, so if someone want to explain that to me I would greatly appreciate it!
-
Can you expand on what you mean by "clipping the little piece into the circle." I think I may have arrived at something similar, but just curious how you accomplished this as I'm not over good at Affinity Designer yet.
-
Yes, this is what I wanted, but was having a hard time describing it. I've gotten close to what I want by fiddling around, but it has certainly been a challenge. The good thing about the replies above; however, is that I now know about the donut option as well as using the subtract feature to make my "hollow circle."
-
Hi All, I'm attempting to make a simple logo for my organization. If you'll take a look at the image file I've attached, you'll get a better idea of my dilemma. I'd like to have my drop shadow show up where the 'K' intersects (goes over the top of) the ellipse. I've made a number of stabs at this and so far I've not found the proper solution. I made a copy of the logo and then attempted to use the intersect button to create a shape that is exactly the same as my intersection so I could just apply my shadow to the newly created shape, but that doesn't work since my ellipse shape is in fact just a stroke around a circle. Any ideas on how to easily accomplish this? Thank you! P.S. I'm not sure if I explained that very well, so please let me know if more explanation is needed.
-
Is there an easy way to add an inner border for basic shapes and more complex shapes? I'v only been able to find the inner outline option in the layer effects panel, but that doesn't do what I am looking to accomplish. I just want to add a border inside of a shape. Something like the attached image. I know for simpler shapes like a square, I can just create a second square with no fill and a stroke and resize it to accomplish this, but I figure there's probably a better way. Thanks.