

DesignBunny
-
Posts
8 -
Joined
-
Last visited
Posts posted by DesignBunny
-
-
3 hours ago, StuartRc said:
Thank you for your comments..
The assets were not really build to be bitmap fills..however I have had a look at the files and attempted to fix the issues (not sure whether 100% success).
1.saved out a new set at x2 and 400dpi to try and tackle the blurring issue when scaled...
2. Edited a number of the patterns to remove white lines
3. re-modelled some of the patterns
Thank you they are all working perfect as bitmap fills now!!!
 I appreciate this so much!!!
-
Awesome! I'm a huge fan of this effect and knew about Photoscape's option but it looks like this will give better results!
-
Love it! Thank you so very much!!!!
-
I've been using AD for years but have only just discovered this fabulous resources thread and @Stuartrc your contributions are SO wonderful and generous!!! Thank you!!! These patterns are great for my work (though they don't line up perfectly seamless when using the bitmap fill option to afford the ability to scale and rotate with ease, just fyi).
-
DesignBunny--are you hosting the photo on a service such as Flickr? Or are you putting the photos directly into the blog page?
Directly from my hard drive into the post.
Your initial problem sounds like it is resolved then?
The results you are getting from WordPress could be due to various factors.
First, when you reduce the size of an image in AP, either using Resize Document or Export, you're going to be working with resampling. Depending on what option (Bicubic, etc) you choose, you will get different results in how your final image looks..
As for uploading to Wordpress, it depends on a few more things. Your theme could be display the image you uploaded directly, and let the browser resize it on the fly. Alternatively, some themes might generate thumbnails for various uses in the theme (which might not necessarily be tiny), and this re-saving process could again change the quality of the final image.
If you want to keep things simple I suggest resizing it and making sure you get the quality you want before inserting it into WP. And when you are importing the image in WP, just make sure the image is display at "full size" so it simply display the uploaded image.
Yes the Affinity importing issue is solved. I don't know anything about resampling or the options such as bicubic, I just leave things as they are set by default in AD, but it sounds like I should commit to some experimentation there and see if I get better results with a different setting.
My theme allows you to choose thumbnail, full size, or a specific pixel size - I always select full, and create all my images in an AD template with the document size set to the width of my blog post container. My theme is retina ready/mobile optimized so from what you and Asha are saying, that may be causing some issues, though I still don't really understand what my options are there to address it if I'm working with an image that looks right after I export from AD. (I have AP too, I just mostly use AD to create my blog images)
Thank you for the reply, I really appreciate it!
@deisgnbunny, i suspect that, in your case, "fit to window" caused the image to be displayed at more than 100% size. maybe, with 100% size you iintended that the image was filling the 100% of ap window, whereas i meant the actual size of the image, that is "pixel size" :)
this is why selecting "pixel size" did the trick: try cmd-1, as i suggested, to display the image at its 100% size. cmd-2 doubles the zoom, cmd-0 gets back to "fit to window".
Hmm, well I jumped back over there to have a look at it (I haven't touched it since I tried your suggestion) and the zoom level is still at 100%. Before and after I clicked 'fit to window' the image was filling the screen, it just cleared up after I chose that option.
Also, in my menu it shows cmd-9 as the 'Pixel Size' shortcut, and there is an option right above that in the menu for 'Actual Size' (cmd-8) - so pixel size surely must be something different than the actual size, yes?
-
Barninga and Asha, thank you for the replies.
Barninga - I wasn't exactly sure what you were saying either but I gave things a second look. Affinity opened it at 100% scale, which fits the window viewing area. Still I went up to View on the options menu and looked for some other viewing options that might shed some light. I tried 'zoom to fit', but it already was, so then I tried 'Pixel Size' and BAM! the image cleared up! I have no idea what that option is about or why I'd have to specifically choose that when opening an image, but I'll take it! Now that's squared away I need to deal with what's happening when I upload to WordPress <_<
Asha - I'm glad you mentioned the ~200px thing, because I noticed that too. There is right at a 200px difference between the original image size (963) and the container (780). I am getting better quality uploading at 963 than at 780 (which goes against everything I've read in the blogging world about image optimization). Besides that not making sense, the quality of the 963px file is still degraded. I can use it if I have no other option since I'm not getting the quality drop after editing in Affinity anymore, but I just really don't get why all this "optimization" seems to actually be destroying image quality?! It's a real problem and major frustration.
-
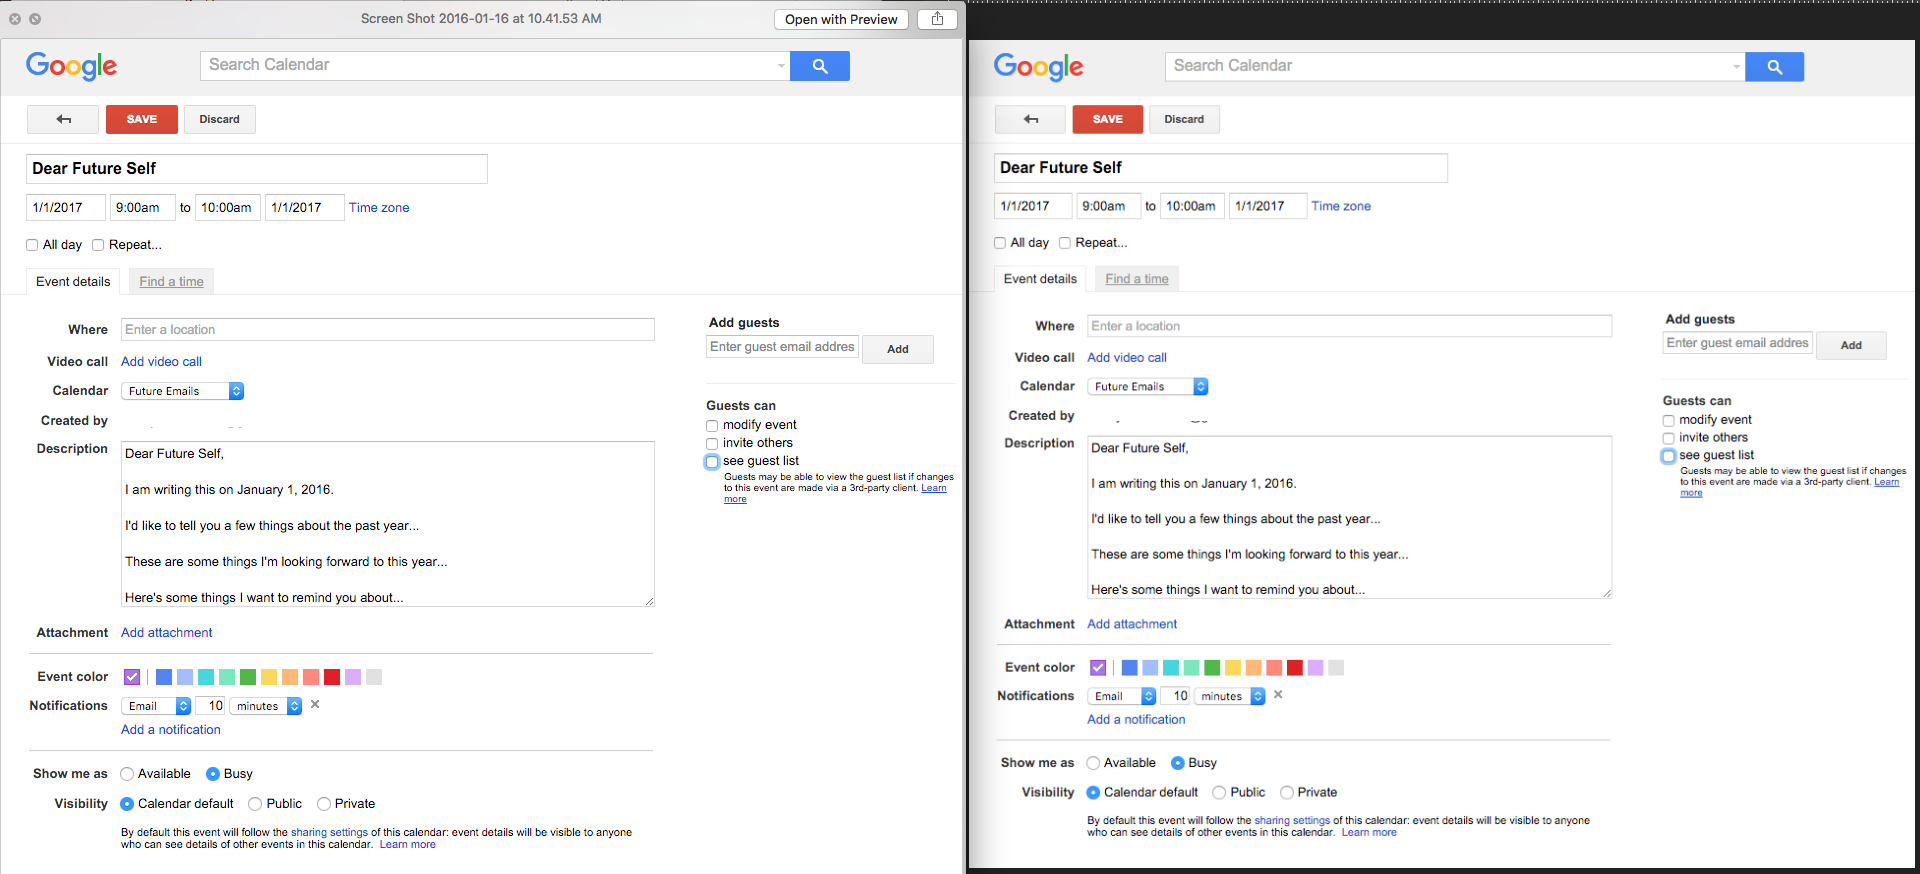
I have taken a crisp screen shot for a tutorial and want to edit it in Affinity Designer. But when I open the png in Affinity the image quality is noticeably degraded. If I upload straight to Wordpress the quality is even worse. The image size is 963 × 843 and the width of the area I'm placing it on my blog is 780. (If I resize the image down to 780 and upload to WP the quality is worse than leaving it at 963 ???)
I don't understand why both Affinity and WP are degrading the quality of the image. I've attached a screen shot of the original image open in Preview next to the same image opened in Affinity (however screen grabbing this example shows a bit lower quality than I'm seeing in real life (why???) - but it's still good enough to show the quality loss in Affinity vs the original.

Re-Organize Brush Categories???
in Feedback for Affinity Designer V1 on Desktop
Posted
I have just organized all my (raster) brushes into custom categories, but now I'm stuck on how to reorganize my custom categories so that they aren't all randomly displayed in the drop down list. Anyone know what I'm missing here, surely this is something one can do?