Yumeropes
-
Posts
5 -
Joined
-
Last visited
-
well thank you both for your lights, i can understand your point so : i gonna go as soon as possible in a photoshoot i have to edit, and i'll come back to you with a real problematic picture, what i tried, what failed, what i finally get, maybe gonna be more relevant^^ (you are not ready, gonna be hard ! ) thank you for all your support !
-
 Yumeropes reacted to a post in a topic:
how to enlarge background in studio photoshoot
Yumeropes reacted to a post in a topic:
how to enlarge background in studio photoshoot
-
Thank you but my purpose is so "general" that i just hope anyone already met this problem and know how to solve it.... :3 don't worry !! well... thank you to propose this, but thats not an option because its not what i wanna do (because i dont like it, because its more difficult to keep the decided shadow on the wall, because its more difficult to have like this the result i wanna have.... and because for most of the pictures i have, "cut out" is really too much time consuming, they are not all as easy as this one^^" so thats not my option.... thanks ^^
-
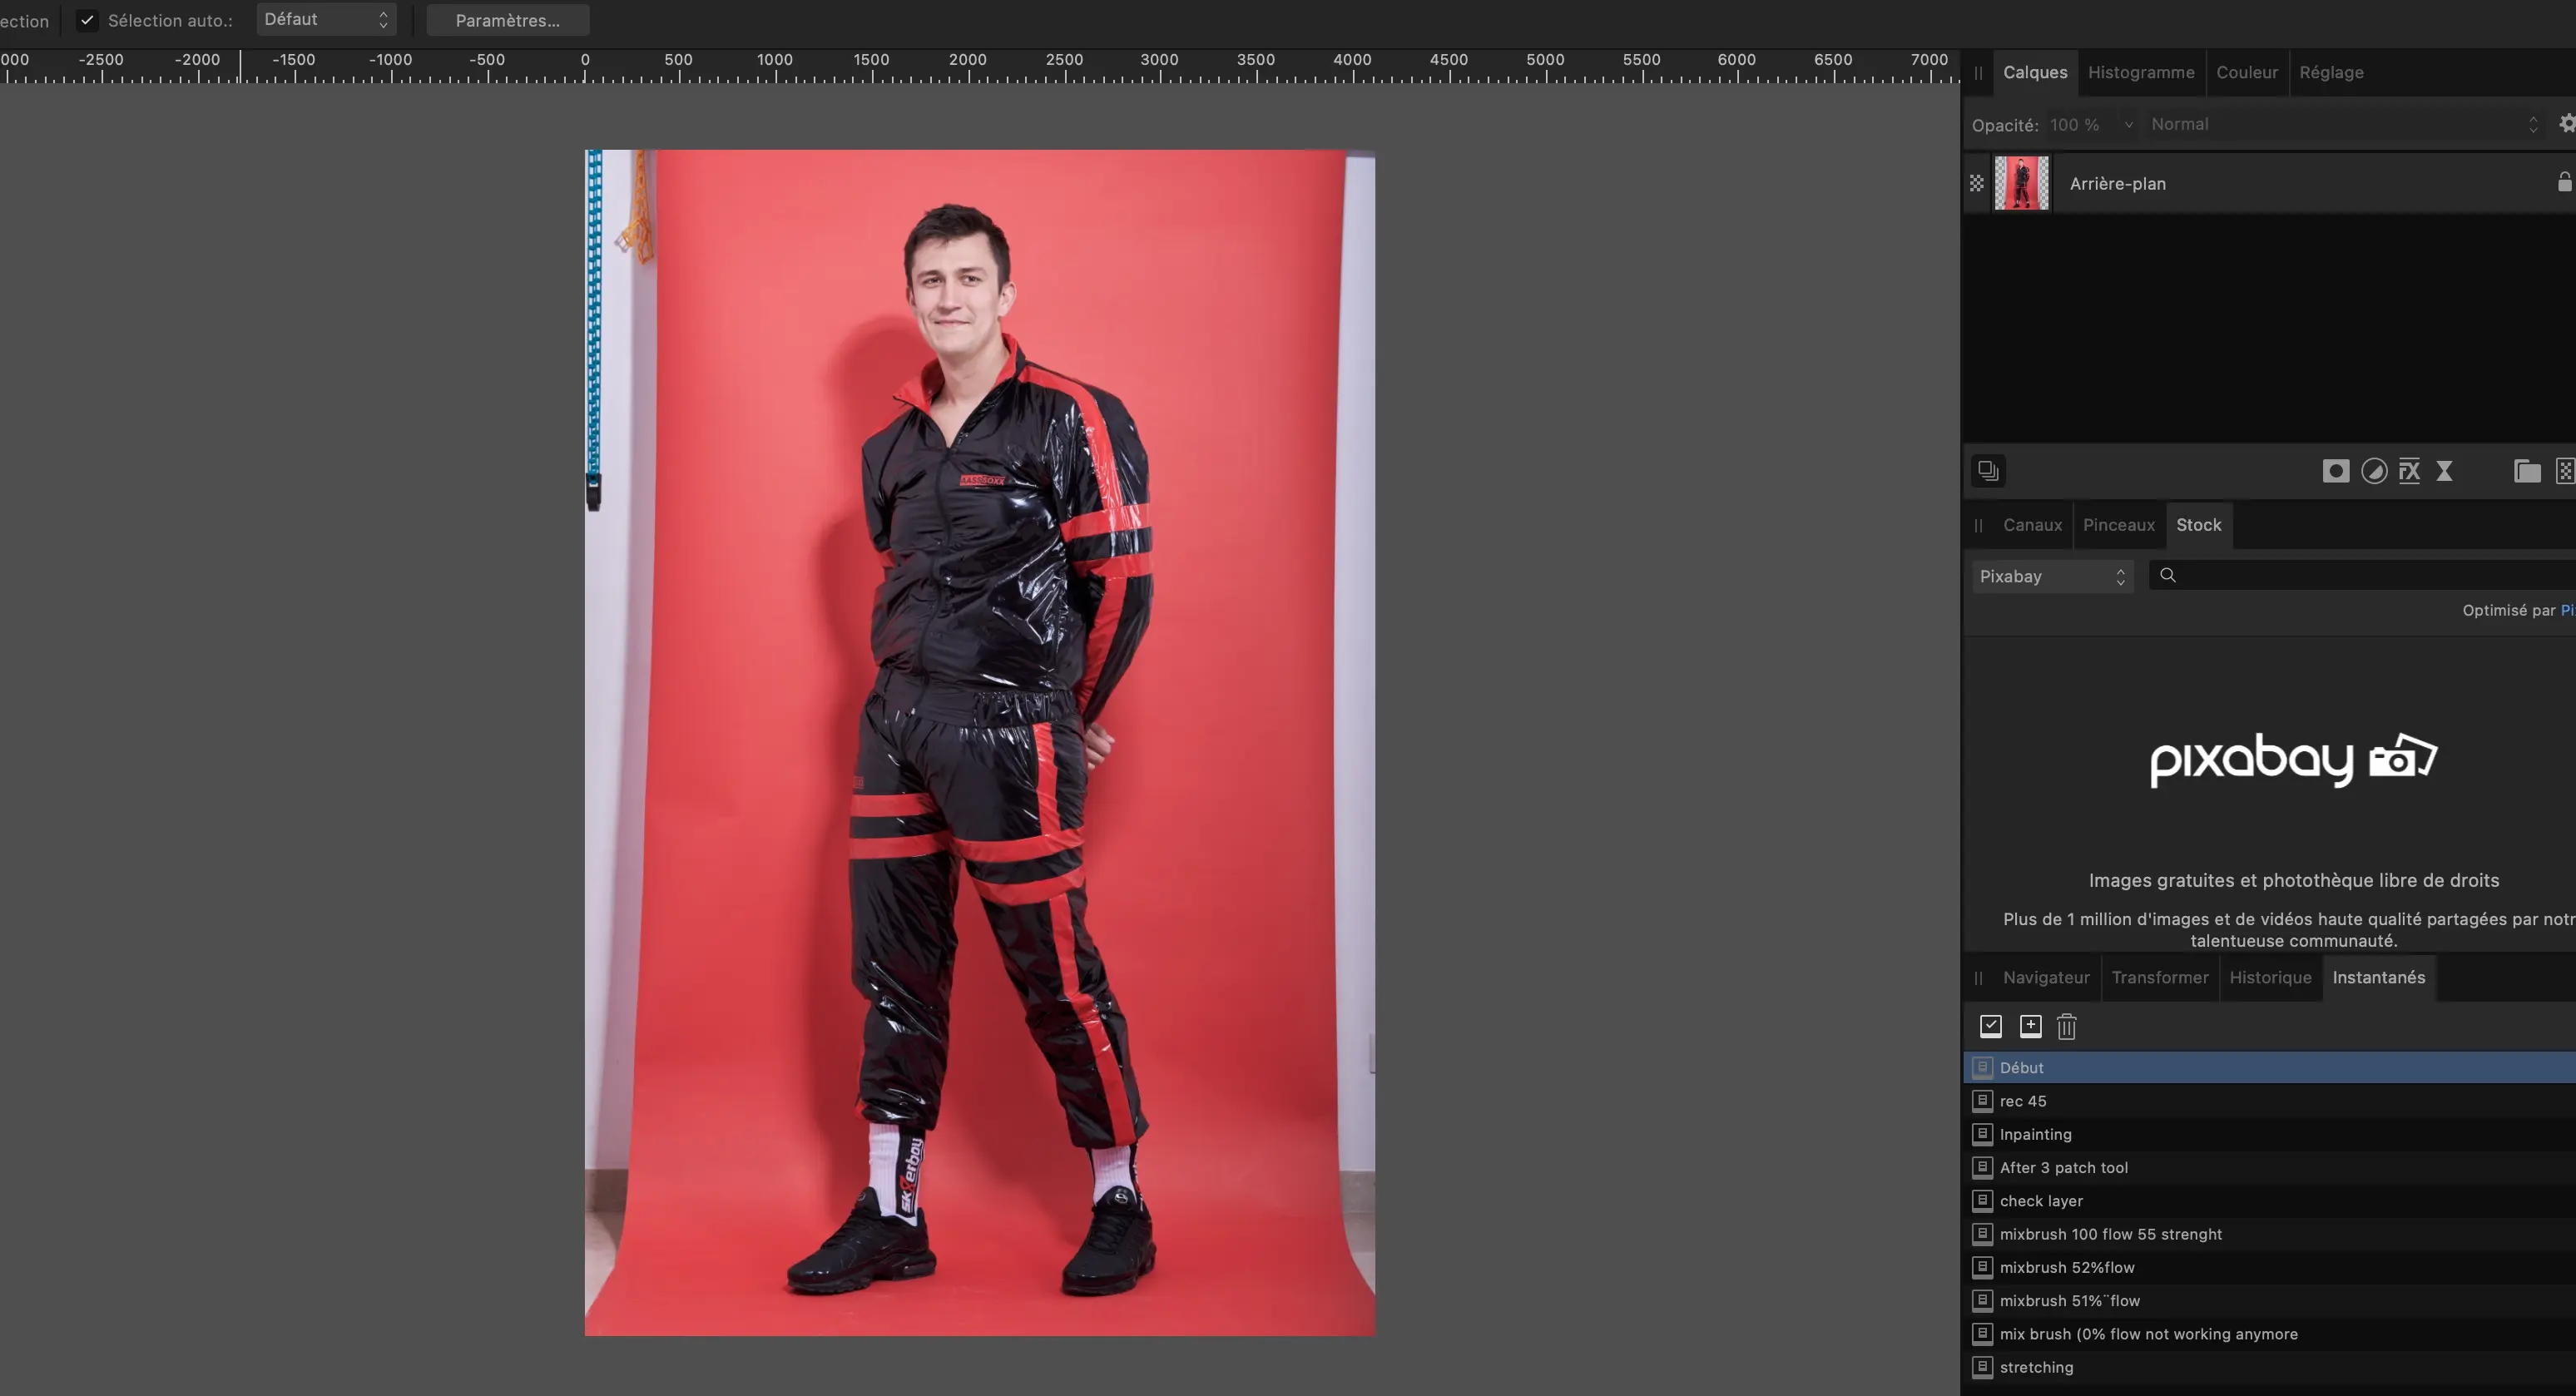
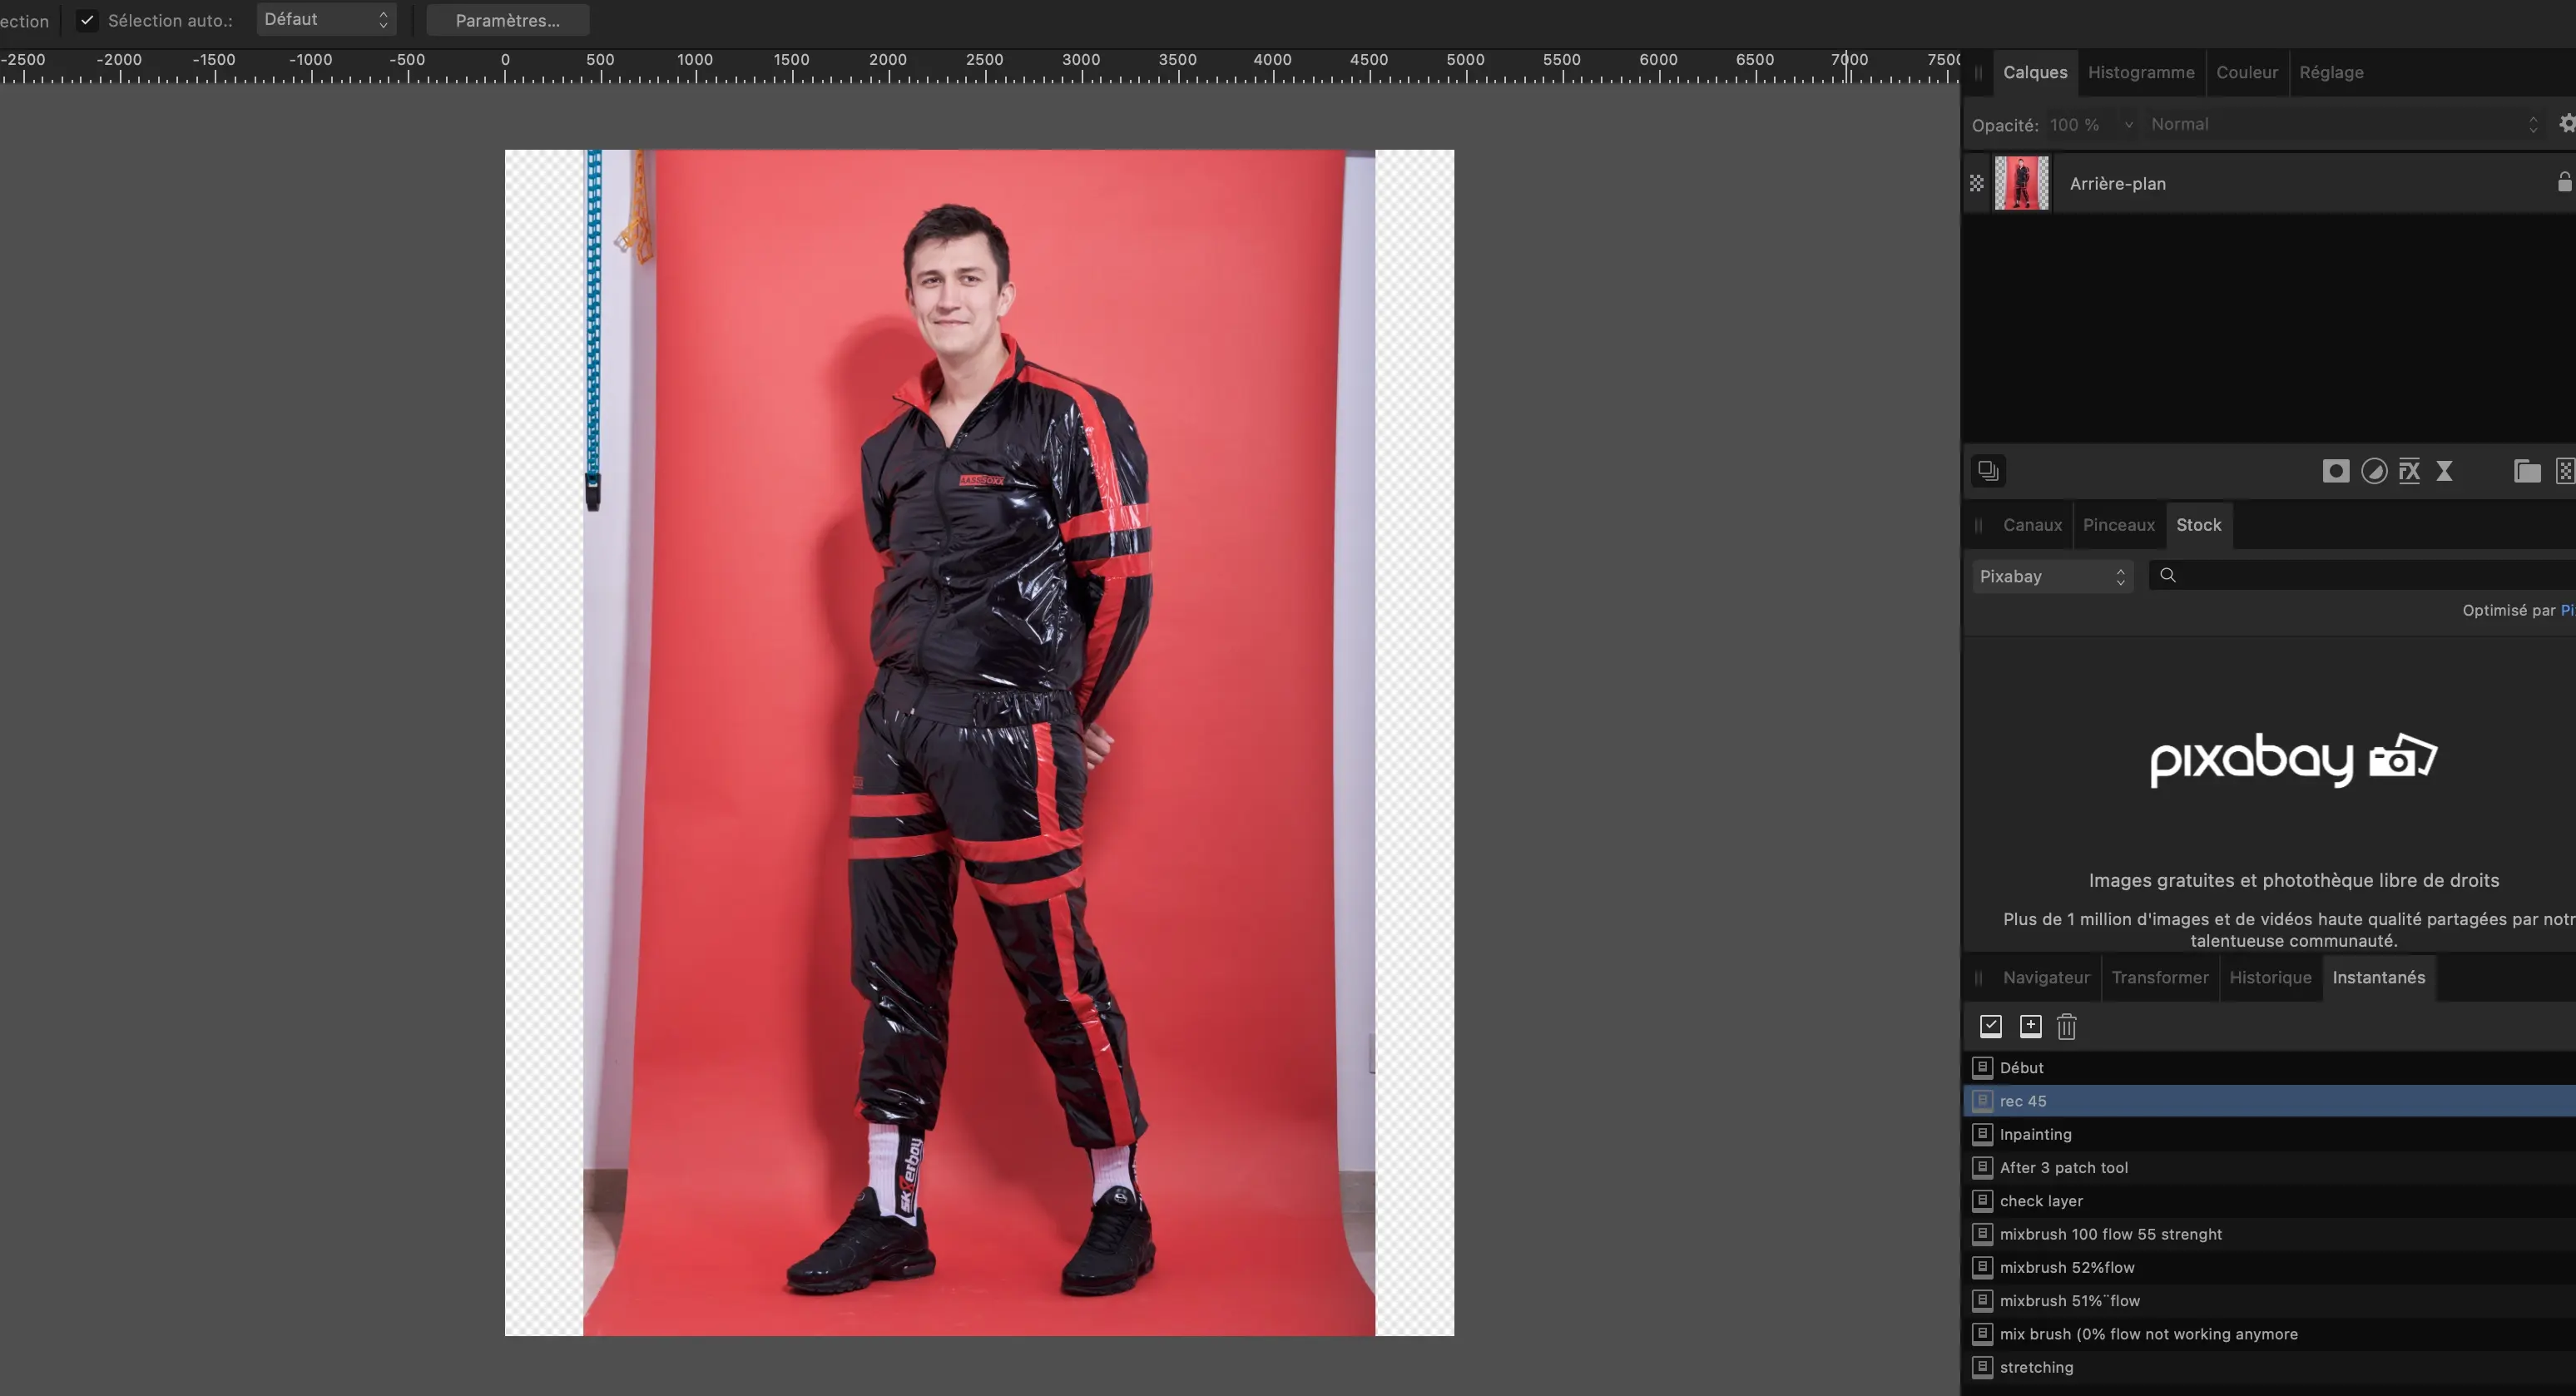
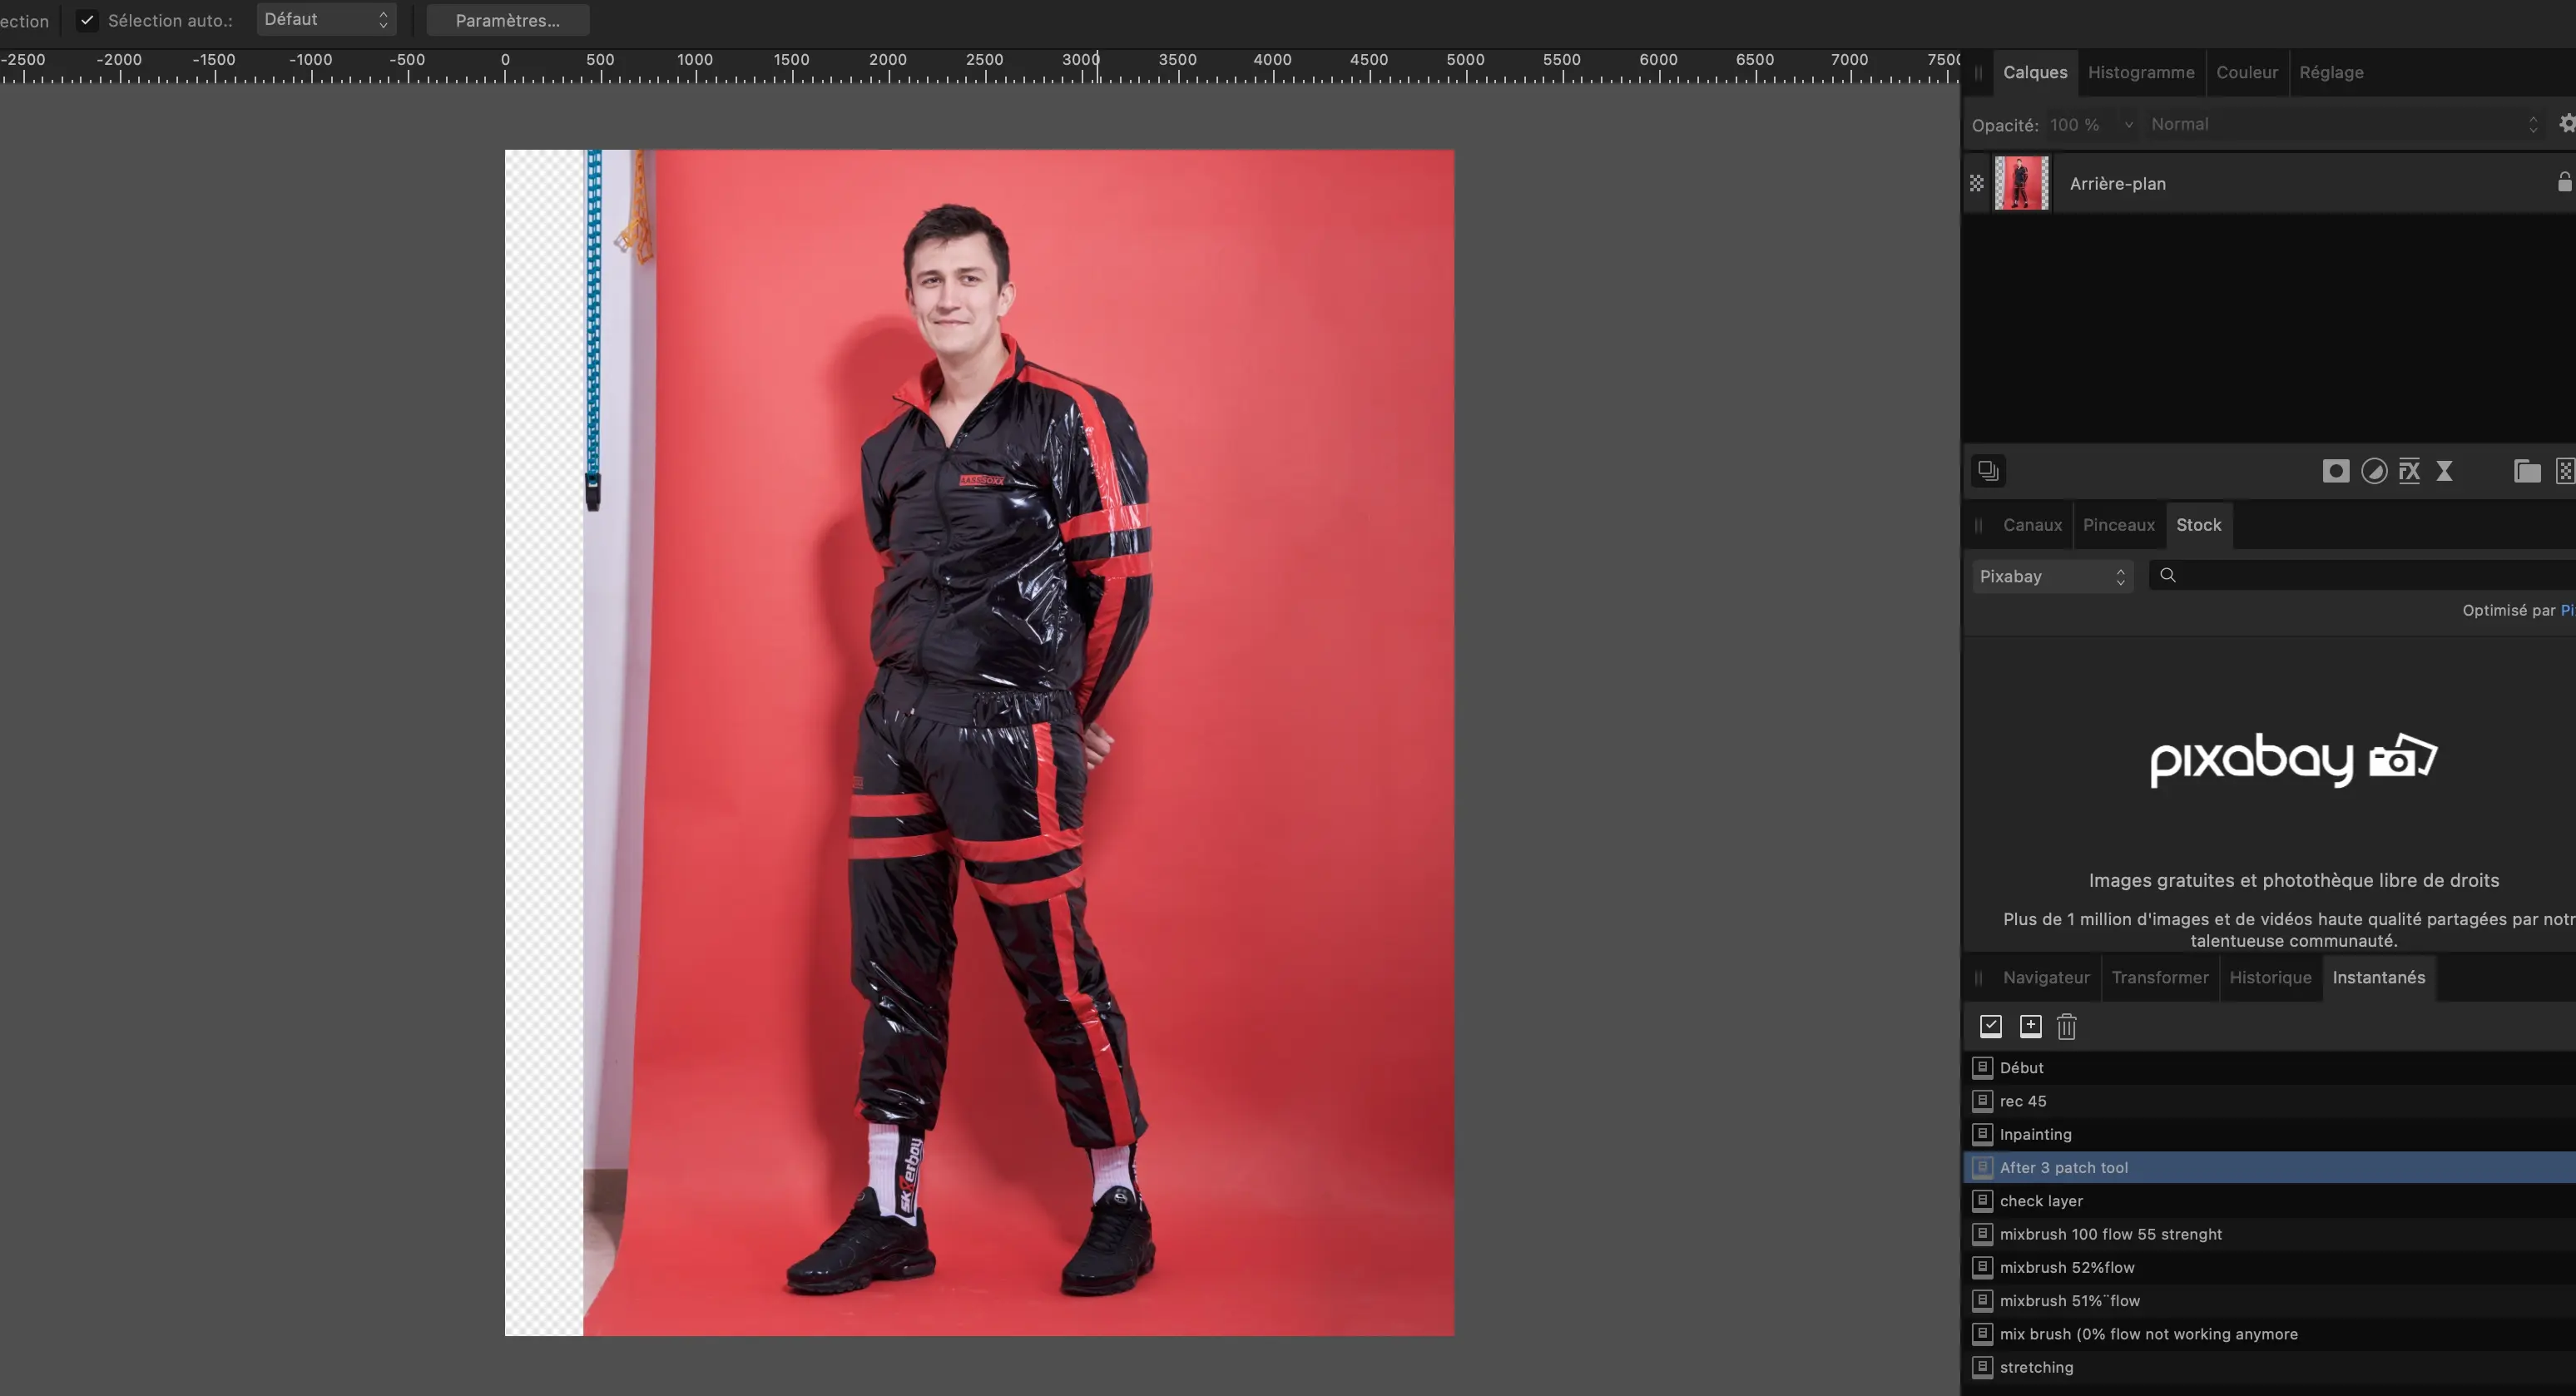
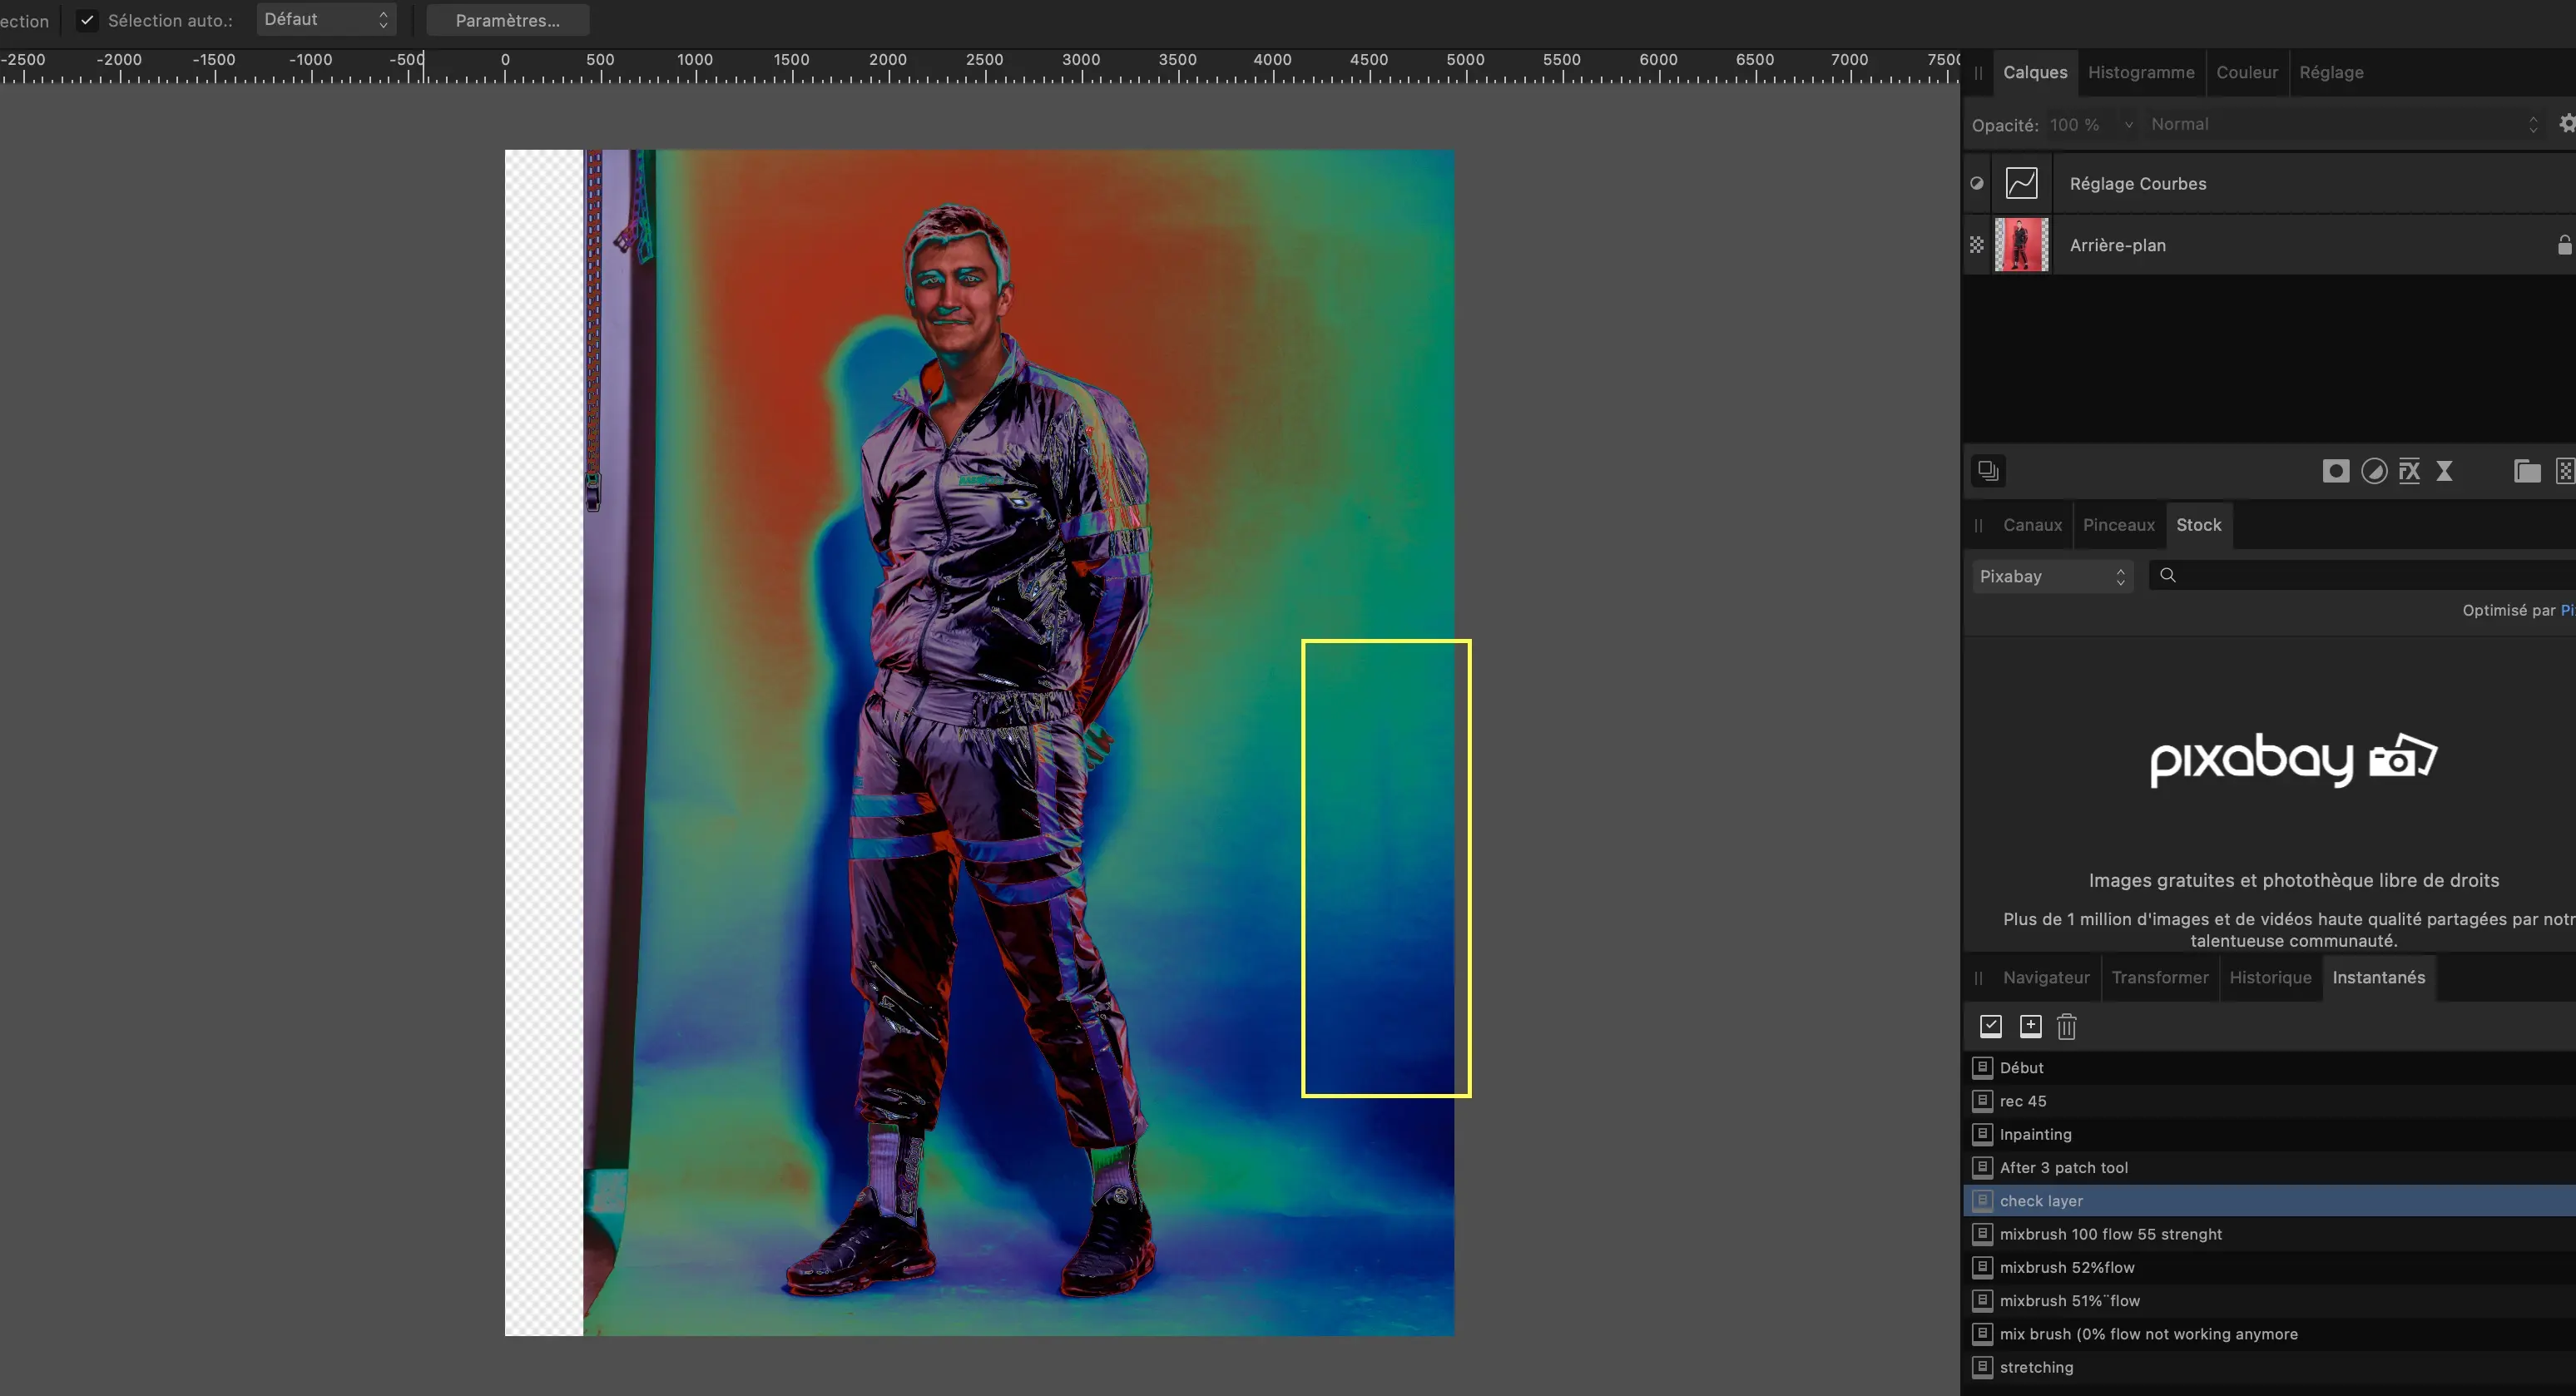
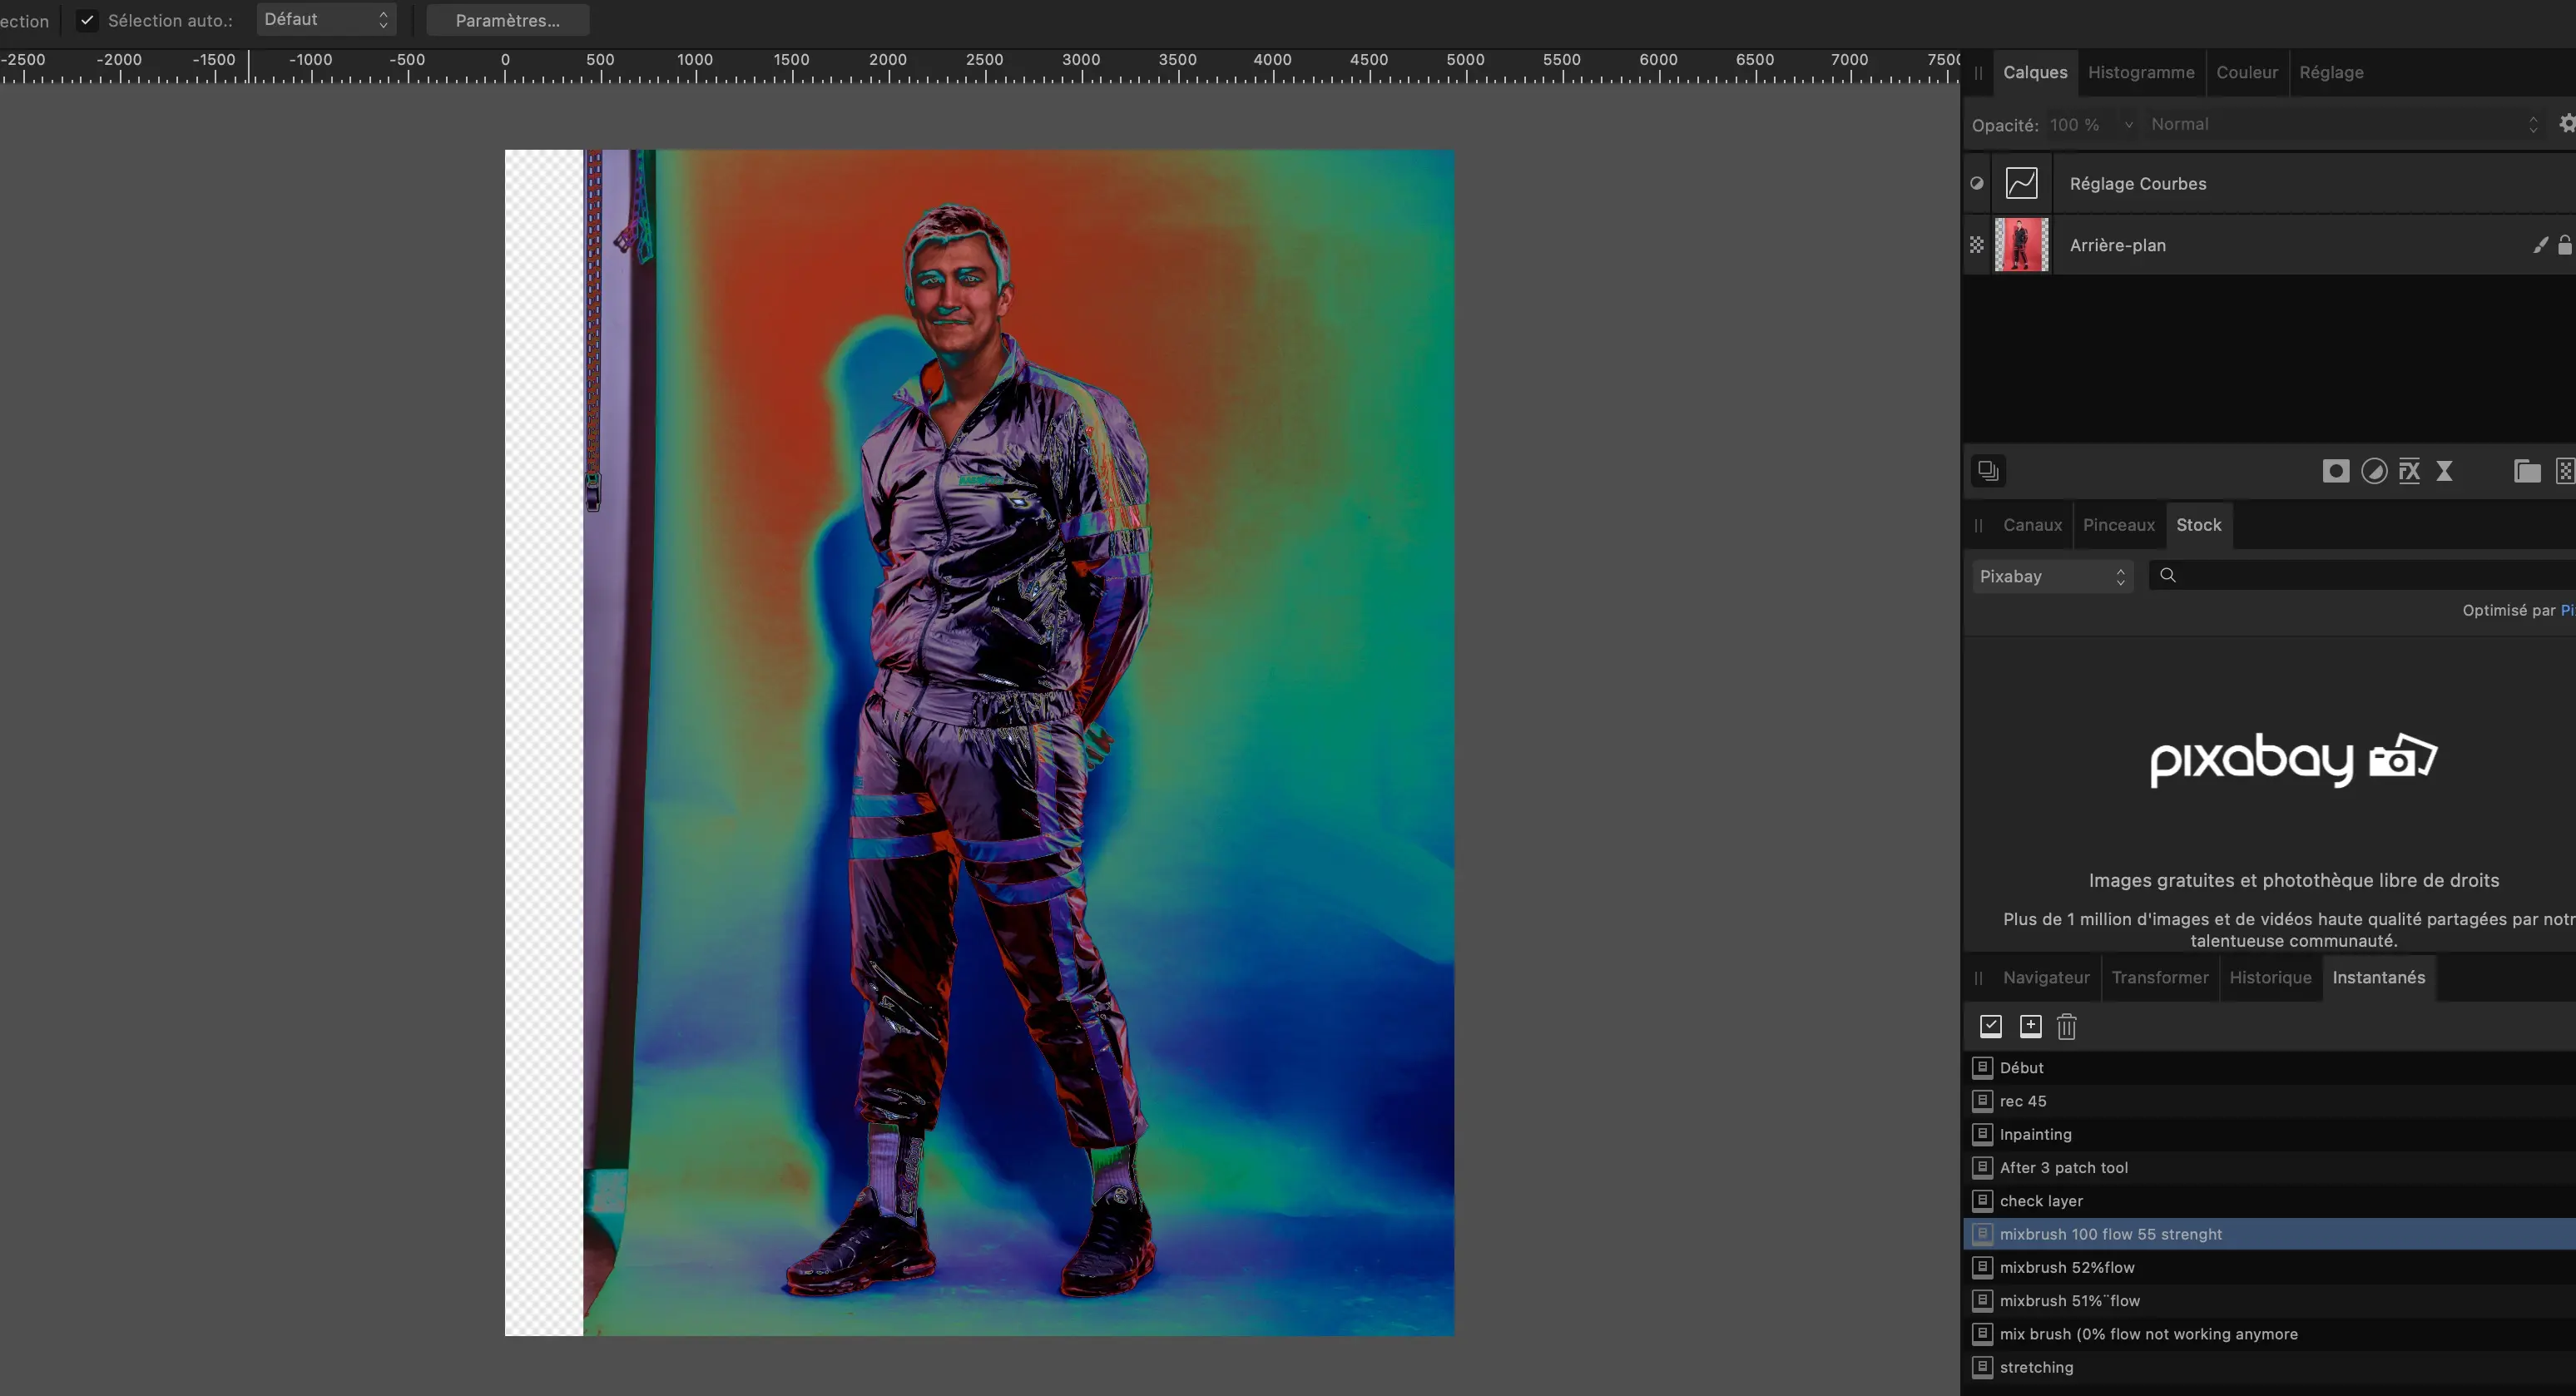
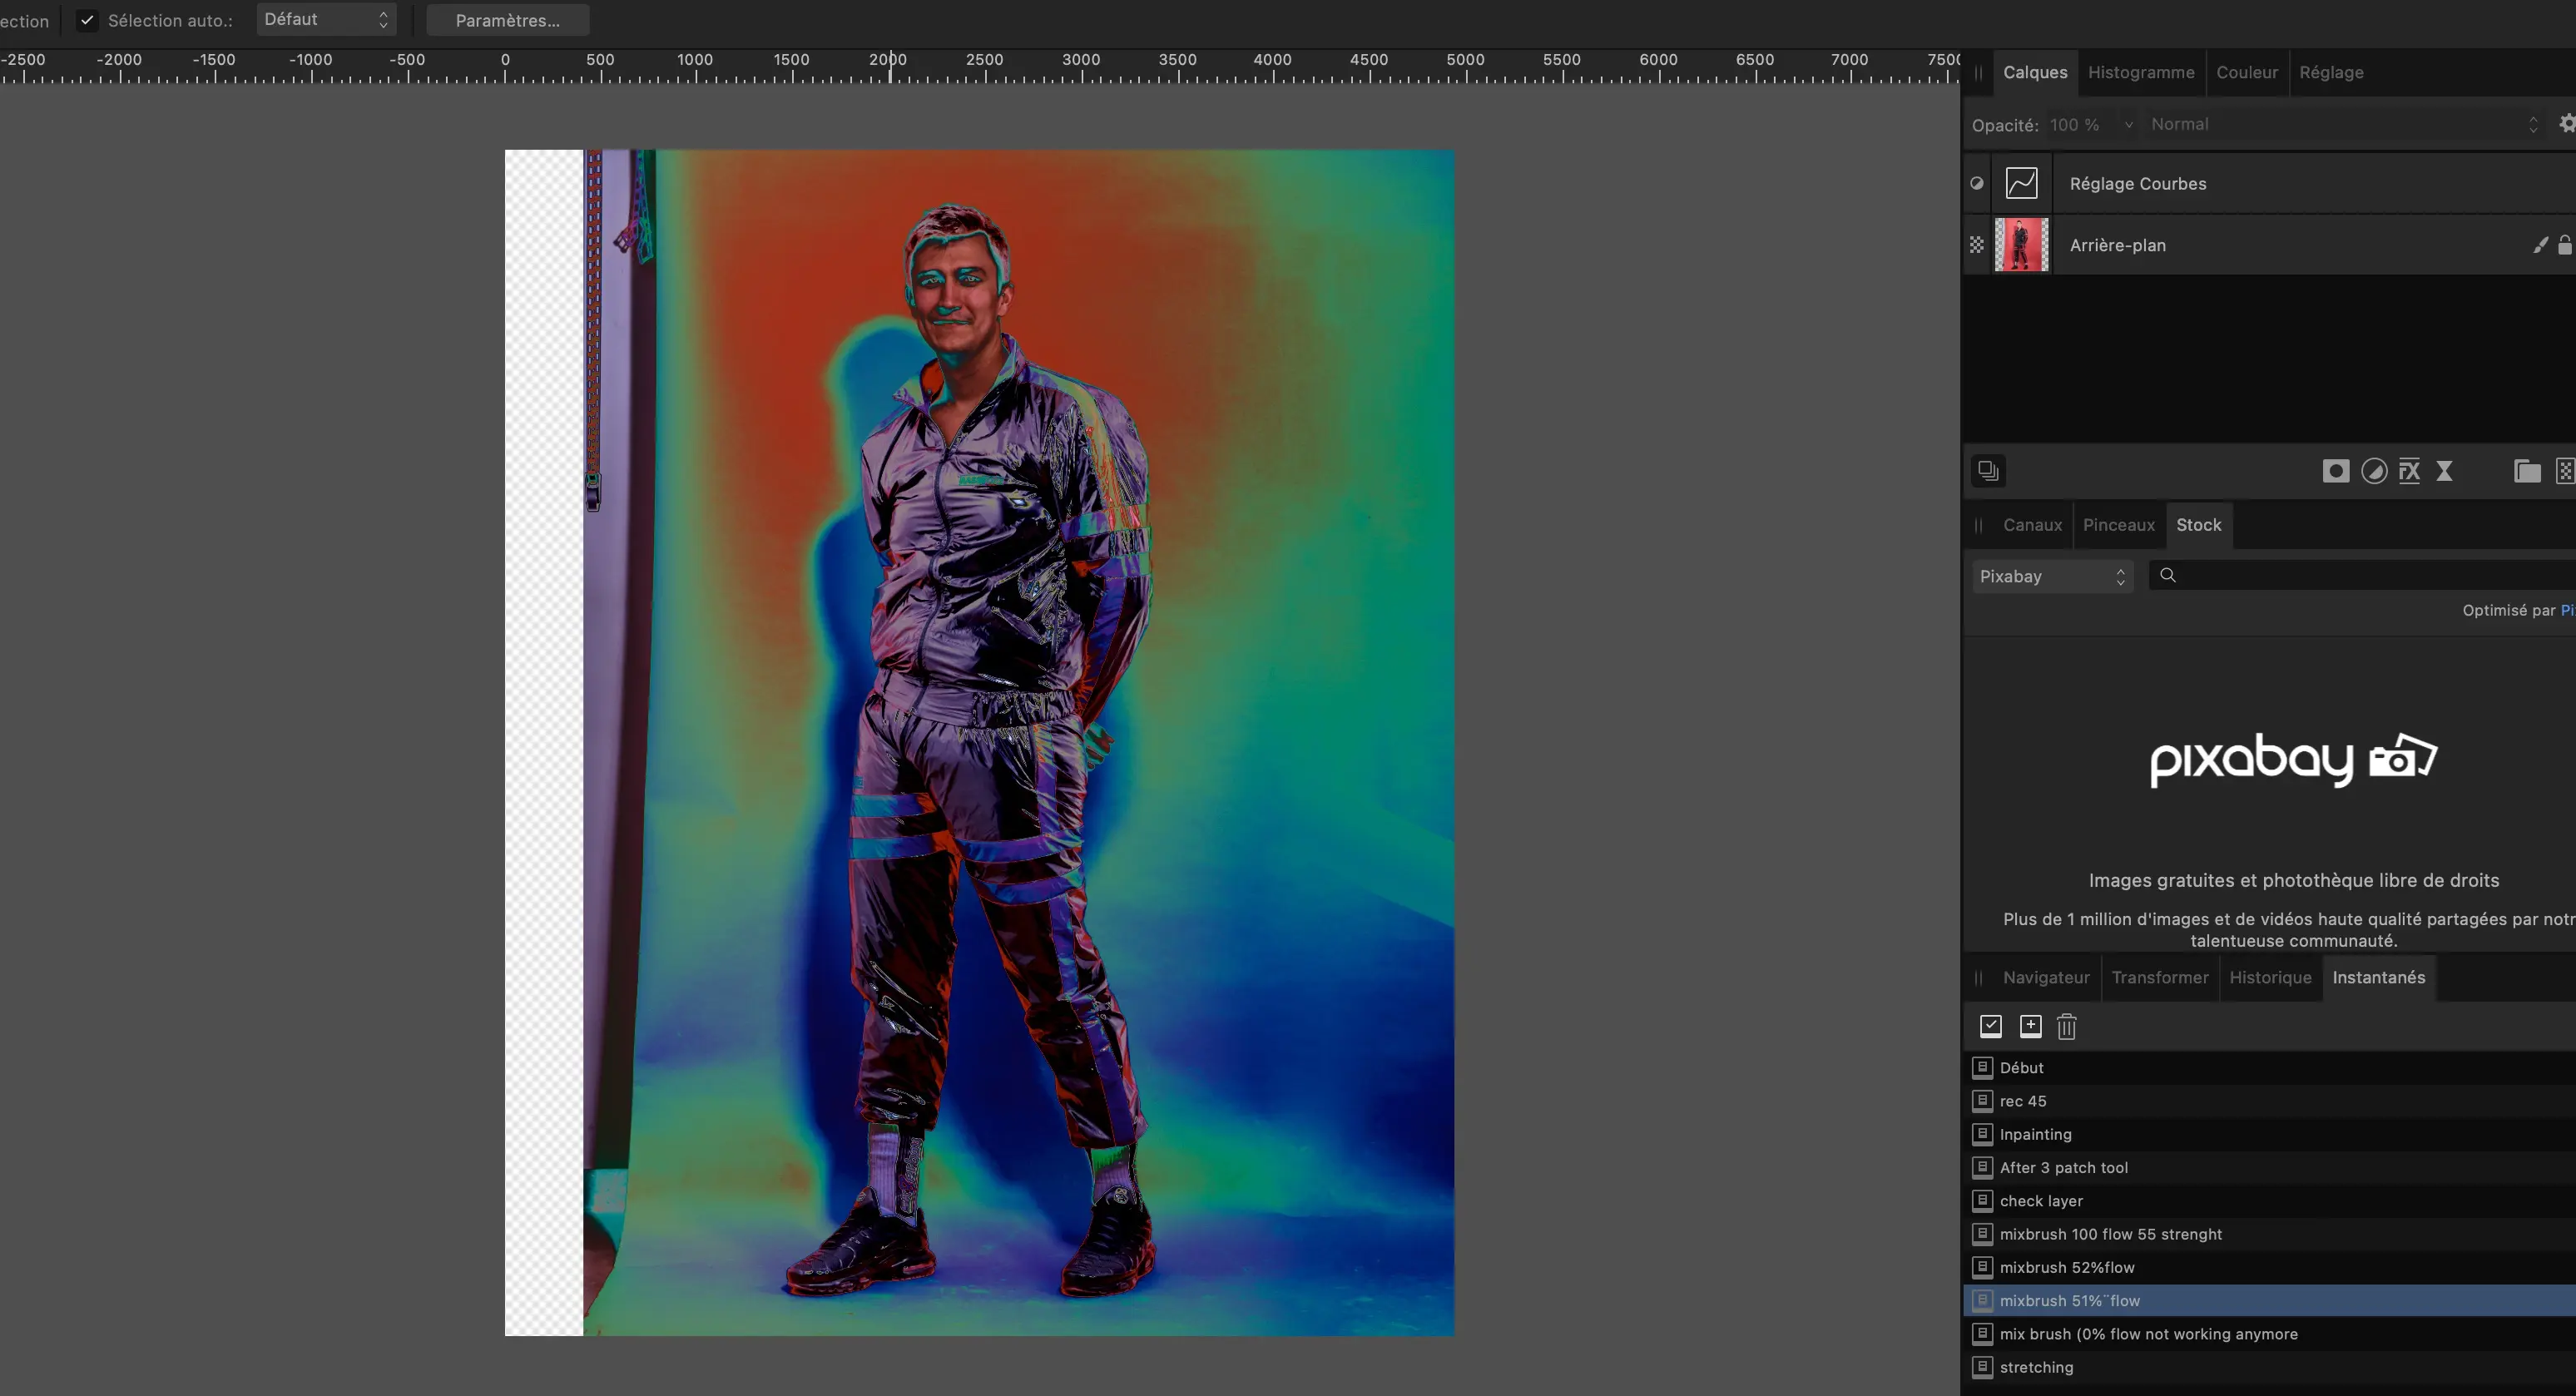
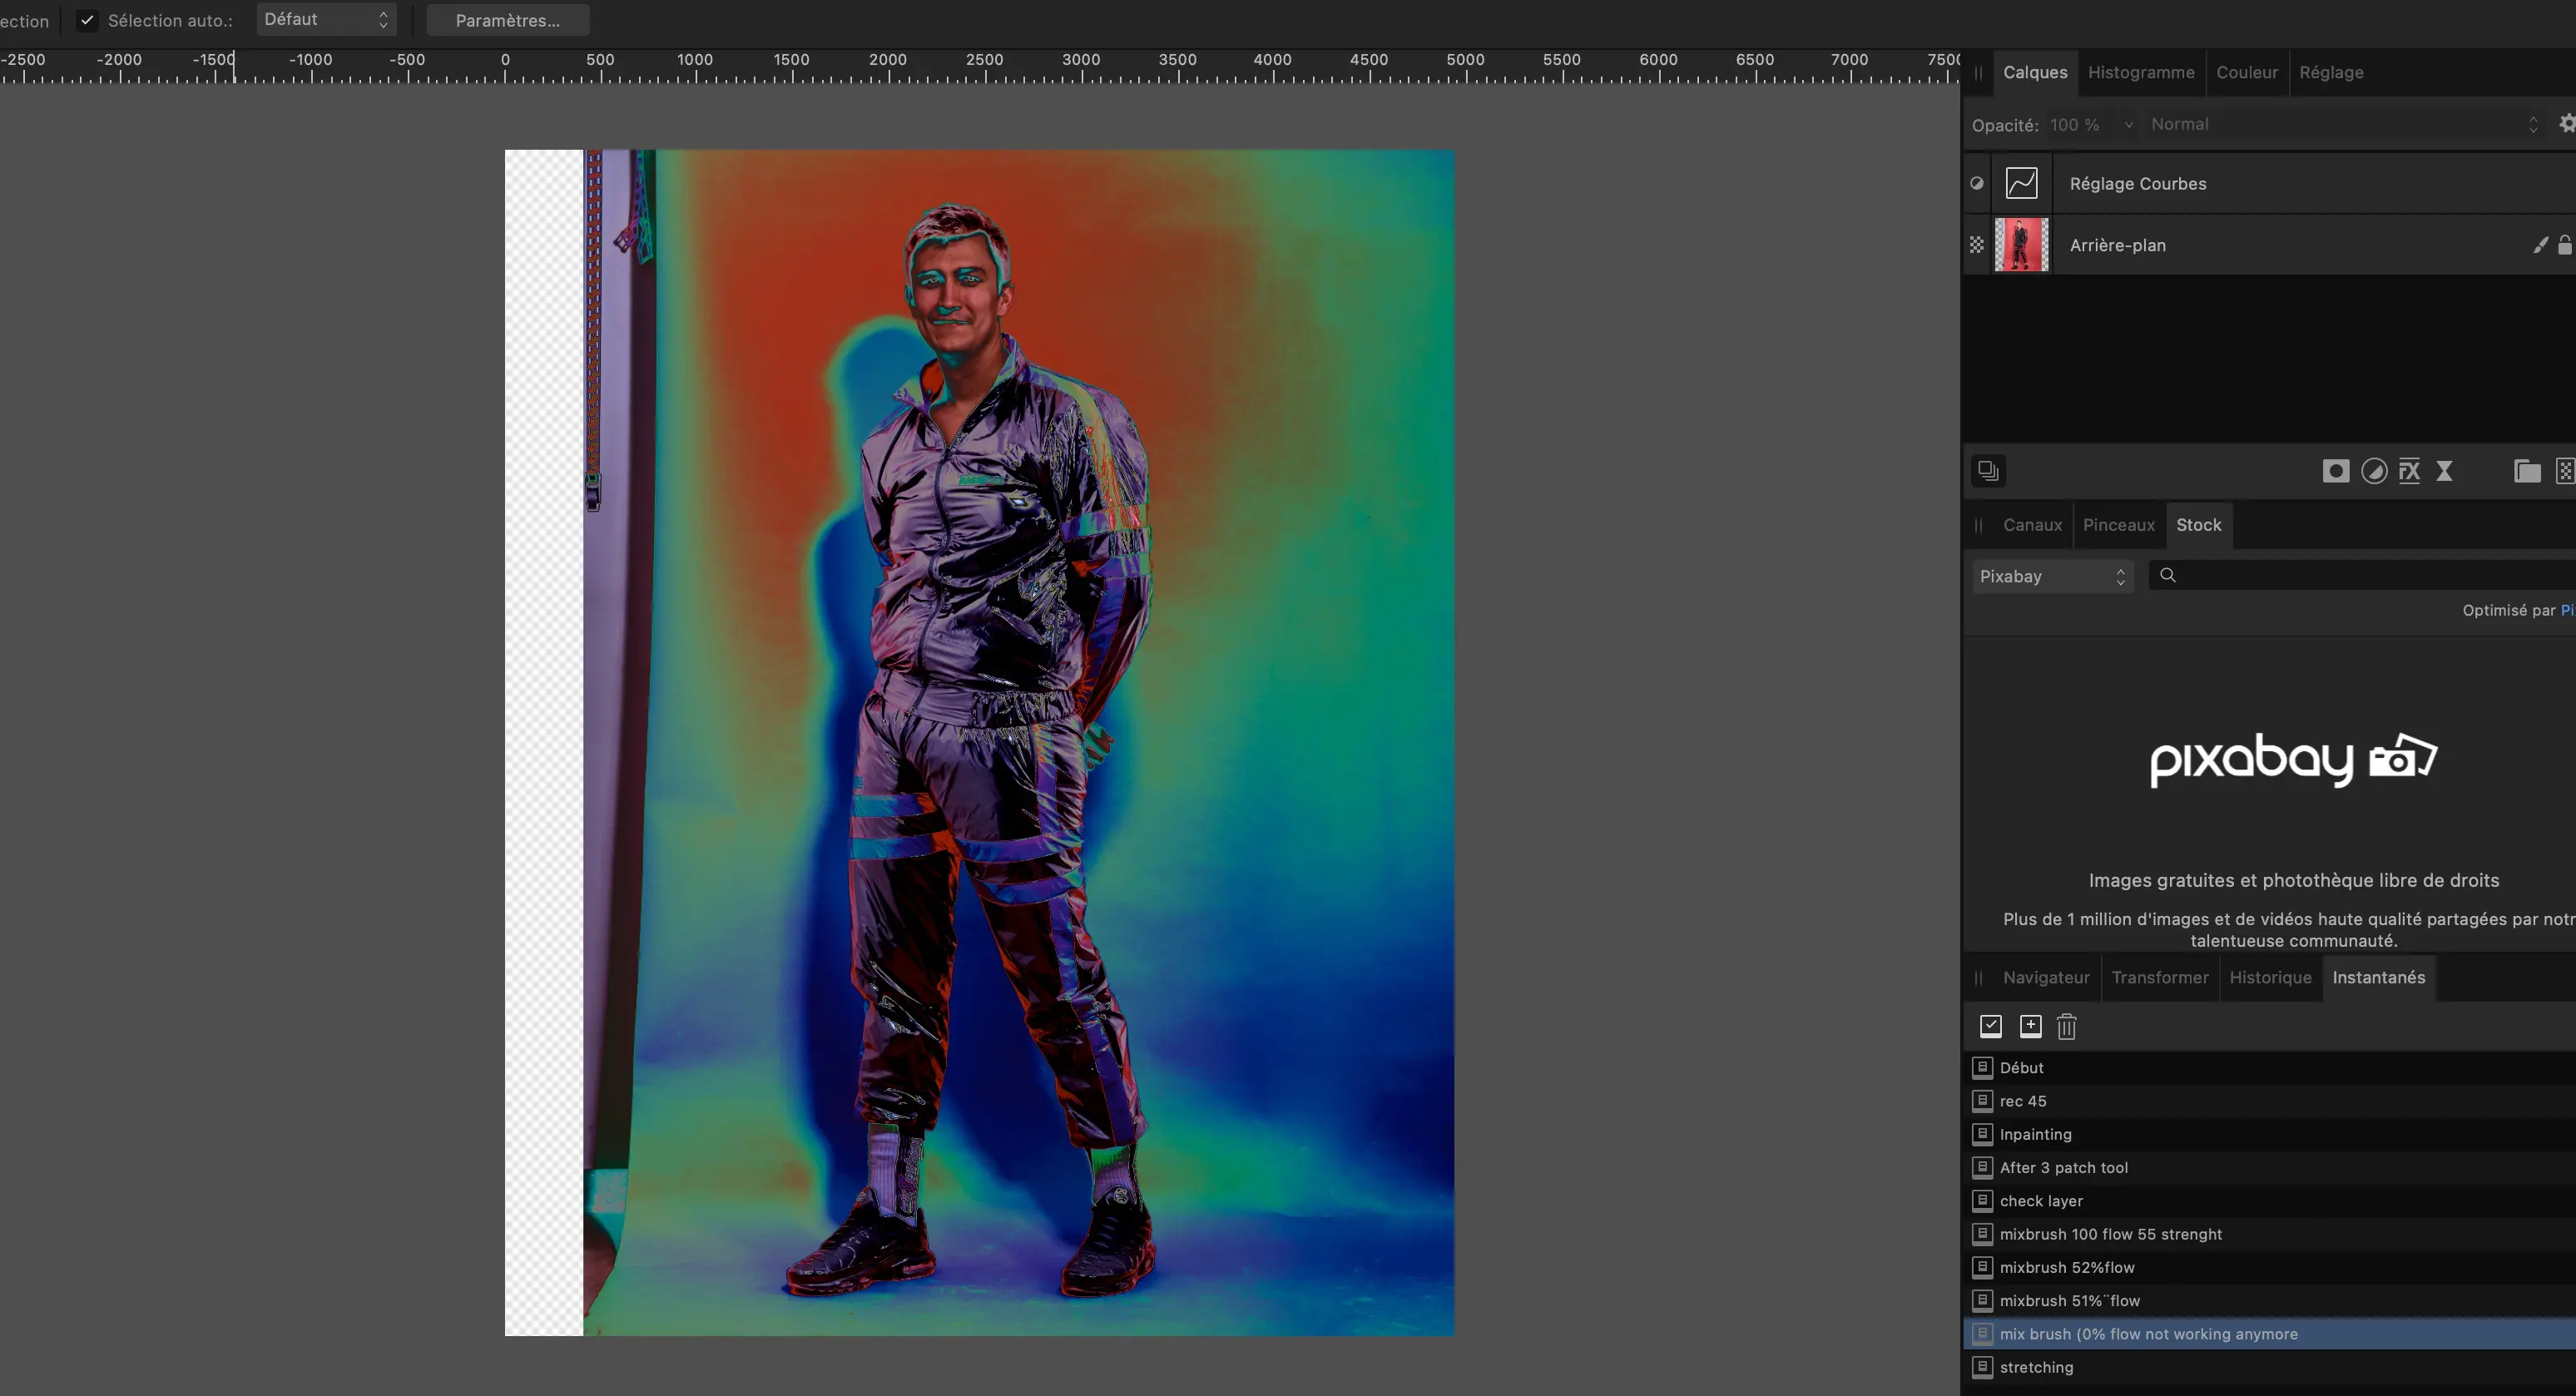
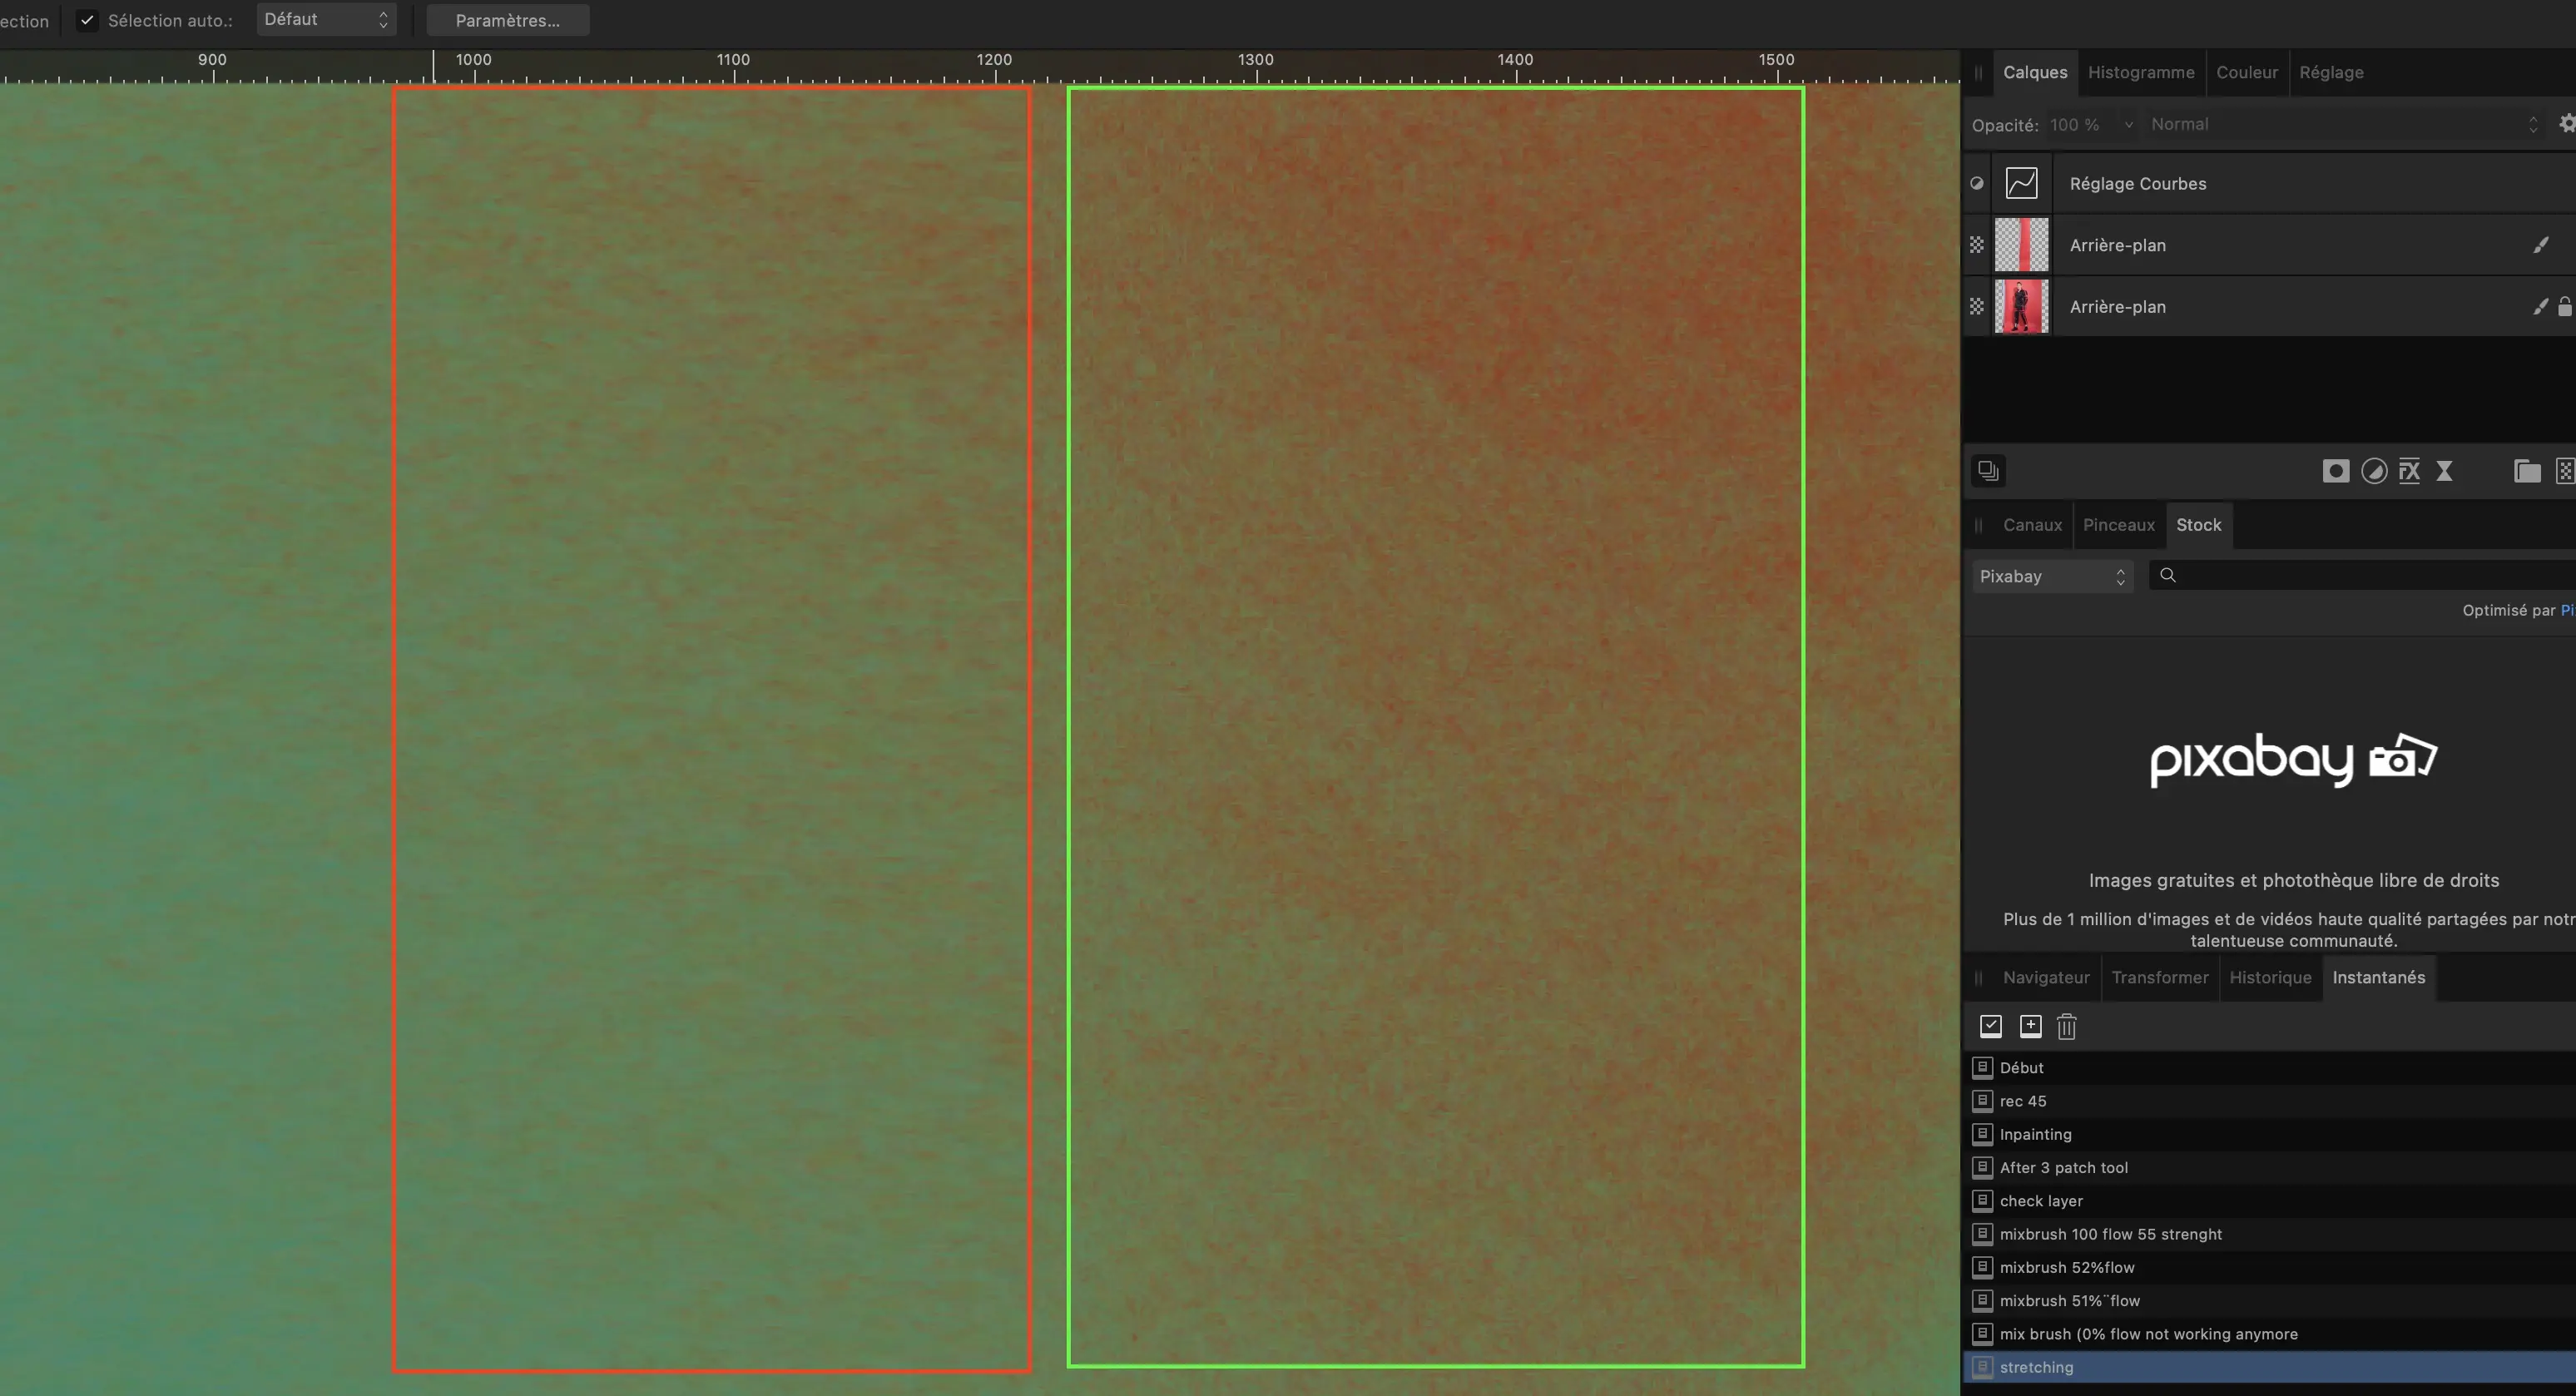
well well... il try to be as clear as possible with this exemple, maybe not the most relevant but... it still can explain things.... Typically the kind of things i need to handle, here is a simple one because the backgroud doesnt take to much different things like gradient shadow.... anyway my concern is that most of my pictures are unfortunately on a way too much little background (things gonna change, but money is needed, wating this, just spending way too much time.... thats life) most of the time i gonna need a 4:5 ratio for export, so i have 2 option : most of the time i just crop on it (much more easy) but sometimes i had to expand the picture let's try to the right side the first option INPAINTING : as you can see, here we have some artefact, the color dont match, the light neither, thats really bad, i had same kind of issue in photoshop BUT i can handle it with layers in color, mode, curve and selector, but things who doesnt exist on affinity (i made another post to know more about it) so here, i can try patch tool to "kind of unifying things"thats a little bit better but using a check layer we can see in a better way what kind ot things i dont want to keep i used to solve those things with another layer, and the paintmixerbrush with few opacity, little bit noise, to mix it, and verything is fine but here when i use the paintmixerbrush witht like 100 flow and 55 strenght its dirty (but thats normal) so i go flow down even 51%flow the result is really way too strong and dirty, just made a line to show but im used to work with very subtiles things.... so i go down JUST A LITTLE BIT MORE for 50%but here NOTHING happend, it does'nt work anymore, except if i make strenght up, like 70% and its as dirty as with 53%flow 55 strenght, ... so i cant understand why this tool dont work at all like photoshop one, and here, it seems to work more like the finger tool... thats a clue.... then my other concern is if i try for the left side just to expand , duplicating a little bit of the background and stretching itits almost "ok" exctept that "it stretches out things" so i cant keep the same texture we can see that the stretched left part dont have the same texture, here again with photoshop i can handler with paintmixerbrush, noise, opacity, and make the deal.... my main question is that "how can i just do a clean work quite fast" because to compare times for one picture, with photoshop : expending cleaning background take me like 3min, cleaning retouching D&B when needed on subject like 6-10min, in affinity : expending cleaning background : 13-15min, cleaning retouching D&B when needed on subject : 25-30 min i know that "when thats a new software you are not as fast in the beginning" but the truth is that i started by affinity, but to learn, affinity doesnt had enough tutorials and online course so i learned photoshop, and everytime i go back to affinity, i prefer so much things.... but all my "ordinary job" takes eternity XD Im pretty sure that some people have to do this, and can handle this, without spending a whole life on everything so.... i'm just looking for "the thing" i missed ^^

-
 Yumeropes reacted to a post in a topic:
how to enlarge background in studio photoshoot
Yumeropes reacted to a post in a topic:
how to enlarge background in studio photoshoot
-
Hello !!! i already tried much tips in affinity tutorials to enlarge backgrounds in studio photoshoot.... my main concern is that i often have to take 2:3 pictures (my captor ratio) and turn em in 4:5 for socials like instagram... most of the time the background is kinda neutral, color, white black, but with light effect, not only solid. I saw the good tip that you select each "side" cmd+j , V then you just enlarge the side and everything is fine, ok so if you dont do it to much, thats quite good, but in some situations, you also need to "complete" a little bit, not just strech. inpainting work randomly, sometimes perfectly fine, sometimes, you dont get what is the problem. the patch tool can be ok but even if i think to rasterize, border of patch get blured, or even sometimes transparent... paintMixerBrush is often a quite good option for me in photoshop, adding noise then, but.... here in affinity, it cant work on "active and under" but only on active one, thats a problem, and more : sometime, with same setting, it work, sometime not, most of the time it work REALLY TOO MUCH, and sometimes really not enough : for exemple with flow set to 13 its already too much for me, but like 12 dont work enough at all... so i dont know if i just have problems with every feature or... if any tip can be relevant thank you everyone
-
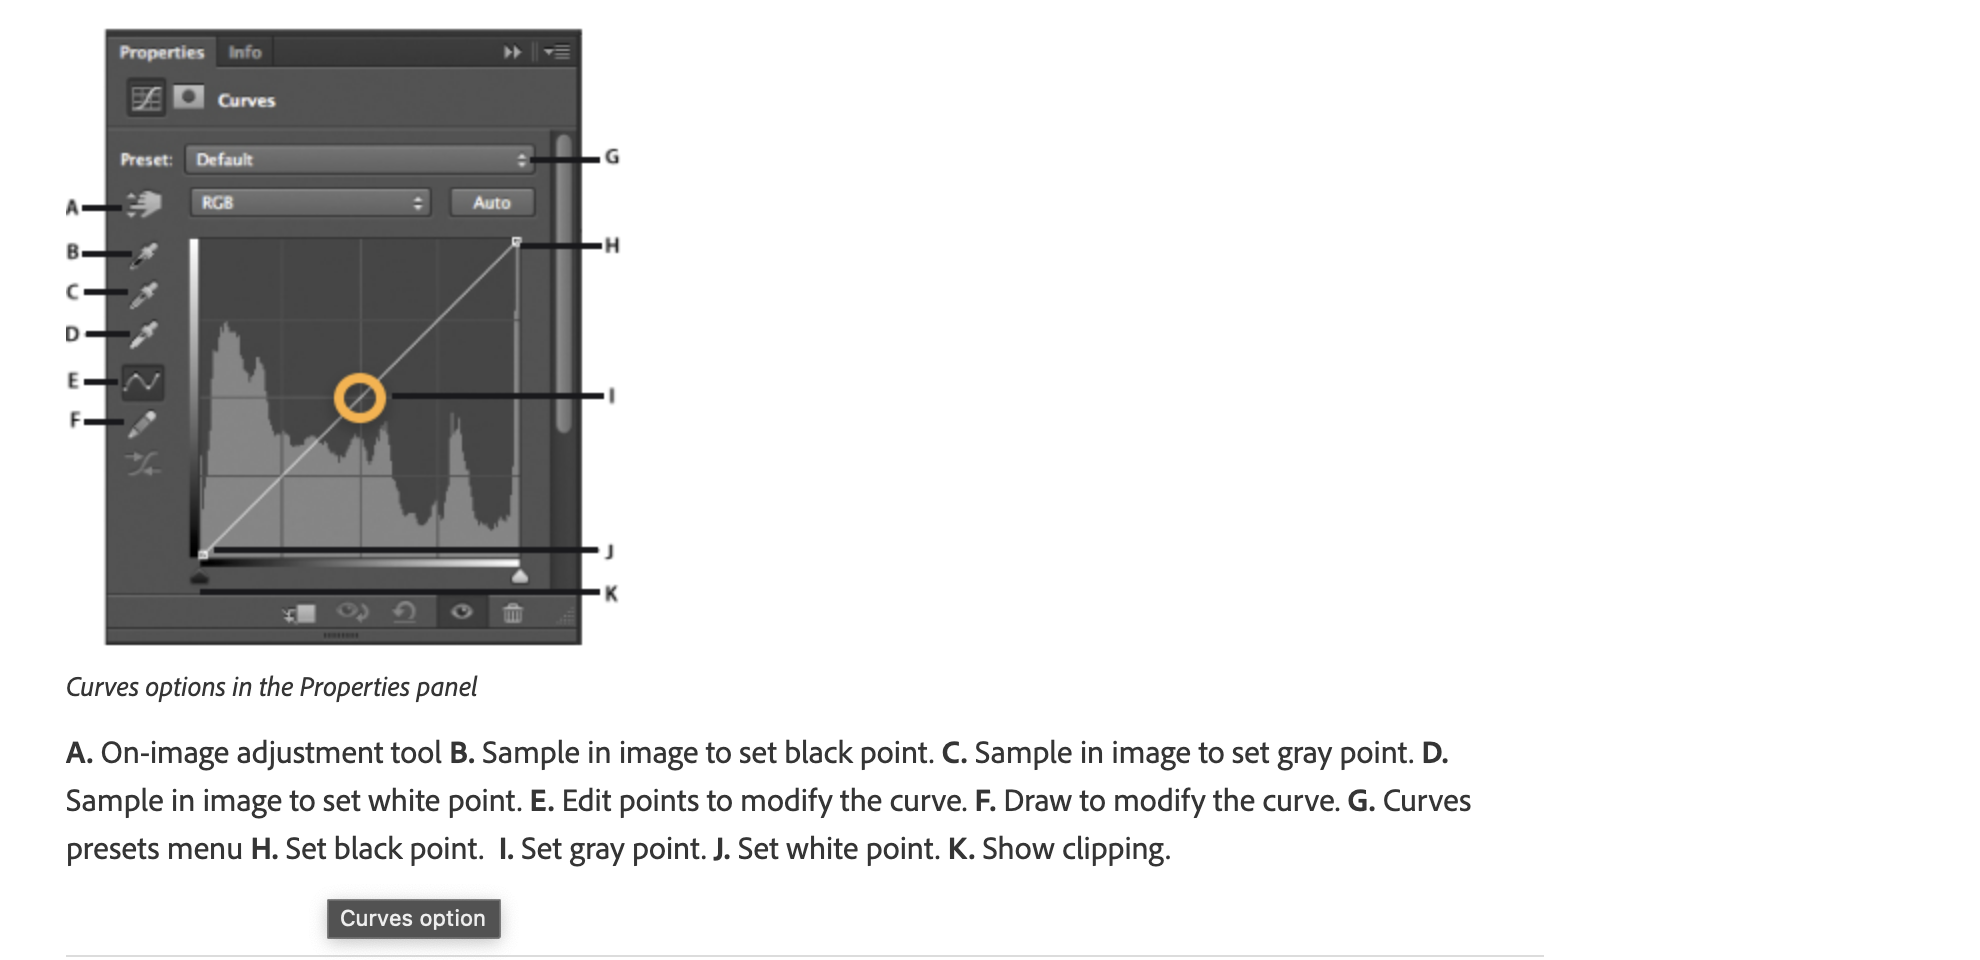
Hello ! i love affinity since the first release on IPAD, but i waited long time before switching because i have a few things that take me much more time than in photoshop to do... i think thats just because im not able to find HOW so... if anyone can give me where can i find.... i use almost EVERY SINGLE DAY the B tool in the CURVE : to double clic and define the color i wanna go : allow me to correct many issues, like marbles on skins, issues with colors on produt photography.... and so much things helping to "match a color" to a color already existing in the picture..... i also tried to use "tsl" selector but my main issue is that i cannot say "ok take all this colours and go for THIS ONE i can pick on the picture" so its just "almost" the good one "almost" ok "almost" precise... i could be really happy to know if anything like this can be possible... here (sorry thats in french) a video where a guy use this "feature" and.... i wish i could have your assistance to find how to do this in affinity photo beetween 6:40 - 8:20 (even if here the use is really... gross, thats to make my question more understandable) https://youtu.be/sgNXQFecUVw?si=sloYwyLpOwZFHBl-&t=400