SBH
-
Posts
19 -
Joined
-
Last visited
Everything posted by SBH
-
Thanks! I've been poking around a bit more and found a non-linear way. I even managed to implement the separate control for highlights and shadow (a.k.a. move the "contrast center"). It's based on the "brightness" formula. (see first screenshot) The first half is the brightness and the second half is pulling down the shadows. It basically adds or subtracts to/from the pixel value whereas it considers its current value which makes it "non-linear". That's this part: ... *(1-R) ... Variable a controls the brightness and b controls the shadows. As it was a bit strong on most of my test images, the overall effect can be reduced with variable c. It basically divides the effect applied ... /(1+c) ... I'd like to have a slider to move the curve more left or right, but for now I'll try this solution on some more photos. Bildschirmaufnahme 2022-09-15 um 11.17.04.mov LinearContrast.afphoto

-
Hi, does anyone here know whether it is possible to create a "contrast slider" with procedural texture? It's not very difficult to re-create the brightness slider, but for contrast I haven't managed to find the right formula. Thanks for any ideas in that direction...
-
Wahrscheinlich bist du mit dem Auswahlpinsel am Rand entlang gefahren. Der Auswahlpinsel hat eine bestimmte Empfindlichkeit, je nach dem wie groß er ist und wie schnell man fährt. Jetzt ist quasi die Spur des Pinsels ausgewählt. Der Auswahlpinsel geht nach Kontrastgrenzen. Um das ganze Objekt auszuwählen, überpinsele auch den Rest des Objektes grob. Dafür kannst du den Pinsel auch etwas vergrößern. Du wirst sehen, dass dann das ganze irgendwann ausgewählt ist. Tip: wenn du die "Alt" Taste gedrückt hältst, kannst du mit der Maus auch von der Auswahl wieder etwas wegnehmen (wie z.B. links unten auf deinem Bild).
-
Frequency Separation
SBH replied to BiteMe's topic in Pre-V2 Archive of Affinity on Desktop Questions (macOS and Windows)
In Capture One you can alternatively do "Edit with...". By that way Capture One will create the tif file (including your edits) and hand it over to Photo. You can then directly edit it in Photo without going through the "Develop" persona. -
Aaah there it is. I searched the context bar as well but I didn't switch to the node tool... 🤦♂️
-
Yes, that makes sense as well. Early on in my search I did a right-click on the curve to see what options are available. I thought "maybe that shape needs to be converted to something else...". Isn't there somewhere the feature "close curve"? I'm not so fluent in publisher and designer but I think I have heard that in one of the video tutorials, or not?
-
Bingo! There is a red node. With the Pen tool I could close it and the stroke option inside/outside now works. Thanks for that hint! (It would have been useful if that option is grayed out when not available.) contour7.mov
-
Well that doesn't work either. Nevermind, I'll just deal with it as it is. It only occurs in this document that was created form an older pdf. Thanks for our efforts! (In case anyone wants to investigate further, see screen capture.) contour5.mov
-
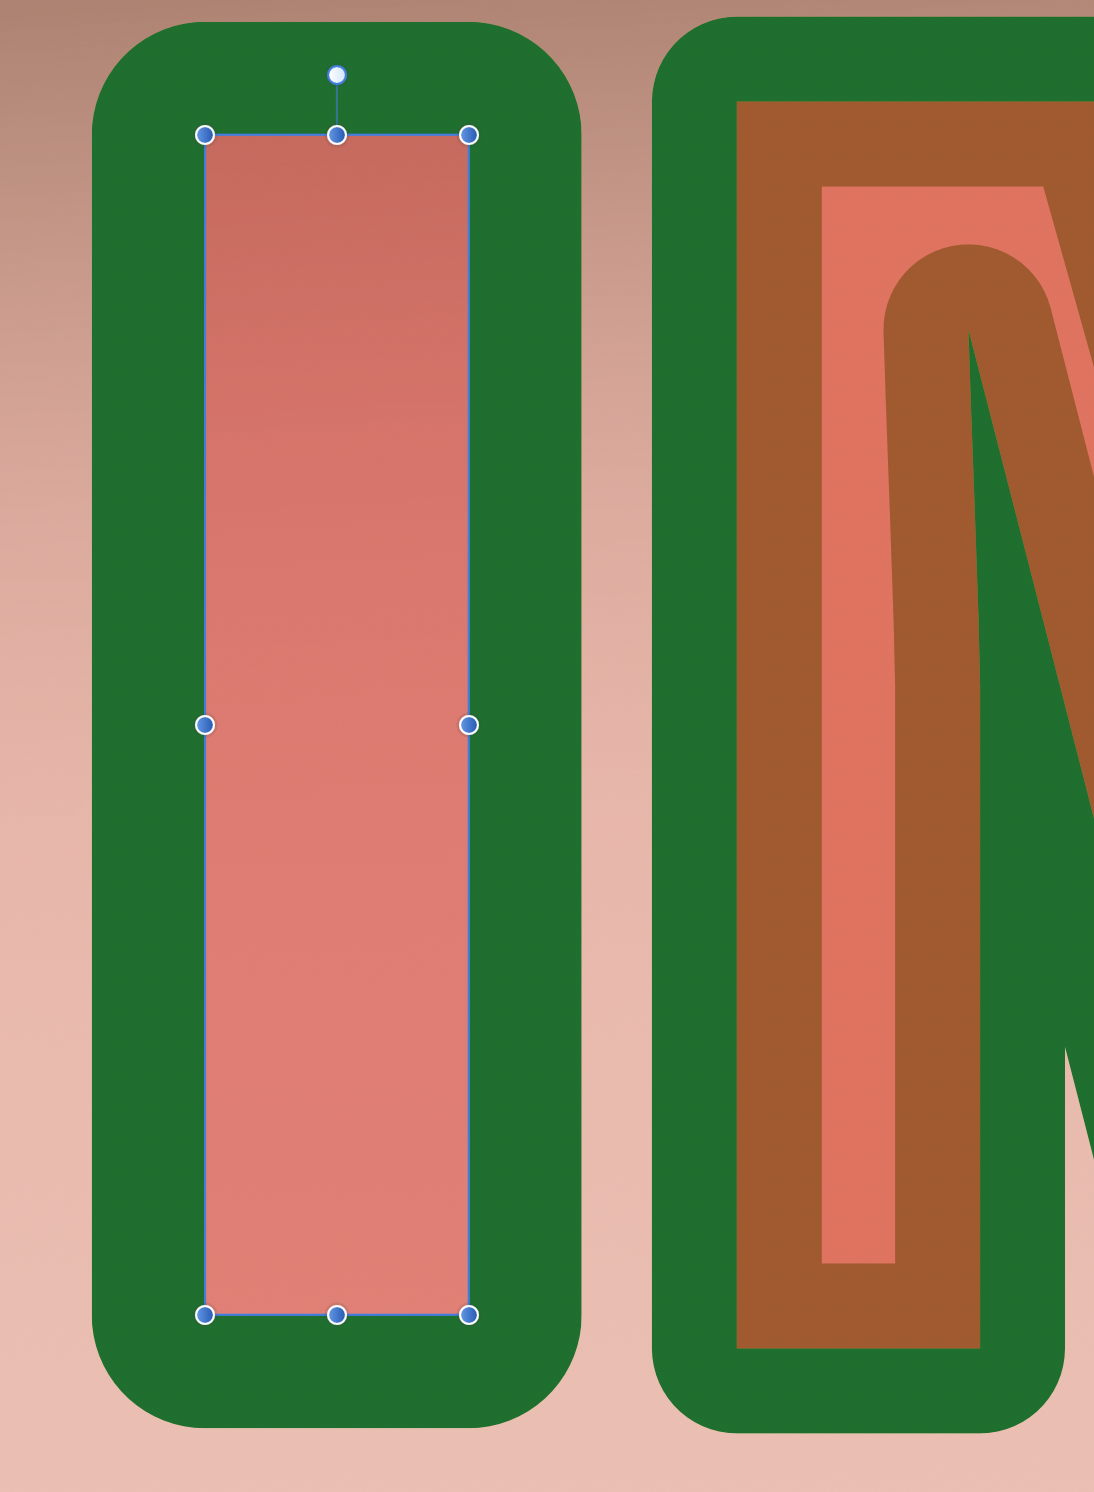
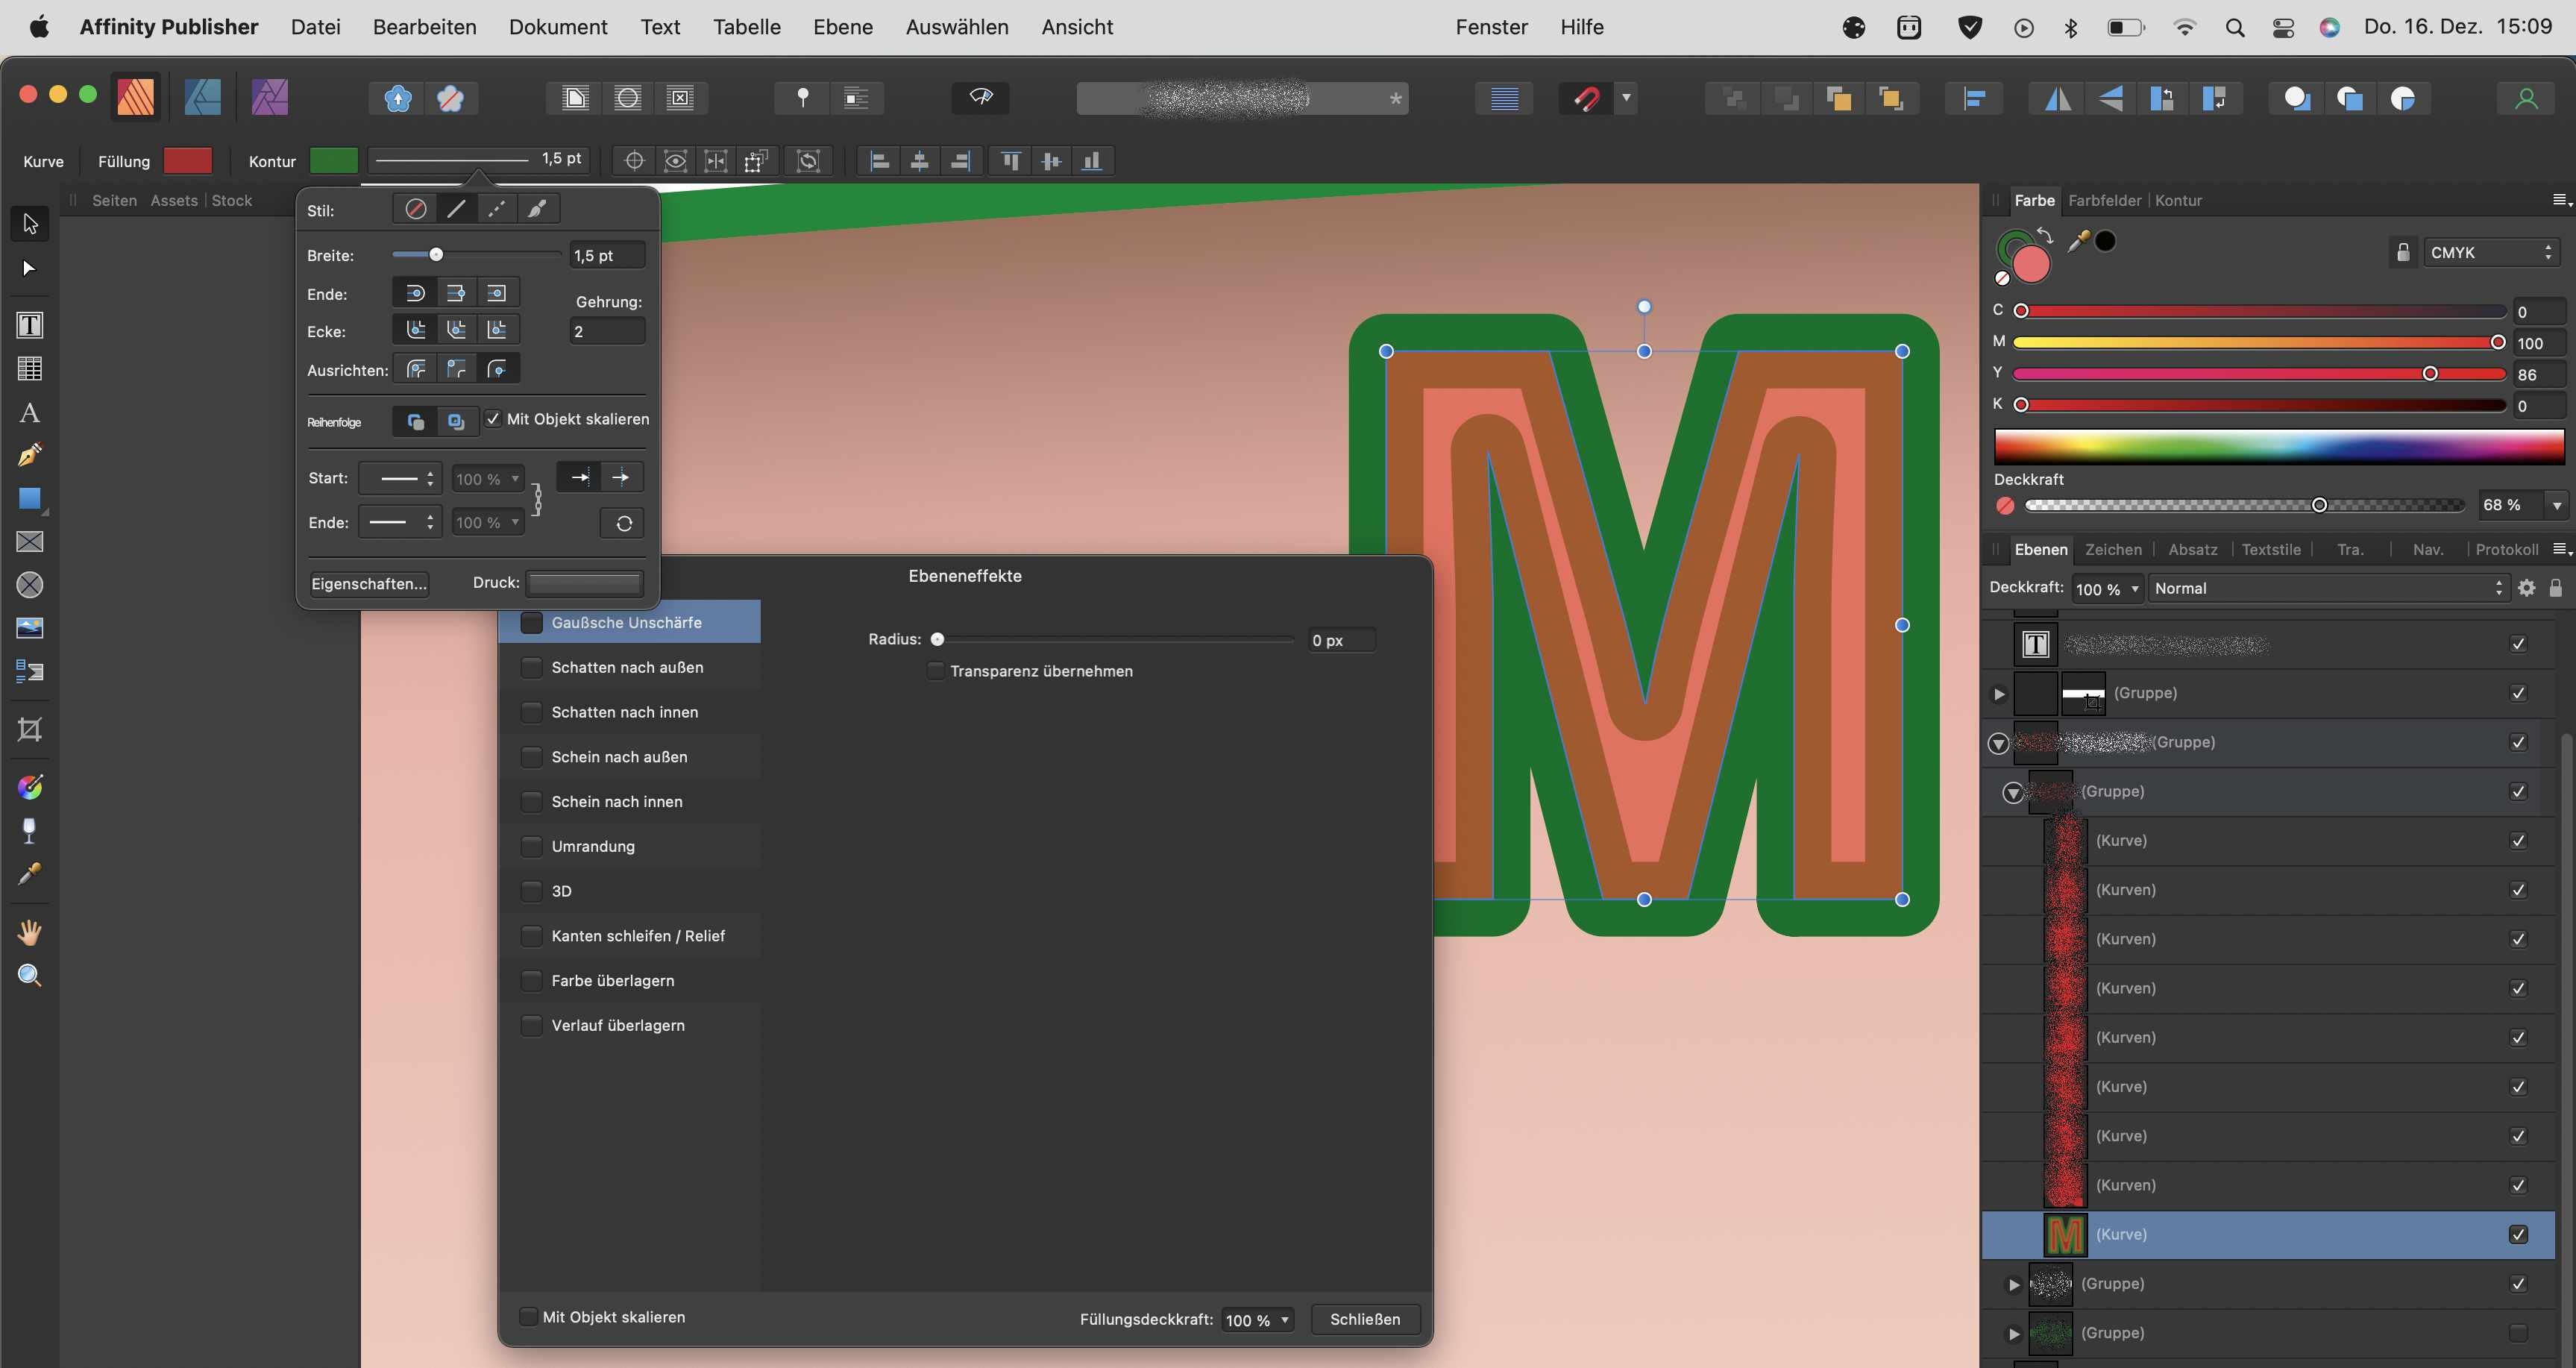
Well, I want the contour only on the outside. Currently it also goes inside although I selected the other option in the strokes panel (see my first post). The fill colour is 68% so you can see the contour behind the actual curve/shape (M). If I make a new shape, it works. But not if I apply a contour to the existing ones. *scratching-my-head*
-
Here is a screenshot with the layers and effects panel...
-
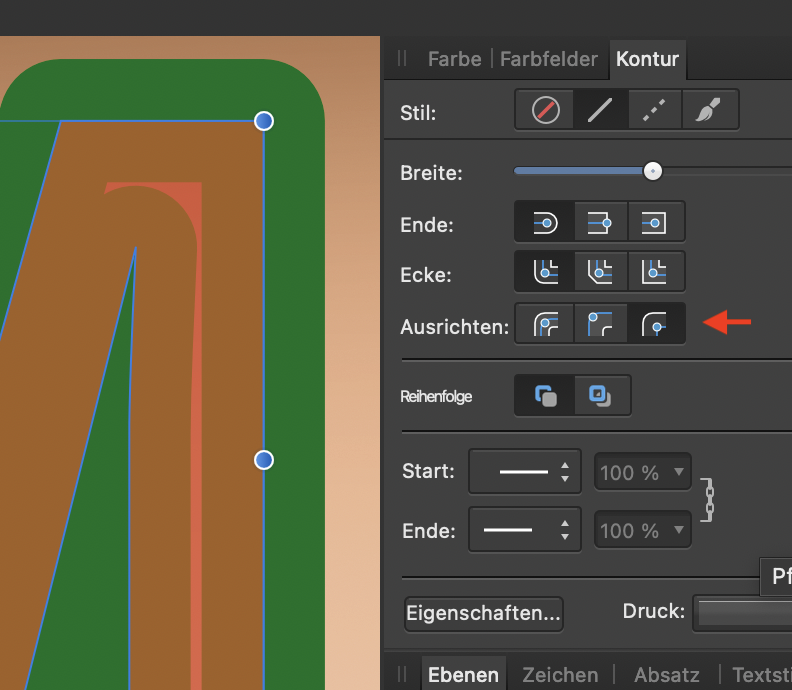
Hi, I'd like to add a contour just to the outside of a curve and can't figure out how. Is there a way to do that? Thanks! (The green is the countour in this example.)
-
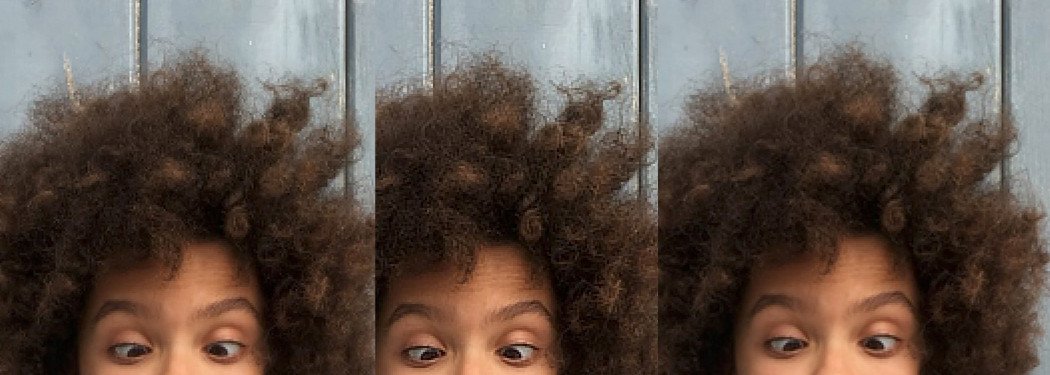
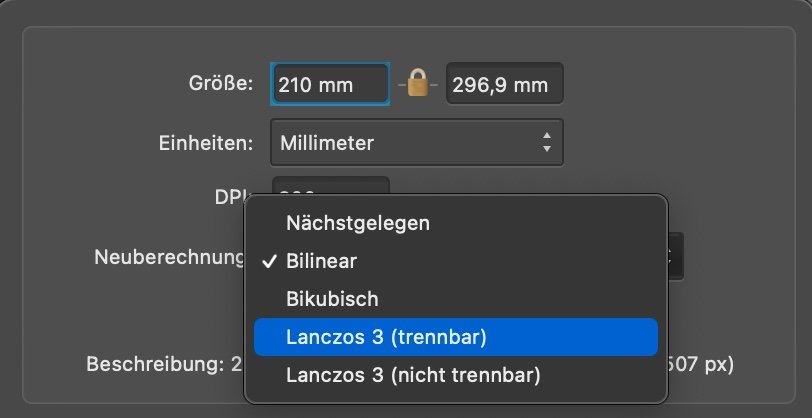
Try using Lanczos non-separable. I get noticeable sharper results with that. Middle: Lanczos non-separable Left & right: Bicubic and Lanczos separable
-
Yes, in the menu Select > Select colour. Then you can click on a colour and adjust the tolerance. This will give you a selection of that colour.
-
Try "Lanczos" for resampling. It produces higher quality results. Maybe it will also show in downsizing.
-
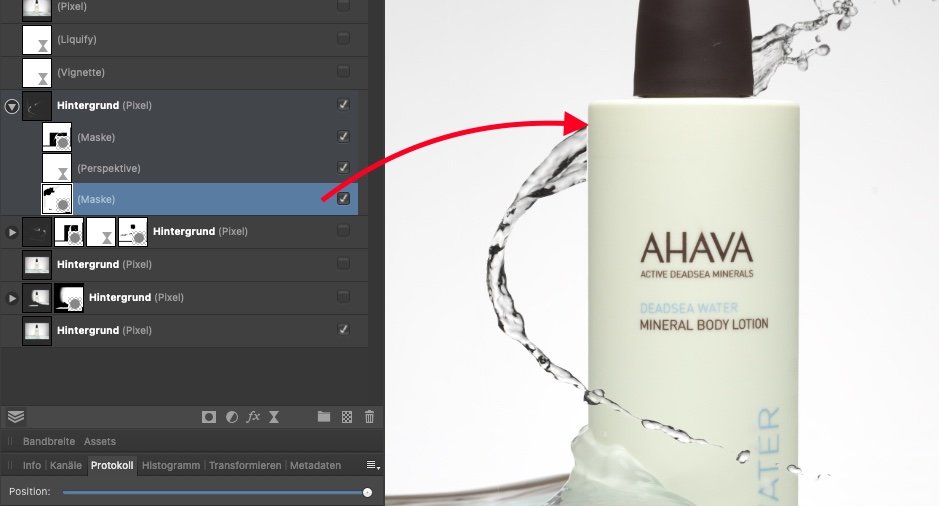
Thanks for tip. I didn't know it was going from bottom to top. 👍 I've tried several combinations but none worked. I assume that is because the perspective was aded after the mask has been created. And now it somehow doesn't align properly. With a second mask added I can now mask it out the way I need. I can work with that no problem. re-arrange.mov
-
I'm trying to mask out the lower end of the splash. It should be behind the bottle at the lower end and in front of the bottle in the upper part. The perspective makes it look more realistic (it's not finished yet).
-
I'm having trouble getting this to work. The perspective doesn't seem to apply to the mask... Perhaps I'm just missing something... Any recommendations? Bildschirmaufnahme 2021-11-30 um 16.53.00.mov