johnptd
-
Posts
36 -
Joined
-
Last visited
Everything posted by johnptd
-
New v19 Live Tone Stretch Macros not working
johnptd replied to johnptd's topic in Desktop Questions (macOS and Windows)
I updated to 2.6.2 and initially it made no difference. I then played around a bit and discovered that I needed to first do a "Remove Background" on the initial loaded image (no curves-levels) or do a "merge all layers" with the added curves-levels then "Remove Background". Doing a "Remove Background" at this point can be a little difficult as there is not much visible except for a few stars. It is sort of a guess. The other issue was that I did not read the instructions carefully where it mentioned the "sub" layers of the stretch. Once I found that, then I was able to fully use the Live Tone Stretch options. So chalk it up to user error although you might want to mention the need for a "Remove Background" before doing the stretch unless I am missing something. Thanks, JohnD -
New v19 Live Tone Stretch Macros not working
johnptd replied to johnptd's topic in Desktop Questions (macOS and Windows)
Any update on this? JohnD -
New v19 Live Tone Stretch Macros not working
johnptd replied to johnptd's topic in Desktop Questions (macOS and Windows)
Yes the v19 Astrophotography Macros. JohnD -
I tried the new v19 (Live) Tone Macros and they do not seem to be working. All I get is a new layer with a white screen and when I try to open the (Live) adjustment panel, nothing pops up. I am using Affinity Photo v2.6.0 on a Windows 11 computer with v23H2. The image is a .FIT file and I removed the standard adjustment layers upon opening the .FIT file. JohnD
-
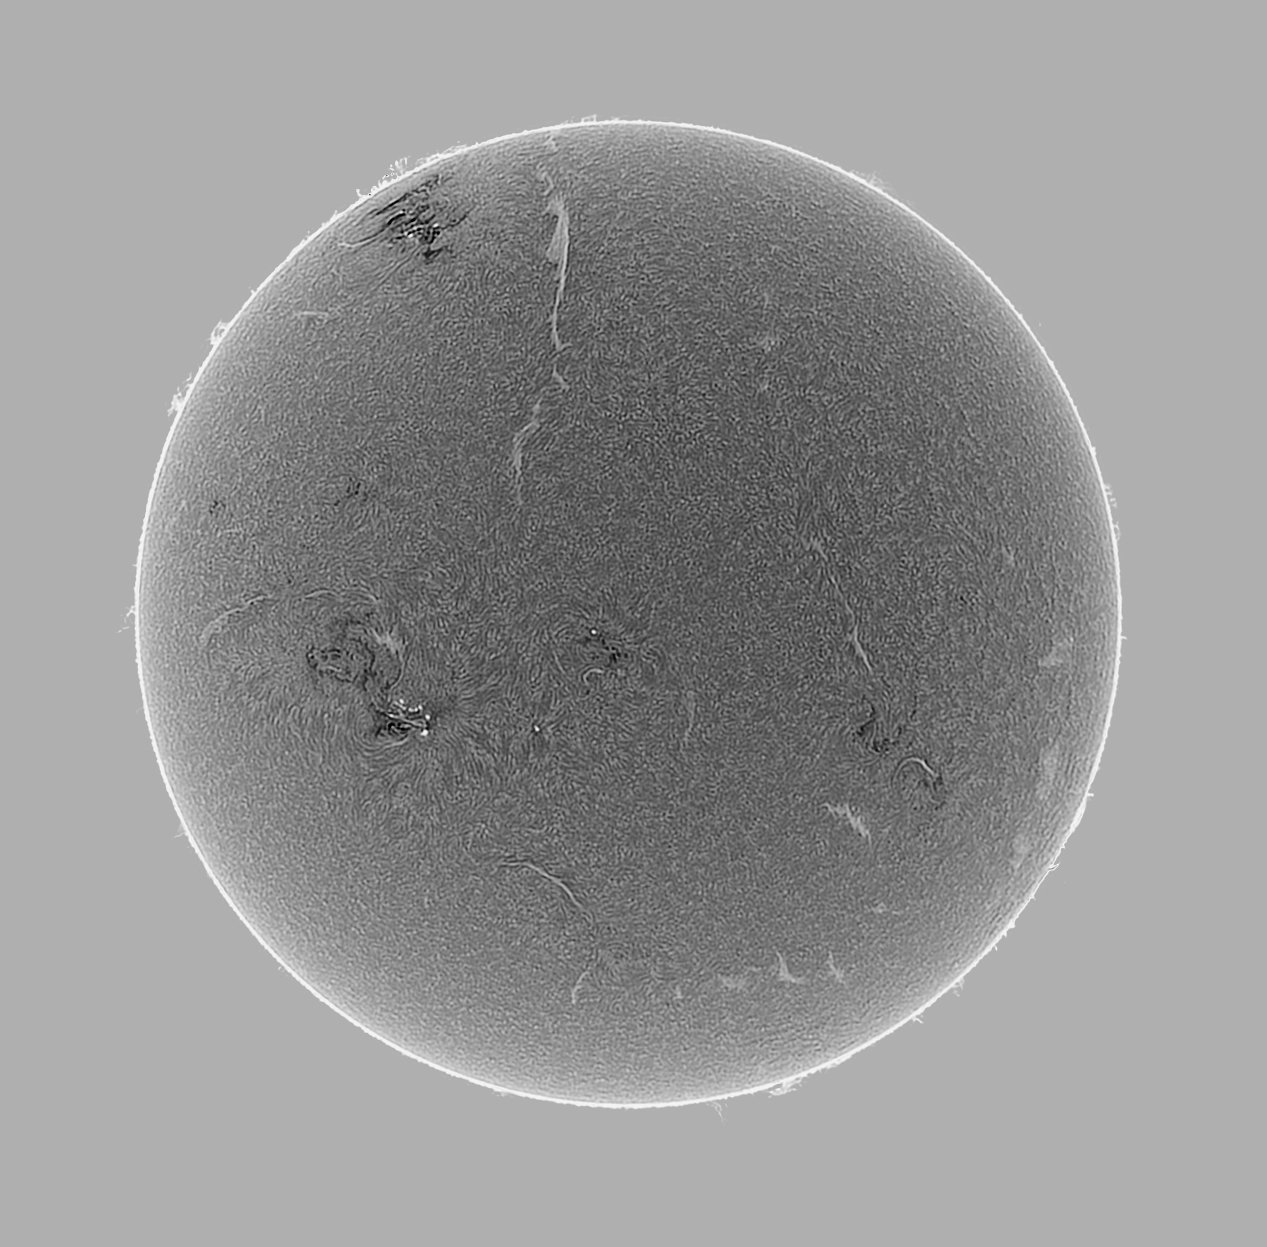
Thanks for your response. I figured out how to set the tonal curve in ImPPG so the background remains dark and the Sun's surface and the proms are displayed as bright without not needing to do any selection. ImPPG is a remarkable tool for processing solar images. JohnD
-
I have a monochrome image of the Sun which was inverted in order to bring out details (prominences) not otherwise seen. I am left with a bright background area around the Sun which I want to change to black or make it darker so I can better display the Sun and its prominences. However these small white prominences around the edge of the Sun I don't want to change. To try to not select these has proven very difficult. Is there some way I can select the bright background without wasting the proms? Thanks, JohnD

-
When updating to the latest macro version, should you remove the older macro version? JohnD
-
Well I tried it a few times again and can't get it to fail. So I guess we just chalk it up to a ghost passing in the night. I have had a few strange things happen with v2.0. One other thing I noticed is that it does not quite align all the images perfectly. It could be a little tough to align images like this and they were a little out of focus. JohnD
-
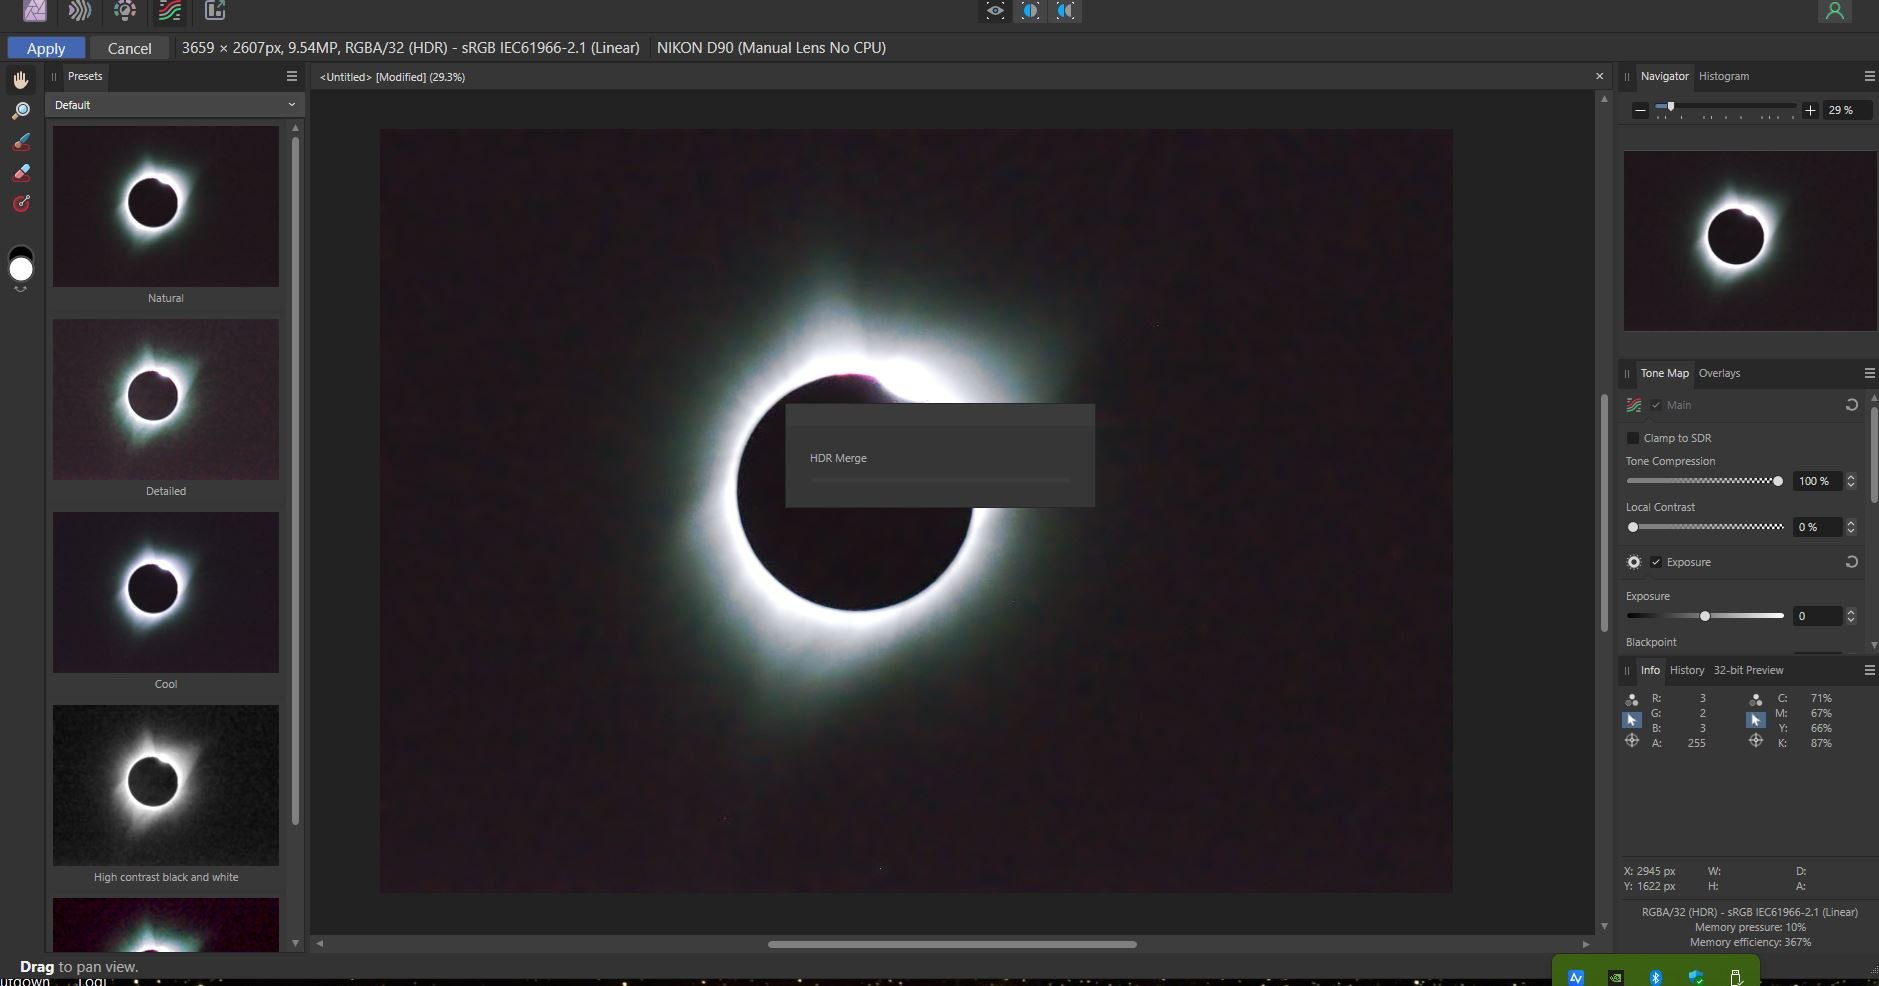
I tried Affinity Photo HDR on 10 old eclipse 2017 images and I ended up with the progress box stuck in the middle of the image after completion. I closed AP and reran the process, and then it worked. I had something similar with another attempt initially with three images where the HDR progress stuck about half way through on the first try. I was able to rerun that later getting it to complete as well. These are Nikon .NEF images. I am using the latest Affinity Photo (v2.4.0) on a Windows 11 computer. JohnD
-
Any progress on this issue? JohnD
-
Hi James, Thanks for your quick response. Yes I am using Windows 11. The normal two adjustment layers are created when I open the file. When I click "apply" to "Develop FITS" pop-up showing the "RGGB" Bayer pattern, it then creates the second adjustment layer set. It did not do that before. Regarding the FITS file crashing, I have complained to ZWO about the non-standard file that they end up with using their stacking software. This was a four minute stack of the Sun. I was able to open it in Affinity Photo 1. It also opens with their FITS viewer program and programs such as NASA's FITS Liberator and IrfanView, very over exposed in all cases requiring big histogram adjustments. I was able to use Curves and other adjustments in AP1 to get a decent image. I have attached the FITS header that FITS Liberator displayed for the file. As you can see it is very non-standard. I have attached the generated FITS file as well. It is only 1.75 mb in size. JohnD FITS_Info.txt 2024-02-04-164014-Sun-Bin1 31.6C_Planet_50.fit
-
I recently updated to the latest version of Affinity Photo v2.3.1. When I open a .FITS file and select the proper Bayer pattern, two sets of initial adjustment layers (Curves/Levels) ending up with a total overexposed image. I have to delete the second set to return to what Affinity Photo did before the update. It also crashes on another .FITS file created by the ZWO ASIAIR stacking process. I think this could be due to the Bayer pattern code it has in its header ("4" = basically None) although other software can open the file but do not display it well. JohnD
-
How to combine multi narrow band astronomy images
johnptd replied to johnptd's topic in Desktop Questions (macOS and Windows)
My situation is a little different. I will have two filters combined into one image. One image set will be H-a and OIII, the other set will be H-b and SII. His tutorial has each image set is only one filter. I don't know how to break down the dual filter sets into two individual colors. JohnD -
I have a Ha/OIII filter for my OSC camera. I have just purchased a Hb/SII filter. Since I will need to create separate image sets for the two filters, how do I combine them a get distinct colors for the four different filter frequencies. JohnD
-
Affinity Photo Resize does not appear to resize
johnptd replied to johnptd's topic in Desktop Questions (macOS and Windows)
It is called ImPPG. It is basically tailored for processing solar images. It has a tone curve function which really does a great job of extracting the proms out of the image and not wasting the surface even though the proms are very faint. JohnD -
Affinity Photo Resize does not appear to resize
johnptd replied to johnptd's topic in Desktop Questions (macOS and Windows)
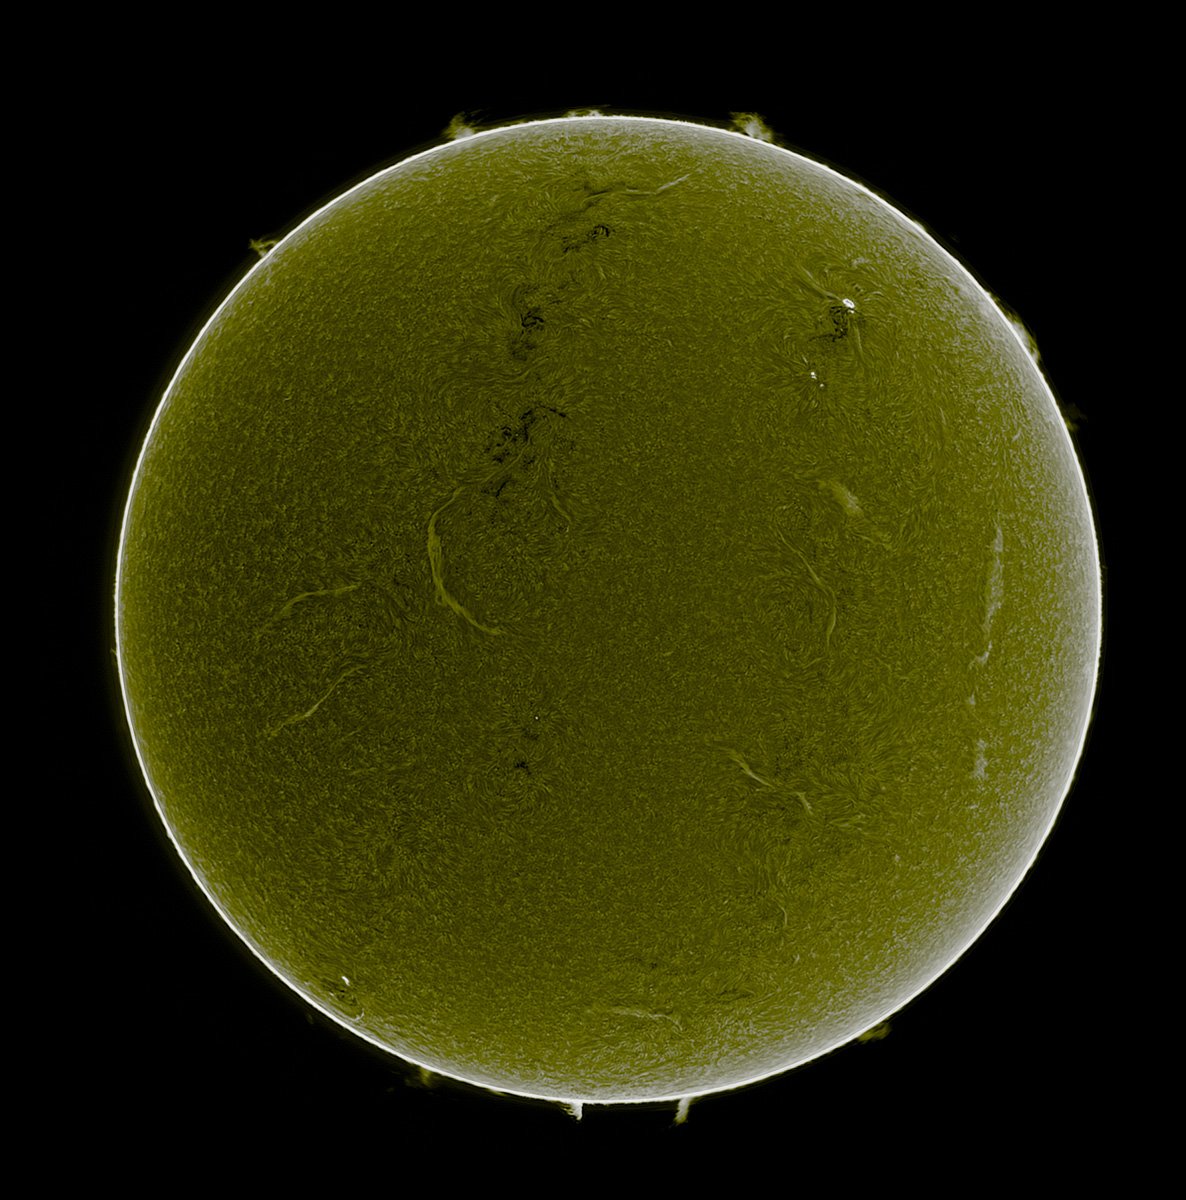
Thanks for responding. Going through everything step by step I realized that I was changing the resolution on the combined surface and proms document and not the particular layer I was on so of course there would be no difference. When I deleted the surface layer that had been copied onto the proms image, then resized the proms image document, and then pasted the surface image onto the proms image again, there was an obvious difference. So I am good to go. Actually a few days later I discovered that with a special piece of software, I do not even have to go through this process as this software can extract the proms out of the surface image. Makes things a lot easier. Thanks for your help. I have attached the finished product after going through the complete process using several pieces of software. As the images were monochrome, I used Affinity Photo as the final step to colorize the solar surface. JohnD
-
I have two images of the Sun. One of the surface and the second with just proms and the surface is either blacked out of totally white. What I was trying to do was slightly shrink the proms image so that the surface image would overlay any of the rim of the proms image. When I attempt to resize the proms image, it does not appear to change in the display no matter how small I make it. This makes it difficult to overlay the surface area of the proms image. Is there anything I am missing in the resize function? JohnD
-
Photoshop Plugins Grayed out
johnptd replied to JeffGar2000's topic in Desktop Questions (macOS and Windows)
What is the image’s format? If it is .FITS, export the file to a .TIFF and re-open the .TIFF version and try again. JohnD -
The image on the left was what I got when I did the Live Star macro. I have no idea what that was supposed to be or how to use it. The one on the right was what I got when I started from scratch and went through your process. After getting rid of the gradient, that worked much better. JohnD
-
OK I tried the Astrophotography Remove Background filter again. I had to place a bunch of points throughout the image and got a halfway decent result. It deleted stars in the upper left corner and maybe the comet is a little over enhanced, but it is a start. JohnD Light_AutoSave_Stack_AfP-Adj_Lv_D-S__Adj_RmBkG_TpZ_DeN_LL.tiff
-
Sorry I did not get back to you. I had to find where to access the "live" filters. When I tried it, I had to set the radius to about 60 to get rid of all the stars. Duplicating the filter did enhance it. 1. I don't understand how you ended up with that "Black" layer. 2. I am ending up with a large gradient around the comet. JohnD Light_AutoSave_Stack_AfP-Adj_Lv_D-S__Adj.tiff
-
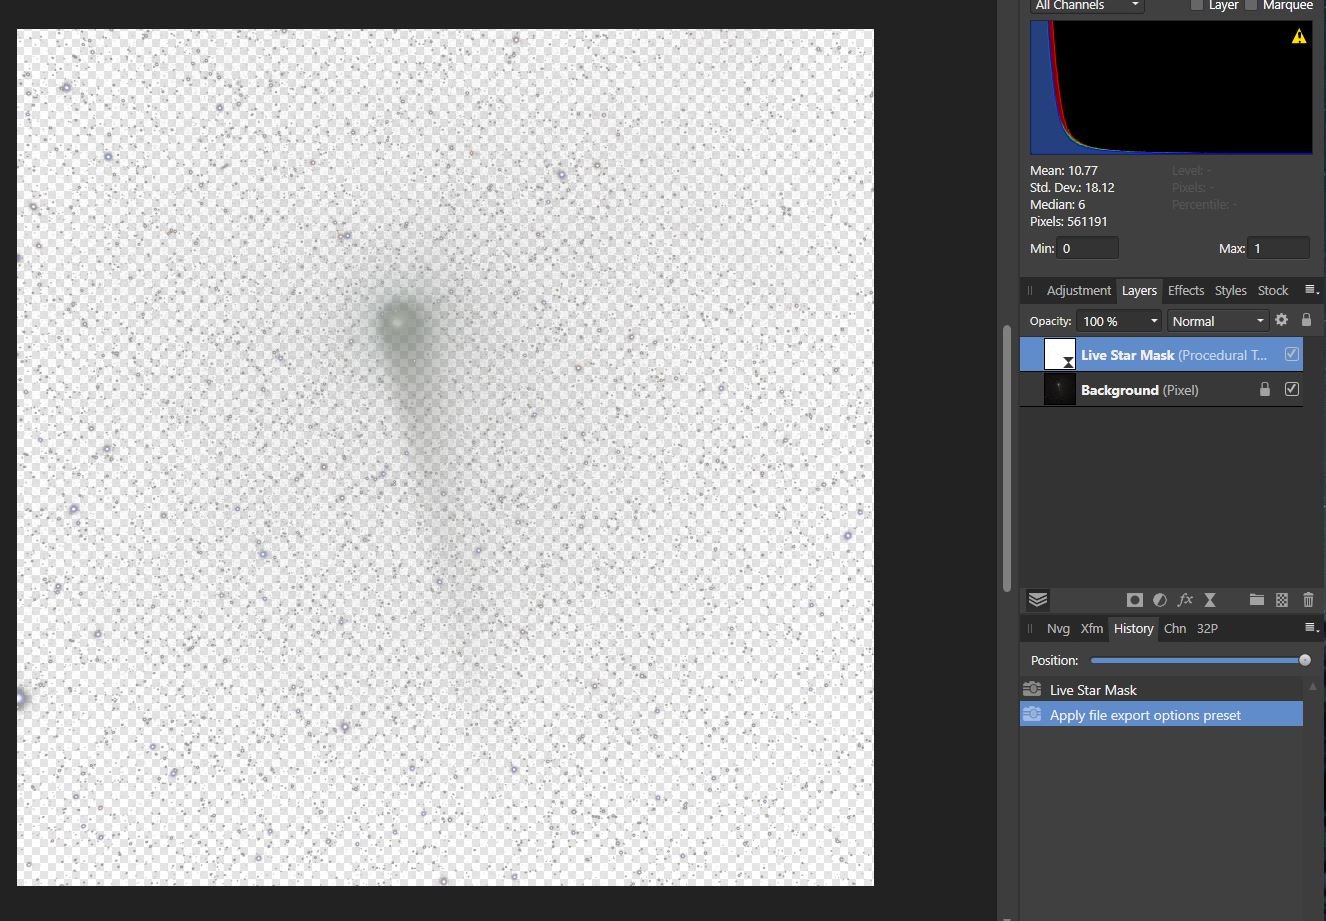
I have attached the file minimally processed (basically stretched) before I applied Live Star Mask plus what appeared after I applied the mask. JohnD Light_AutoSave_Stack_AfP-Adj_Live_Star_Mask.tiff Light_AutoSave_Stack_AfP-Adj.tiff
-
I am looking for a way to brighten a comet without blowing out the many stars in the FOV of the image. I tried "Live Star Mask" macro to separate out the stars, but that generated a strange almost transparent layer. I then tried Star Eater and that gave me a little better result. Any suggestions? JohnD
-
Thanks, I am able to get rid of the green tint using the Astrophography > Remove Background filter so I will stick with that. JohnD
-
I tried a .TIFF processed file and HLV was enabled so it apparently does not like that .FITS file. It was created by stacking a number of .FITS files using the ASI Studio Deep Stack. JohnD