nickburnsap
-
Posts
5 -
Joined
-
Last visited
Everything posted by nickburnsap
-
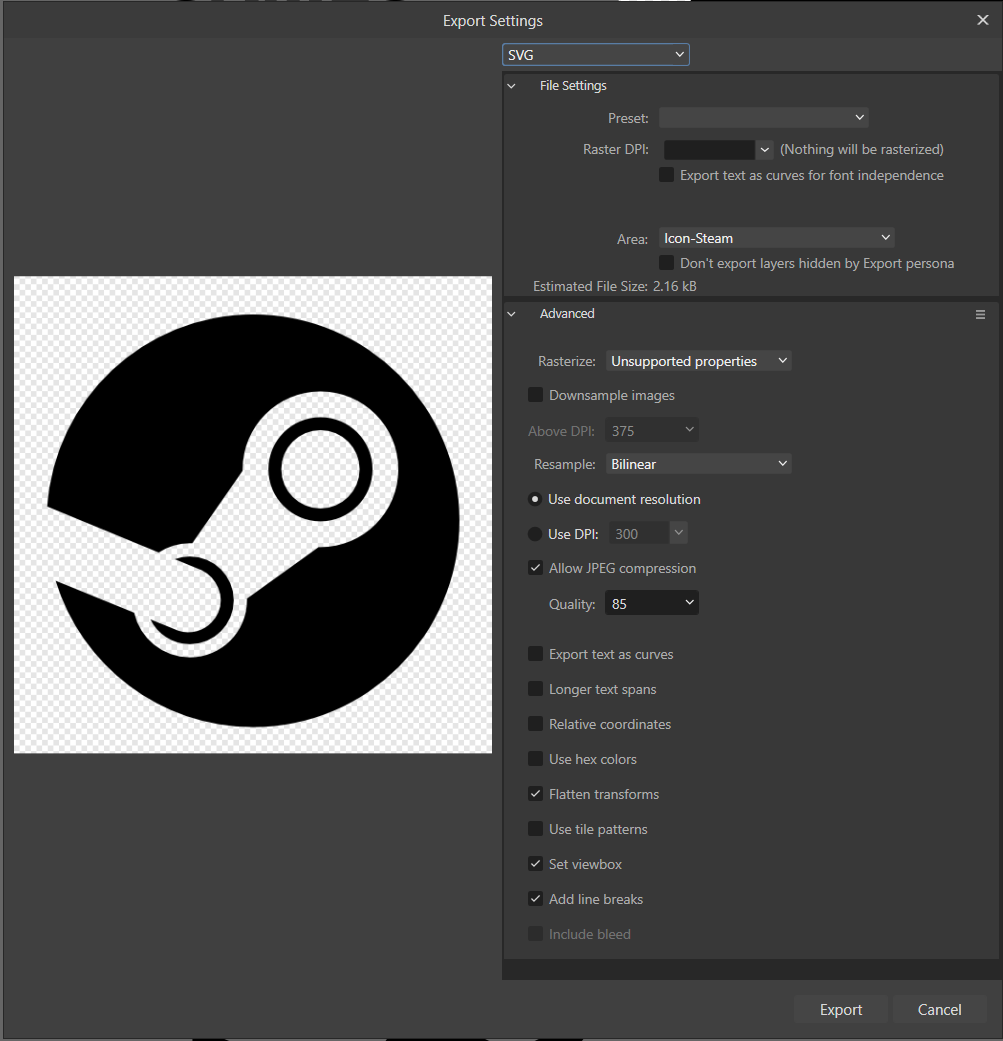
WAIT I got it! So I can't use the artboard, it has to be the curve itself. I also have to remove the code about settings the style. Add the fill like you suggested, and bingo, it works!
-
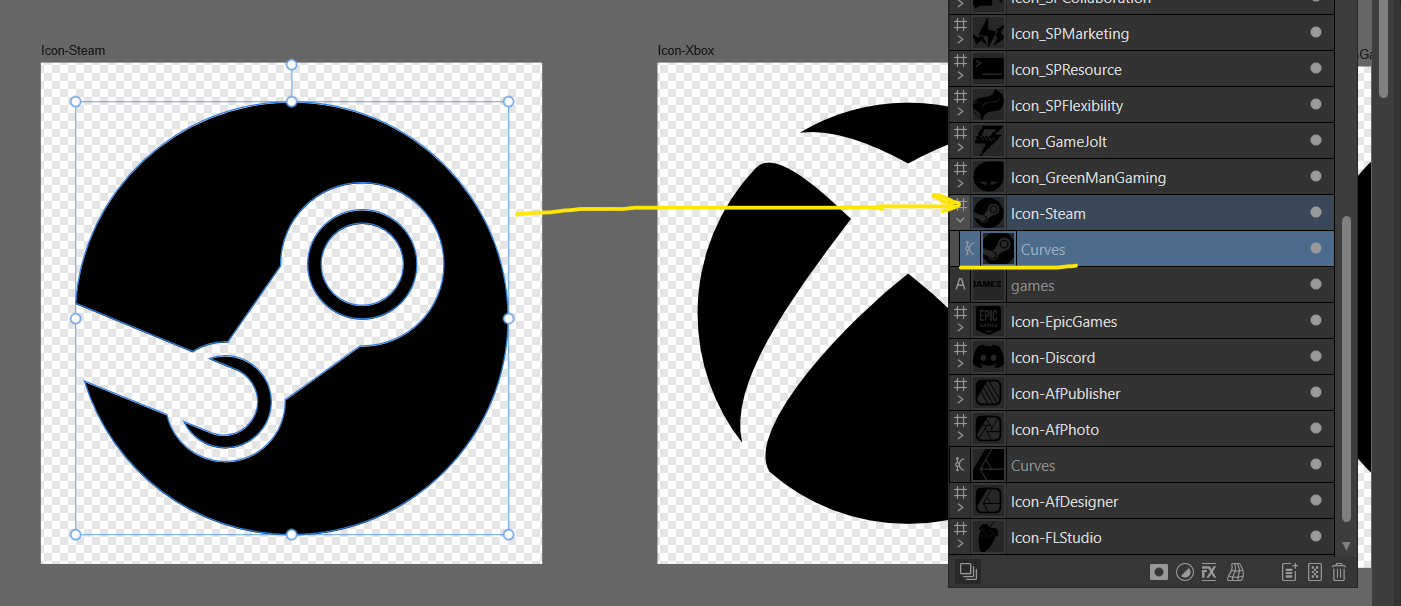
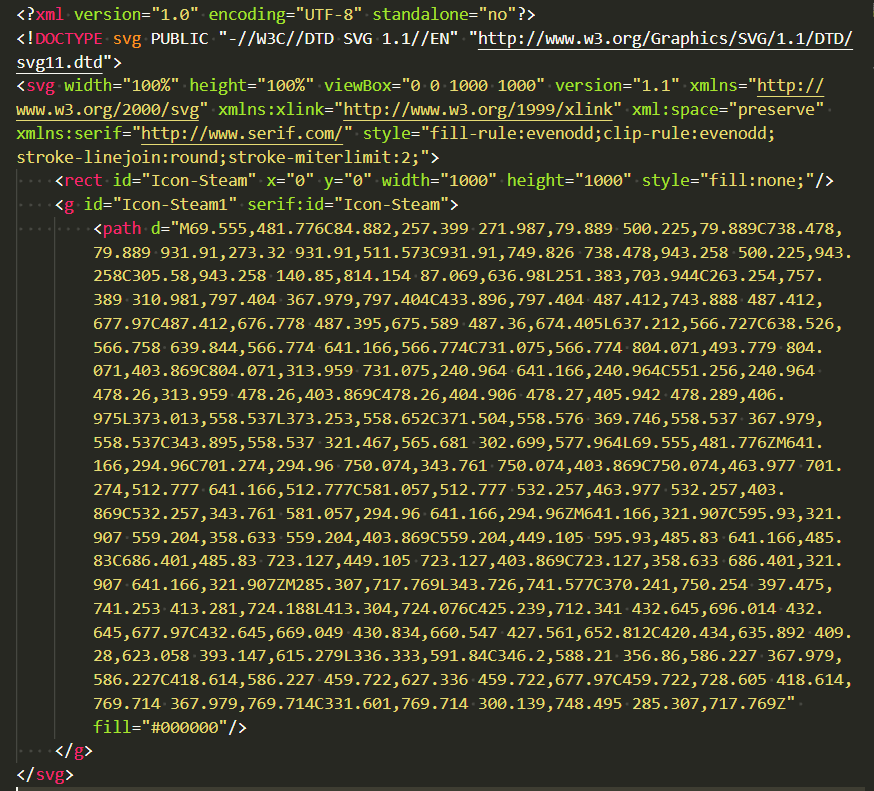
@v_kyr thanks for the reply! I tried to follow it the best I could but I still ended up with the same result. ^ in Affinity Designer (2) this is what my artboard is, just the artboard with the icon as a single curve. This is what it was before. ^ these were the exports, I ticked Flatten transforms as you suggested ^then injected the fill="#000000" at the end. But it still only offers the opacity: whereas the illustrator vector offers color and opacity. I know part of this is that I don't know what Wix uses to grant the SVG "color" but my theory is that it just has to do with the SVG code right? At the end of the day that's all an SVG is right?

-
Hi, I'm currently working on a new site for my business using Wix, and they have a feature that let's you change the fill color of an SVG. This is great because it means I don't need to color match everything and upload dozens of assets of the same thing. I was working in Illustrator on a different computer that exported the files with the correct code (I guess) to allow the SVG color to be changed - but when I got home and started using Affinity, the exports were locked to their export color. I've opened both in a text editor and it looks like chalk and cheese, and I don't really know how to make the Affinity exports include the "dynamic fill" code. Both exports are considered "default" for each app. Does anyone know how to make this happen? Example of affinity and illustrator exports attached. Thanks, IllustratorExport.svg AffinityExport.svg
-
Awesome! That helped half way, now when I'm zoomed in its not nasty looking, thanks! Though when I'm zoomed out, the effect still appears.
-
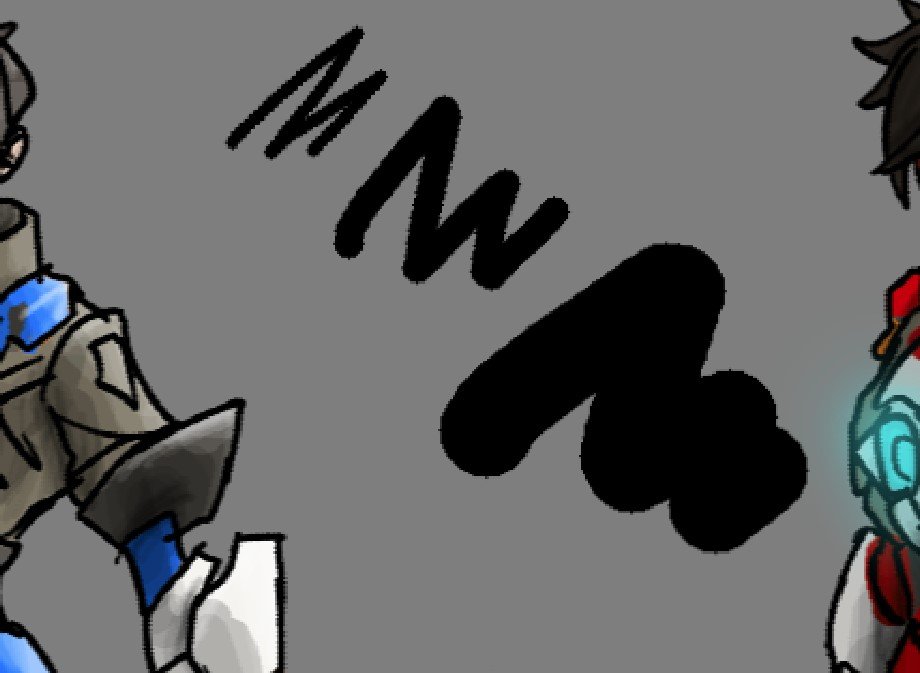
I've just made the switch from Photoshop to Affinity Photo for digital art, and while I'm super pleased with virtually everything, I have noticed a - problem? - with the brush rendering. It appears really aliased and jaggy. Now I know Photo is working with rasterized pixel based images, but it just seem aggressively pixelated. By contrast Photoshop seemed to have some kind of smoothing on just the rendering of it. Am I missing something? Is there a brush setting or the like that I have to flip to smooth the rendering of brush strokes? Or is it just that Photoshop has some kind of secret sauce that makes even raster brushes look smooth? I have the performance settings set to maximum quality (Bilinear, 30GB RAM etc etc). The attached image is from a 1920x1080 150dpi document. I believe making it a 300dpi 4K document would help somewhat, but when I tried that on another drawing it still didn't help. Even when I'm zoomed all the way out it still appears like that. Any direction would be greatly appreciated, I'm happy to troubleshoot the issue as well. Cheers,